Hello and welcome to my Ford Cortina restoration website.
Thanks for visiting. Here you'll find photos and updates of the progress I make during the restoration process. Have a look through and enjoy (hopefully) the journey as I strive to restore this old Ford Cortina to its former as new conditon and maybe beyond, making it even better than when it left the Dagenham factory in 1973.
If you have any comments or would like to get in touch, email me at paul@mk3cortina.co.uk
Background
There are a few reasons for tackling this project. Firstly it has been a long while (2007) since I last did any sort of car restoration (our Bond Equipe Mk2 GT) so I felt like a challenge and a bit of a change. Having attended many car shows and events over the years with the Bond, I've admired many many cars and wondered which model I would choose should I embark on another project. Most cars I thought about appealed on an aesthetic level but didn't really feel like anything special that I could take to a show and talk to people about. That is something I really enjoy about the Bond, very few people know what it is let alone have seen one in the flesh, so to speak, so that is a good conversation starter. I wanted something that would stand out from the crowd a bit but also something I could have conversations about too. Something I noticed was how few Mk3 ford Cortinas I saw at any of the shows, despite it being one of the biggest selling cars of the 70s there just didn't seem to be any about. I also thought about how much I loved the shape and 'coke bottle' styling of the Mk3 back in the day. Then it hit me - I would love to get one like my Mum and Dad had back when I was a young teenager. I could remember it clearly, a 2 litre GXL auto in Onyx green with a black Vinyl roof. My Dad loved it. I can still remember him saying to my Mum "It's so quick, I can beat anyone away from the traffic lights, it's brilliant!" In fact I remember it being his favourite out of all the cars he owned.
This is the only photo I can find of my Mum and Dad's car. If I remember rightly it was taken in the summer of 1975 on a caravan site on the Isle of Wight. You can just see the top of my head behind the windbreak (I was peeling the potatoes for dinner lol)
So I decided to buy a Mk3 Cortina like my Dad's. Simple really? Err, no. I looked and looked for ages and there were none for sale anywhere in any condition, not in the colour combination I wanted. I also realised that old Fords were expensive!! Especially if they were in a decent condition. They were way out of my price range. So I started to look for a project that I could restore and turn into a replica and spread the cost over time.
After looking at a few really bad examples I came across this one being advertised by a member of the Mk3 owners club. It was a project he had already started so was partially dismantled and some areas had been patched already. To my untrained eye it looked great, surprisingly solid in many of the usually bad areas and was a pretty good price. It was even the right colour - mostly lol.
A deal was done and some extra parts were included that would help make it look like the GXL spec that my Dad's was rather than the L spec the car actually was. Transportation was arranged for a few days later and the fun began......
To view a slide show video of the whole process click below...
or to see the full details in my image gallery, keep on scrolling...
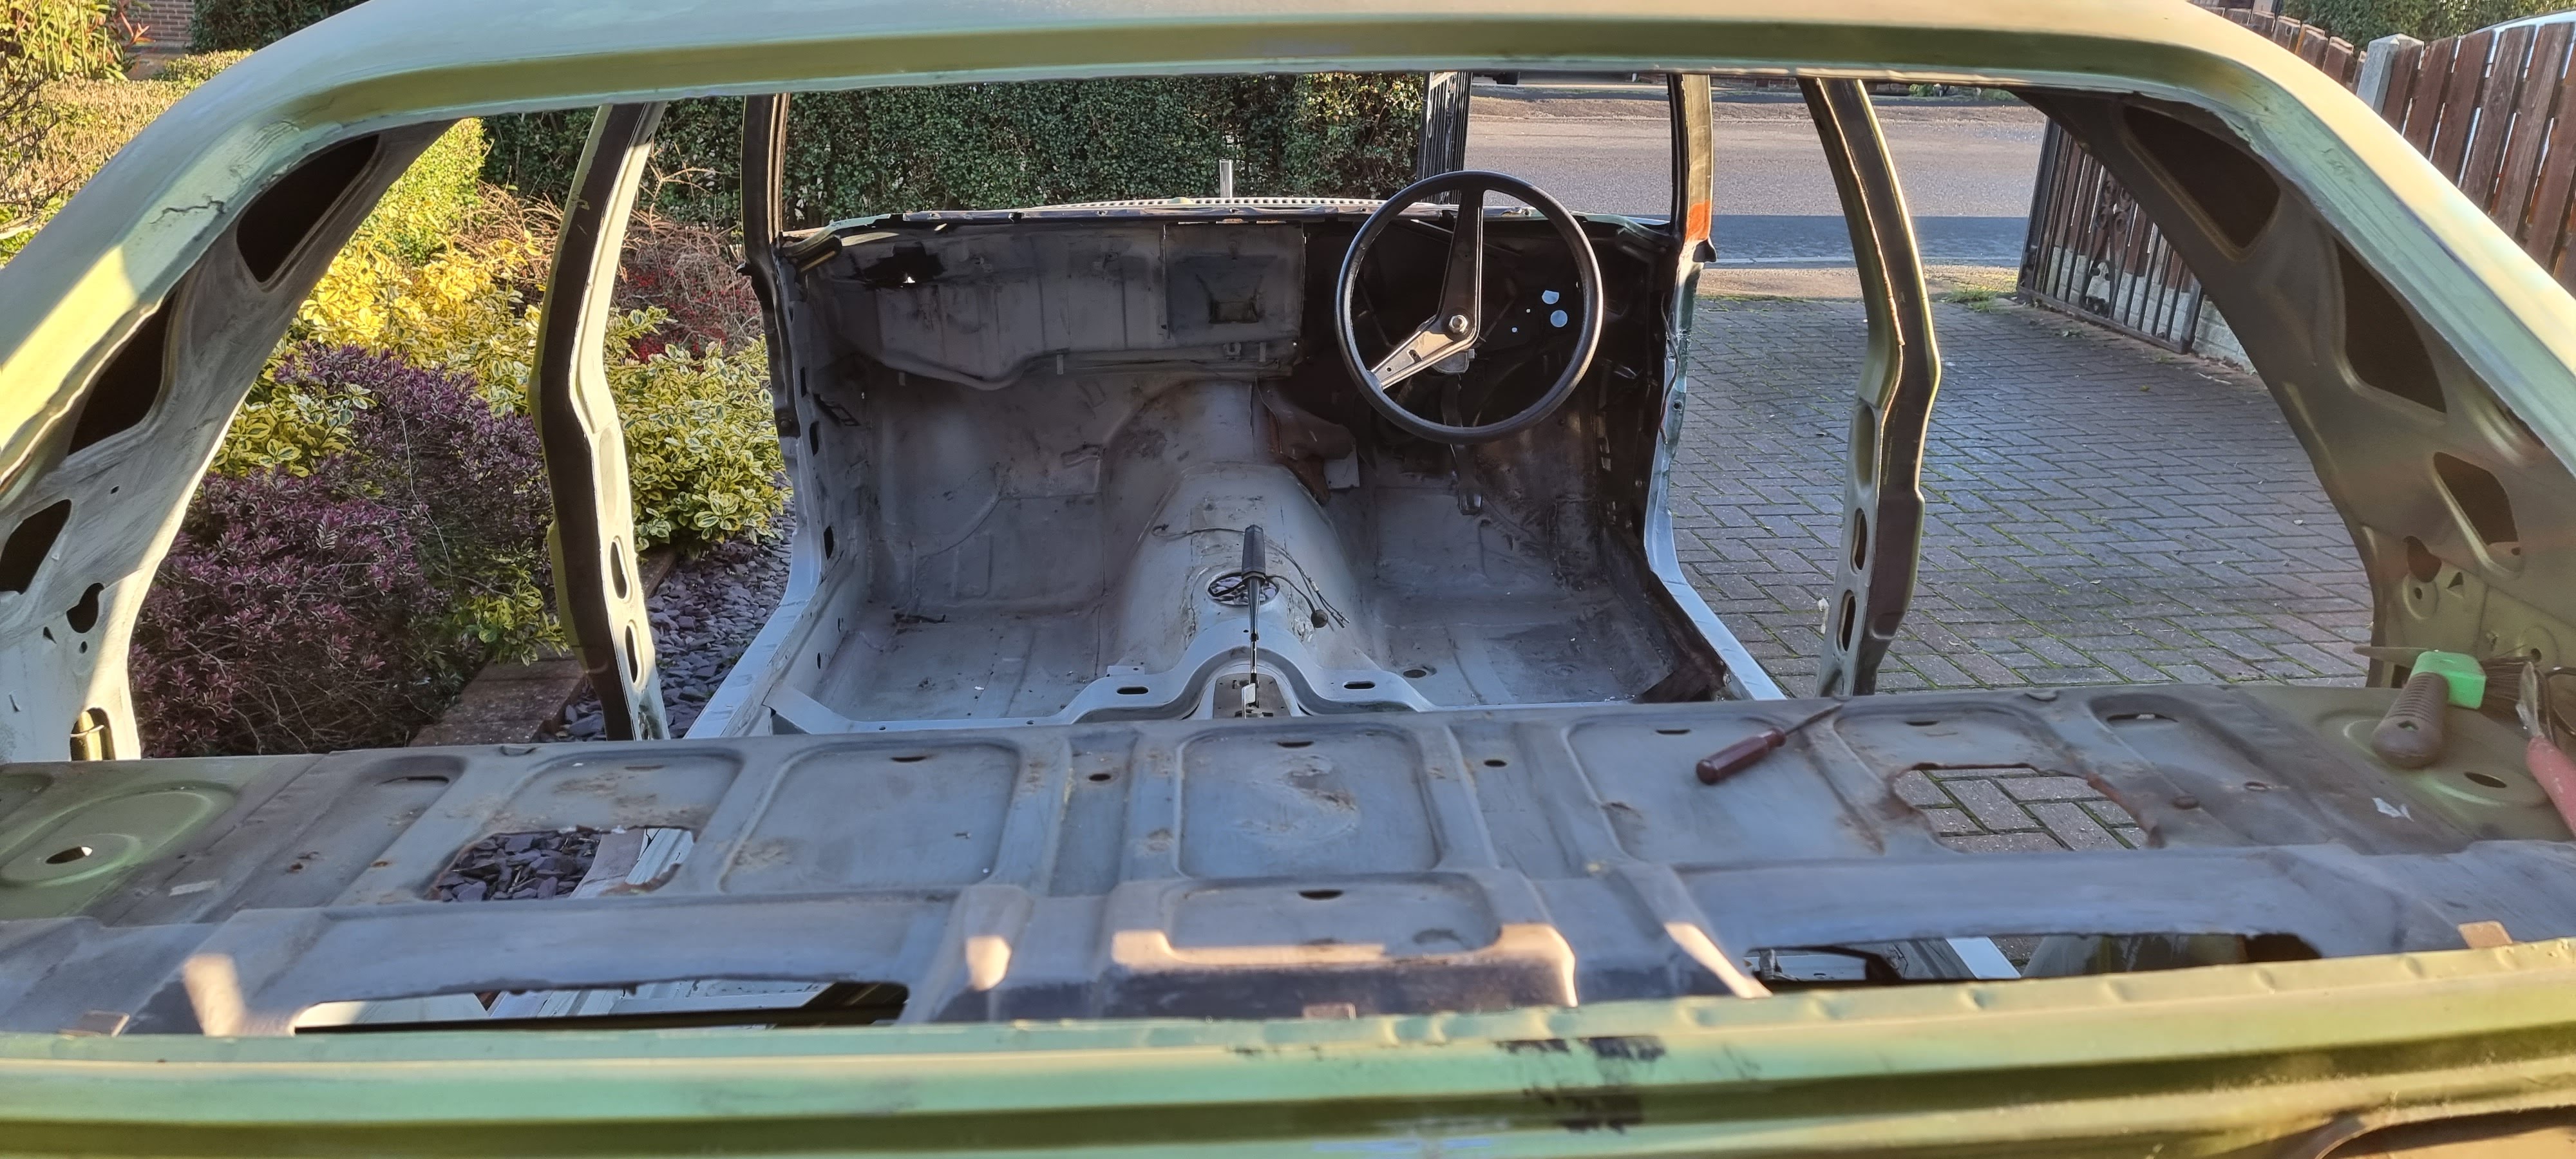
Winter 2019
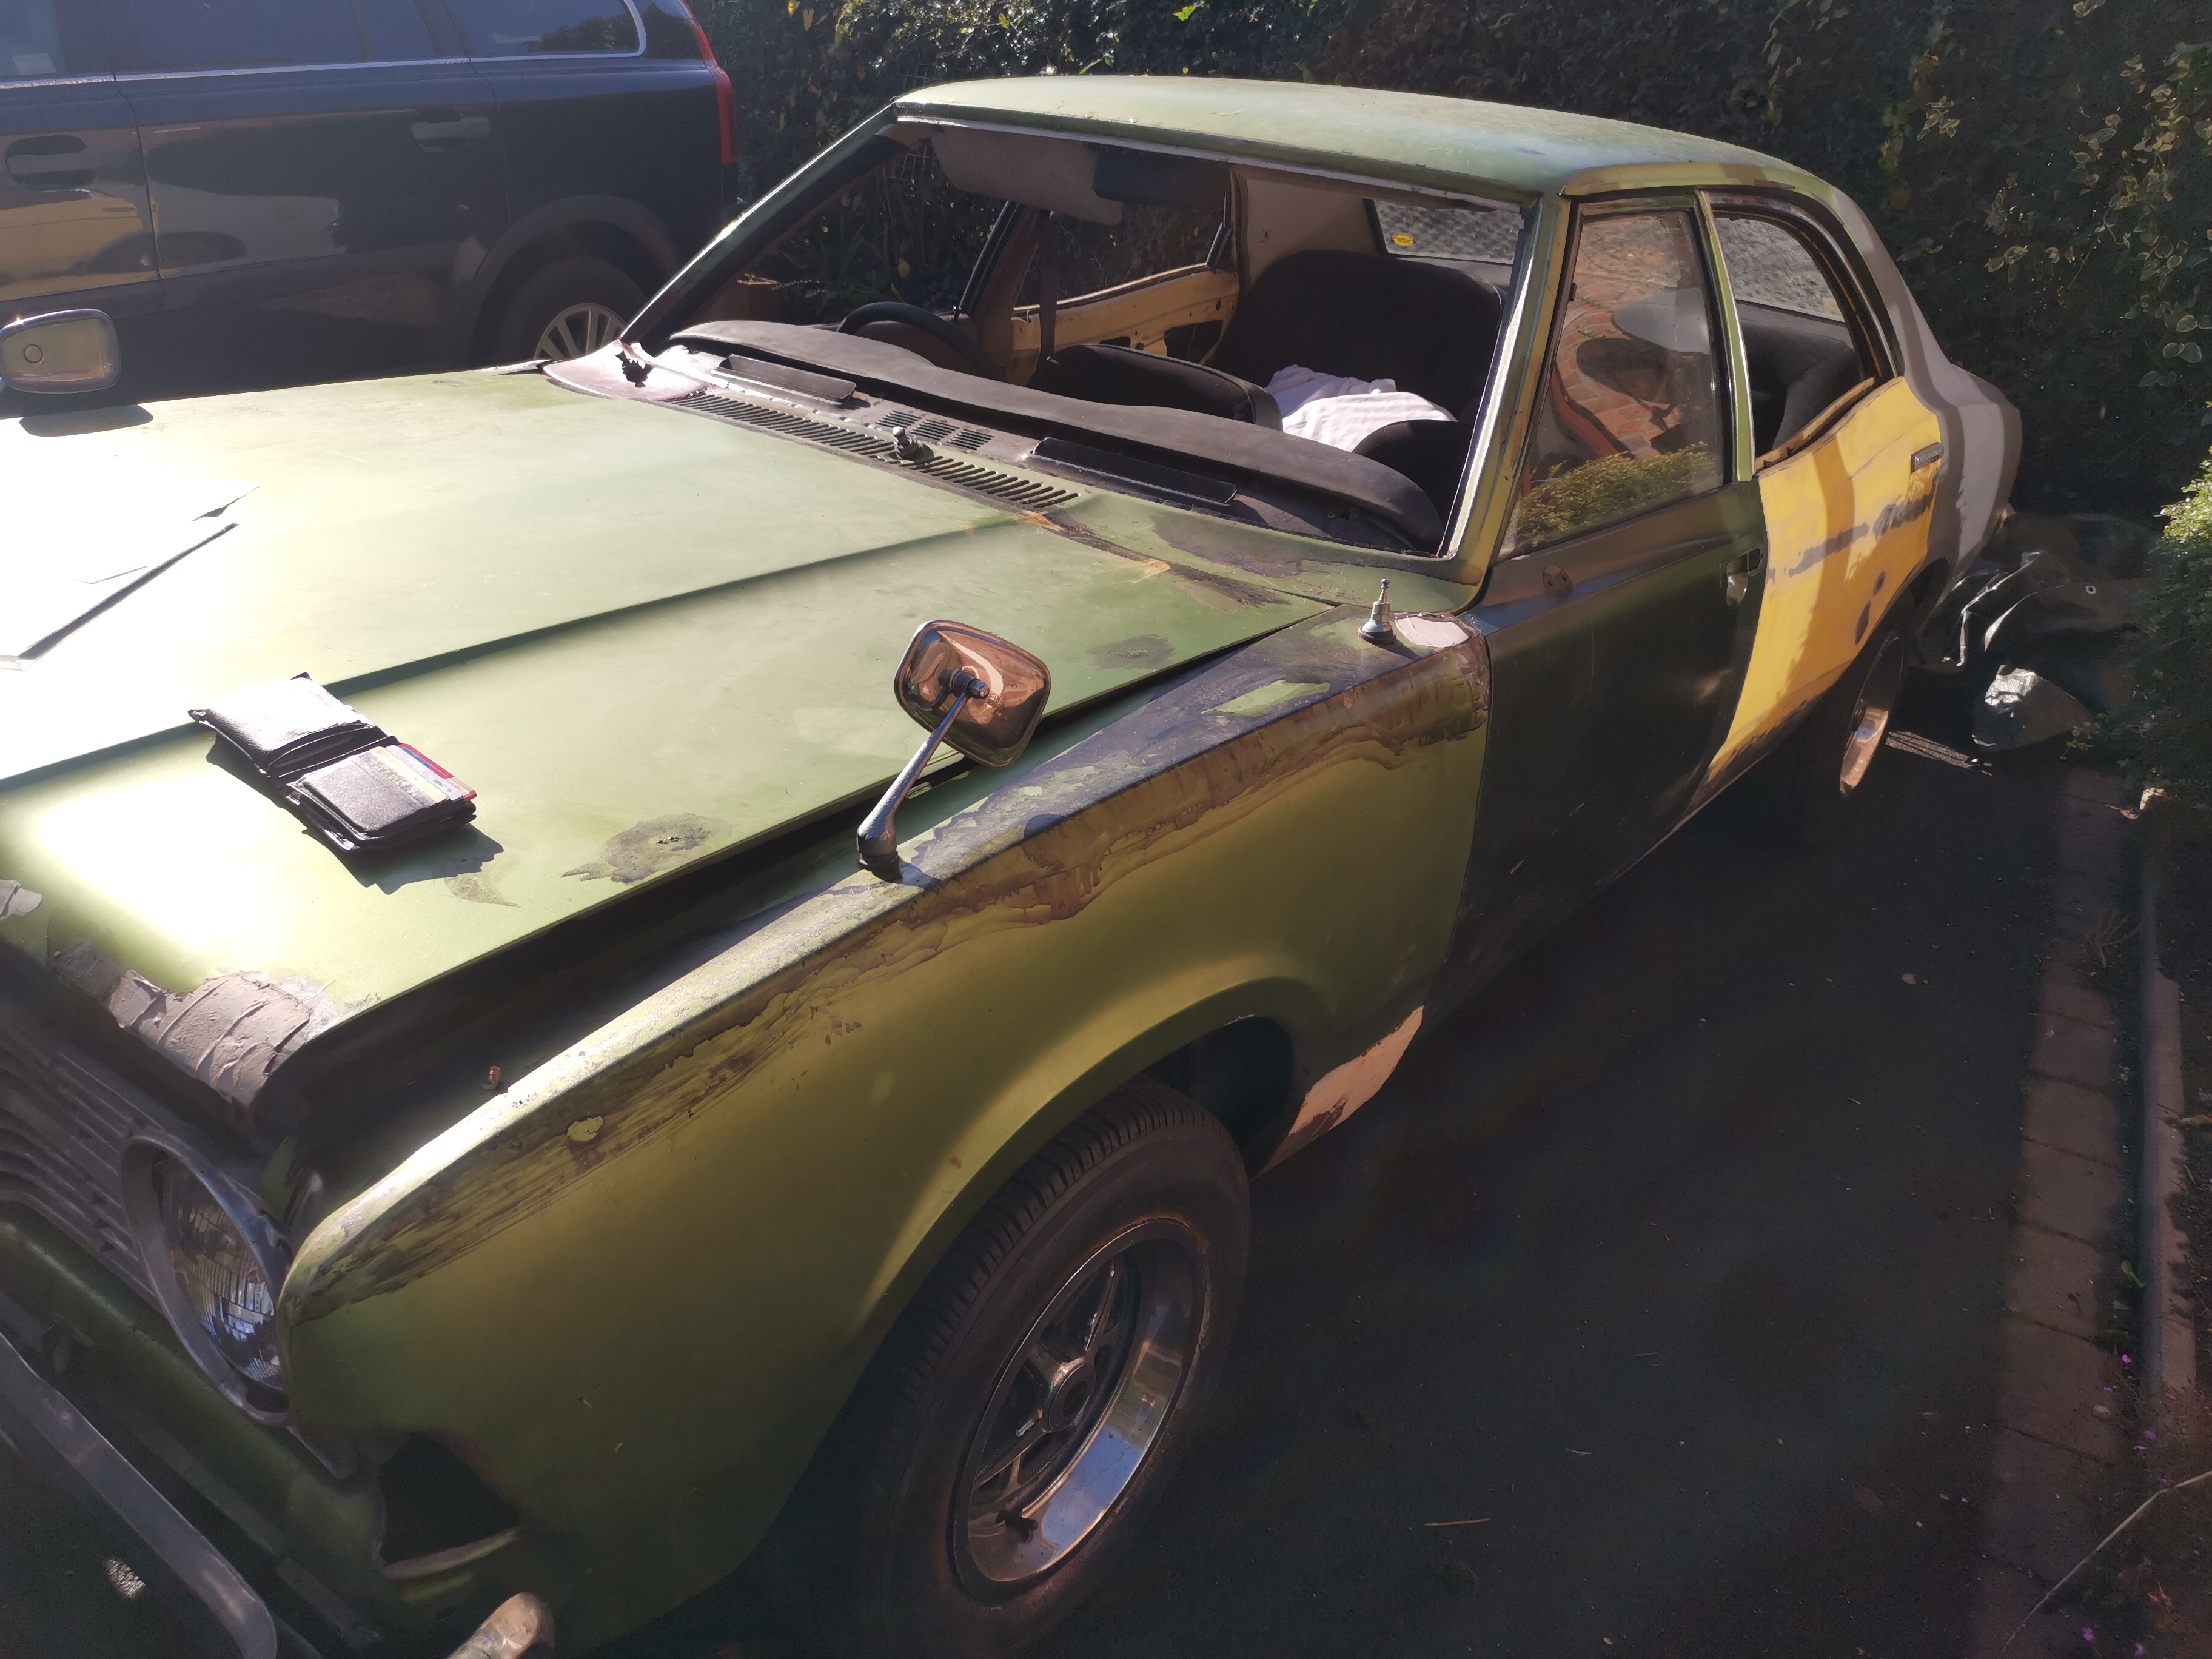
When I went to see the car on the vendor's drive I think I might have either put my rose tinted glasses on or not even looked at it at all lol. I honestly thought it looked ok, but when I got it delivered home though and I started dismantling it and inspecting it properly I realised it was FAR WORSE than I realised. It certainly wouldn't be a case of a quick wipe over with a cloth and some T-cut lol!
Click on any of the images below to see a larger version.
First time view
At the vendor's house I can immediately see the potential.
First time view
With my rose tinted specs on it looks pretty solid lol.
First time view
There's a bit of work to do, but nothing I can't manage.... (Famous last words lol)
First time view
Don't worry, all the parts are there (apparently)

First time view
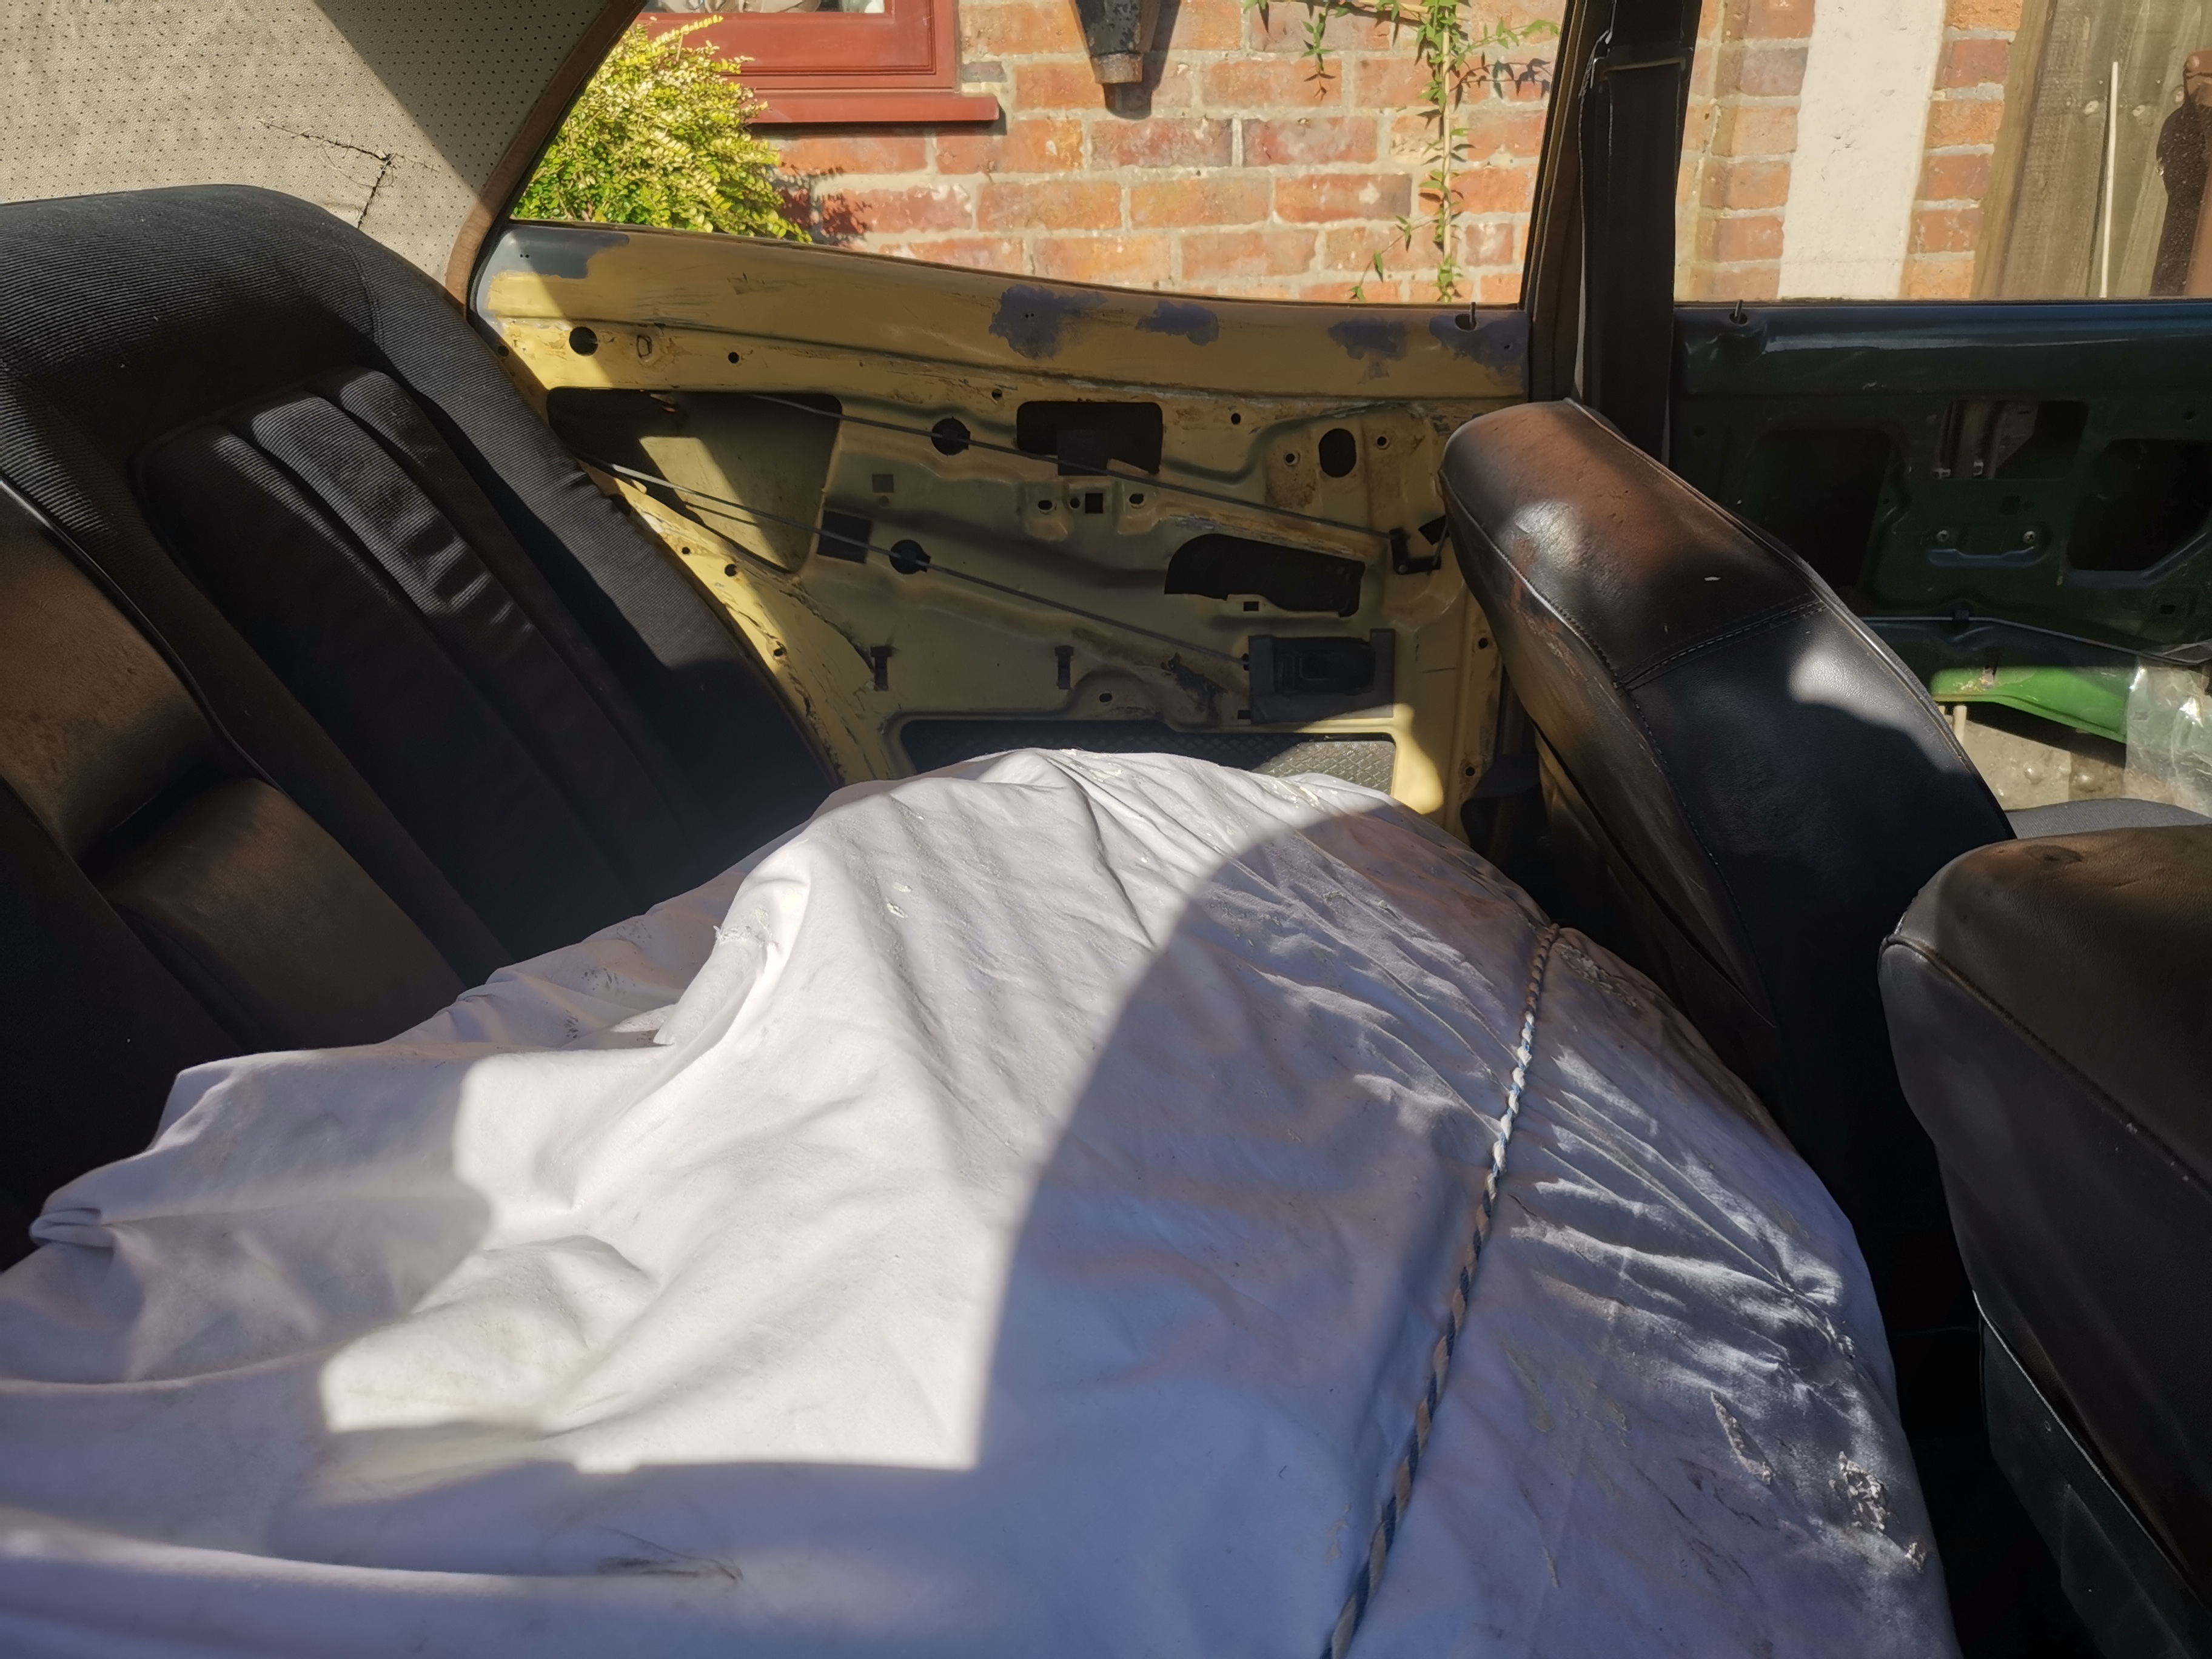
Some of the interior had been stripped
First time view
Actually, most of the interior had been stripped.

Delivery day
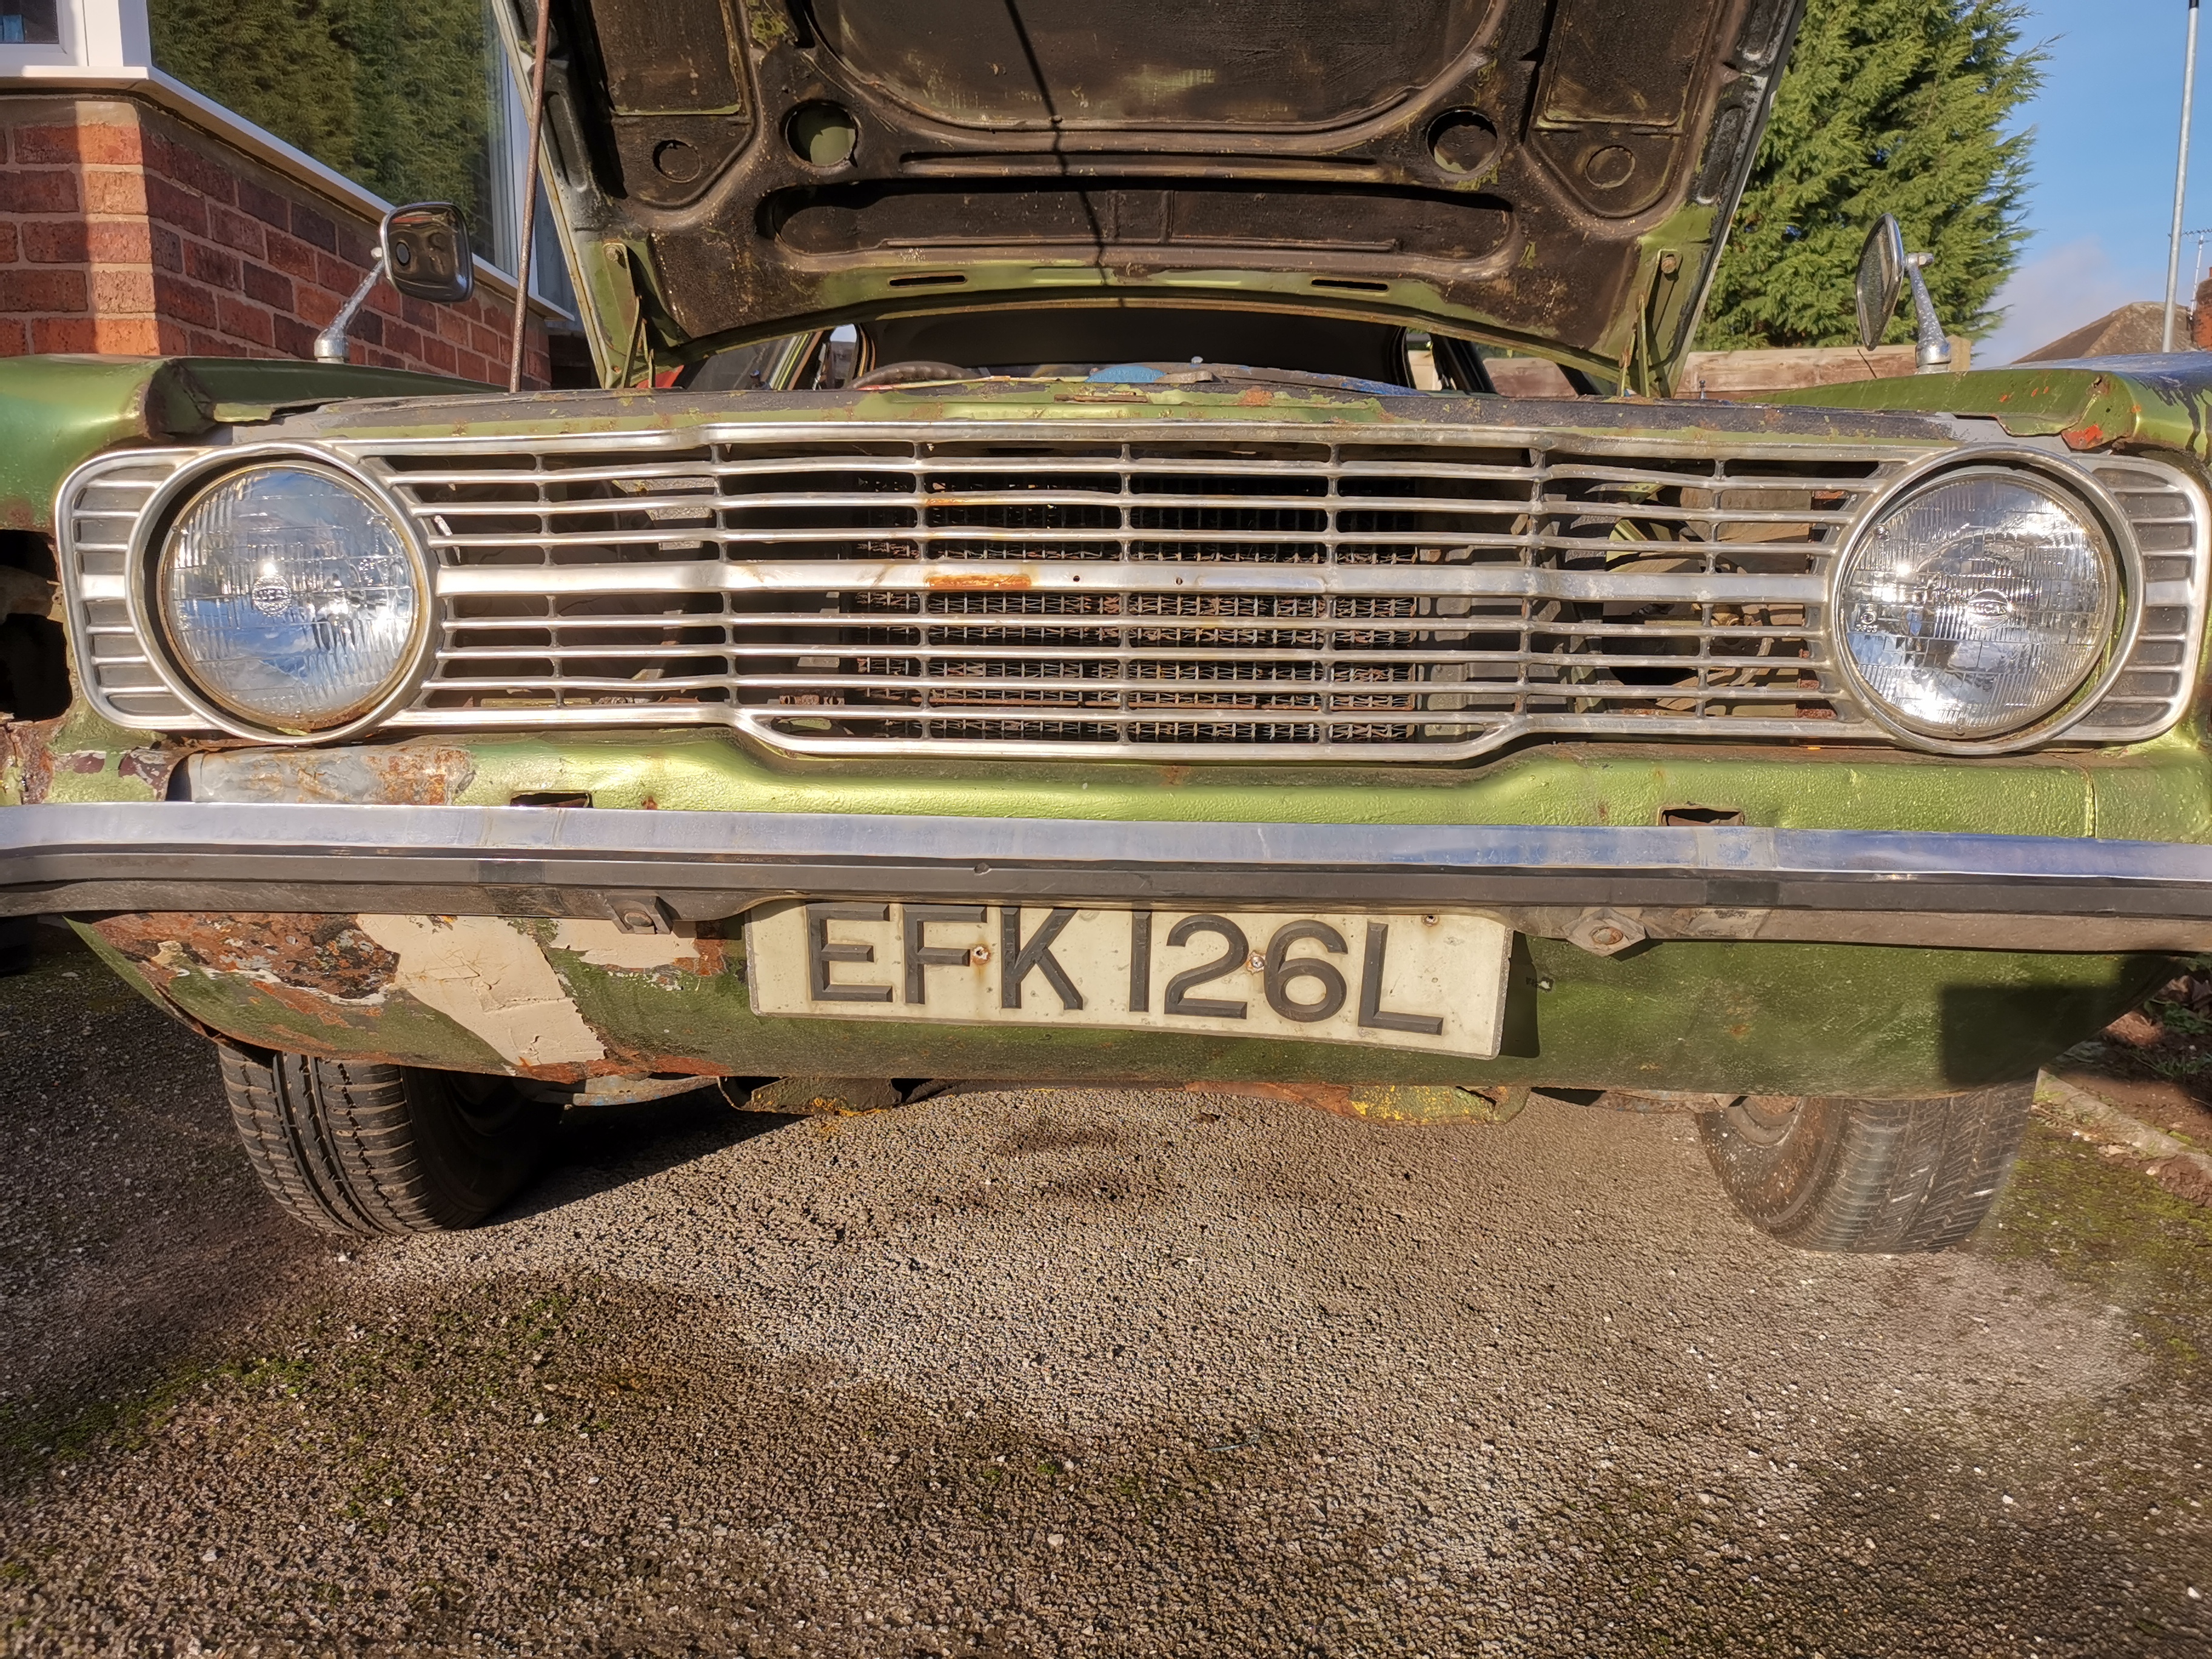
This is what the car looked like as it was delivered.
Delivery day
It was raining heavily and there was no windscreen fitted, so everything inside the car was as wet as the outside!

Delivery day
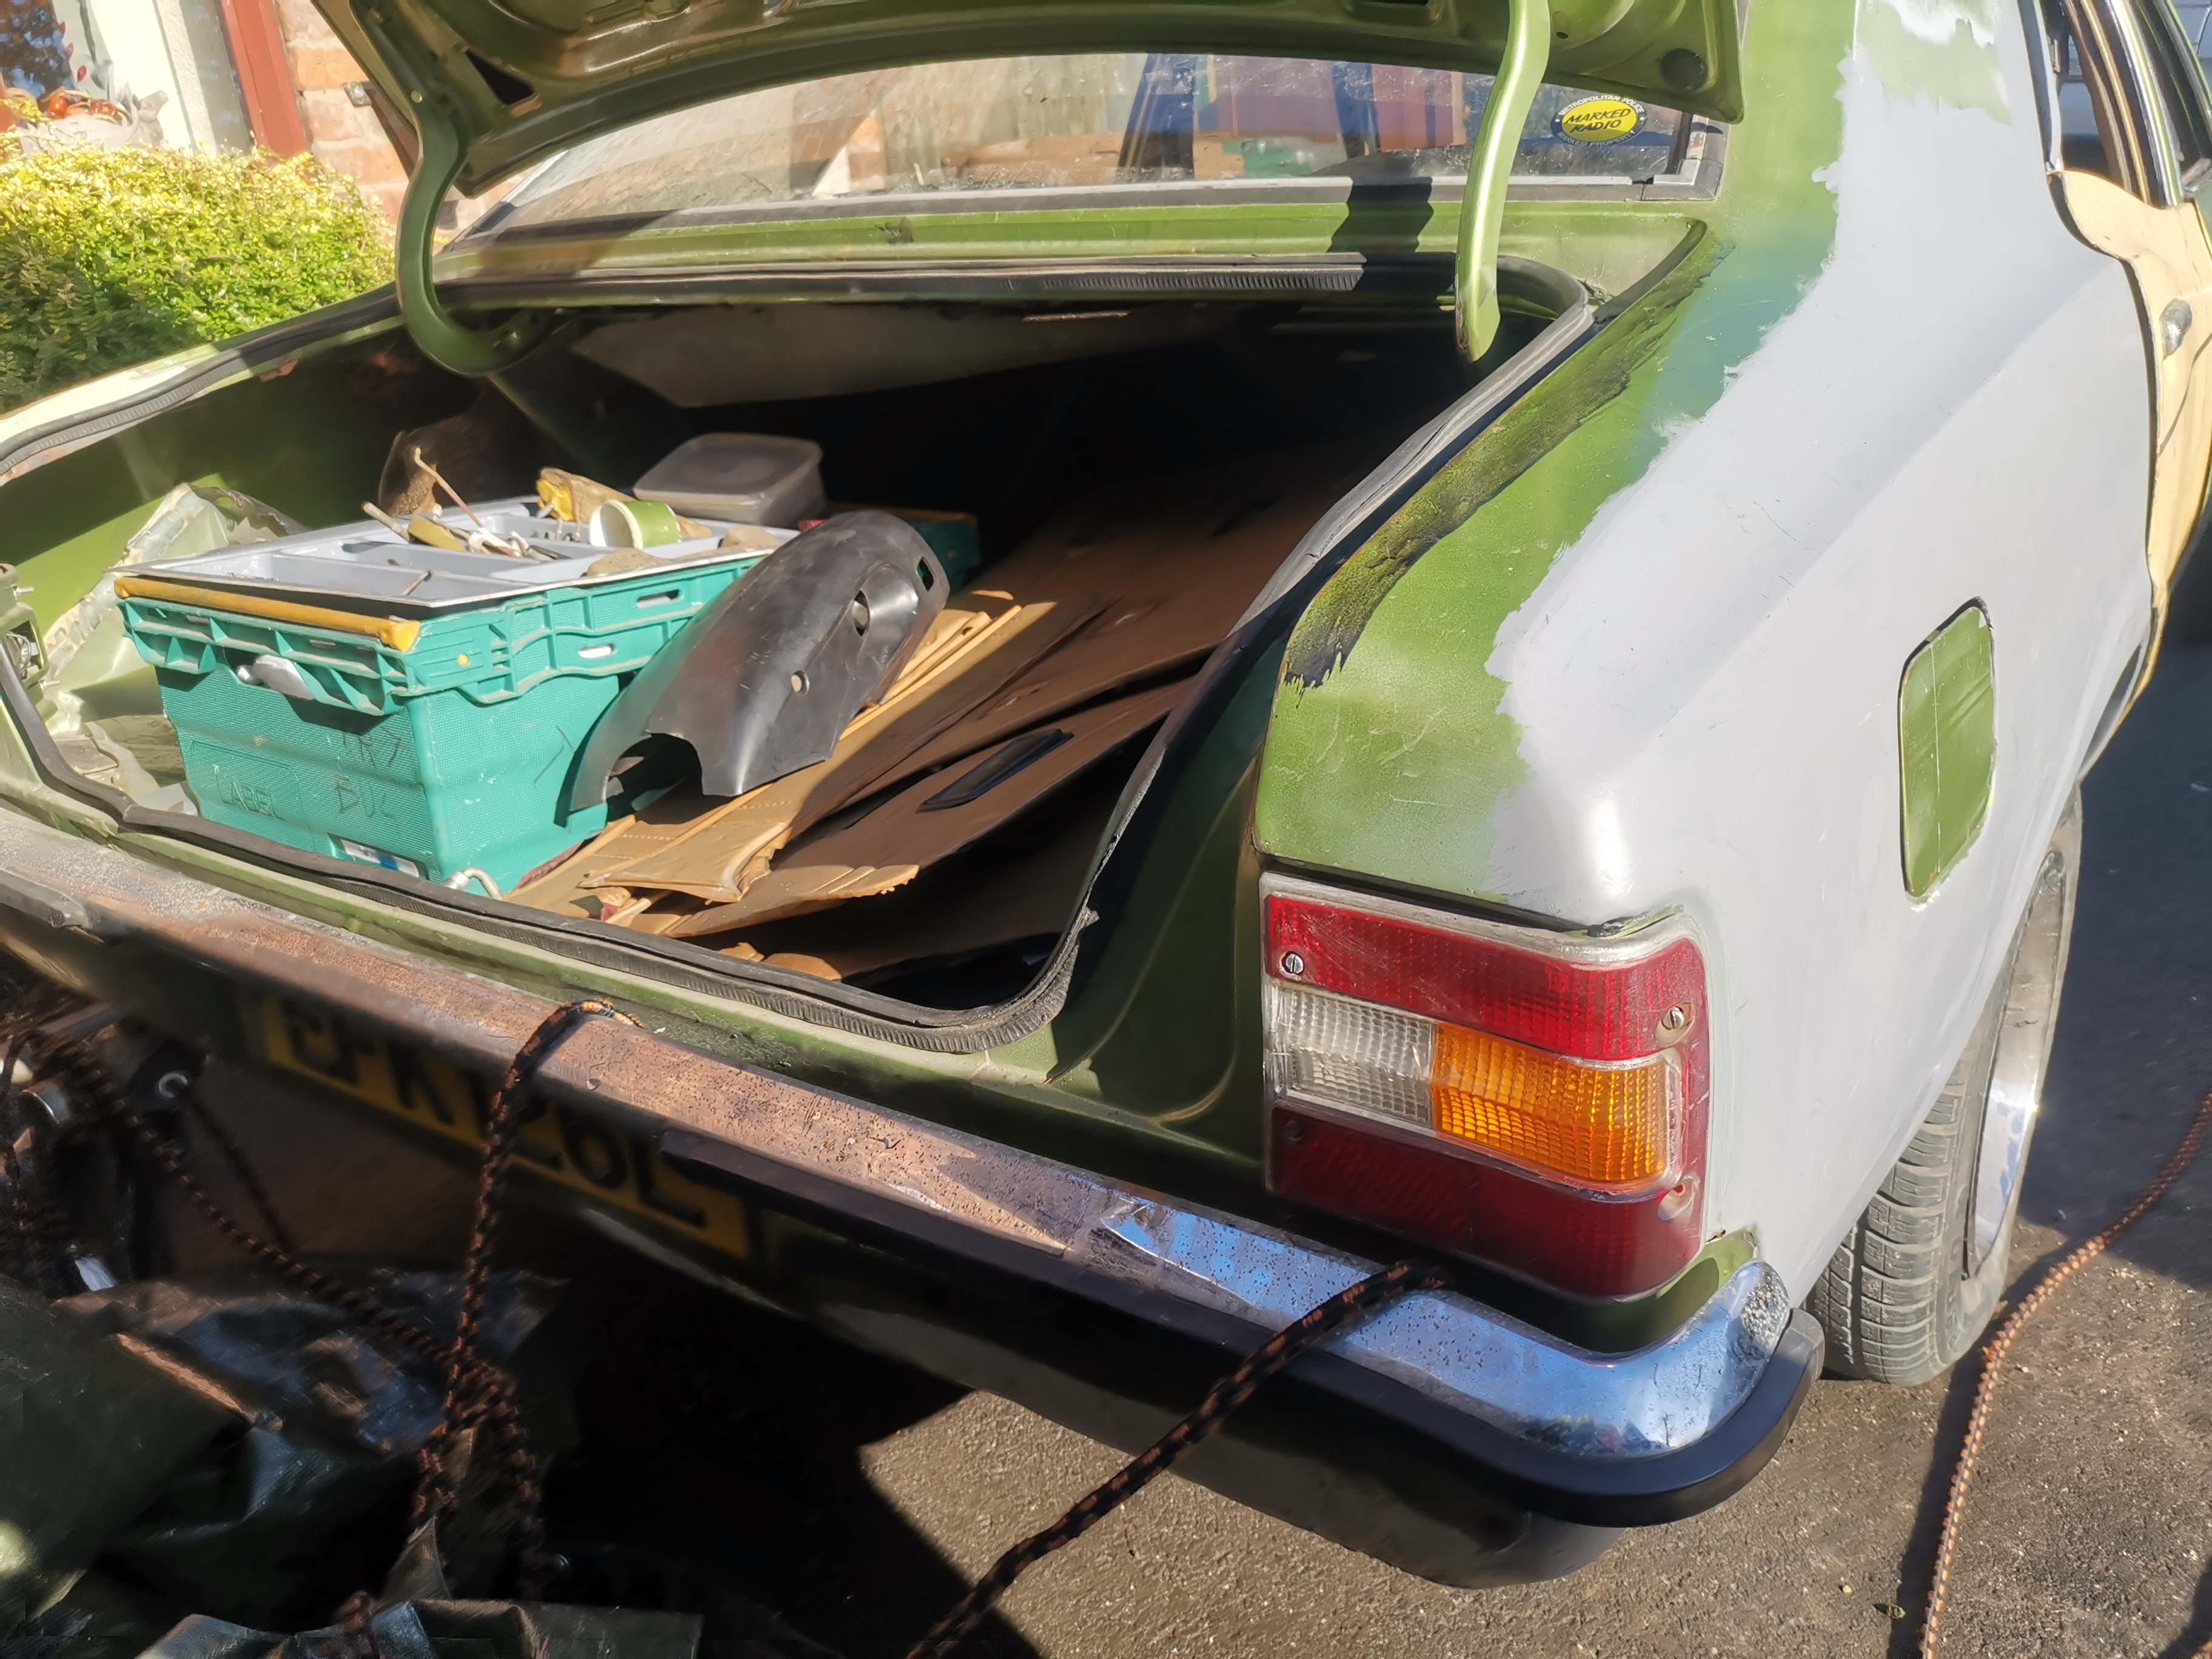
All the parts that the previous owner had removed were piled up inside the car or in boxes in the boot.
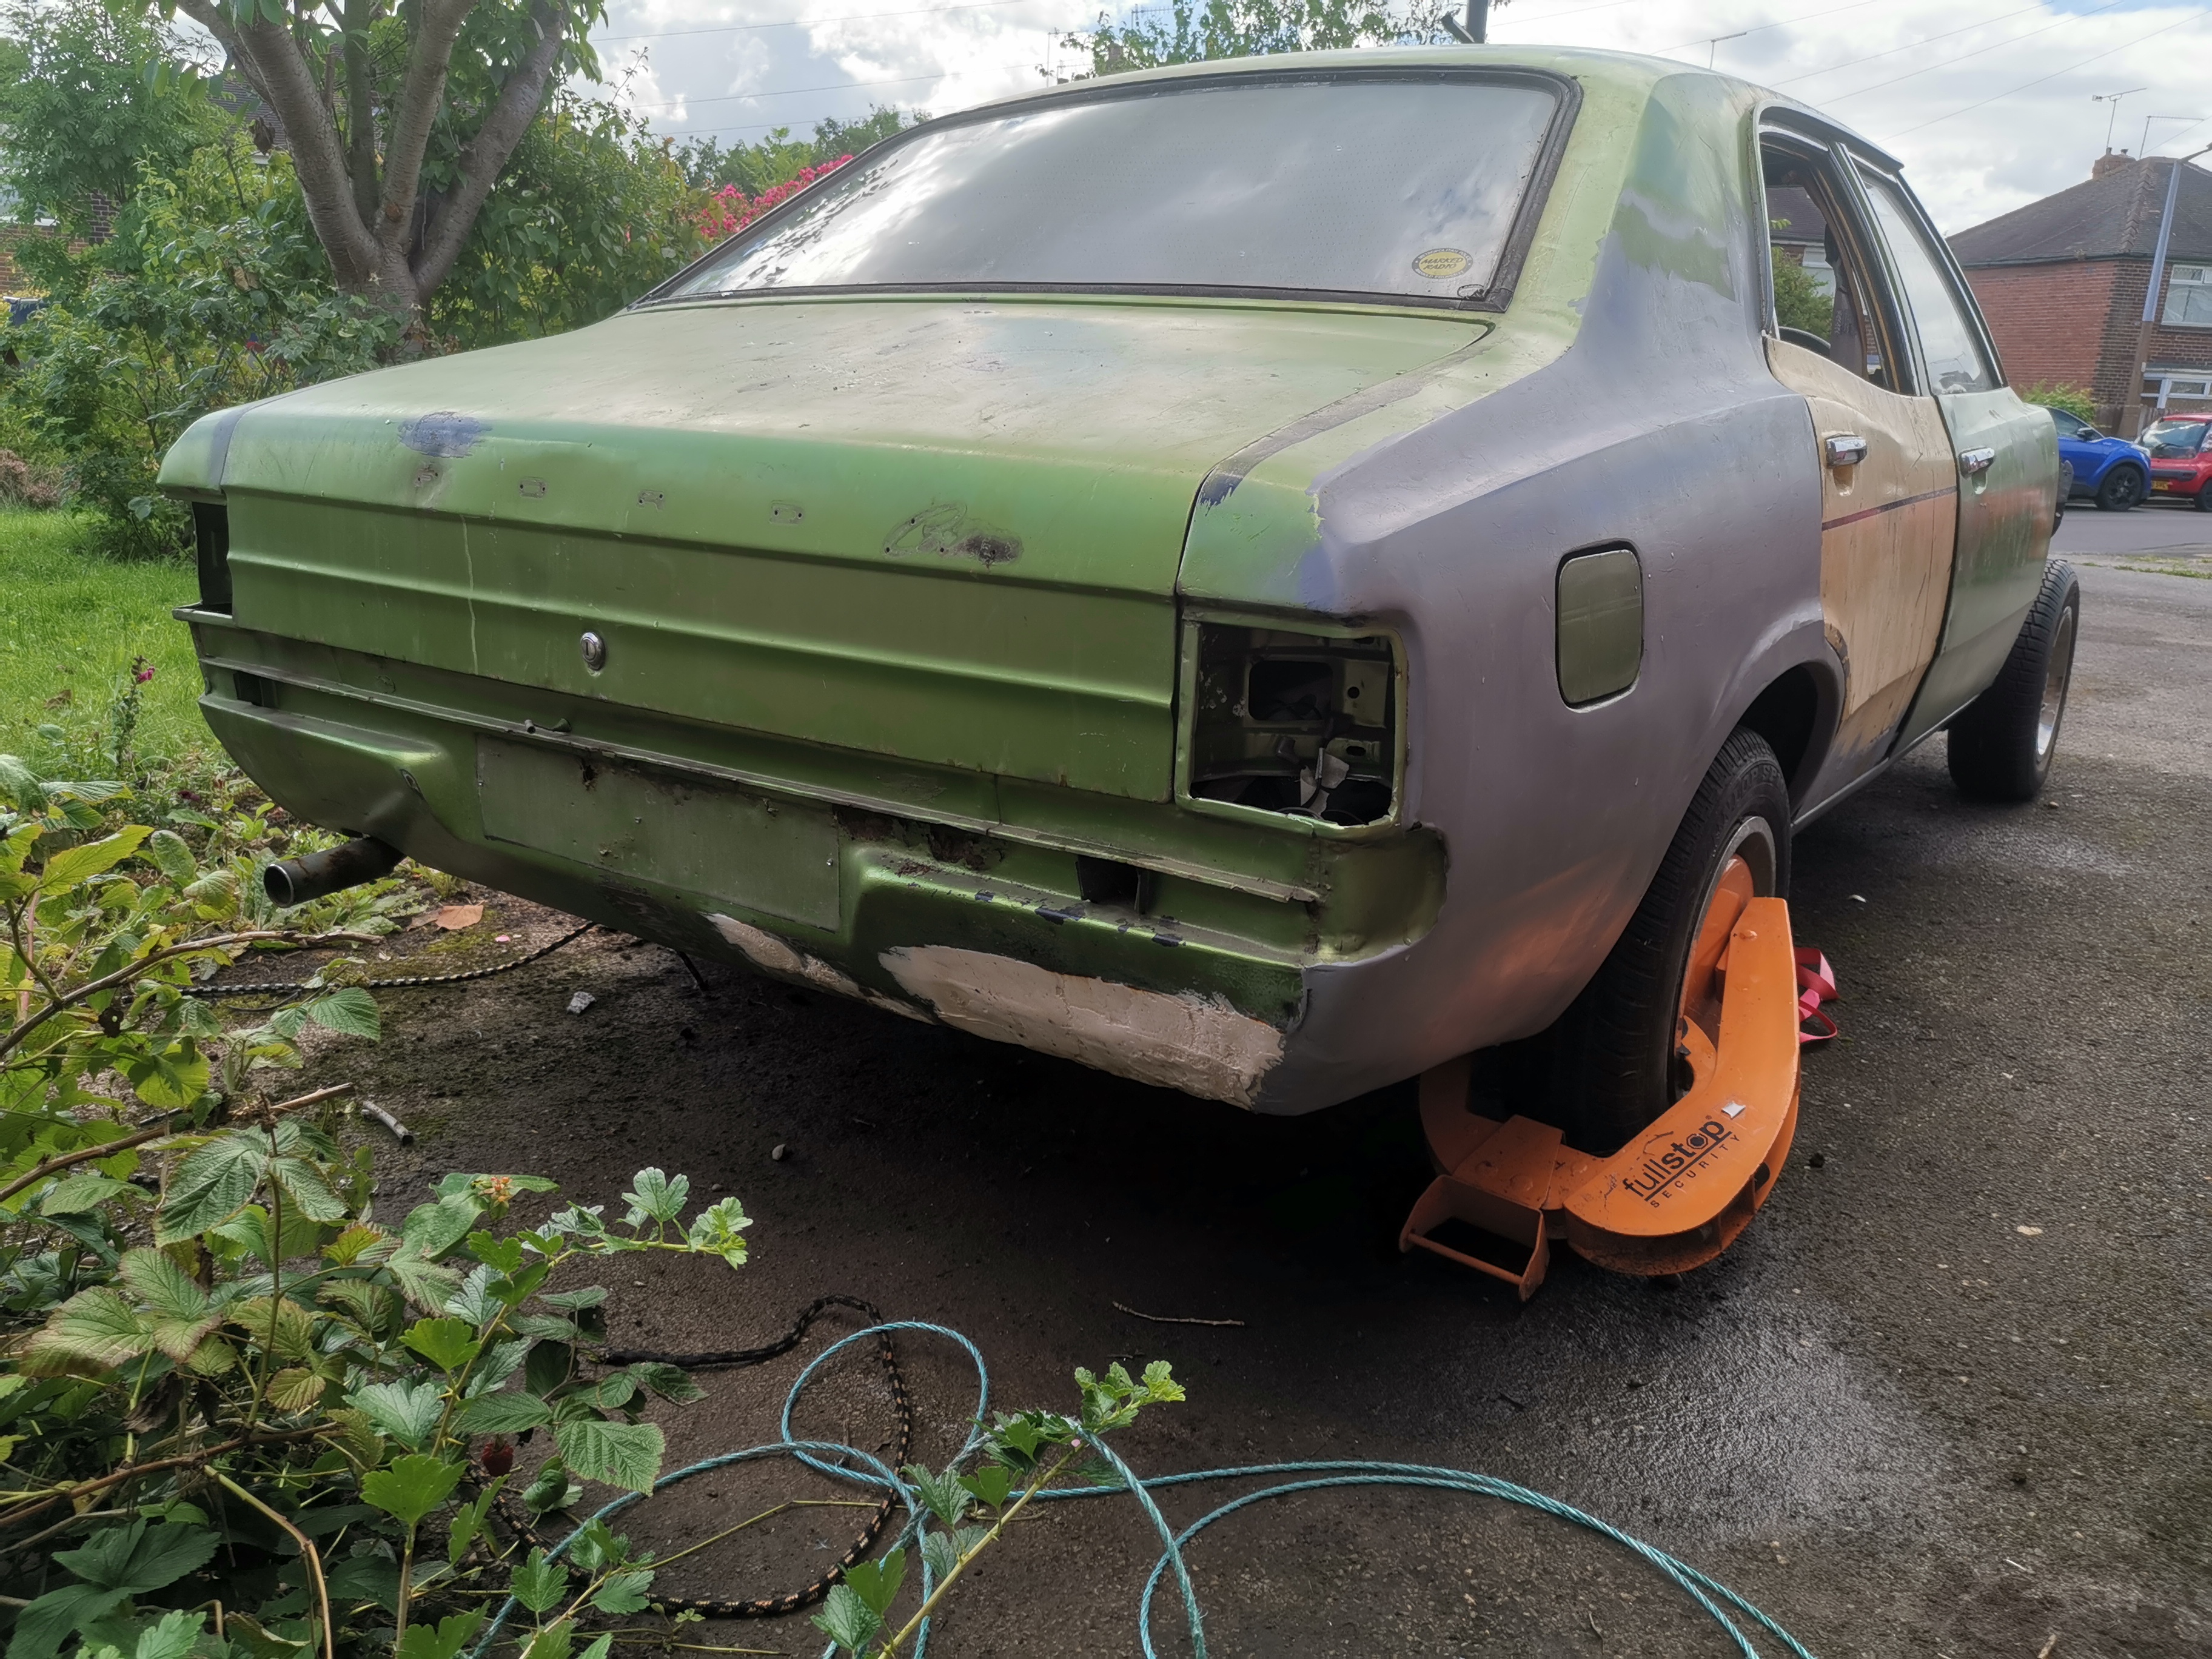
Rear quarter view
Wheel clamp fitted straight away. Don't want anyone driving off with it lol.
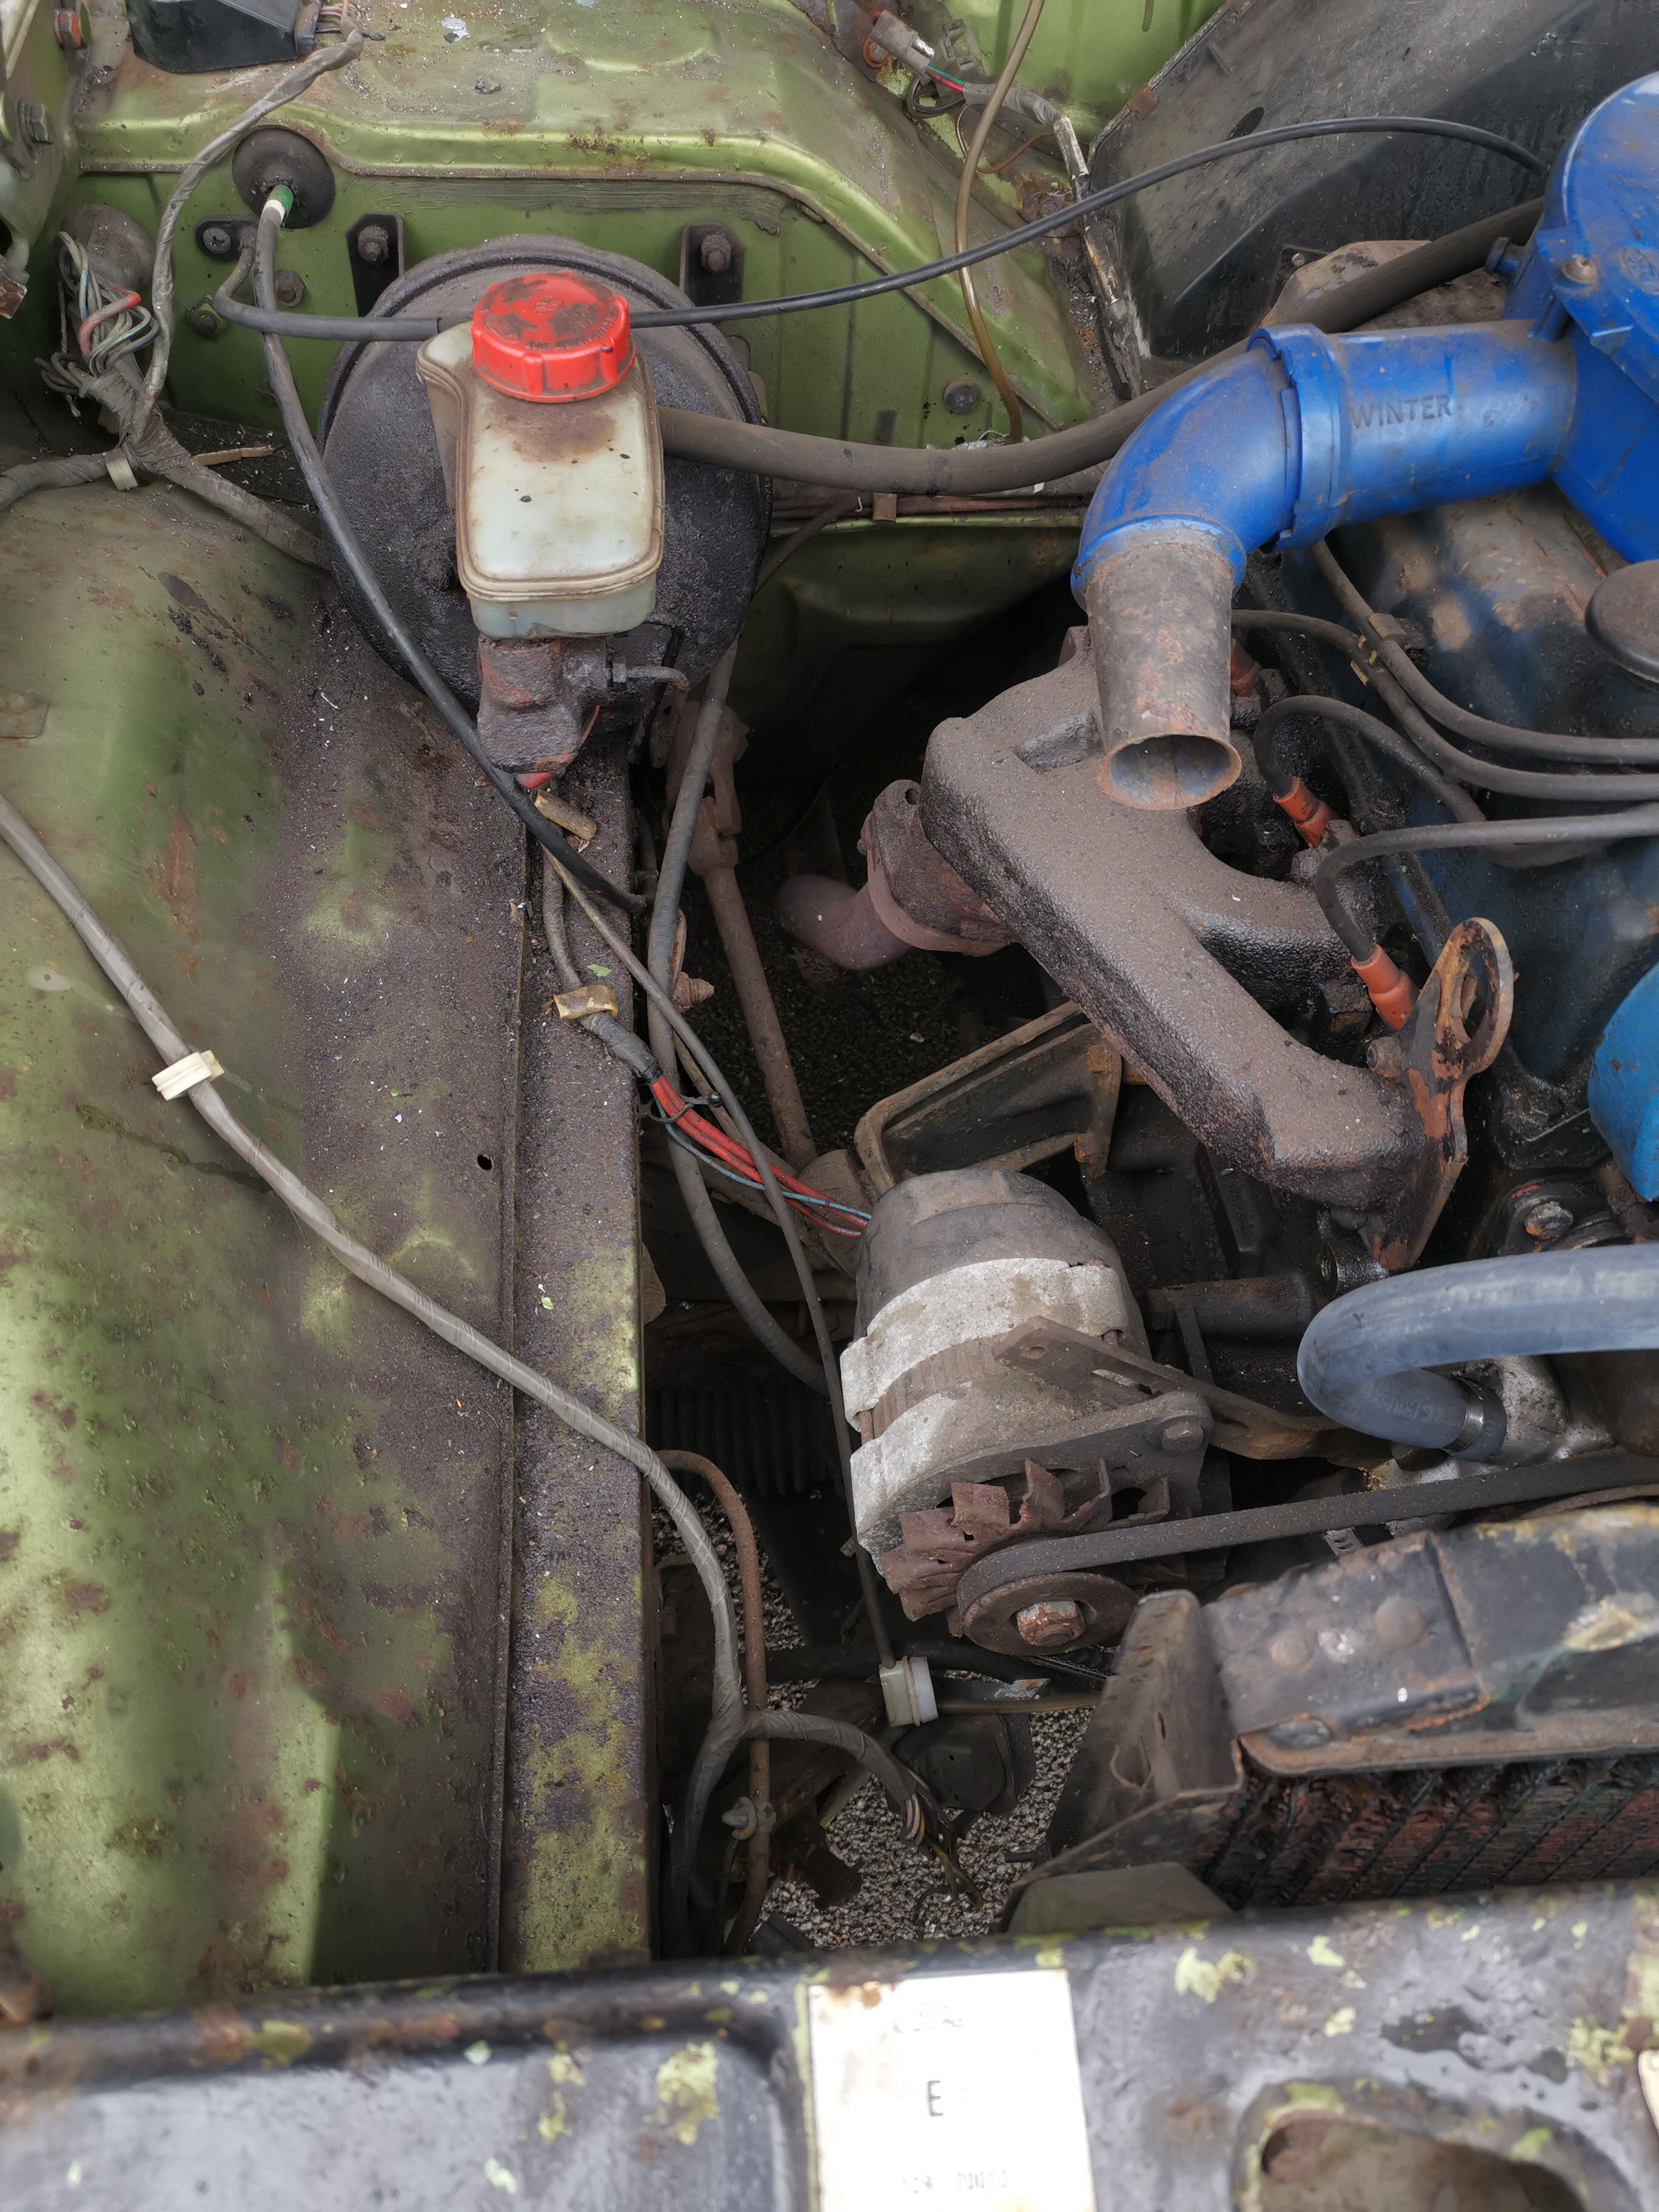
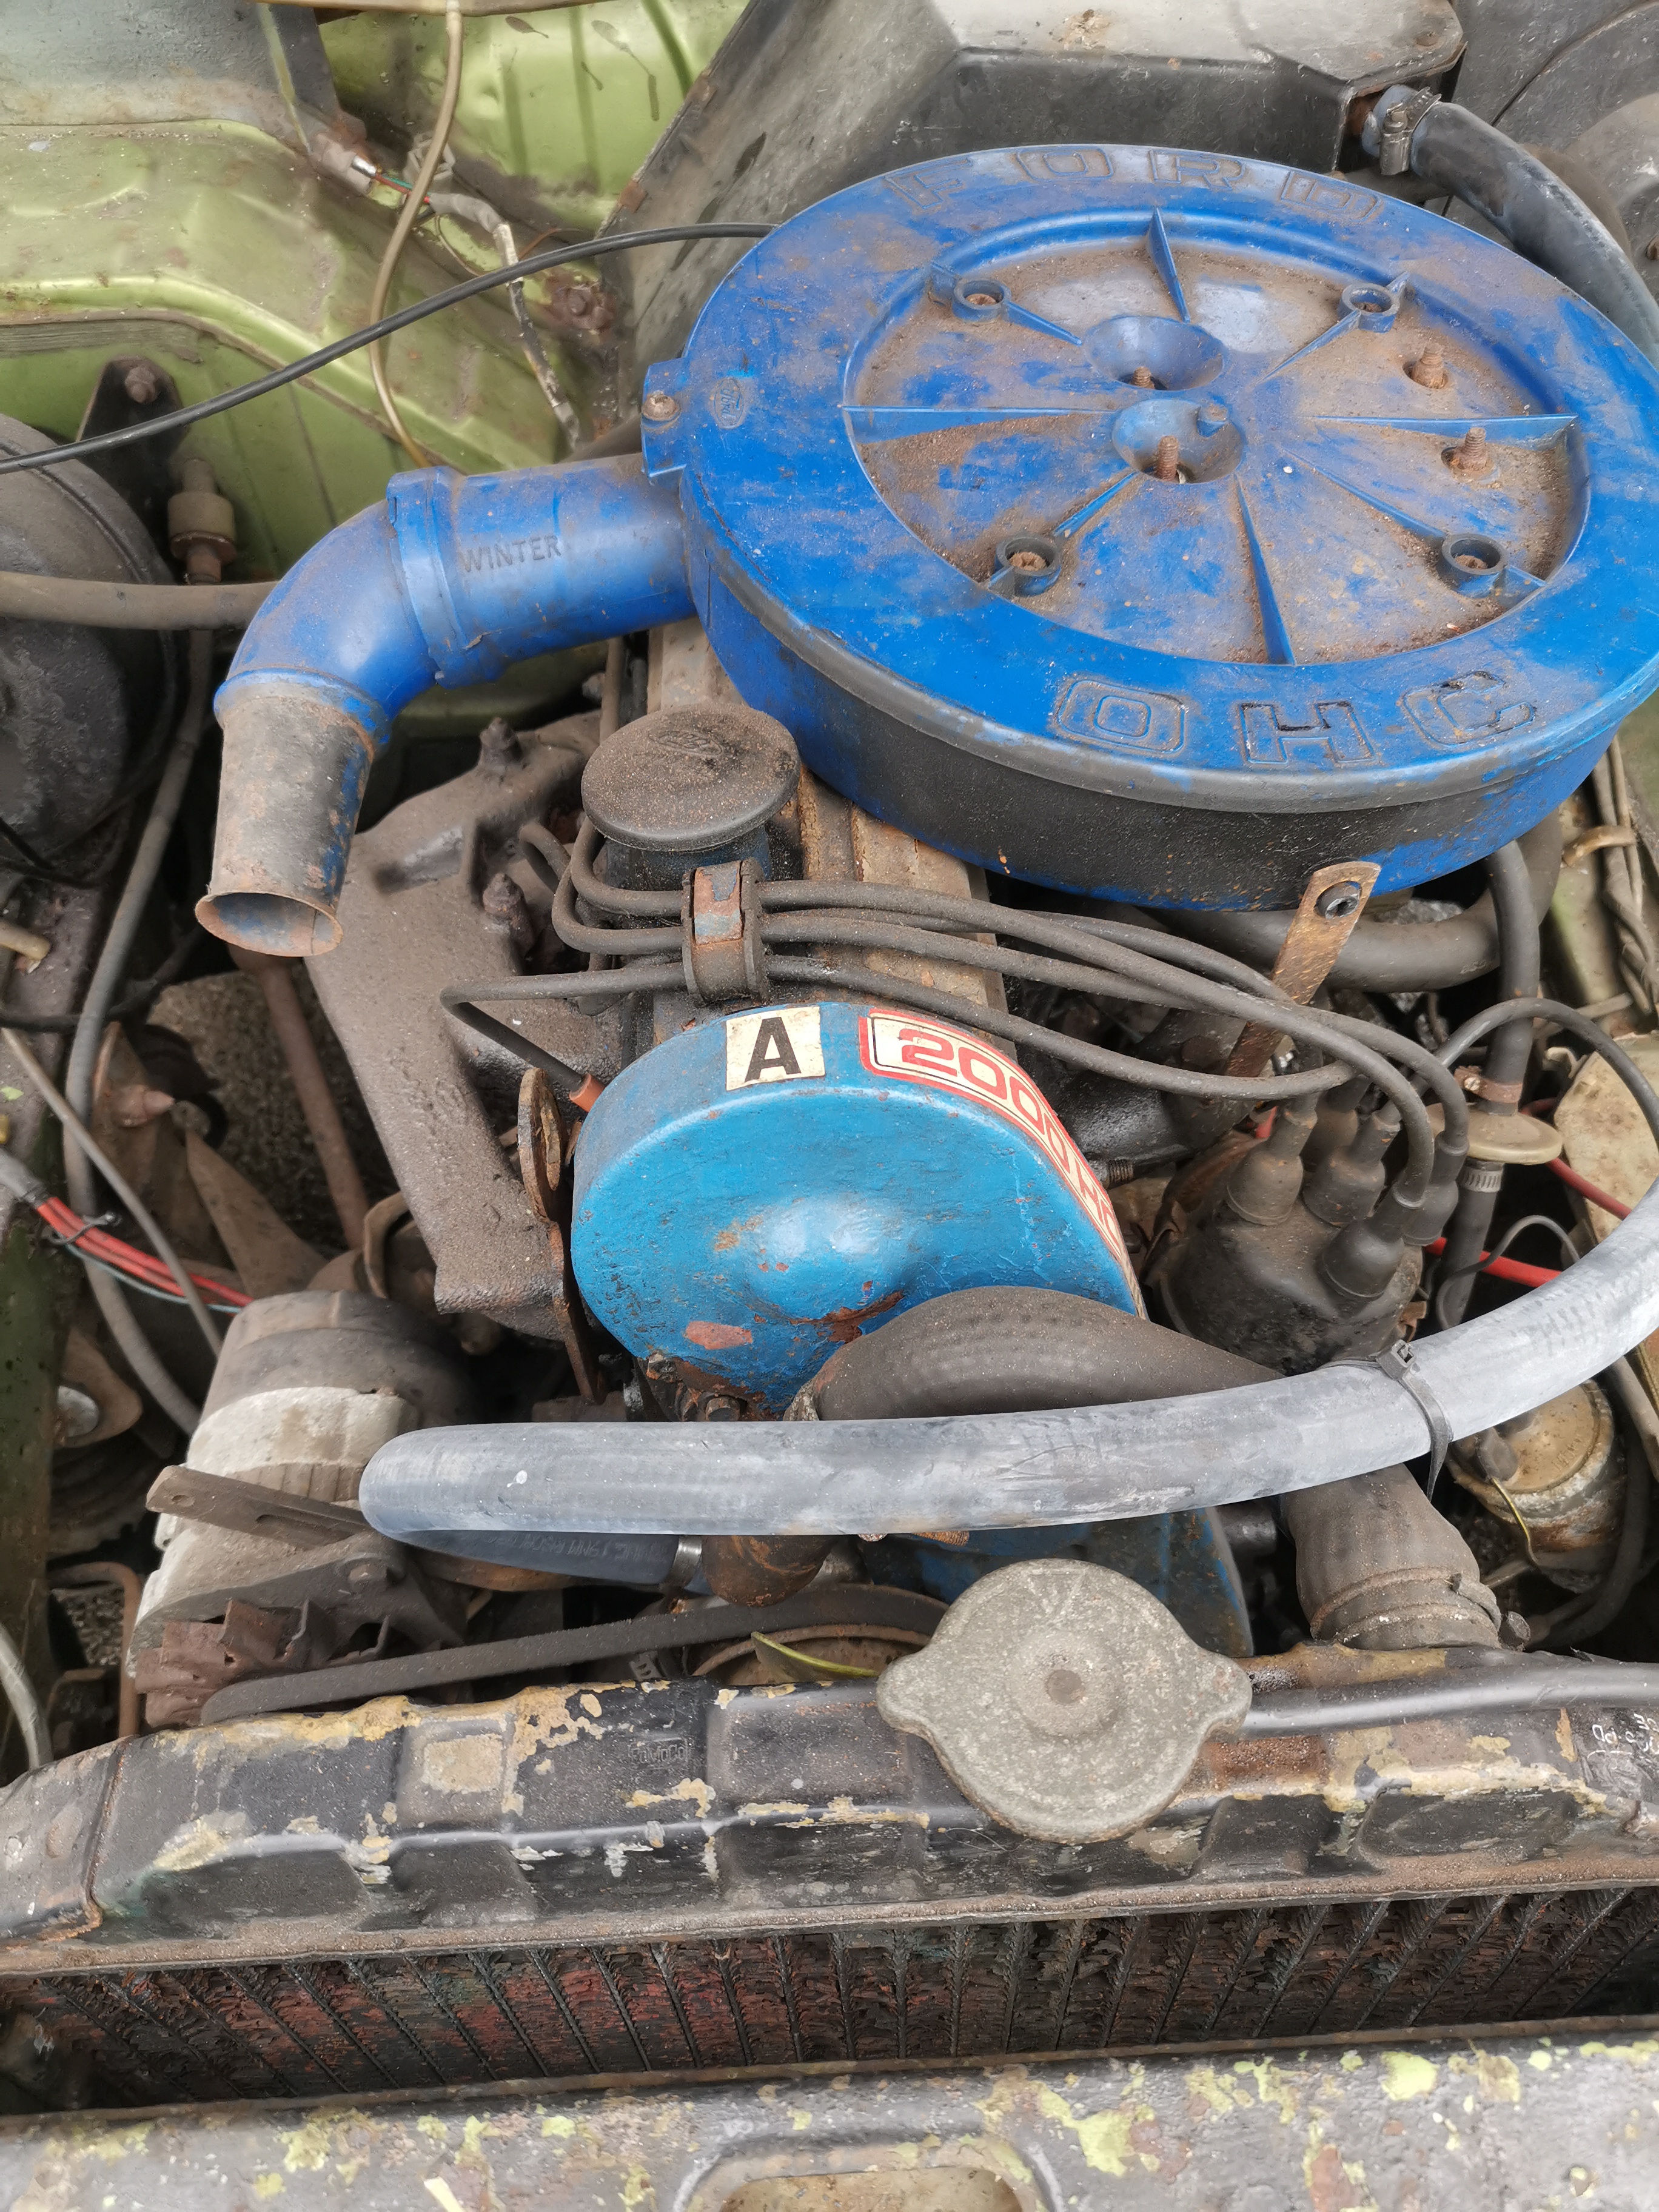
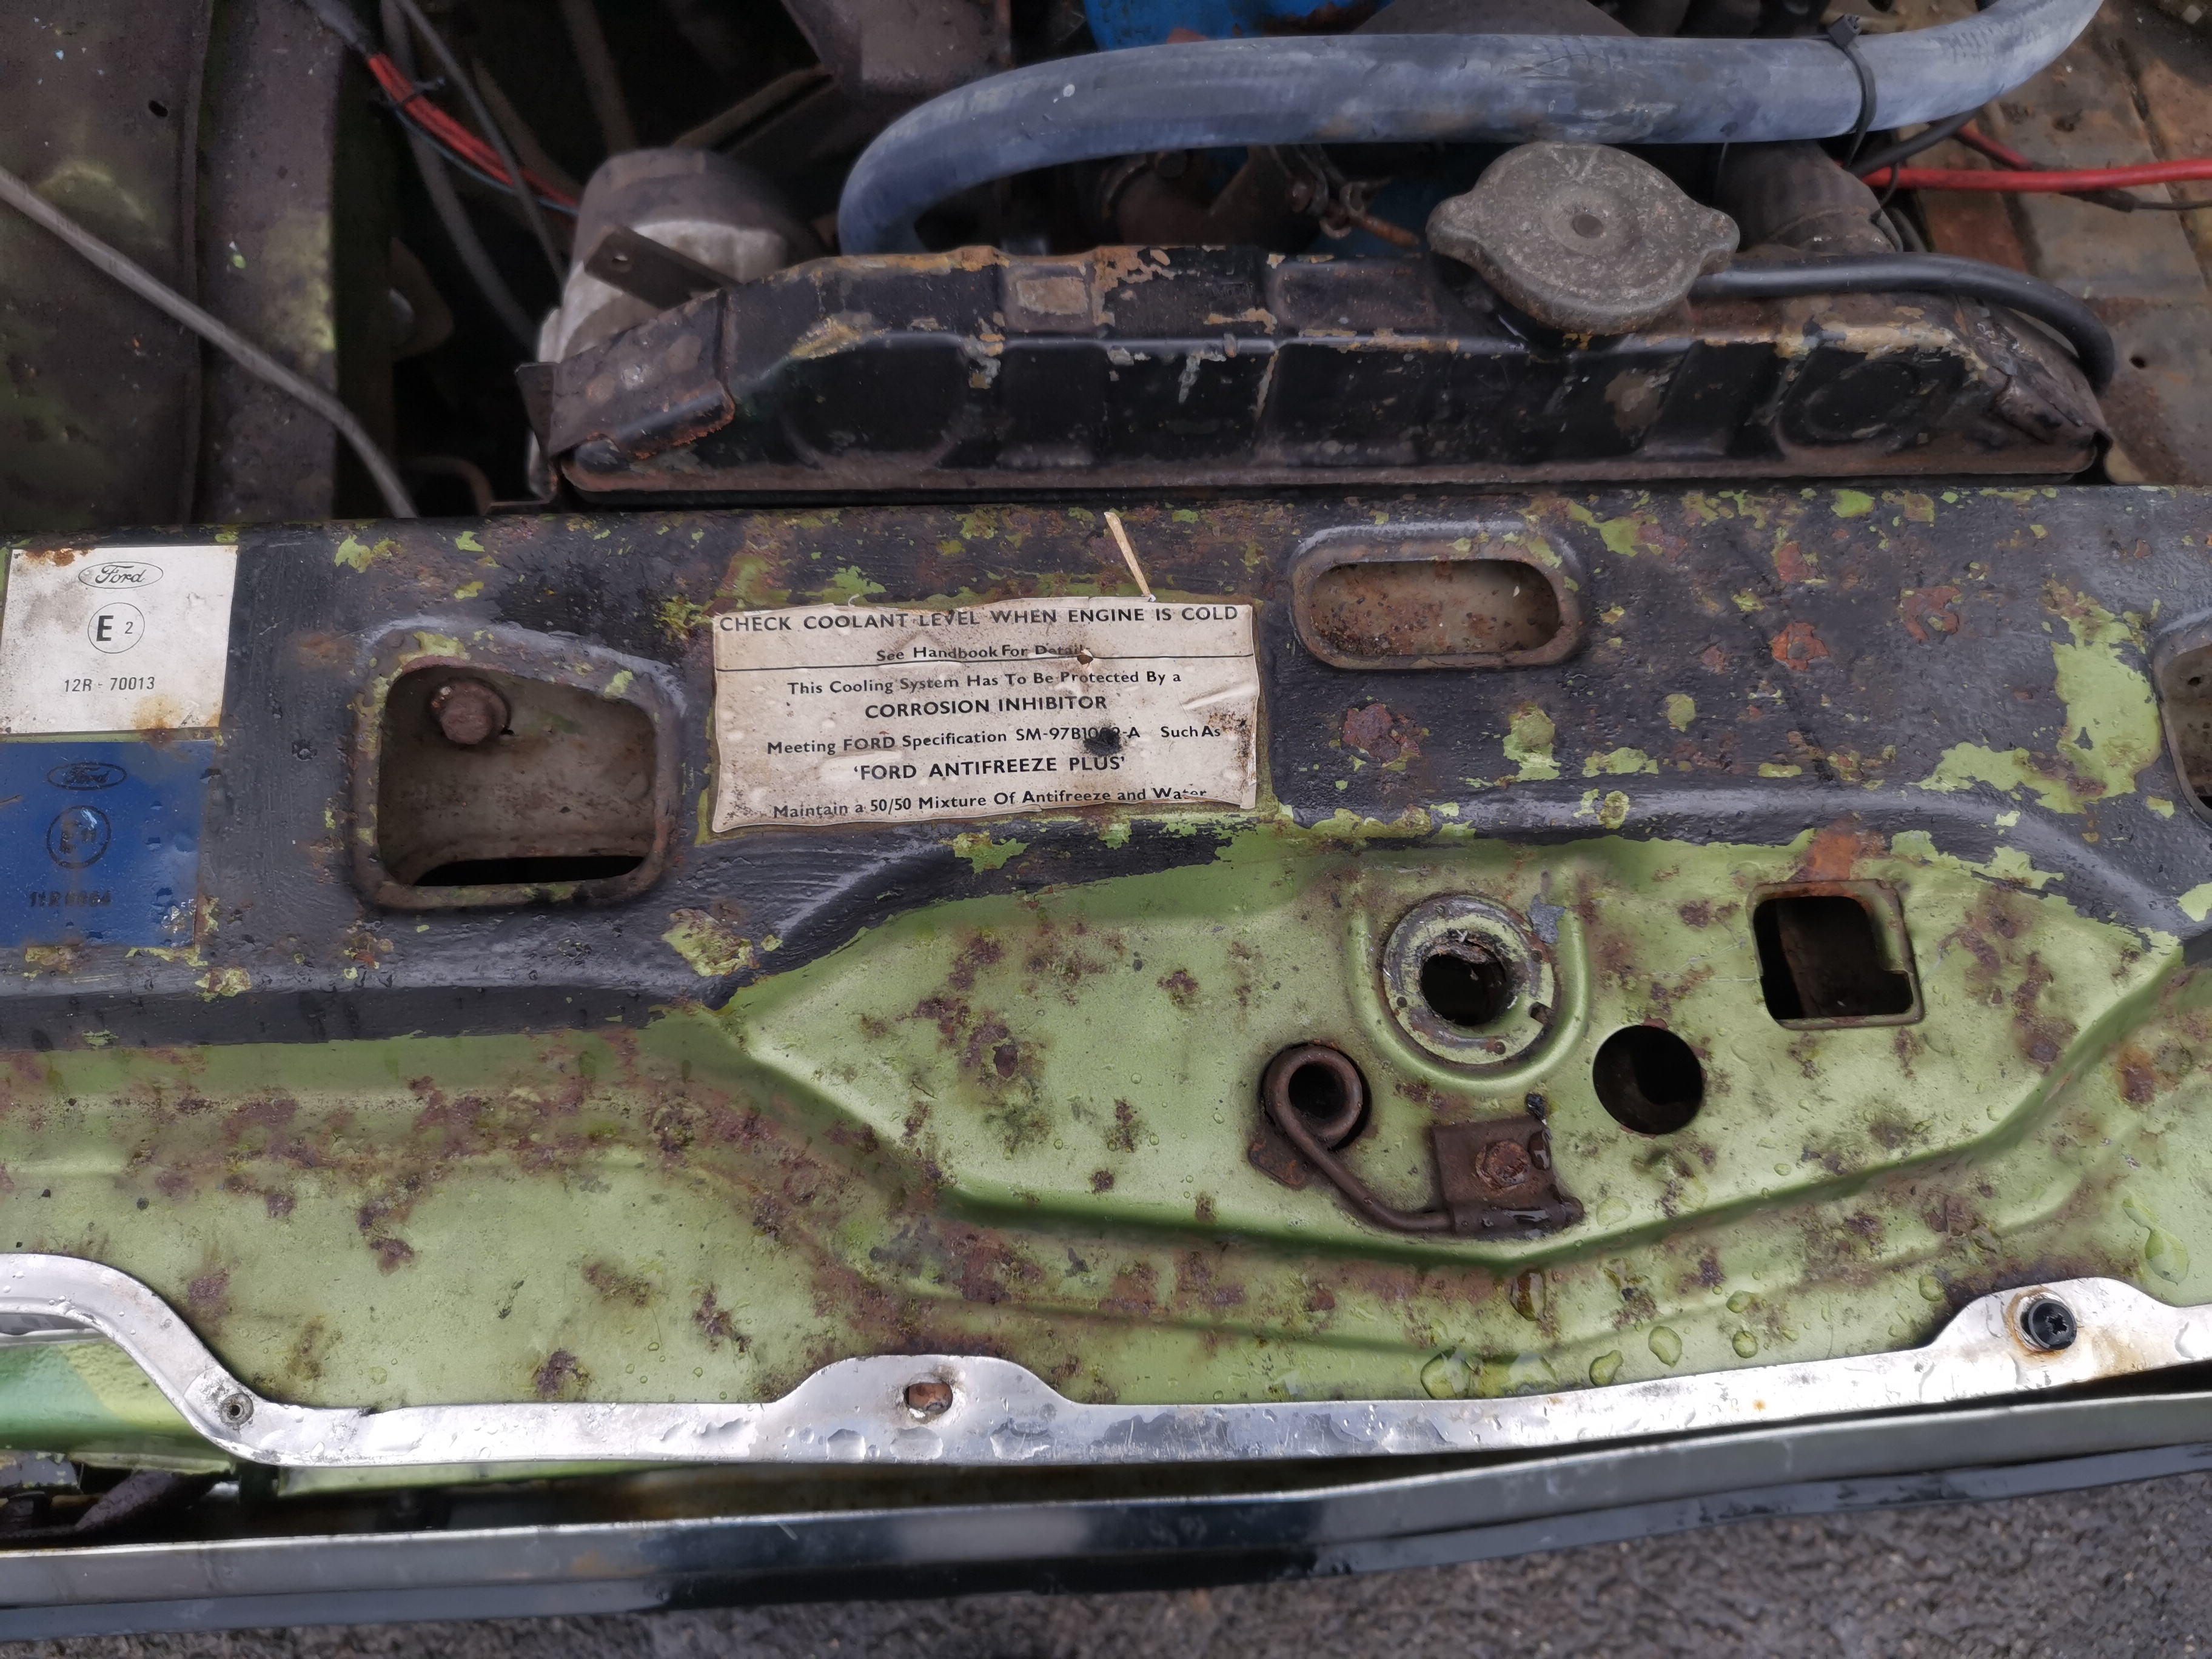
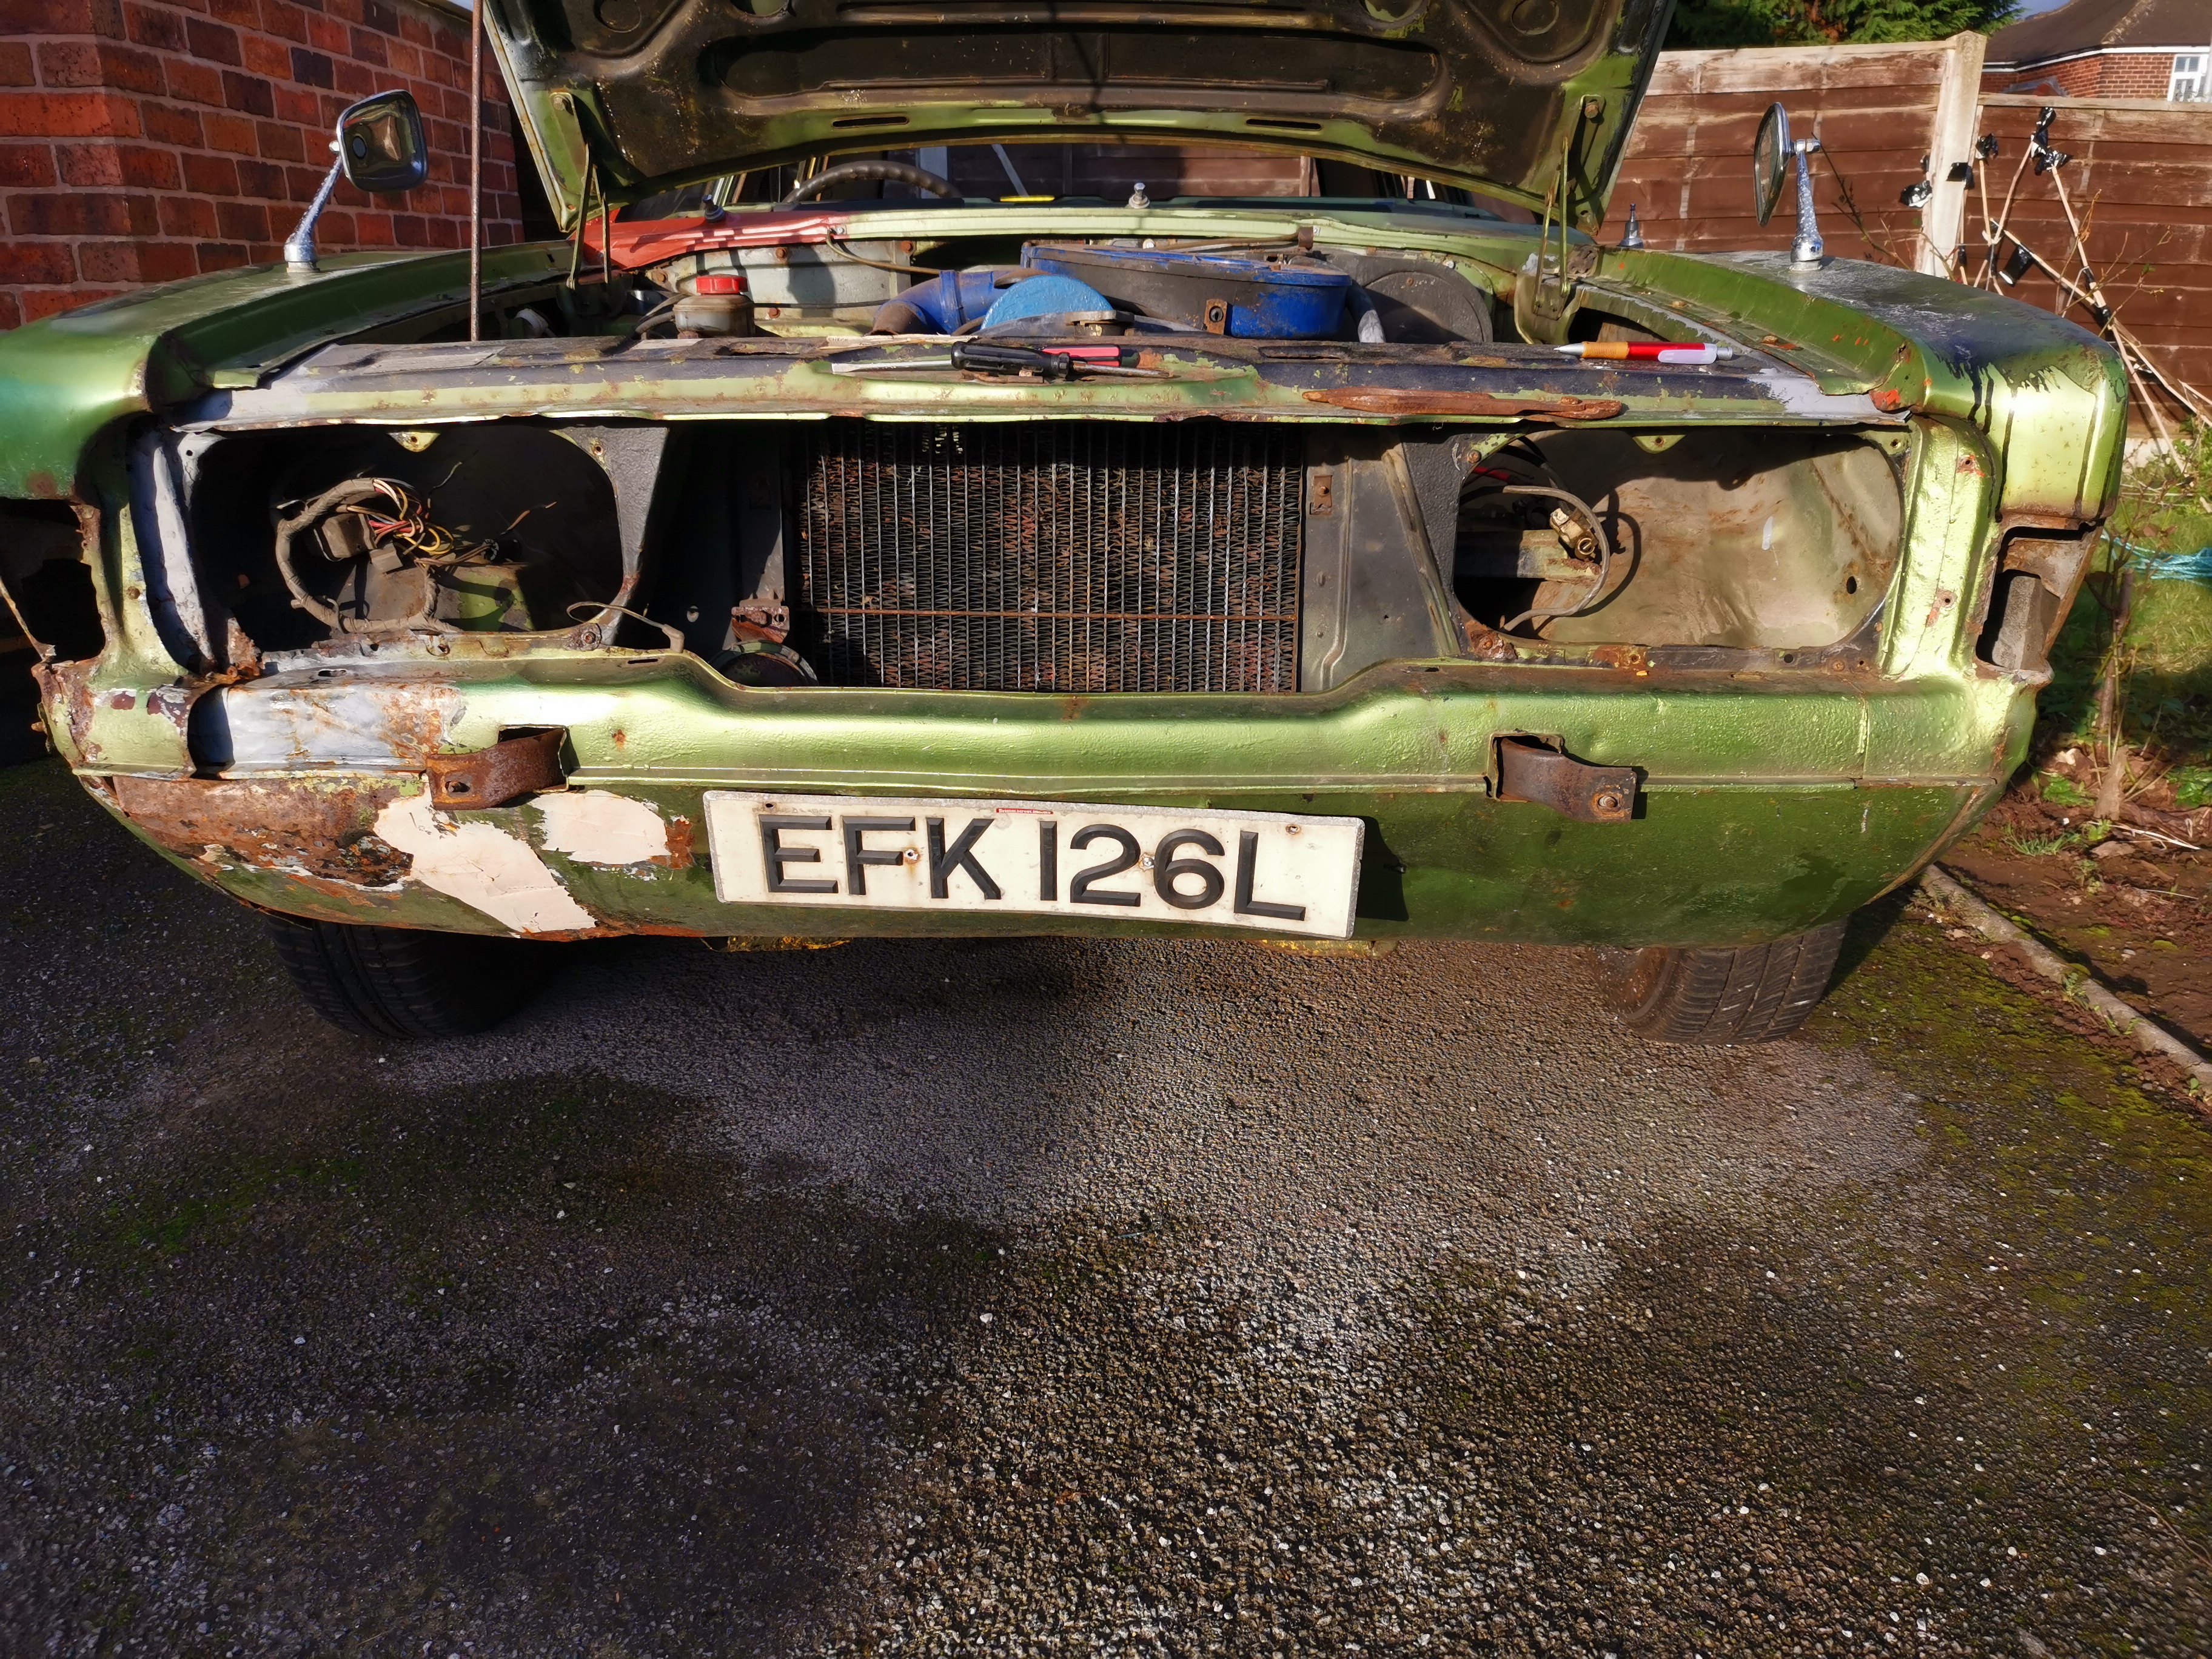
Initial inspection
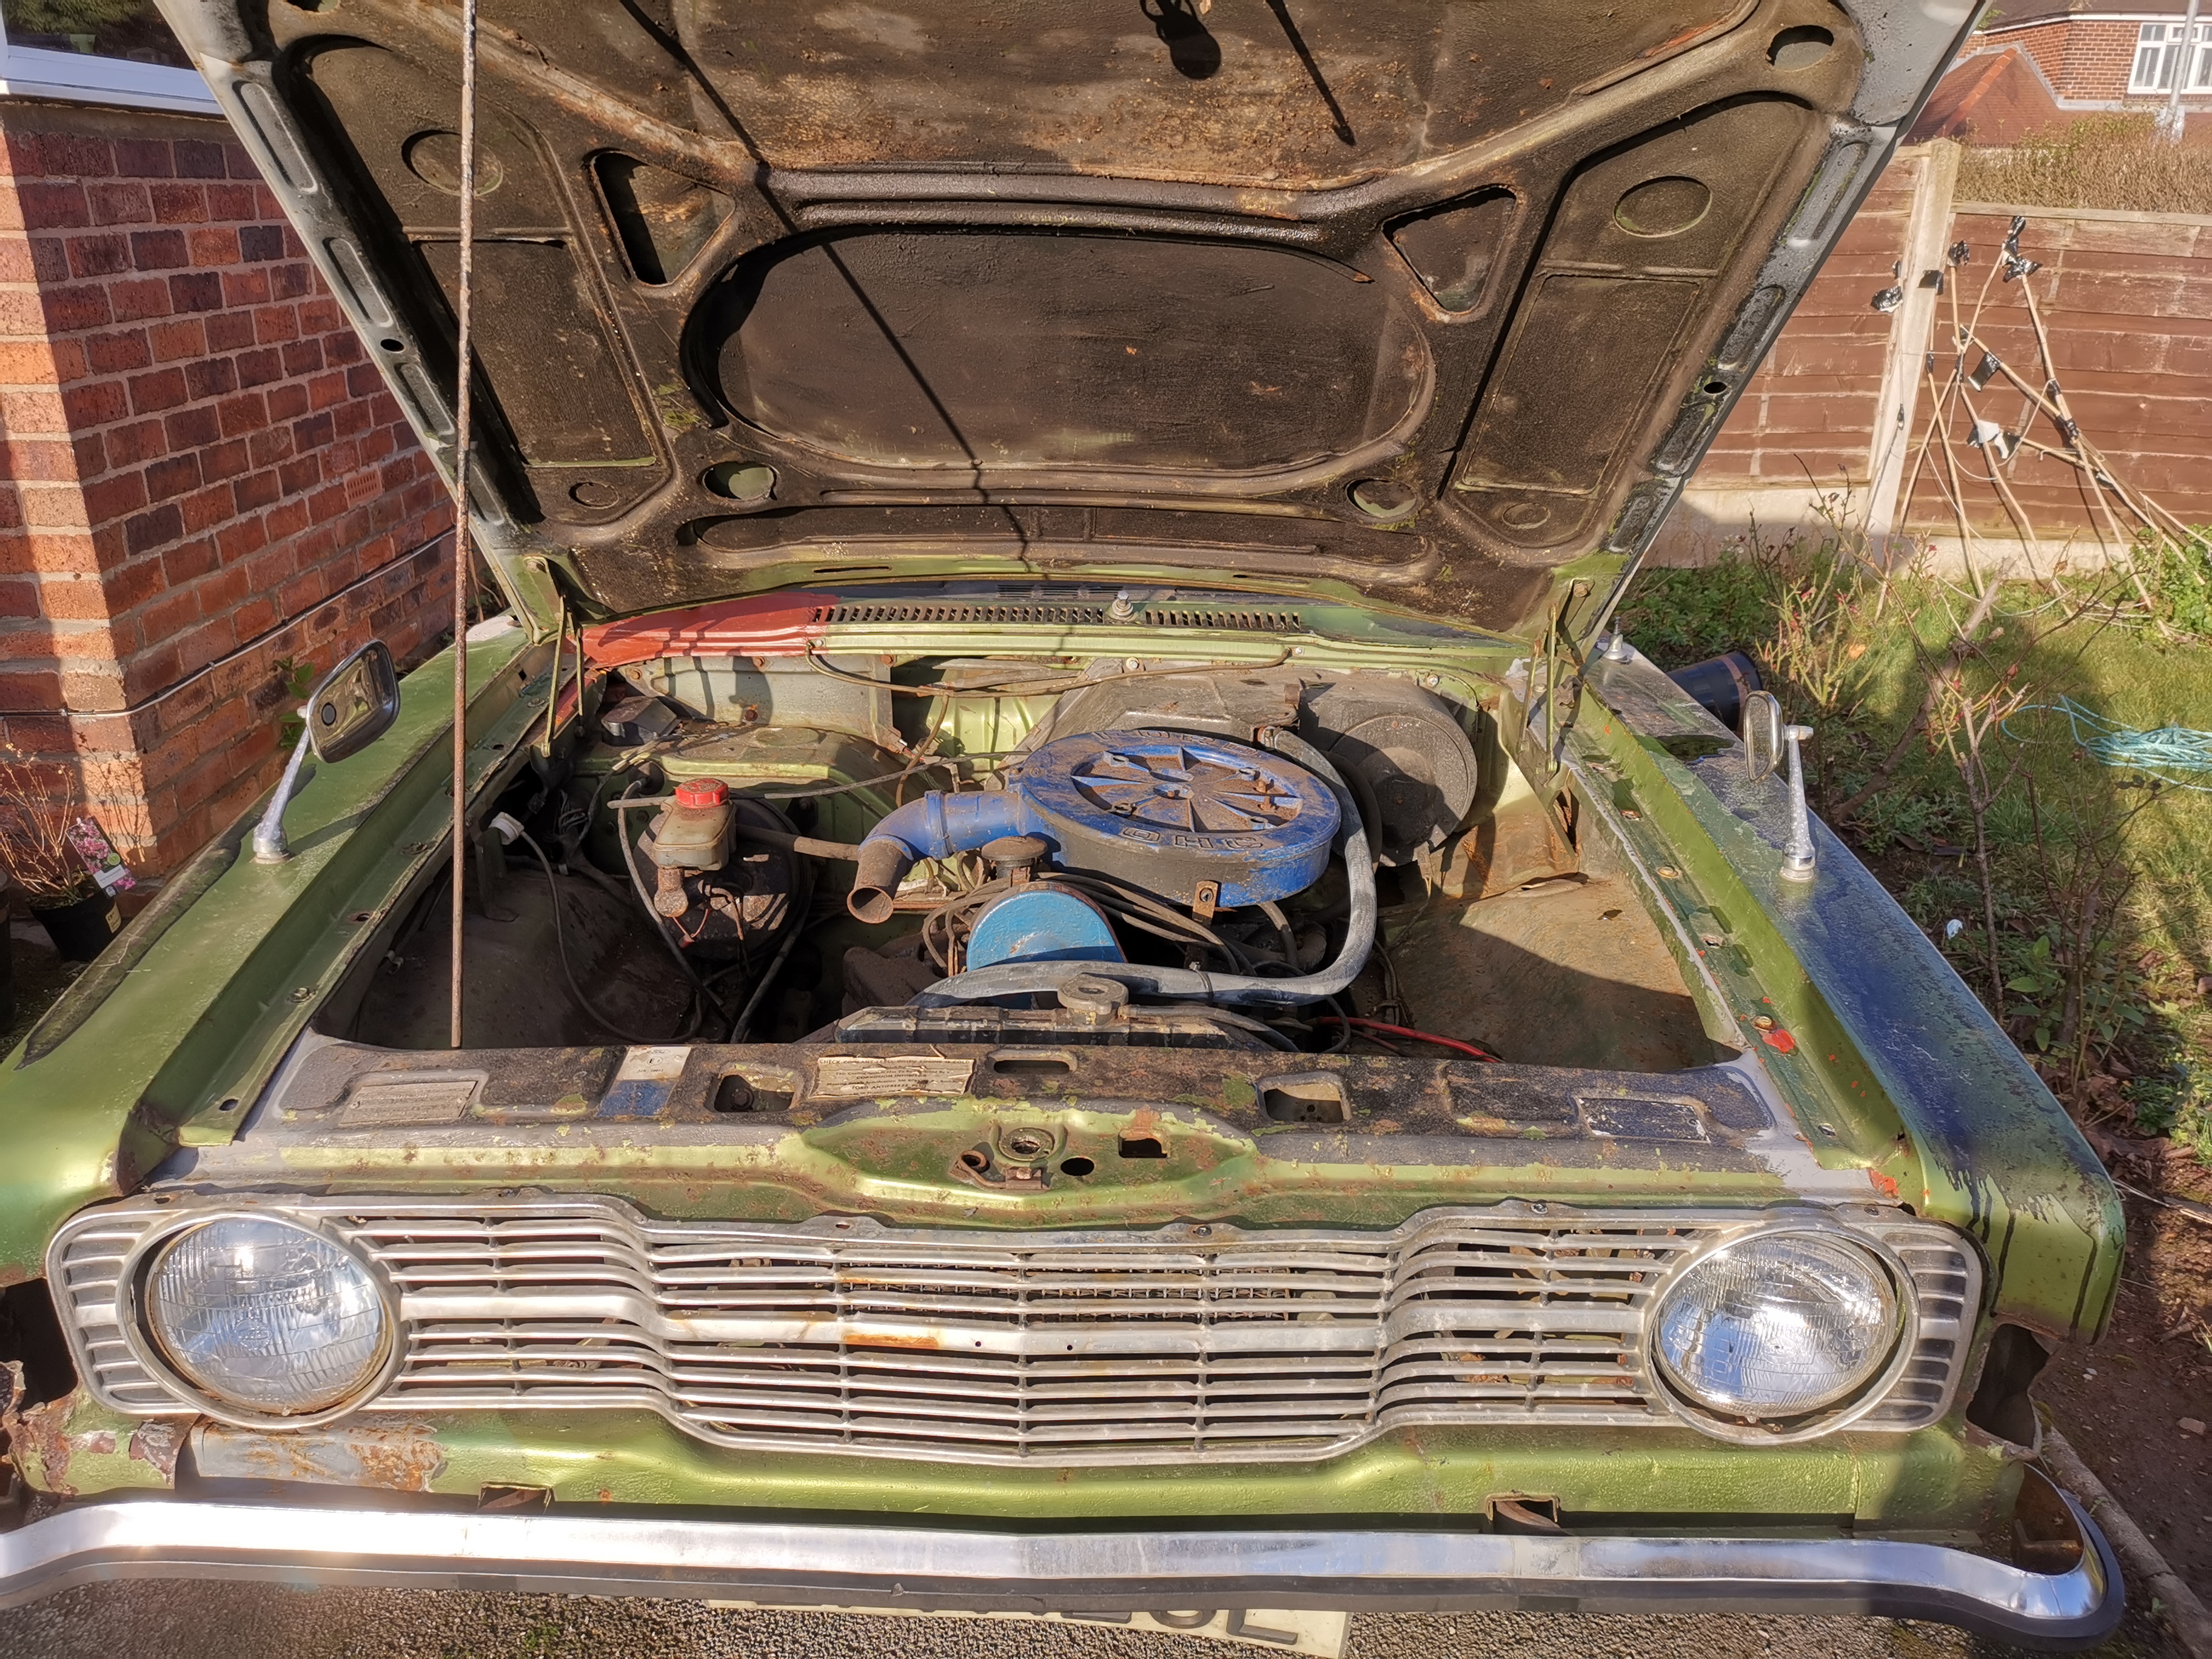
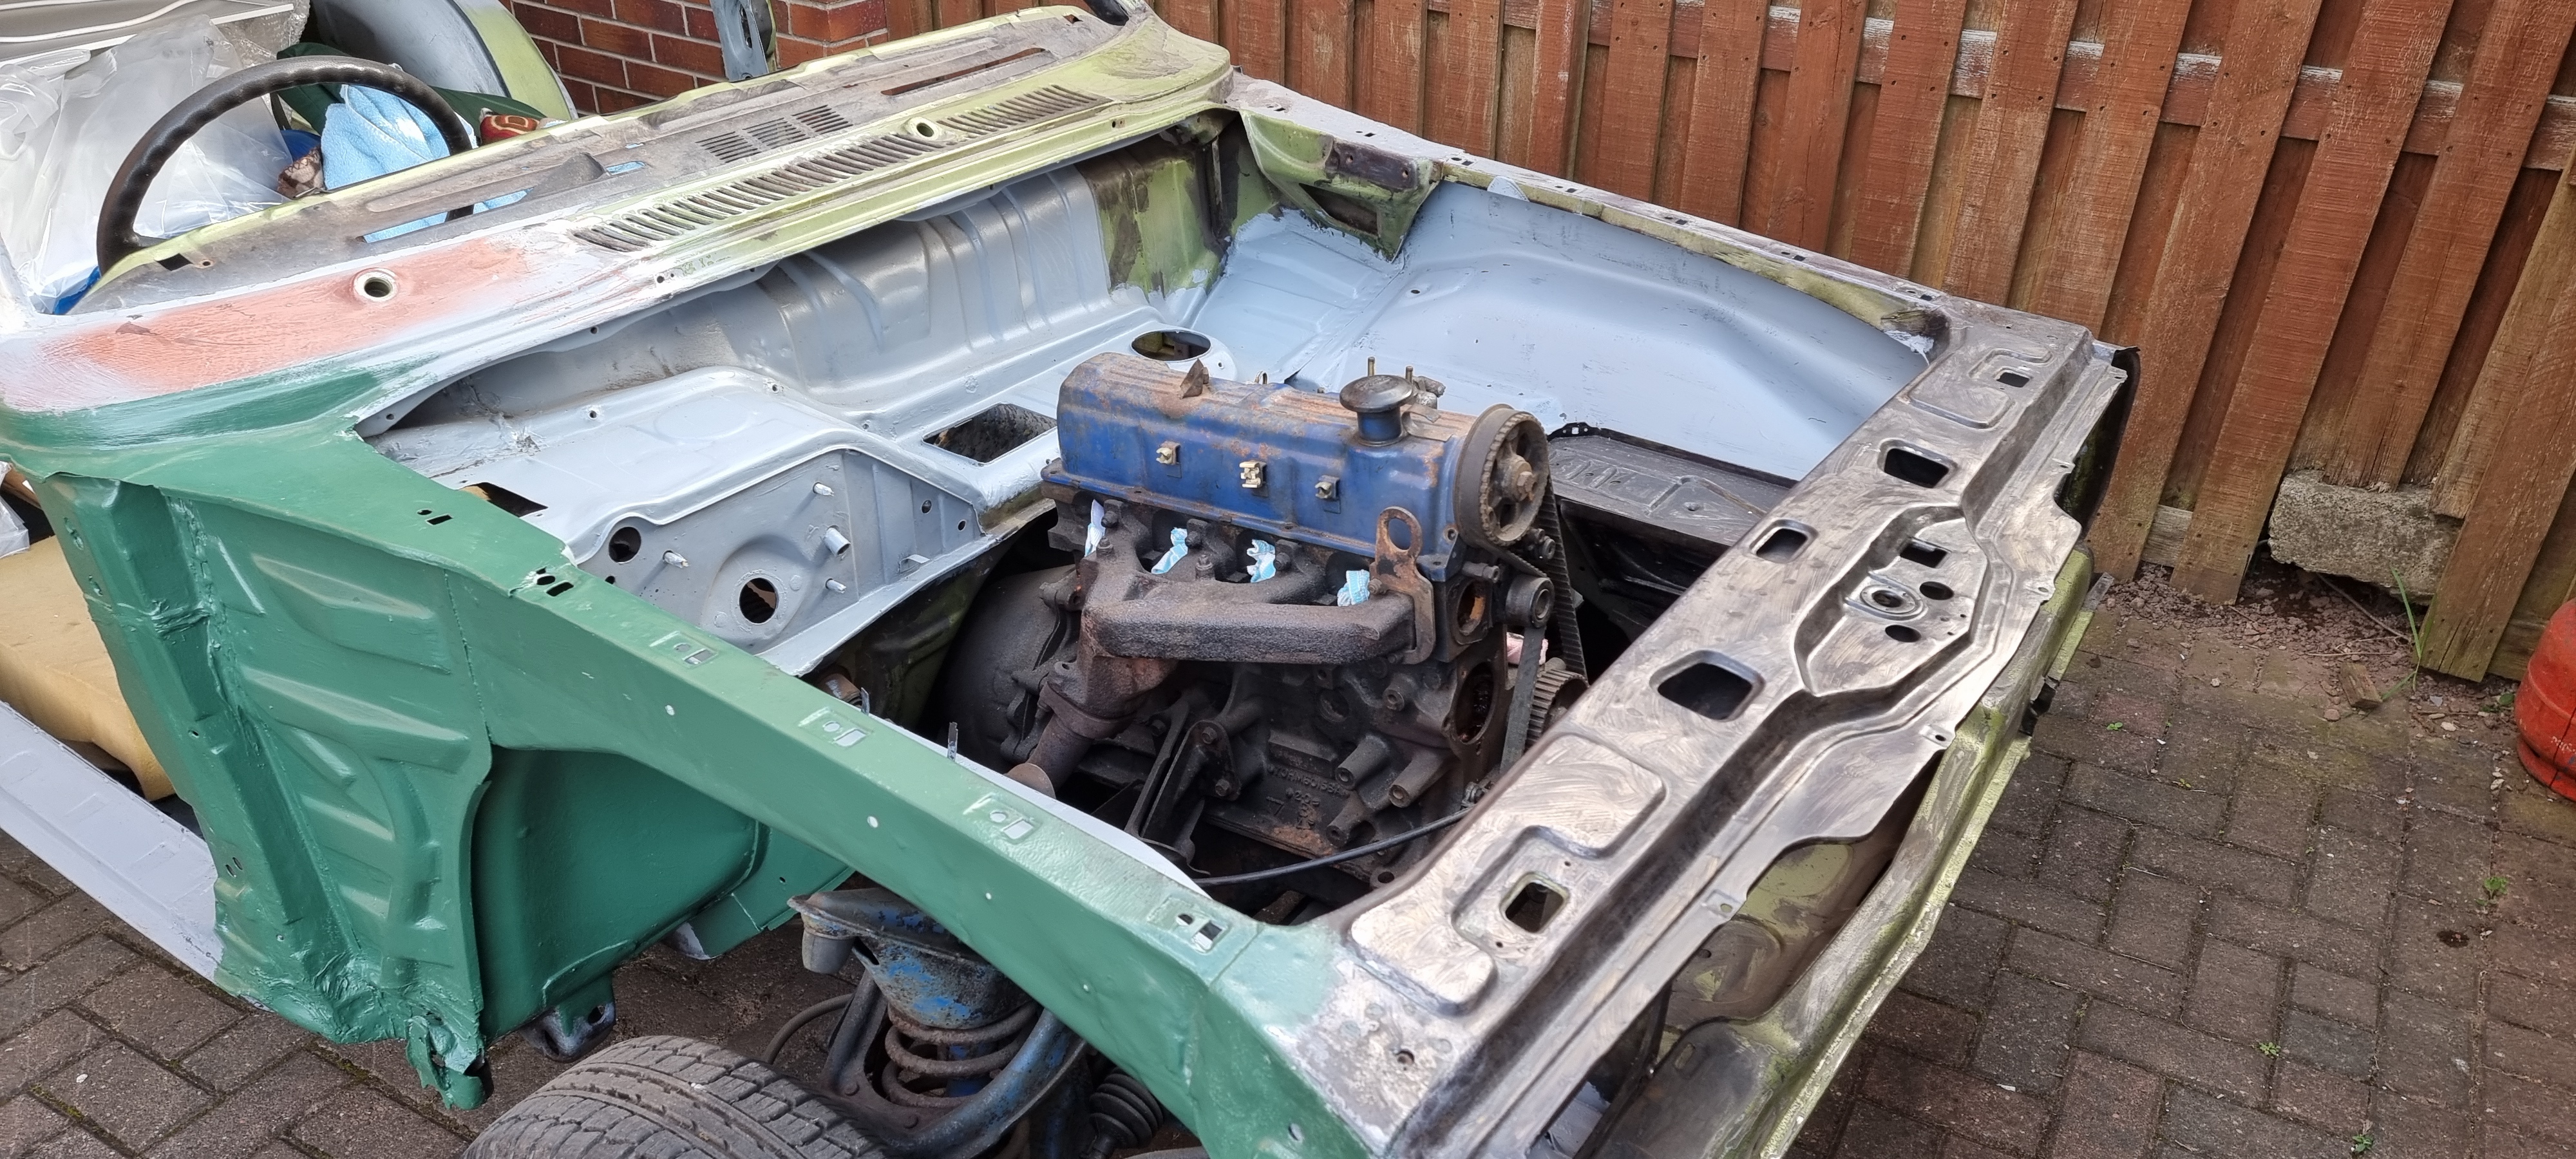
The engine bay is in a bit of a state
Initial inspection
I tried connecting a battery but the engine wouldn't even turn over let alone start.
Initial inspection
Bonnet release cable is broken - note to self - do NOT shut the bonnet!
Initial inspection
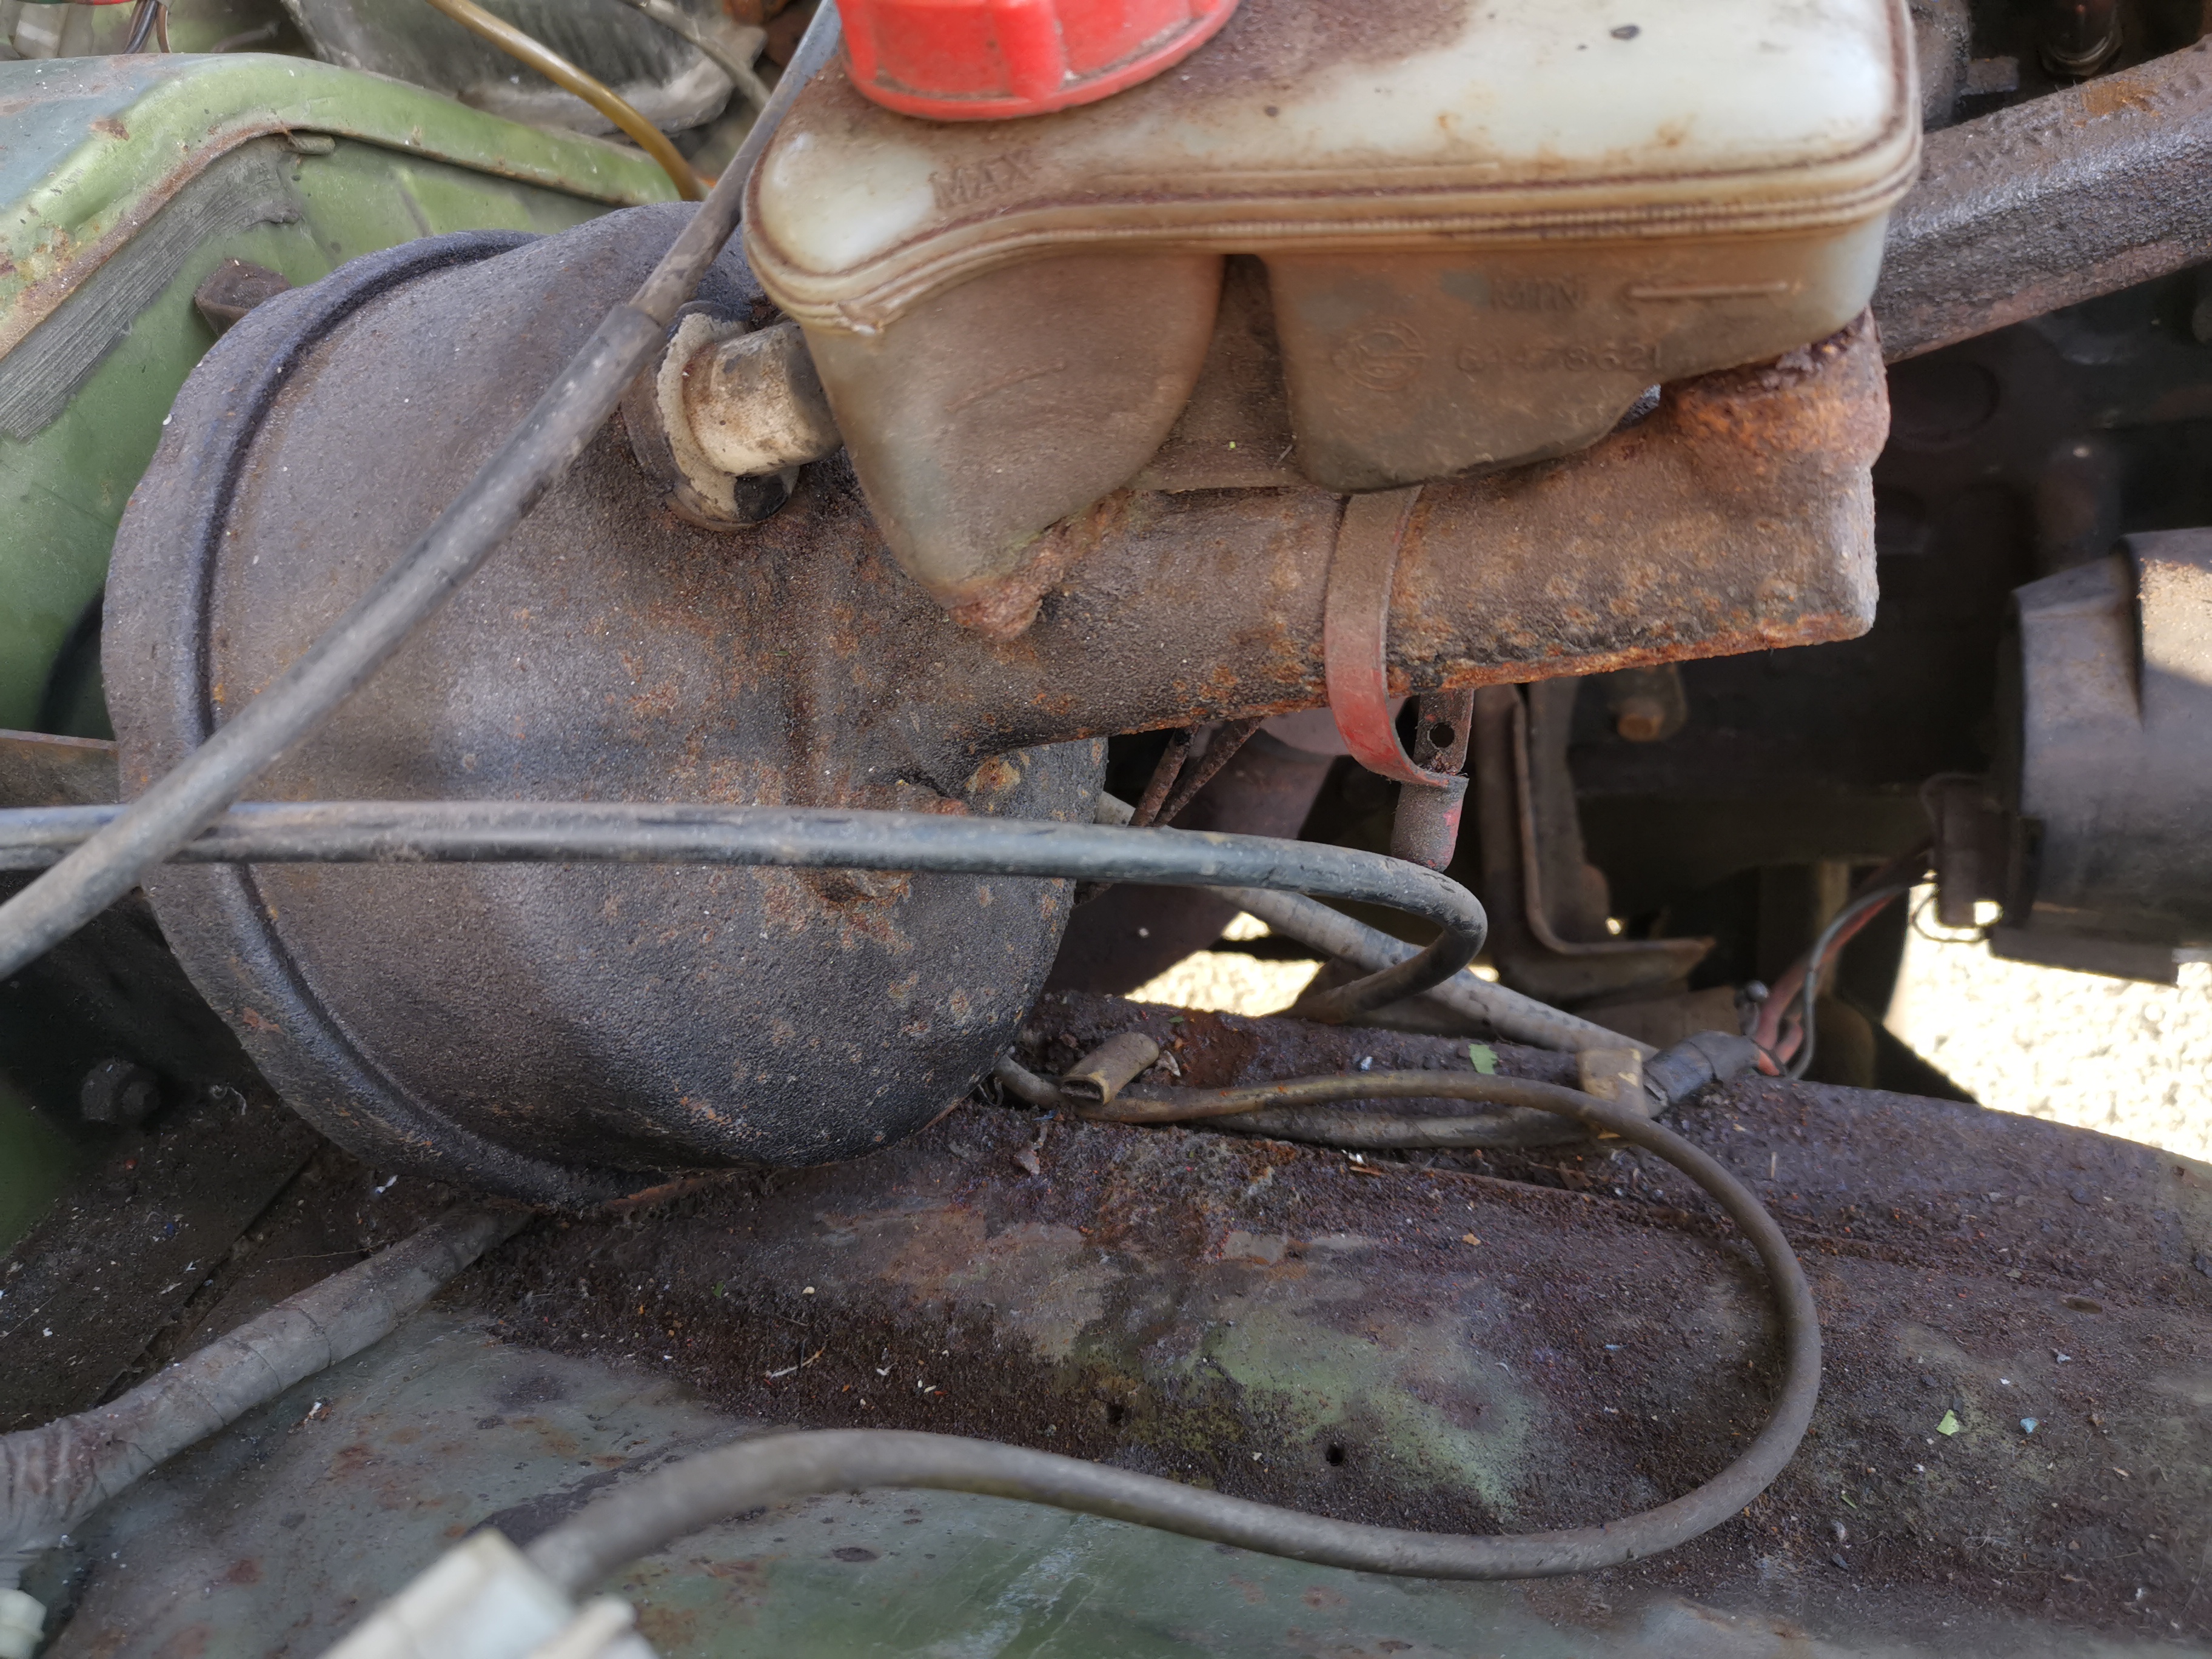
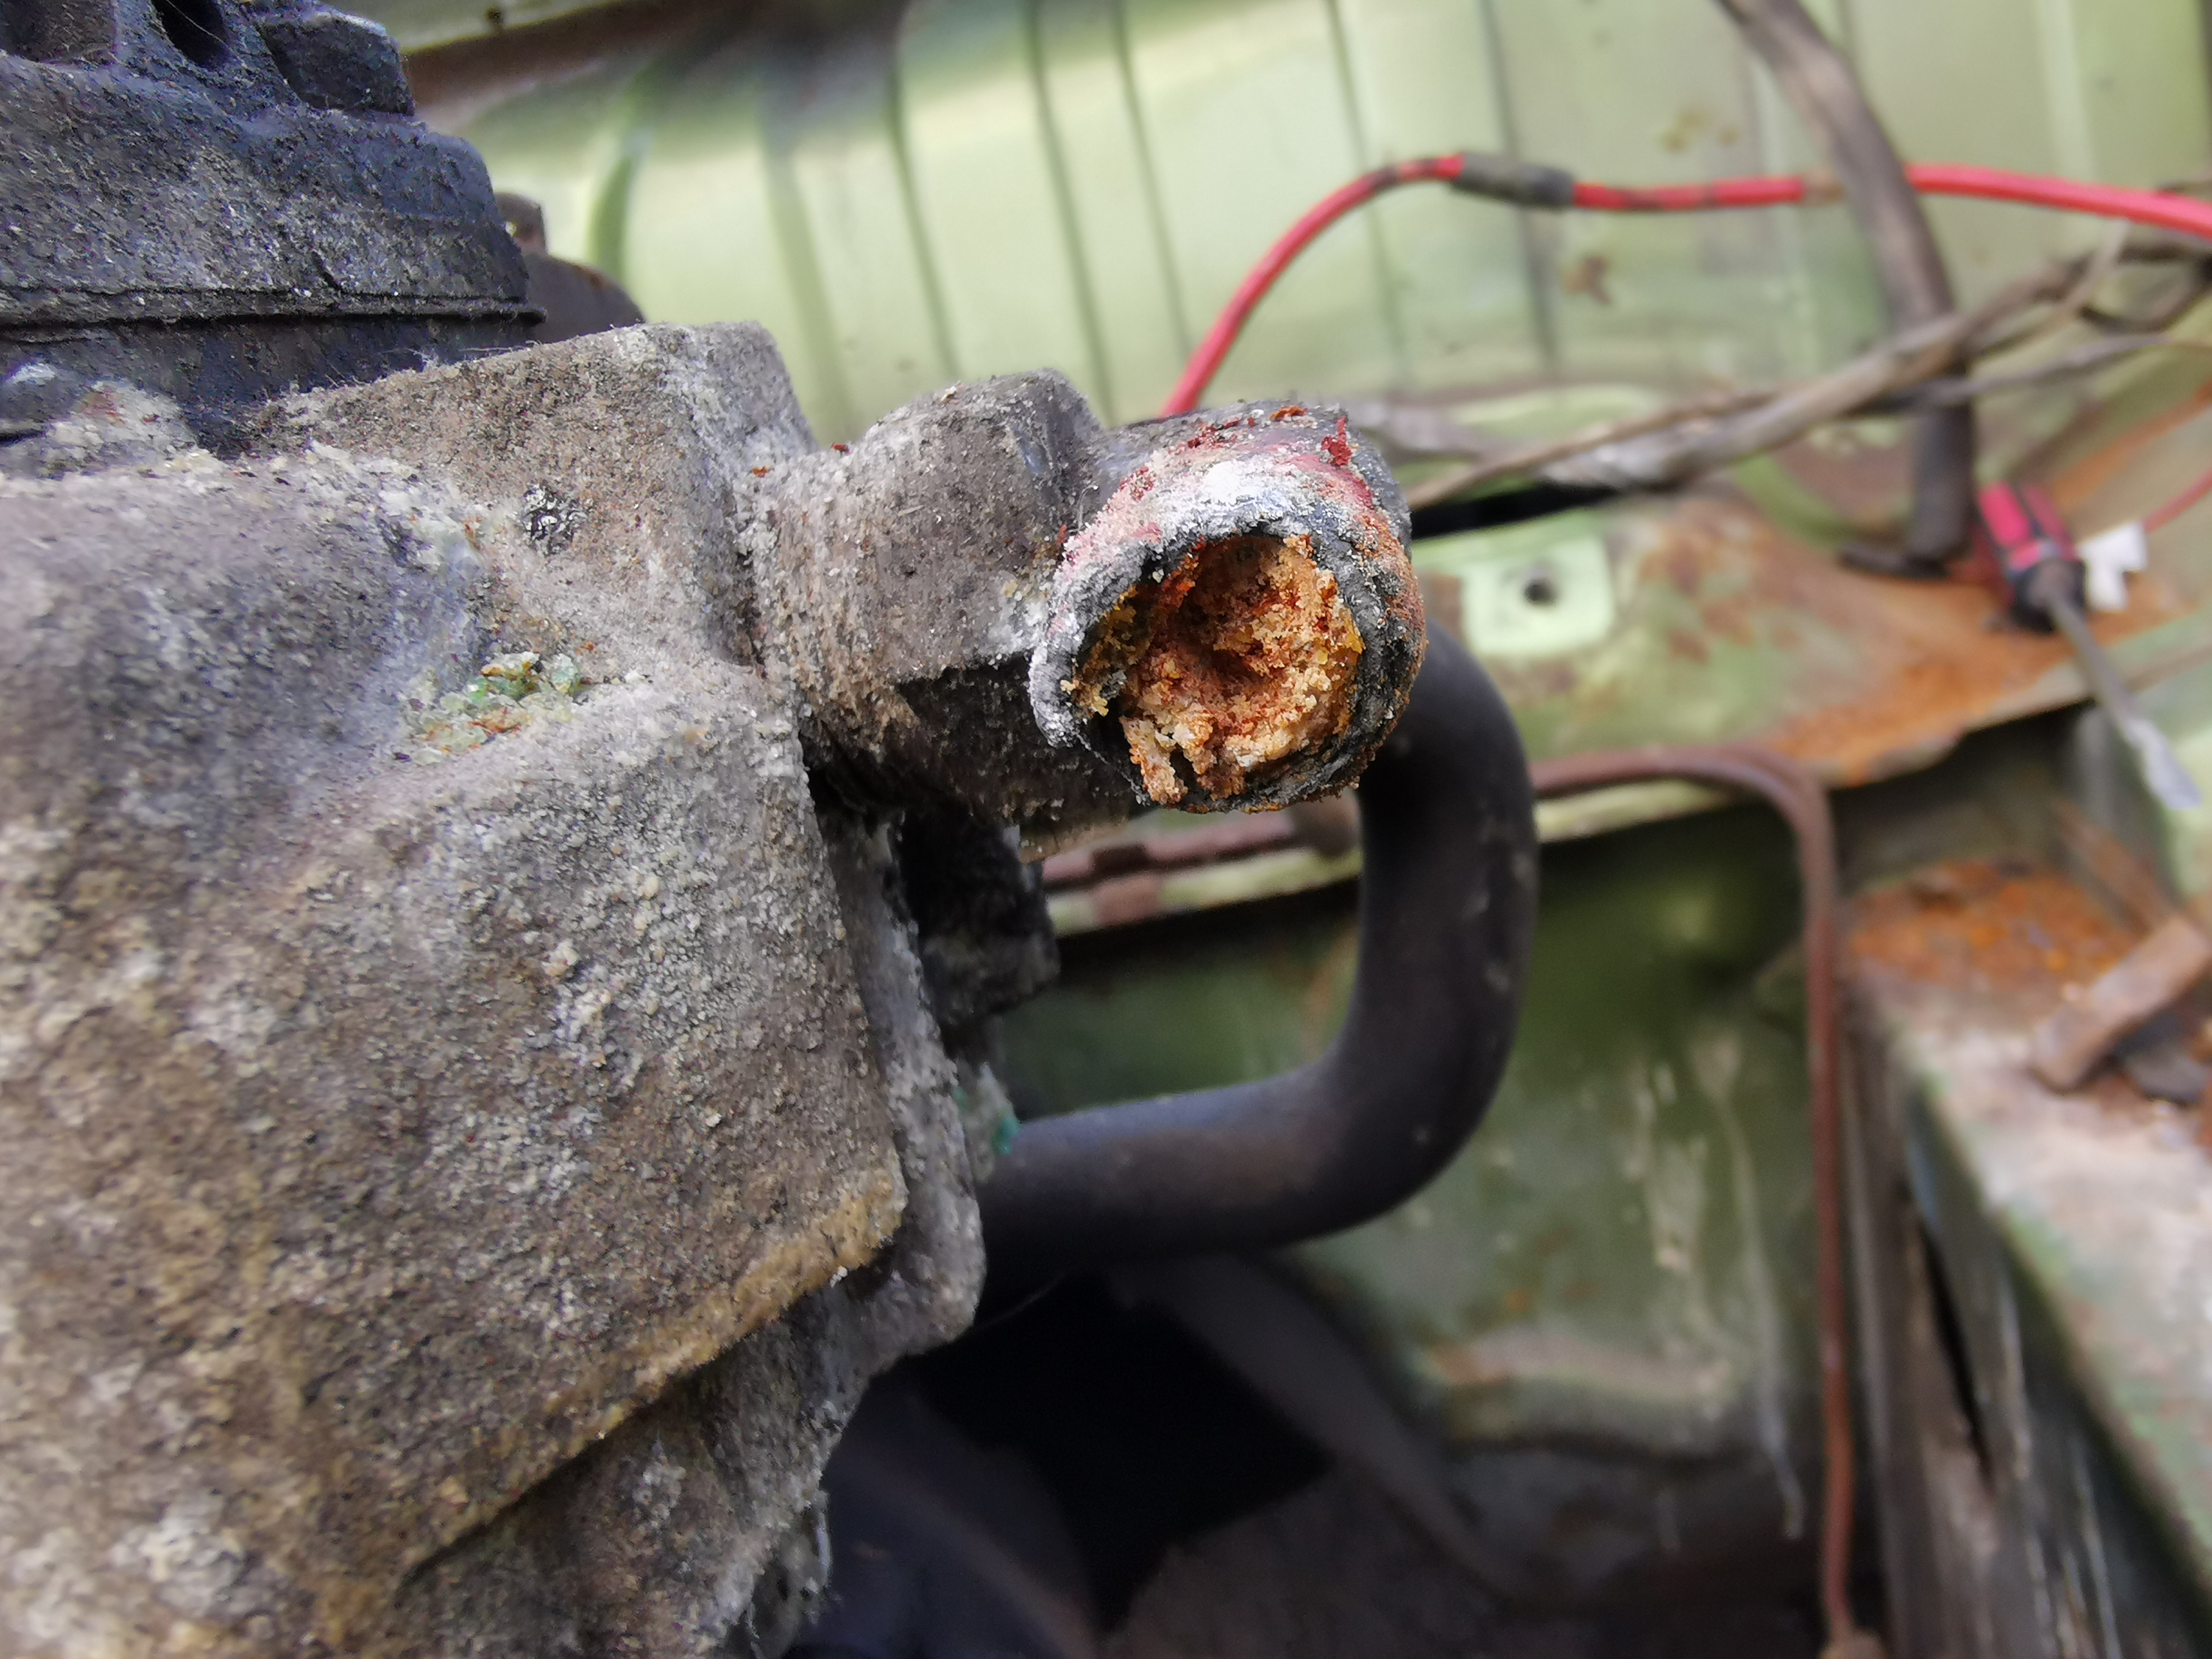
Looks like the master cylinder had been leaking for a while.
Initial inspection
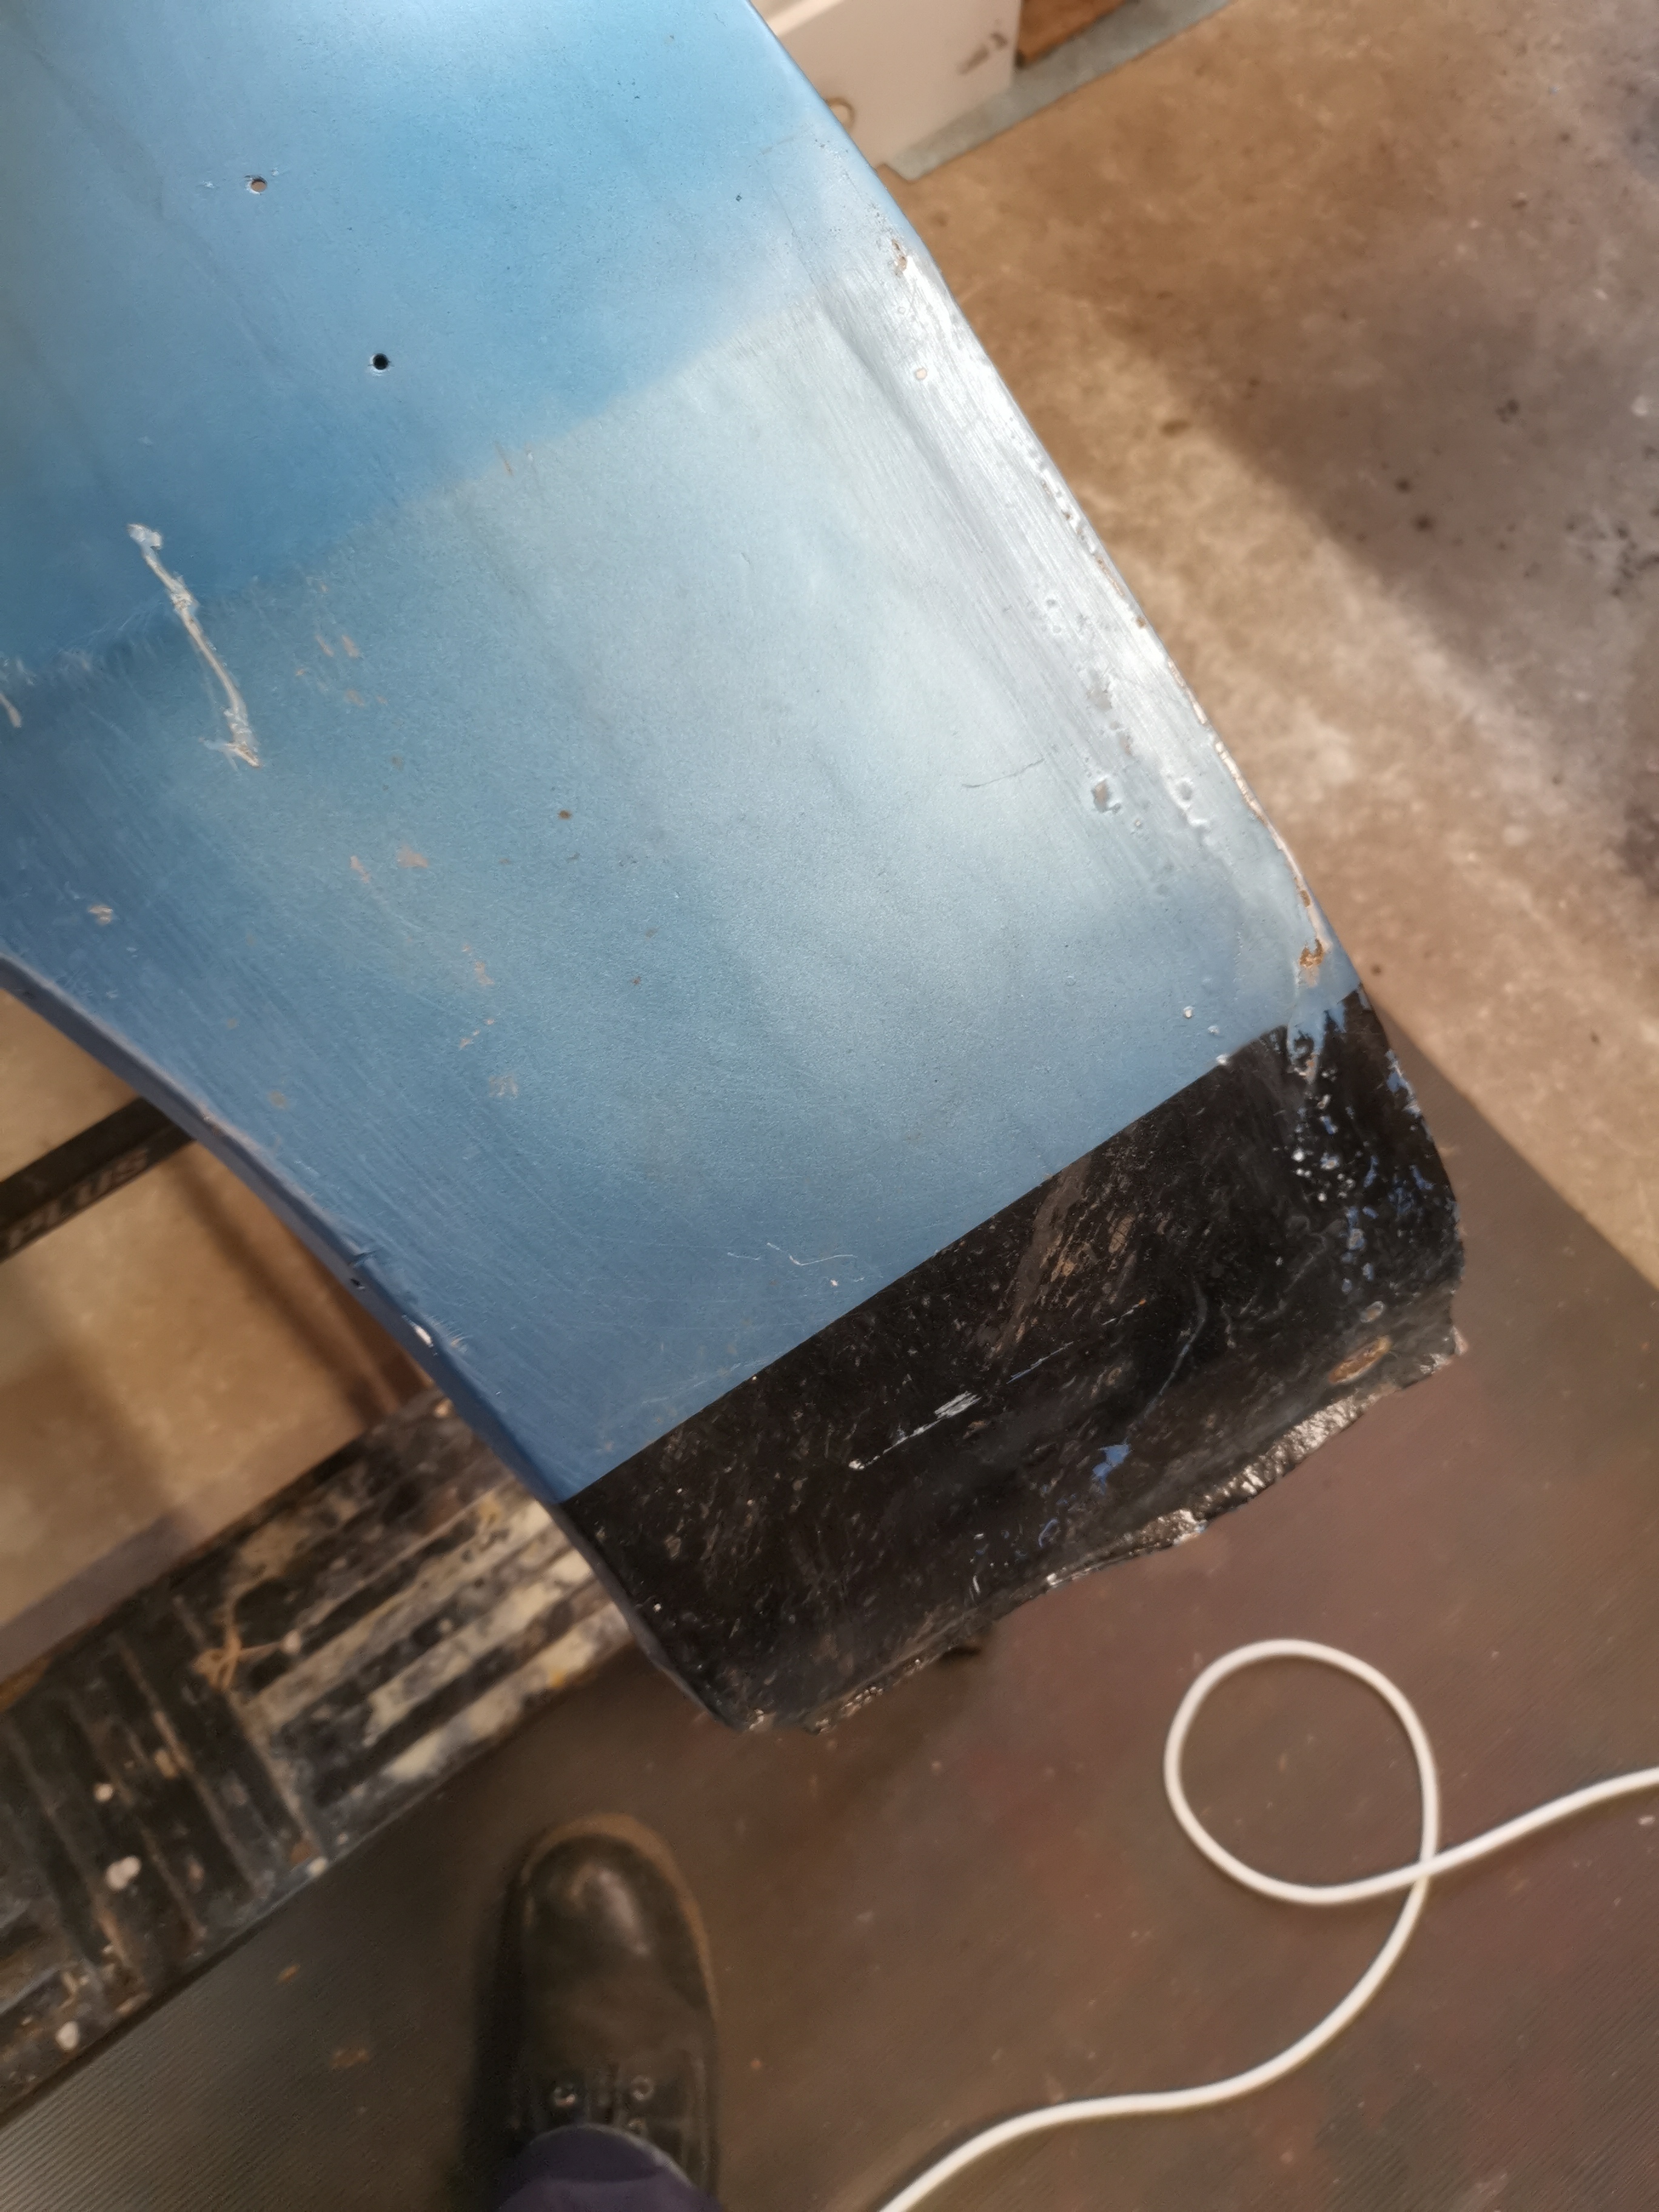
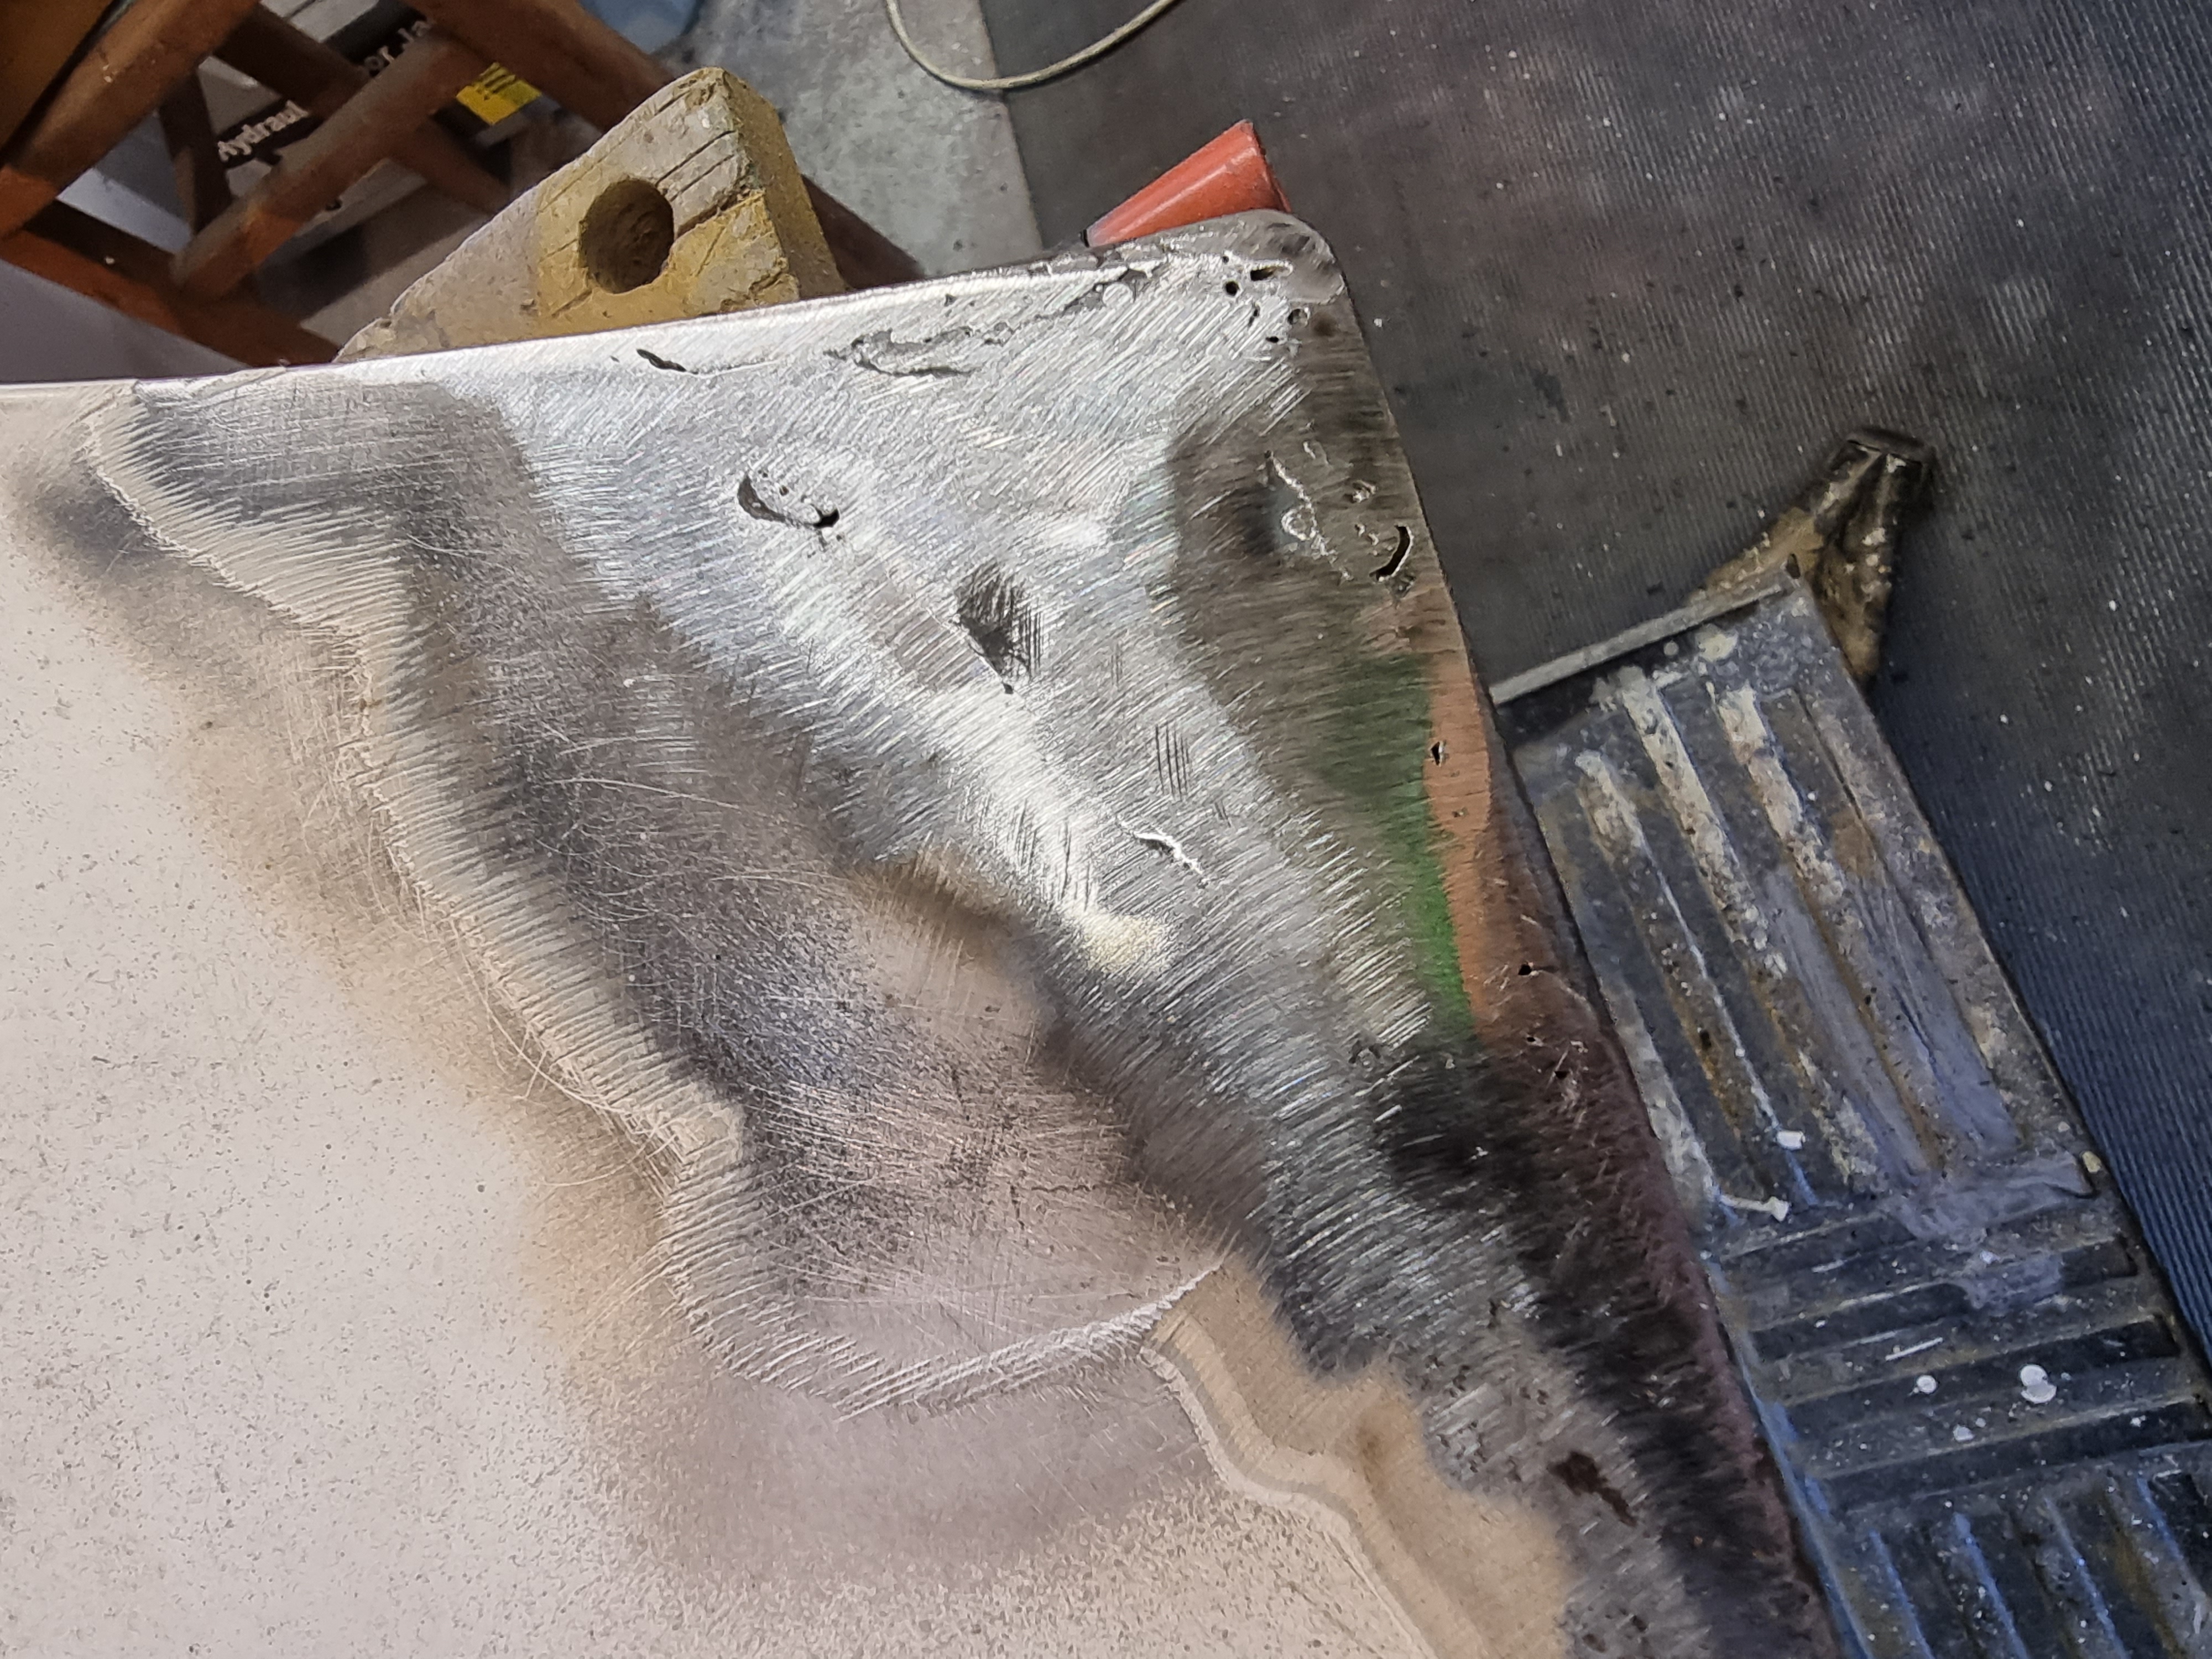
Lots of work needed on the front valance on the nearside. It's all dented and full of filler.
Initial inspection
Under the bonnet is coated in some thick black stuff, some of which is burnt!
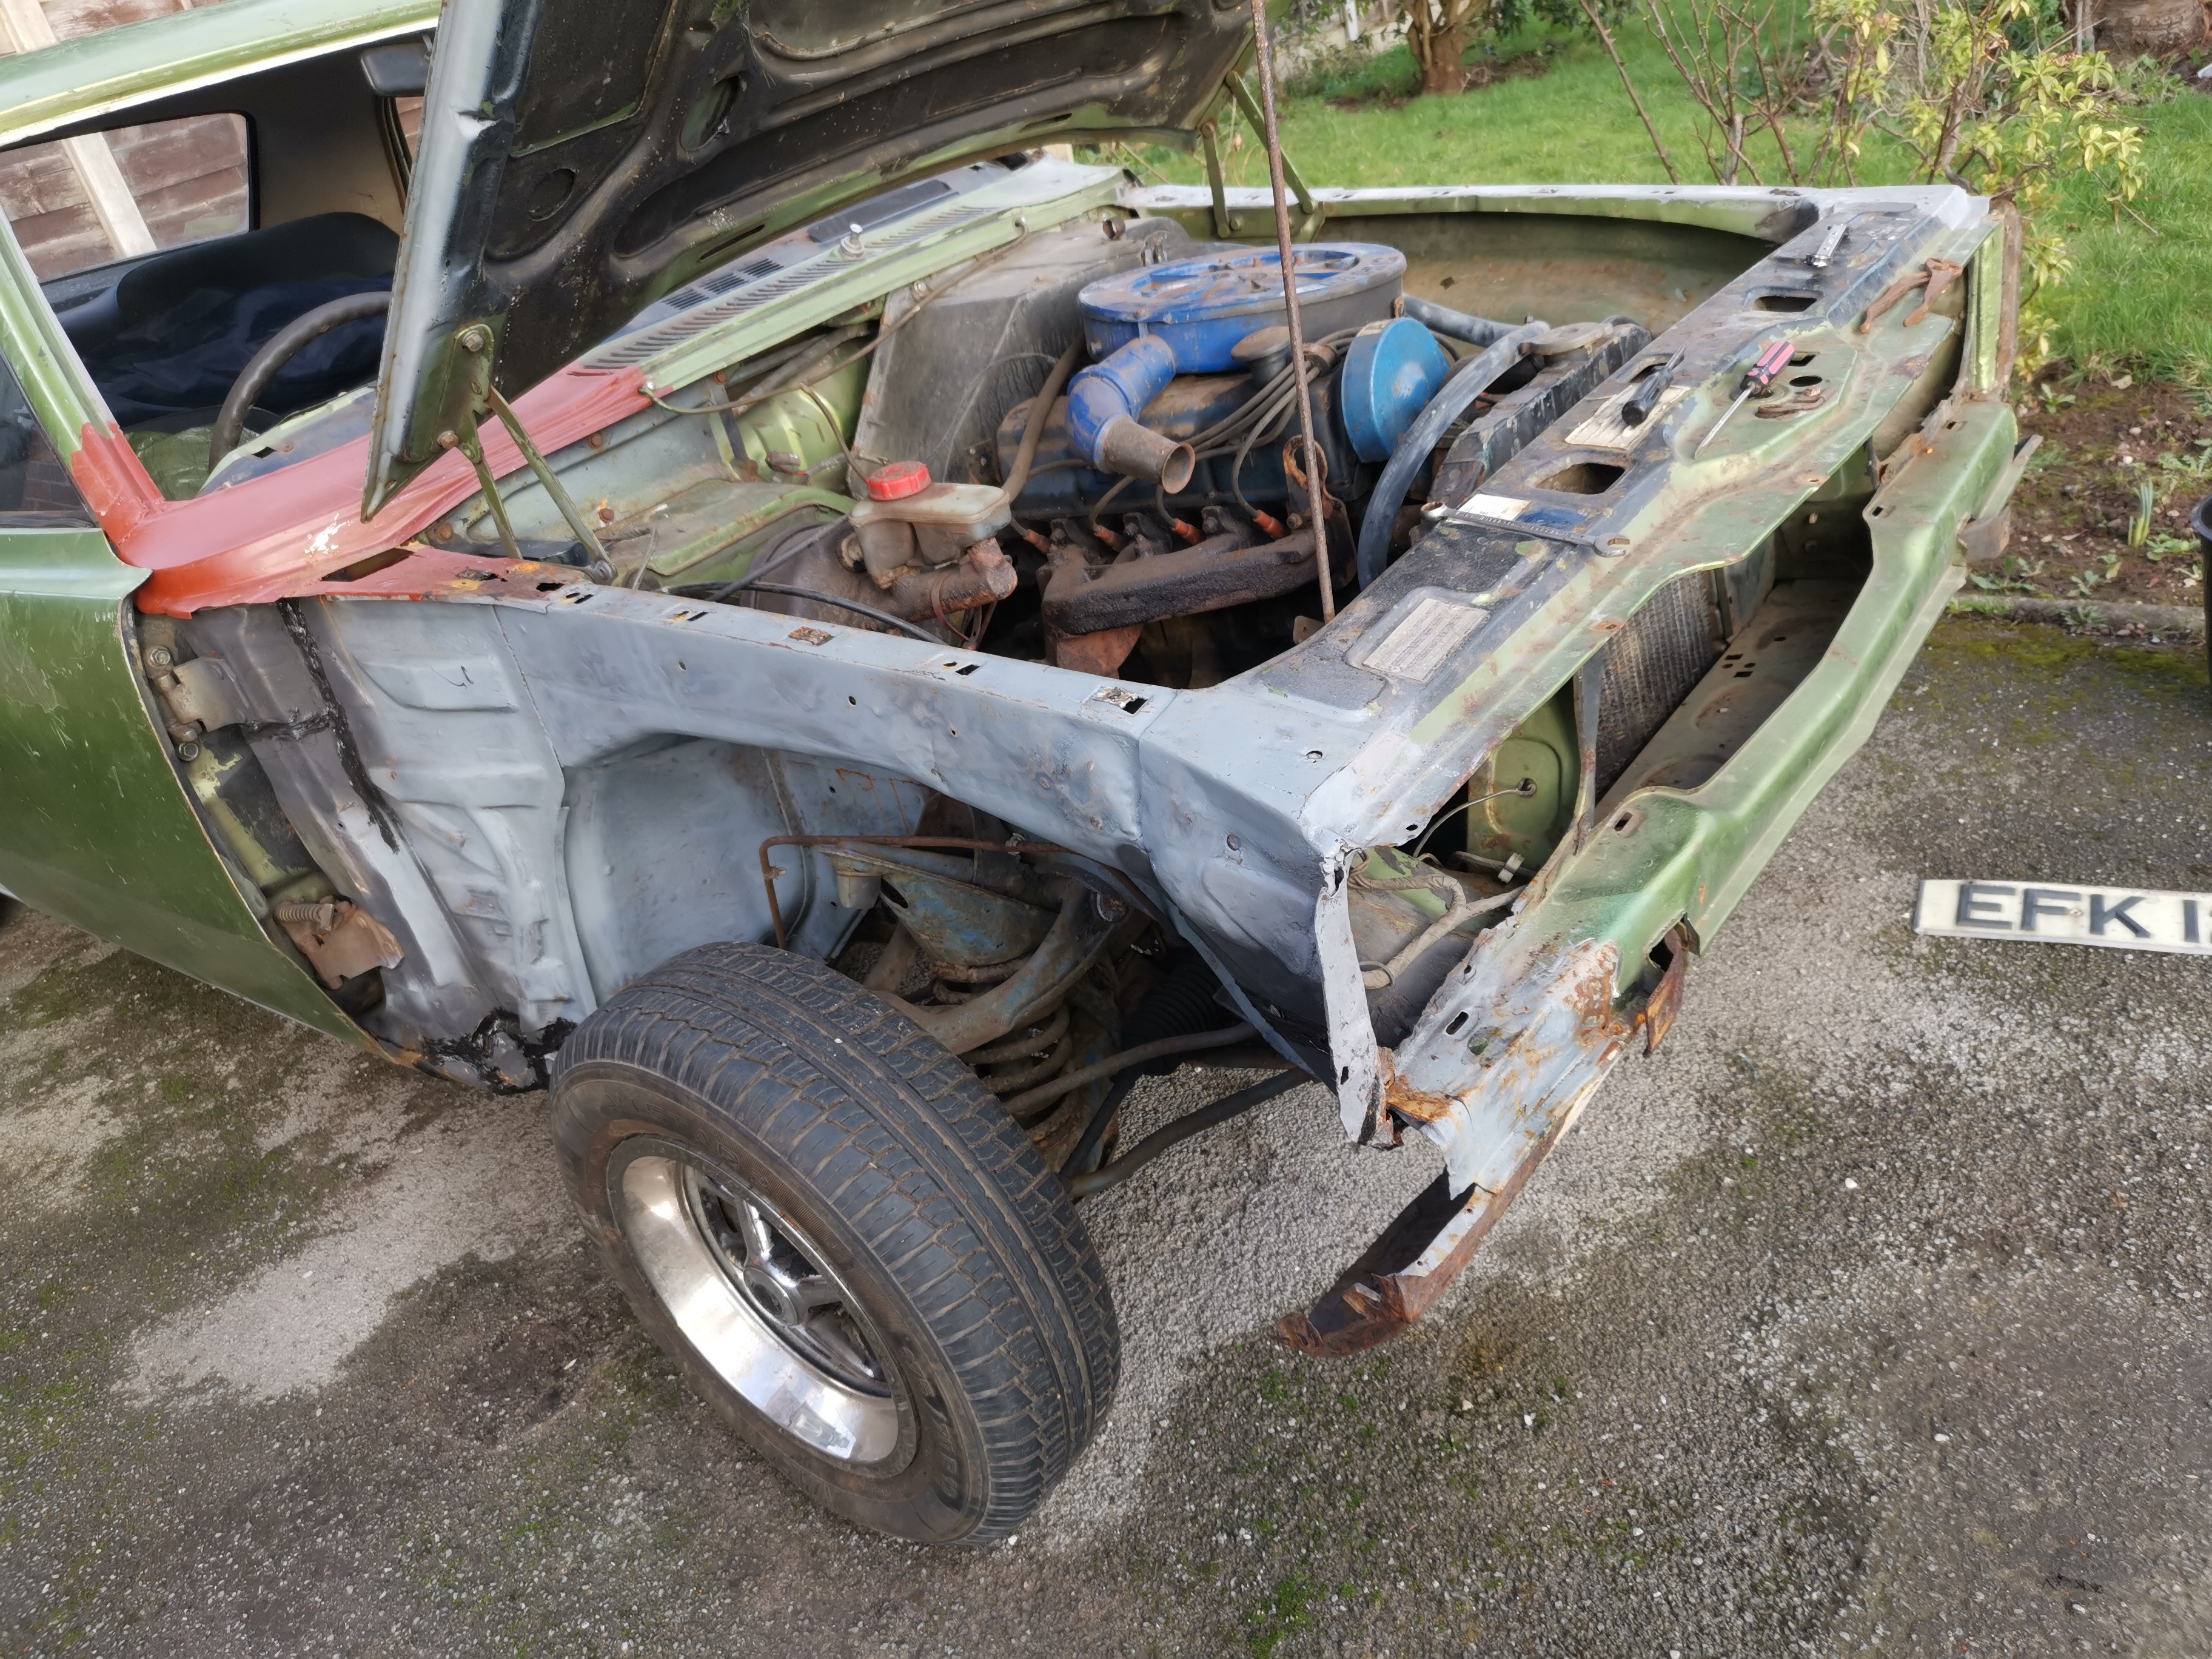
Disassembly starts
Not looking too great... Label up the few connections that are remaining. I'll have to guess the rest!
Disassembly starts
That front corner looks worse now the grille is off.
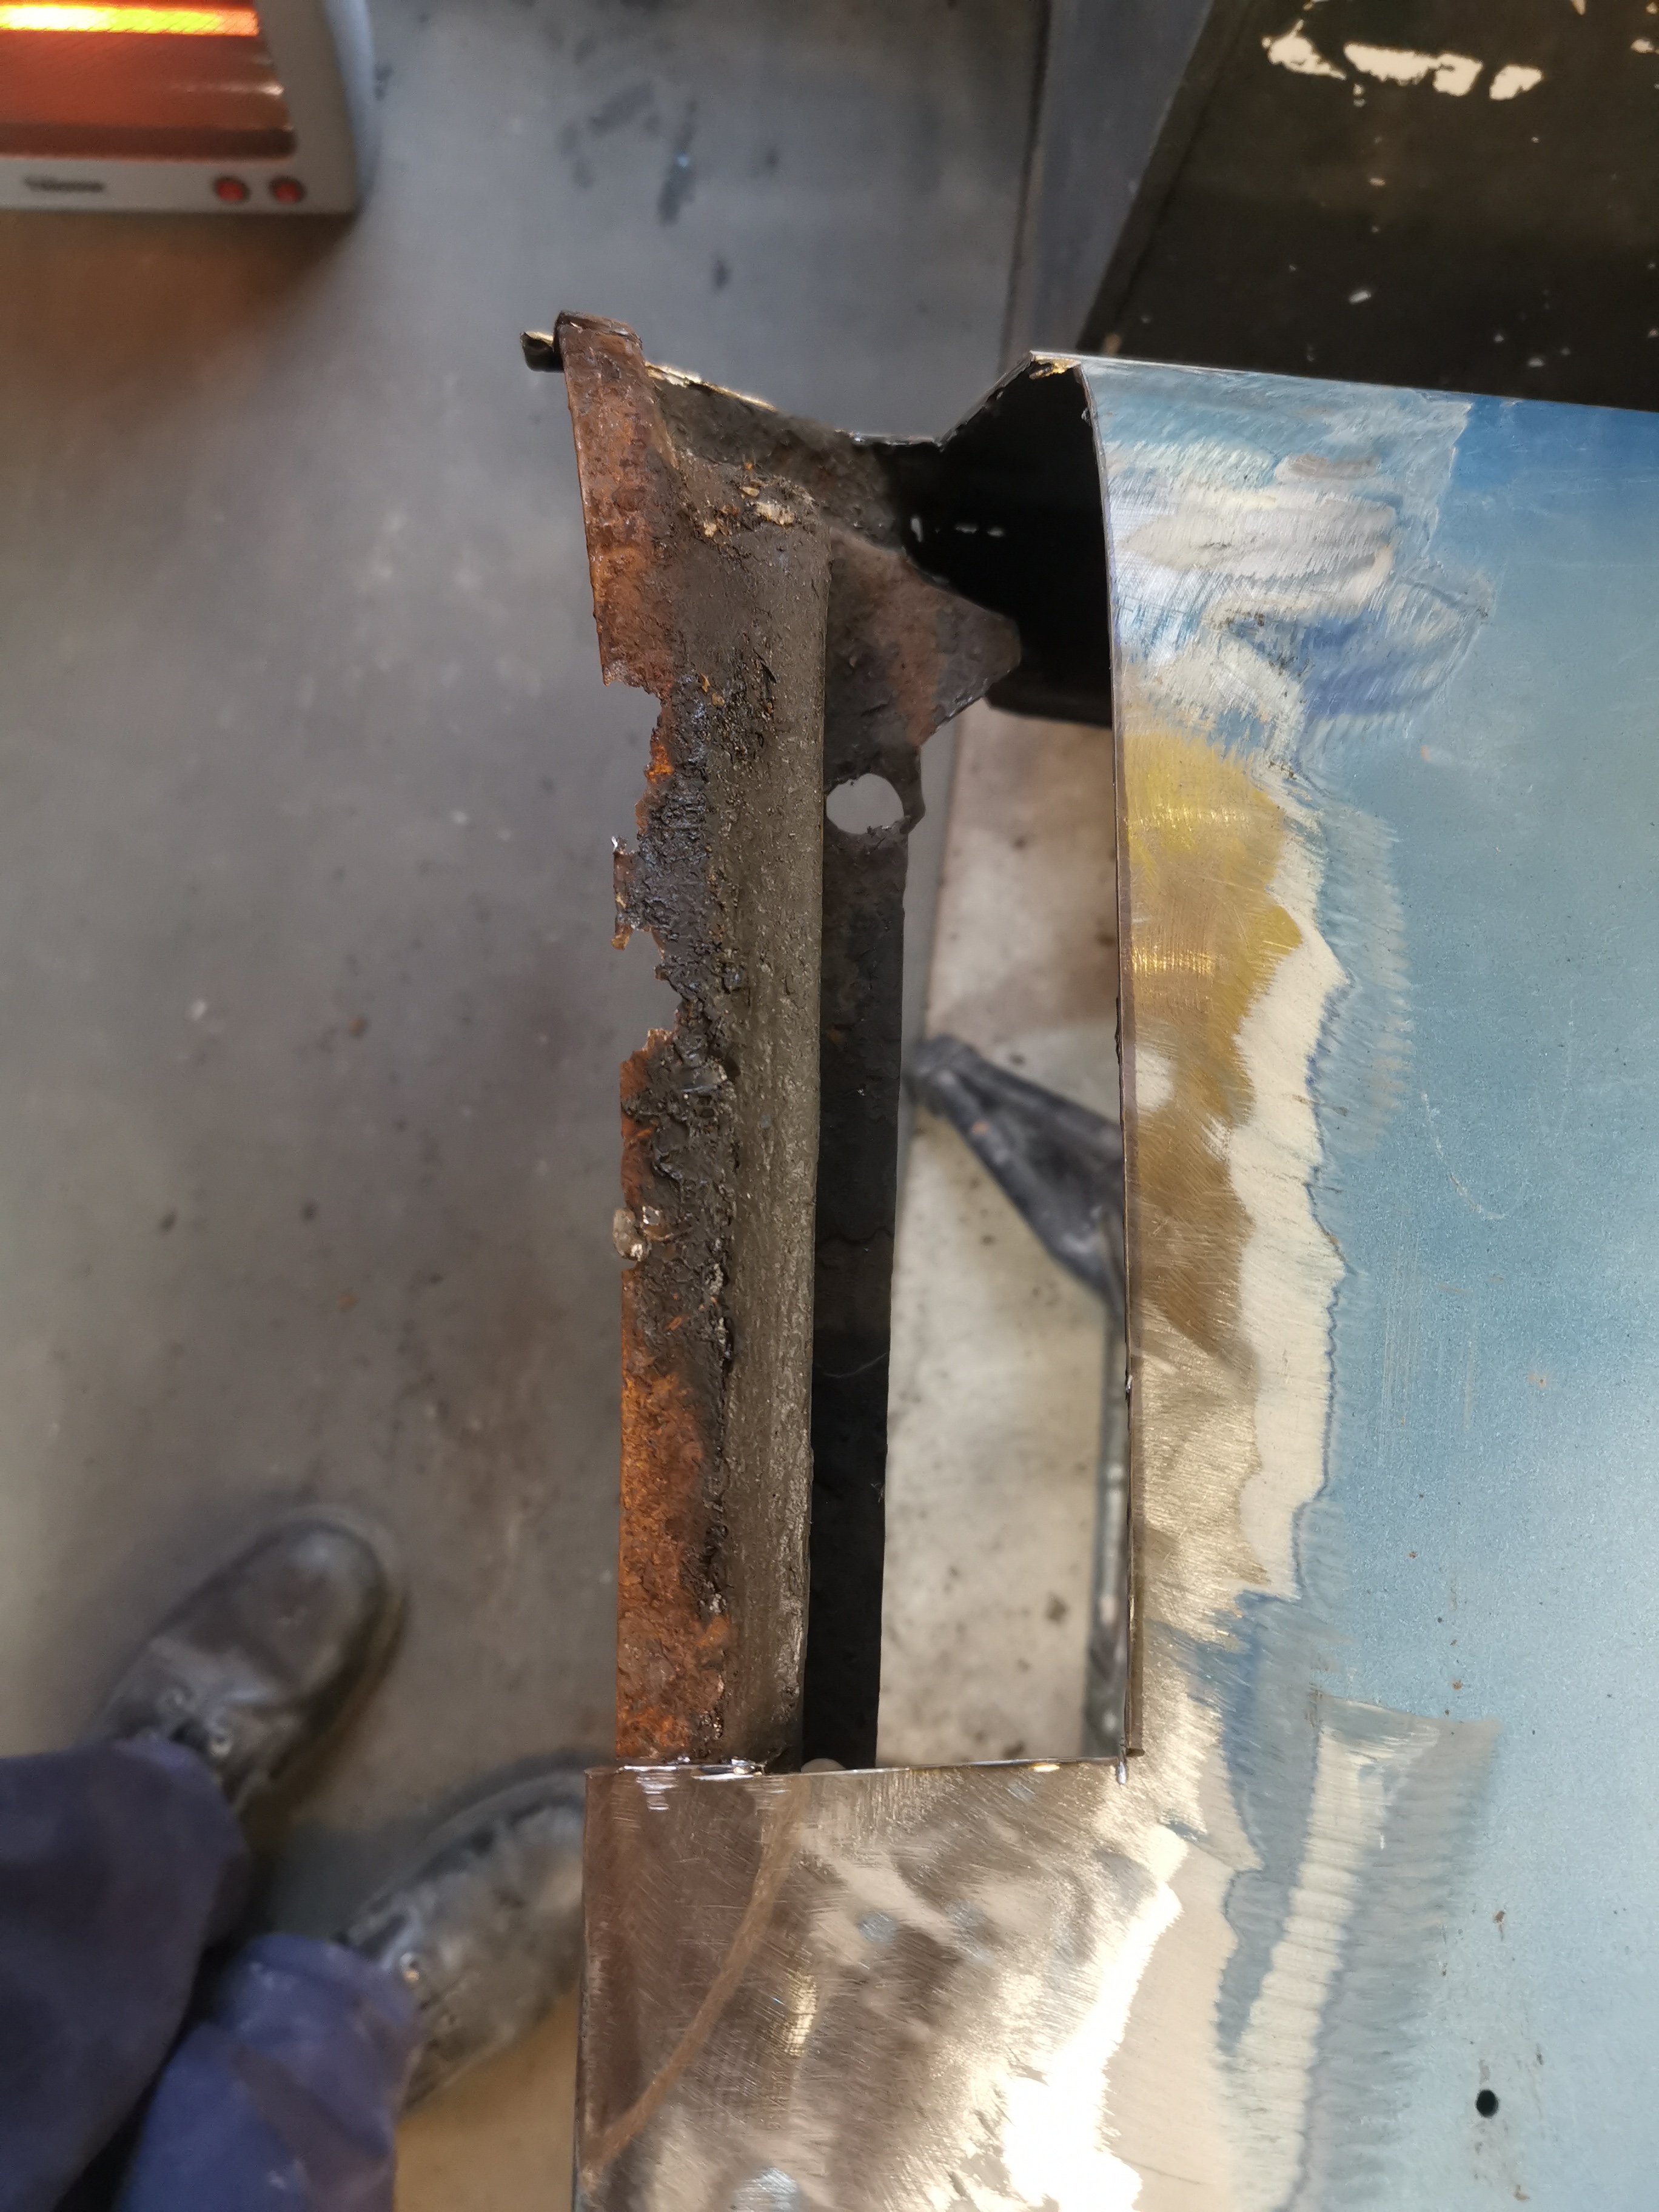
Disassembly starts
There's quite a bit of damage behind the wing too. Looks like it's been in an accident at some point and badly repaired.
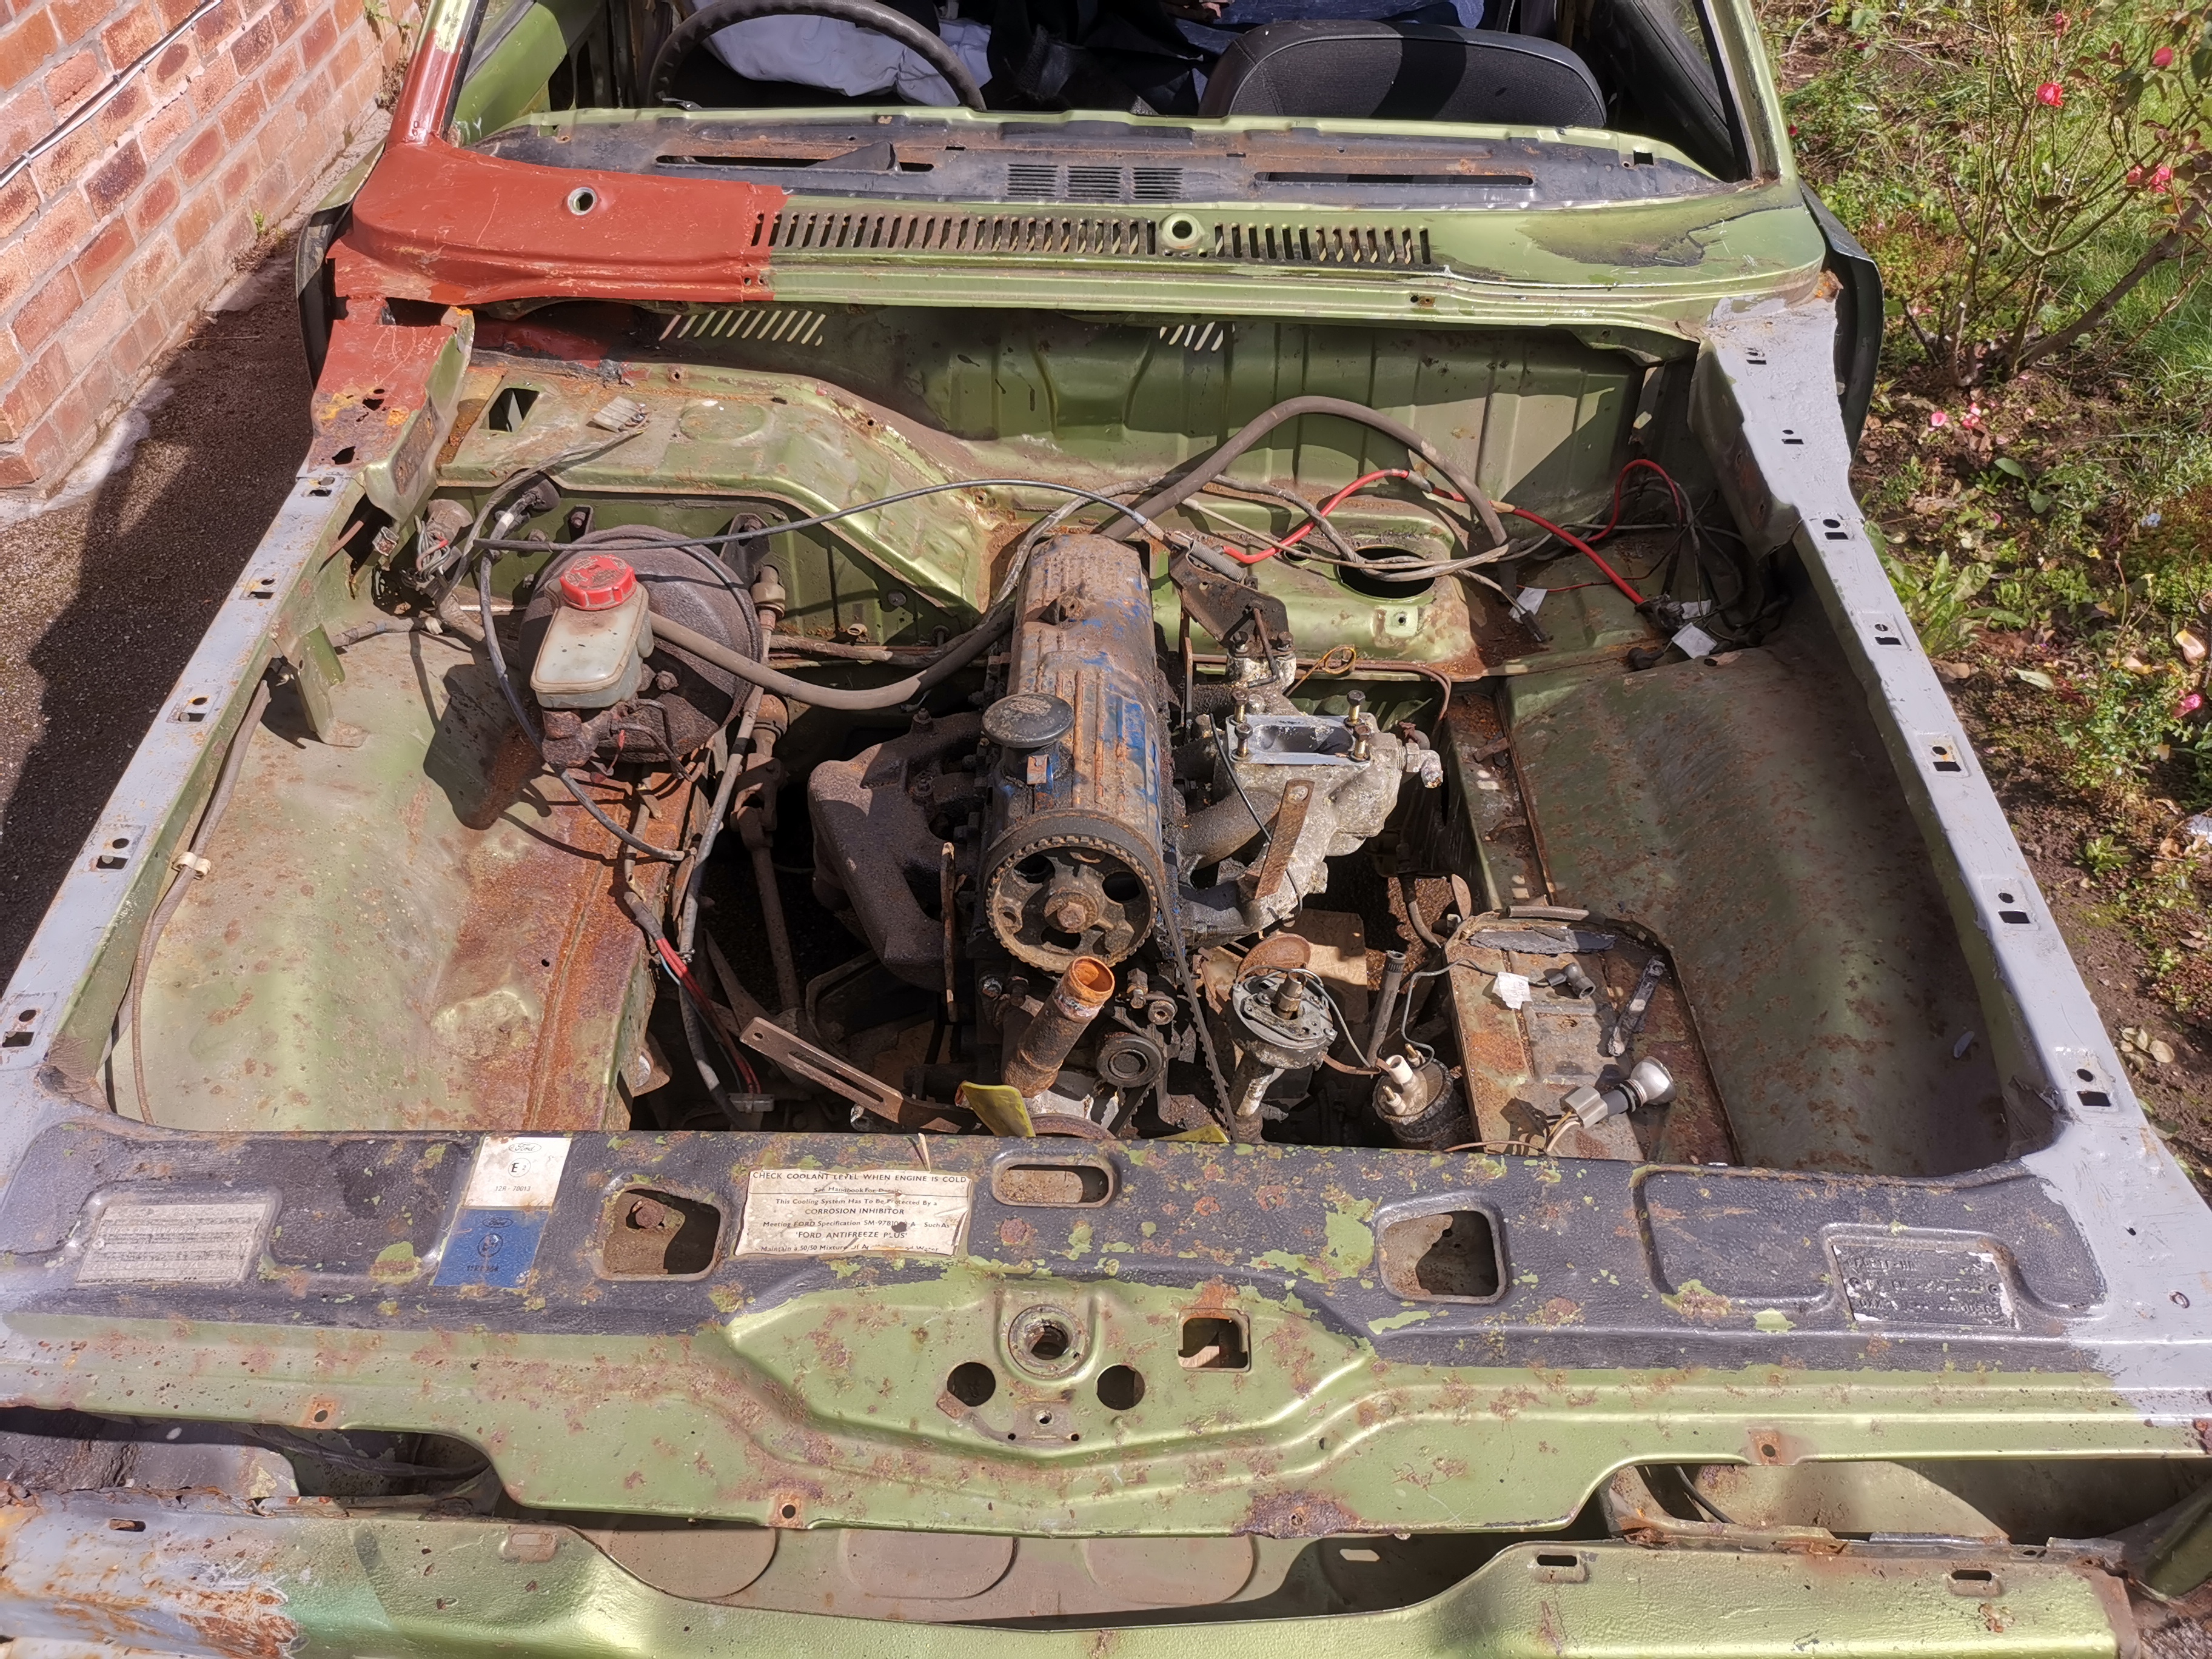
Engine bay
With most of the parts removed I can start to see how bad the engine bay actually is.
Closer inspection
Those bushes might need replacing!
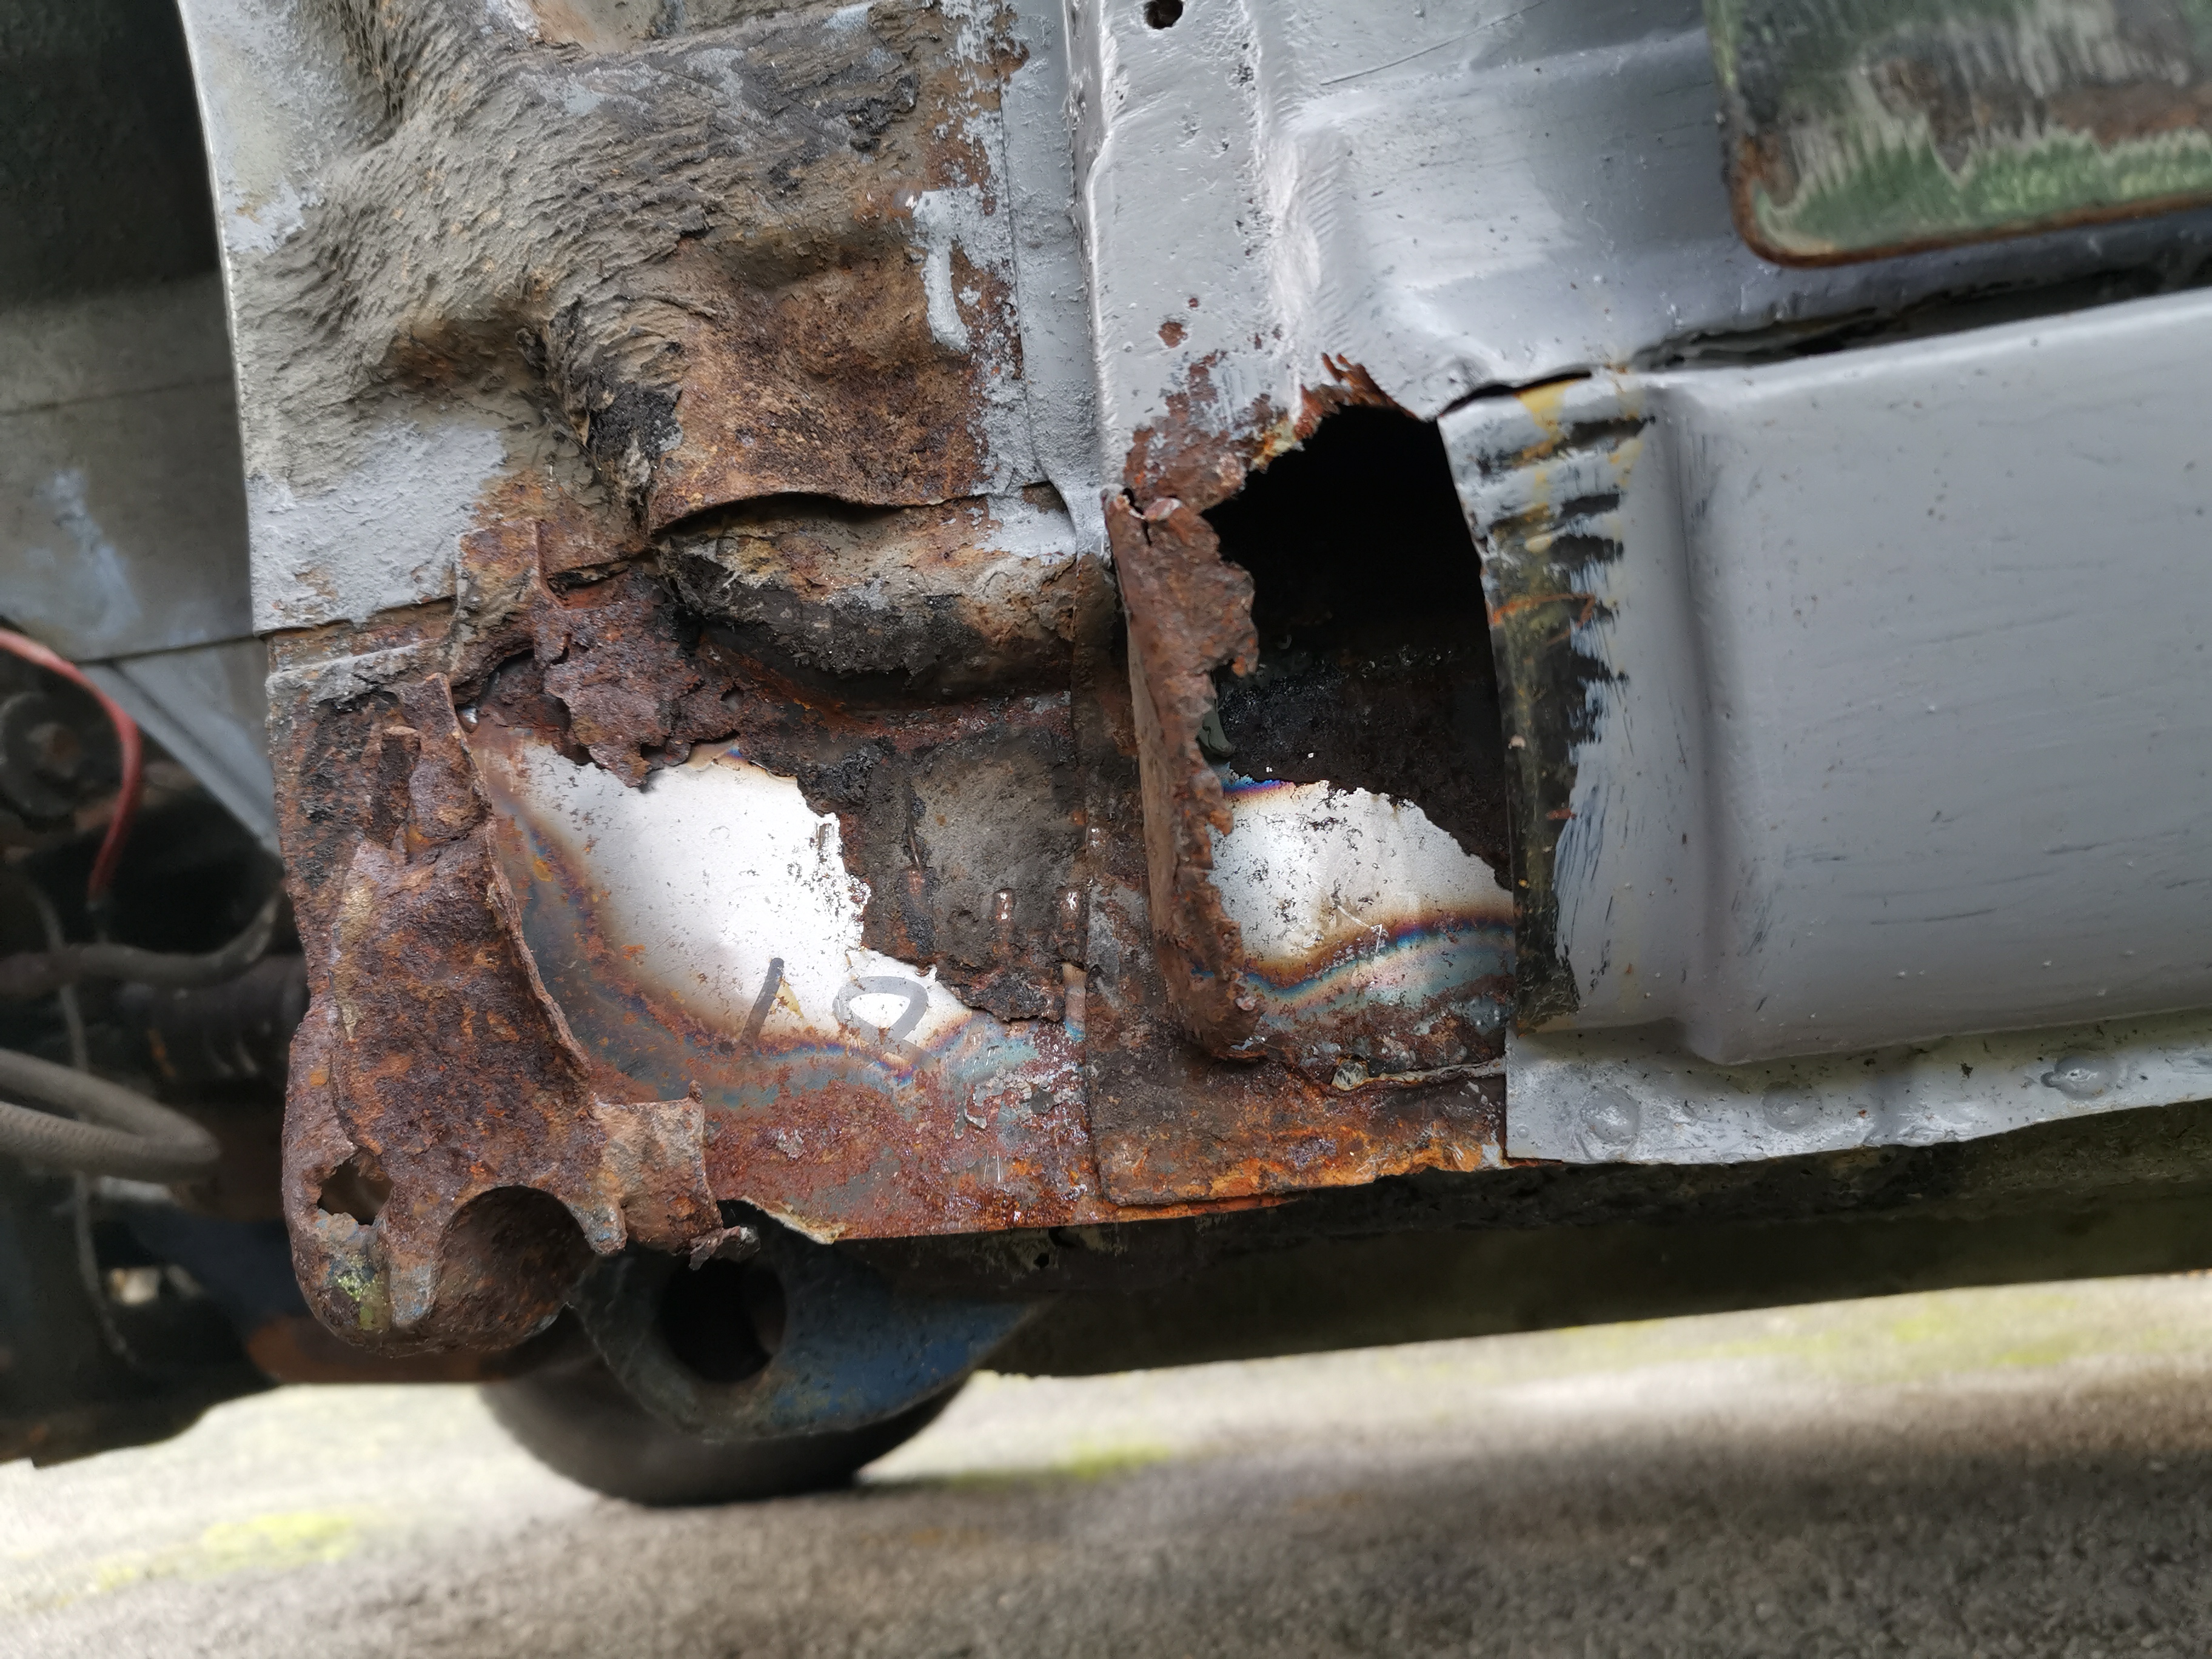
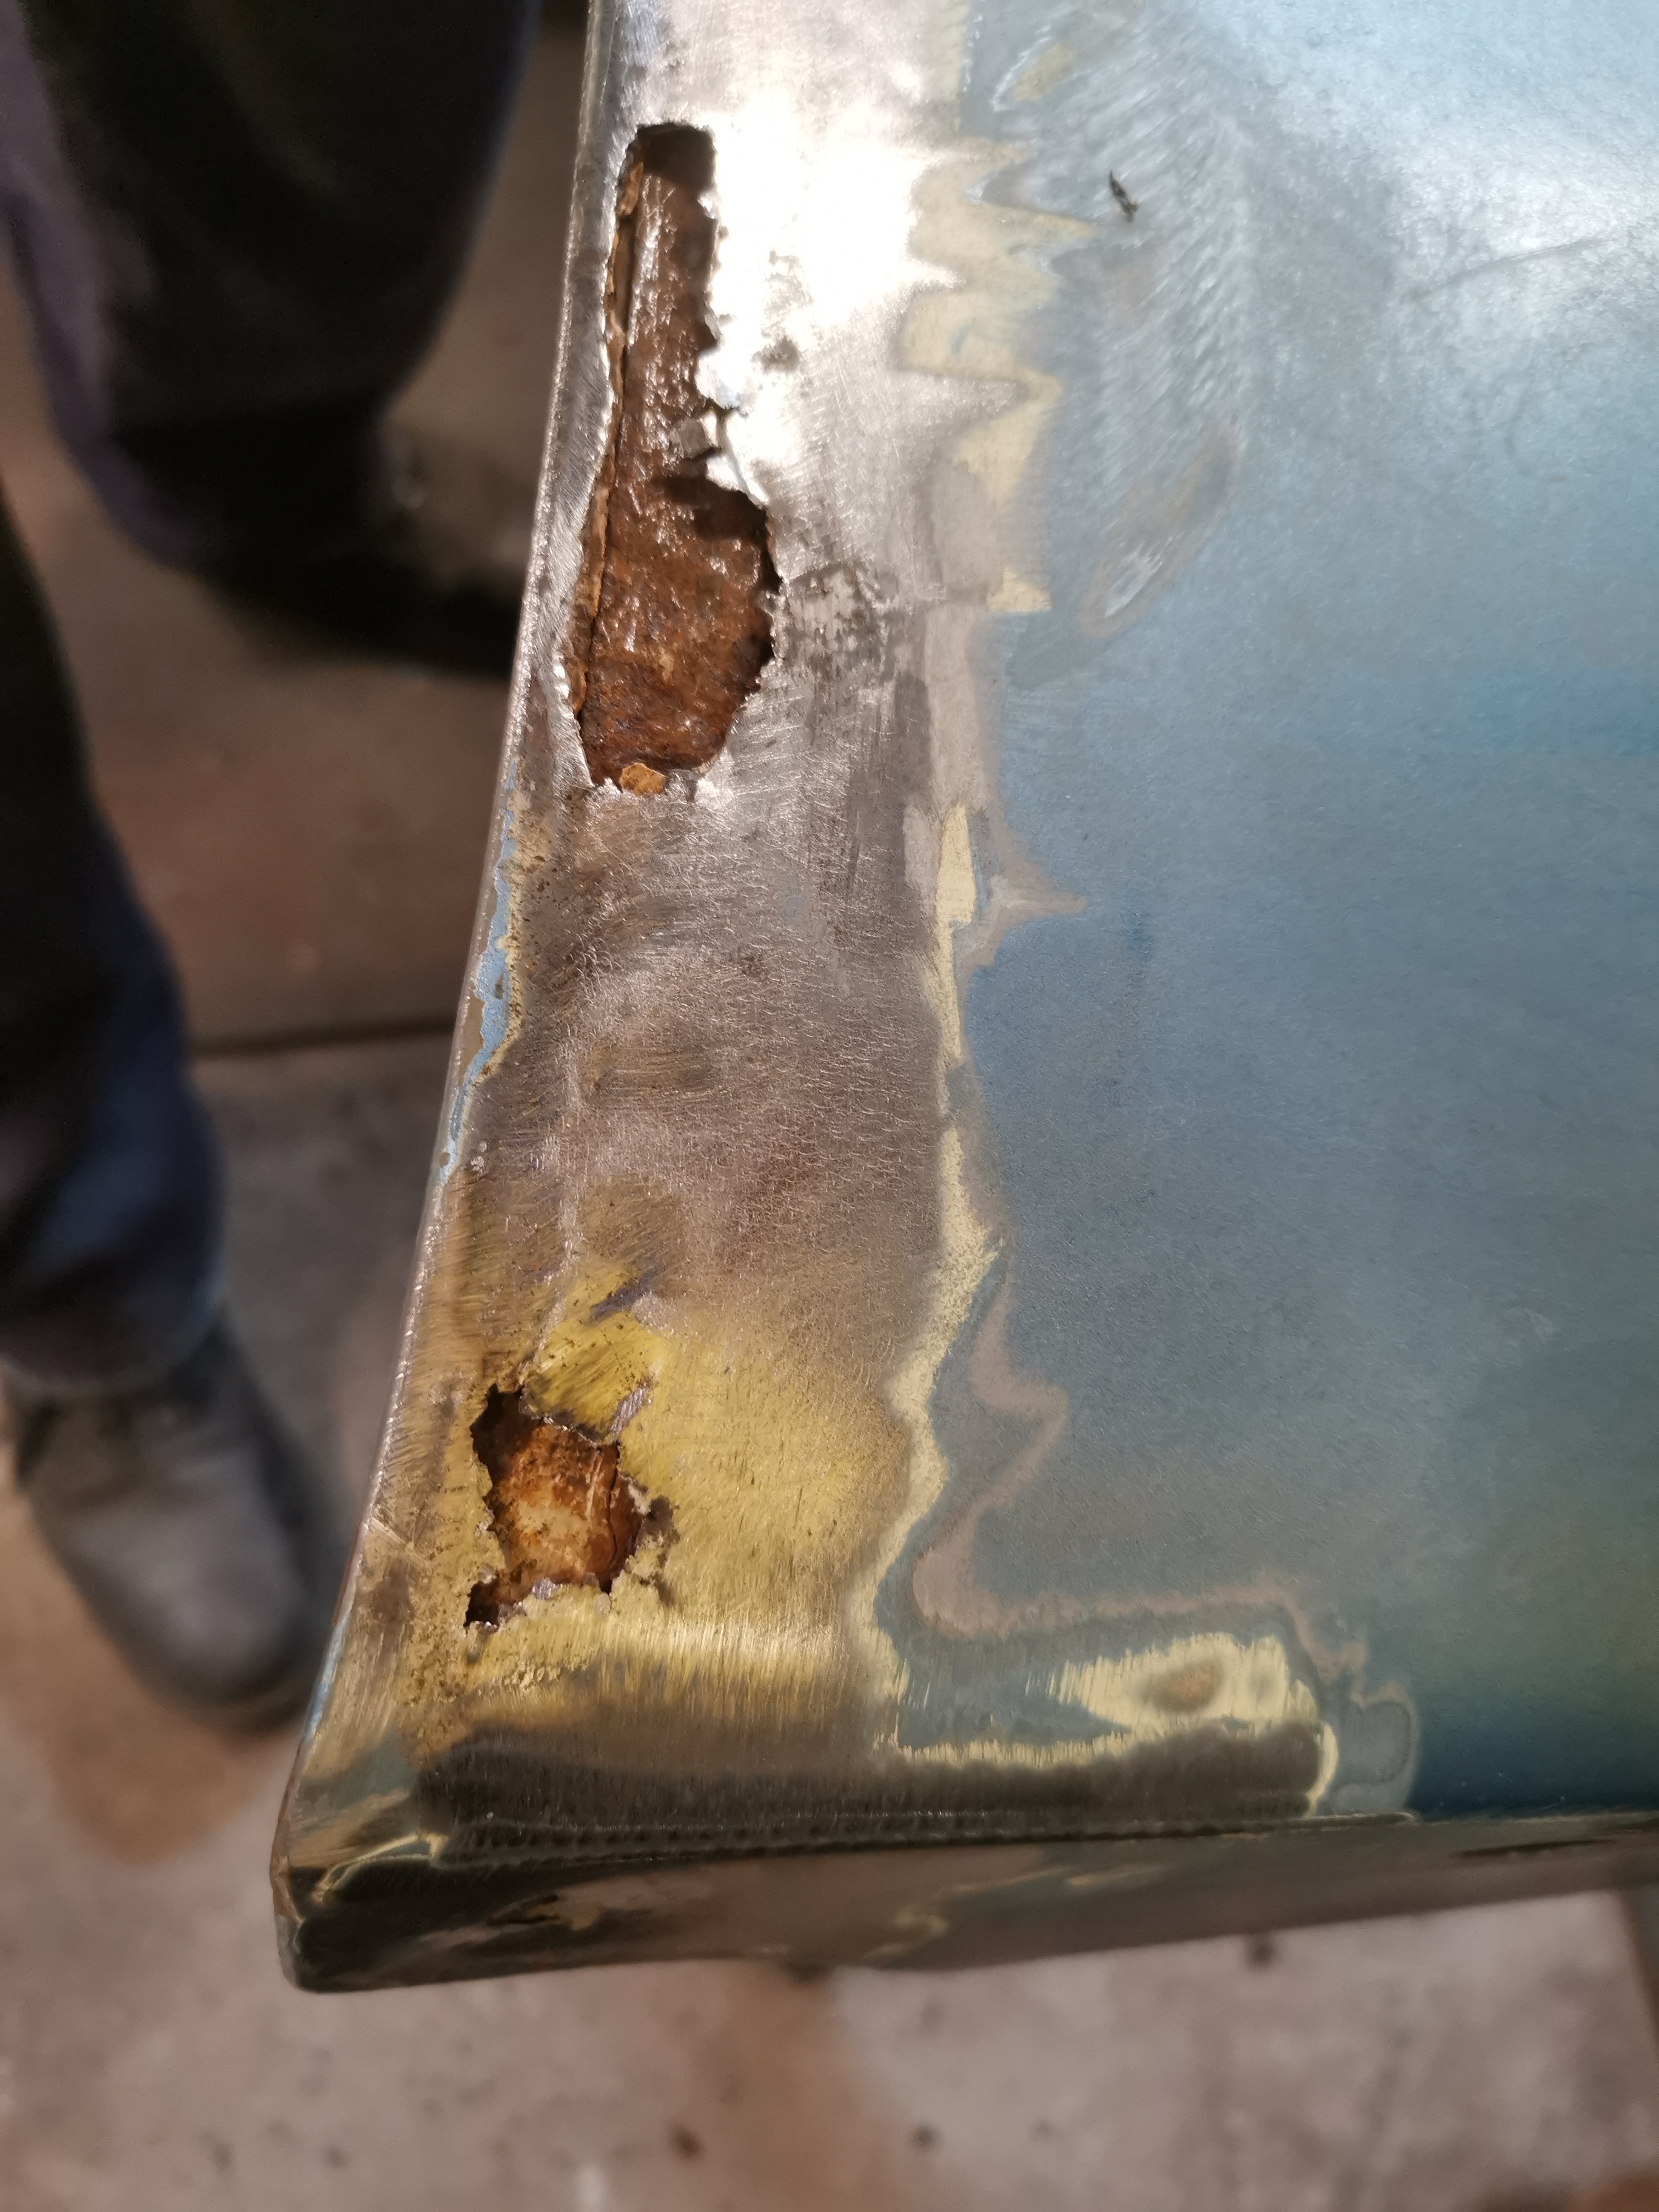
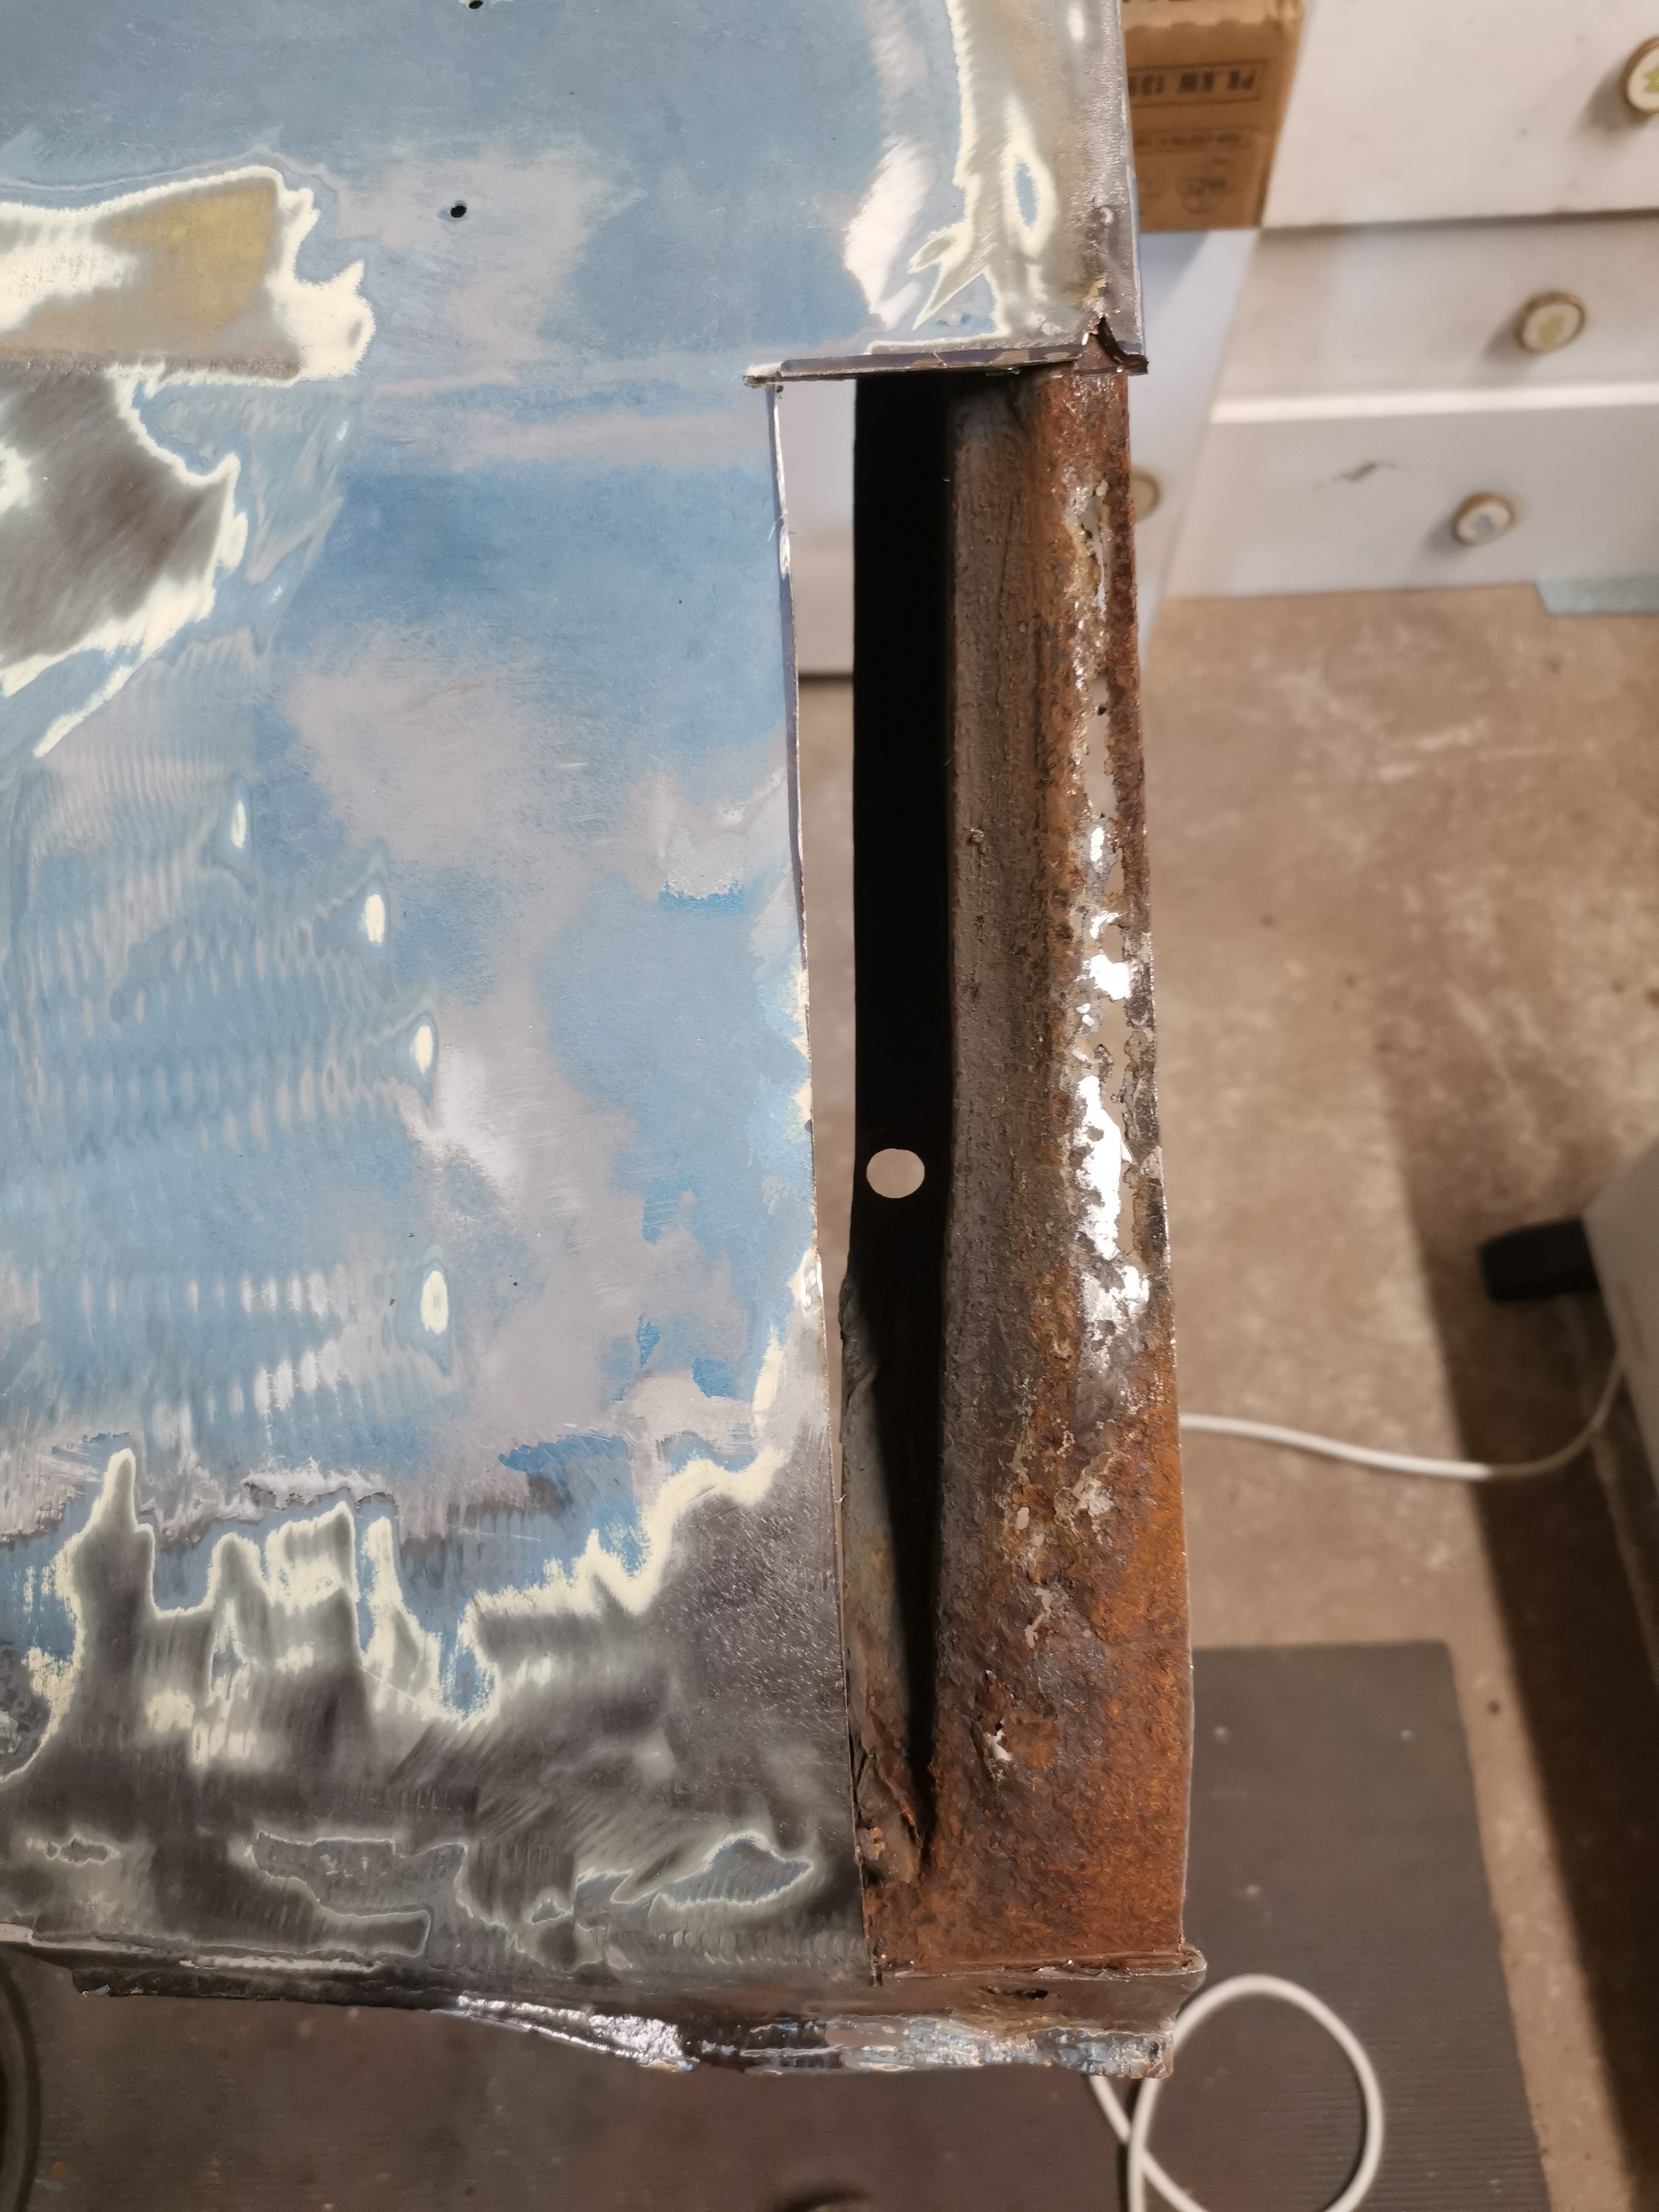
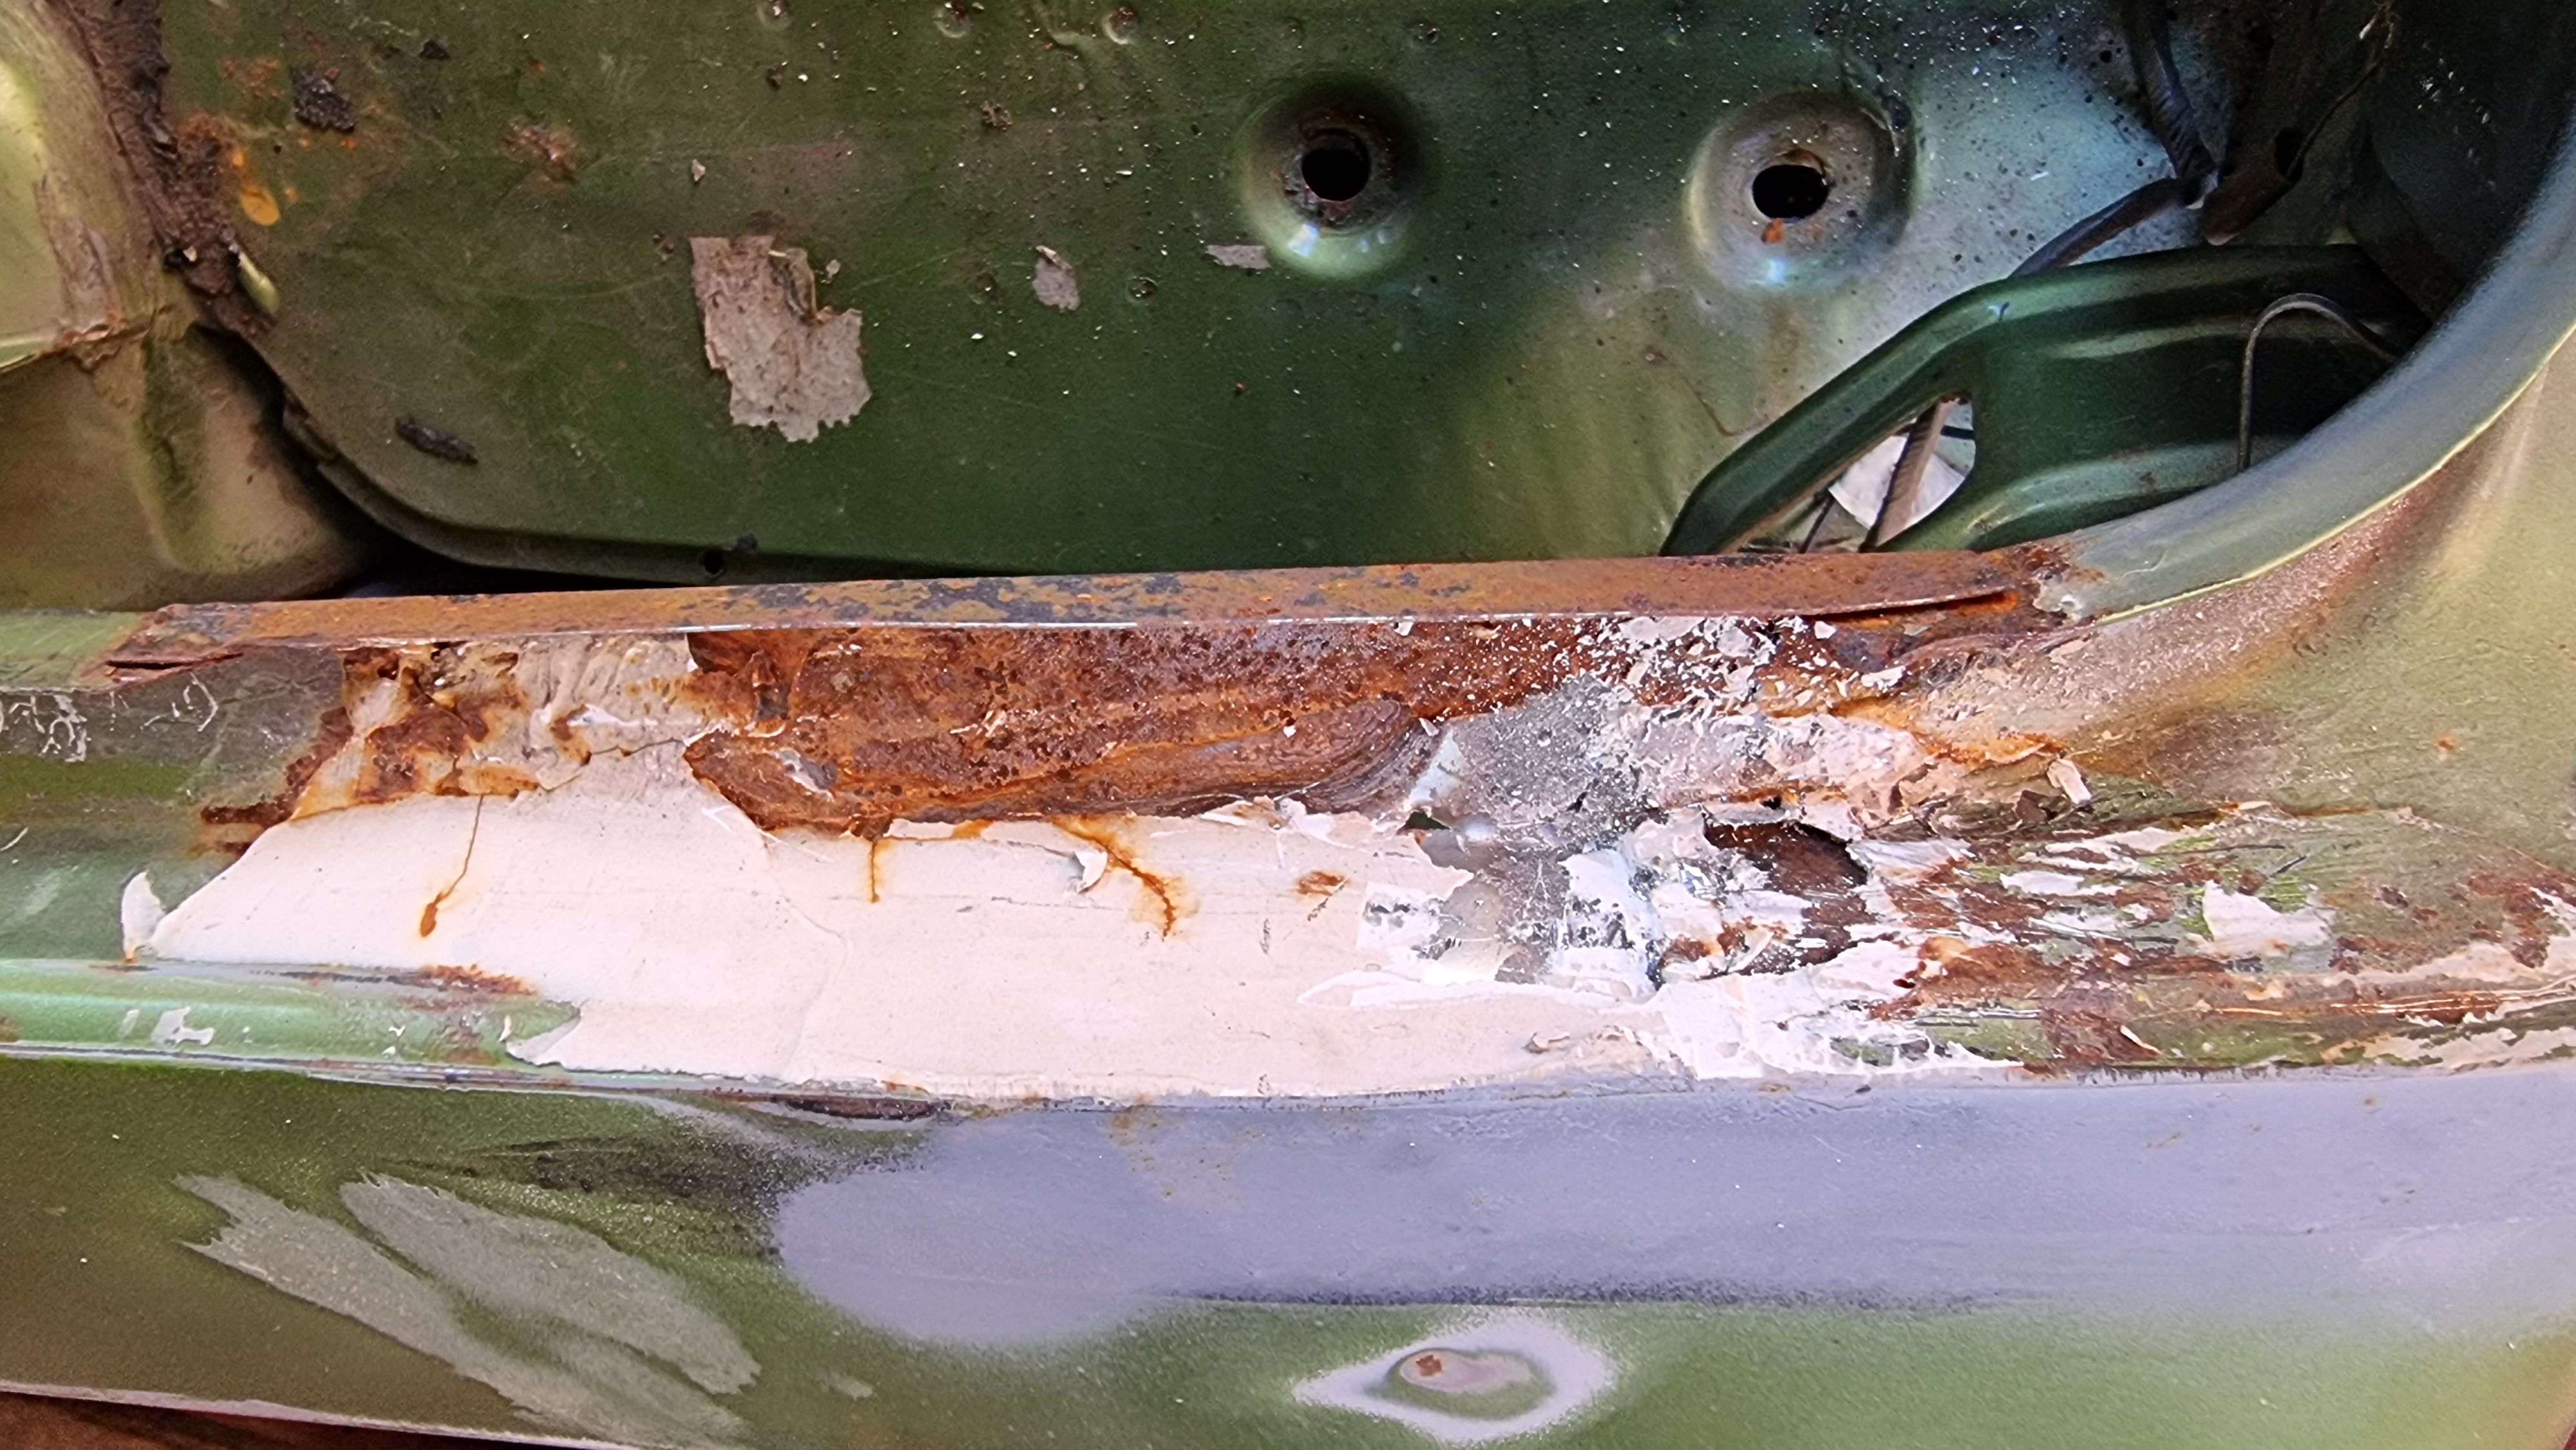
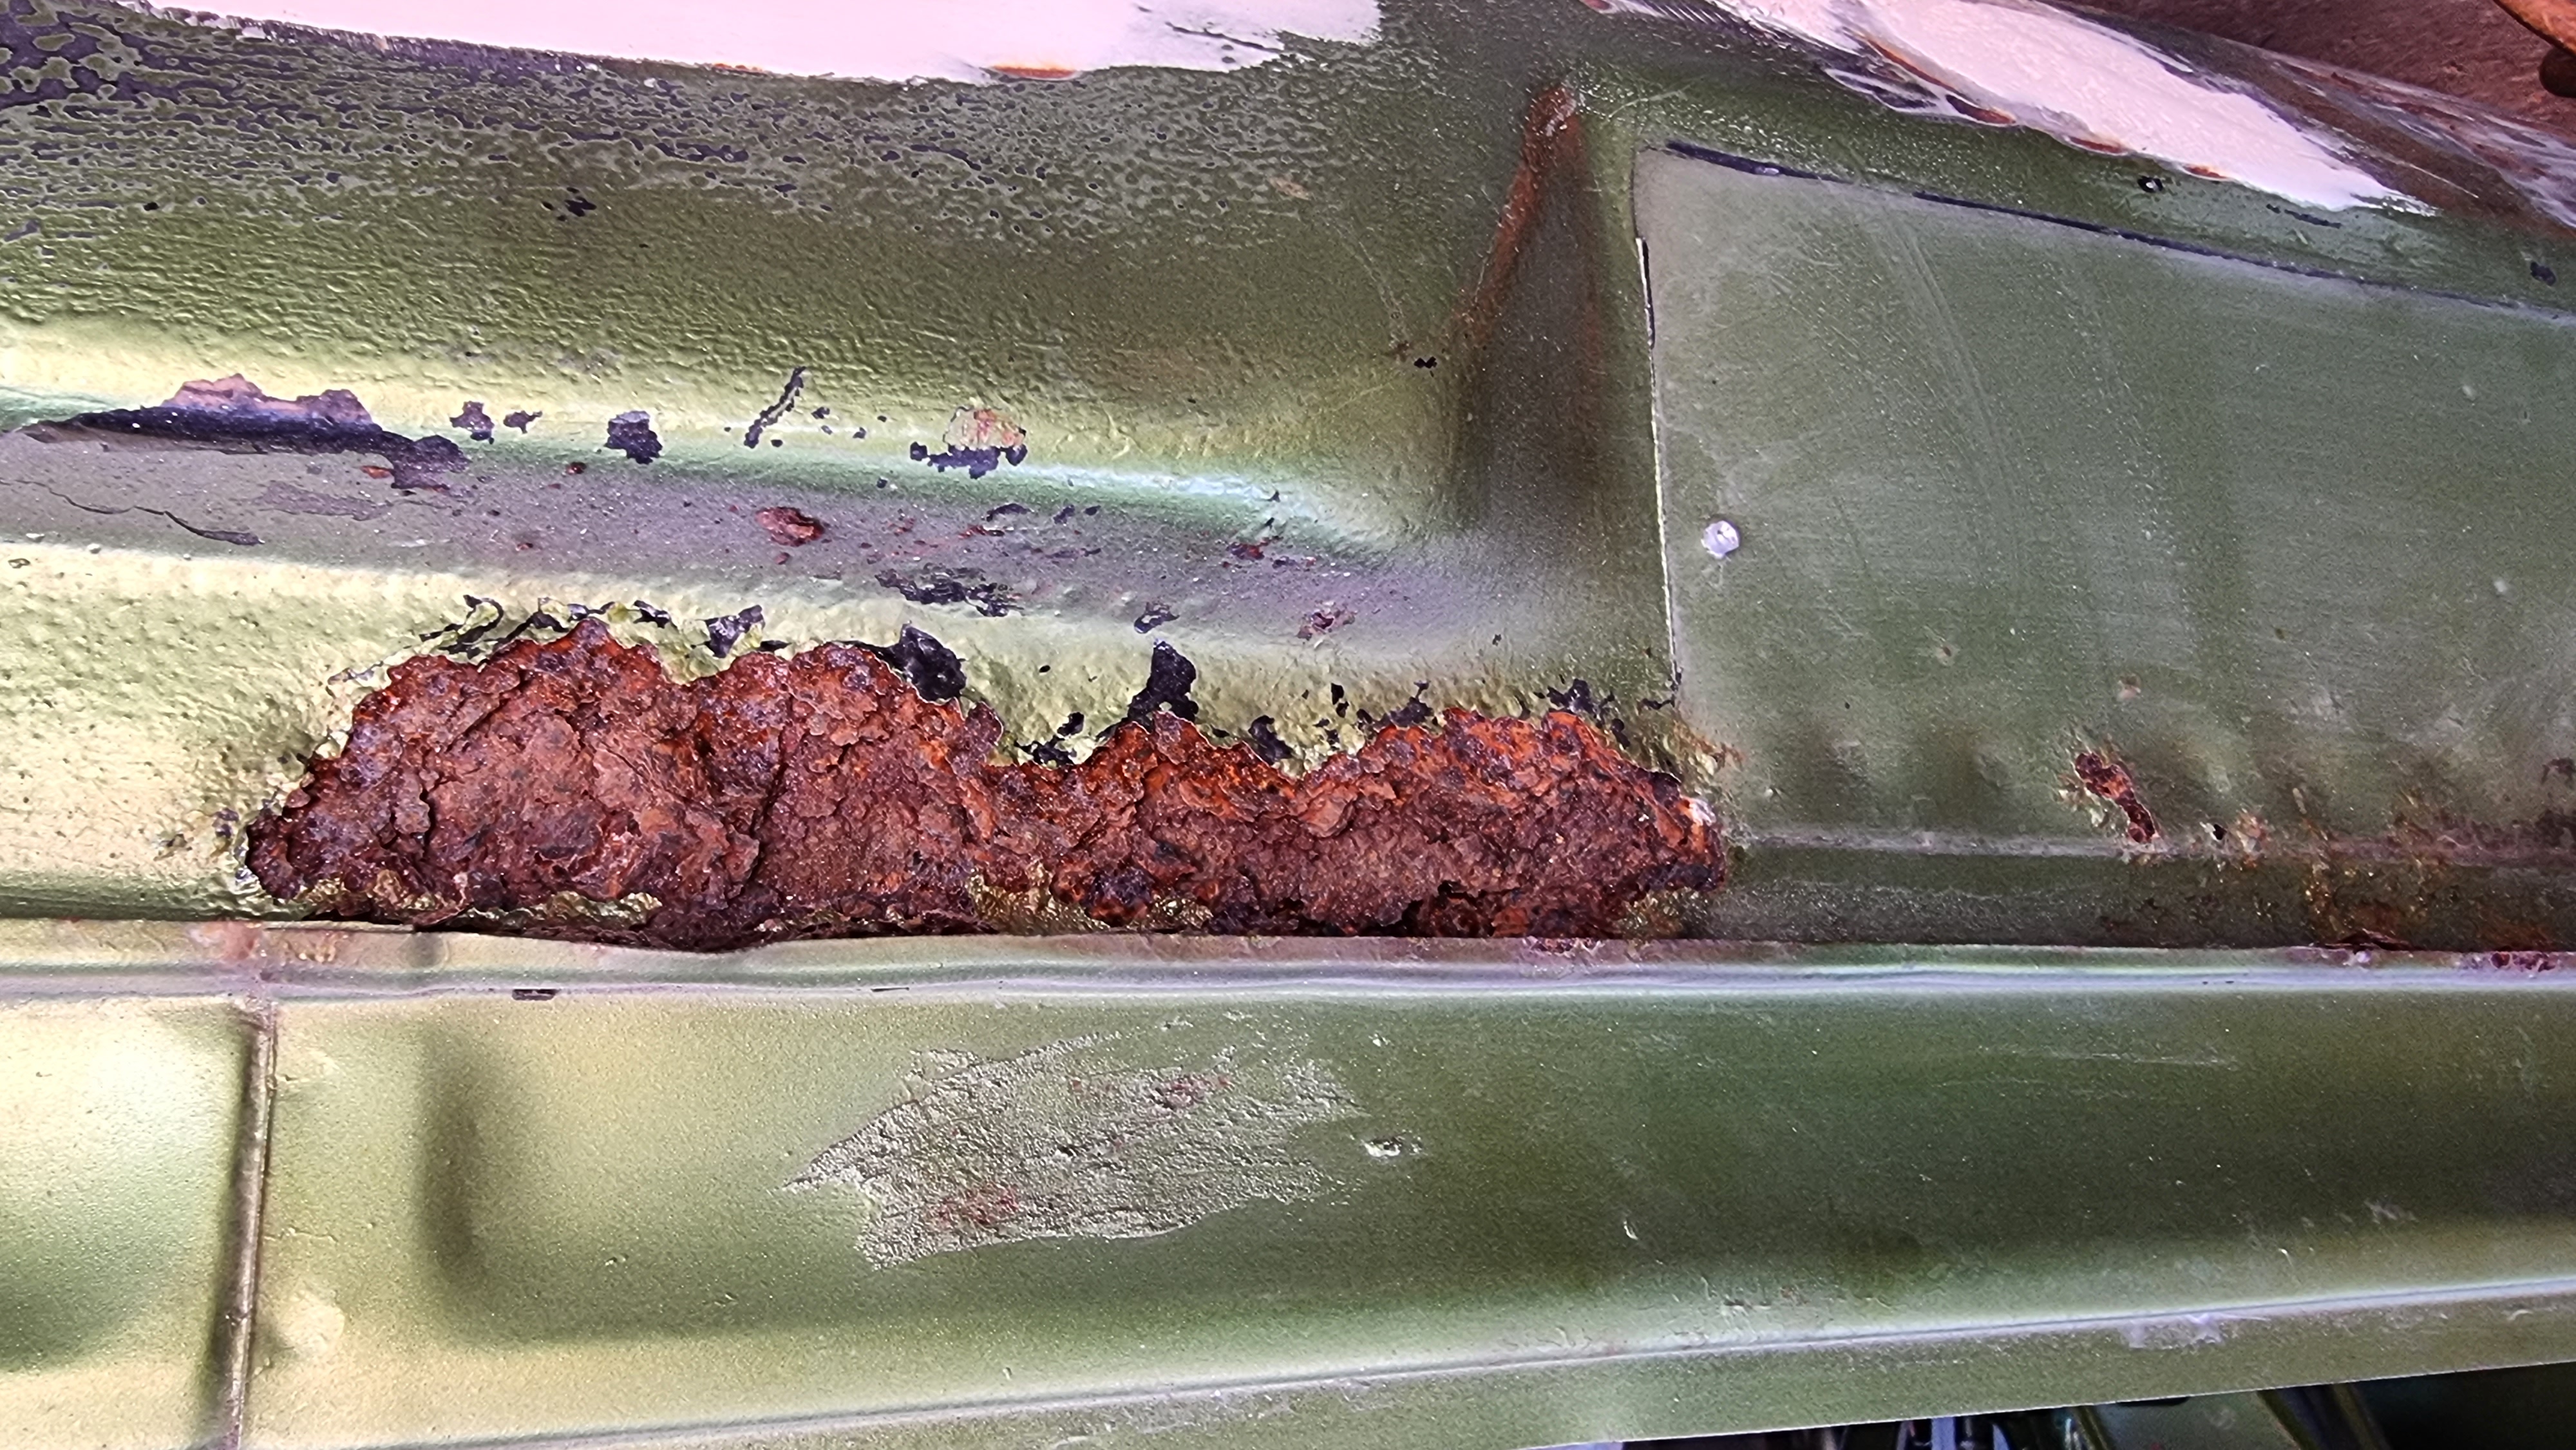
Closer inspection
Mmmm, there's a couple of holes at the front of the sill/bottom of the door pillar on this side! It has a bit of metal on the inside covering the hole though, so that's ok lol.
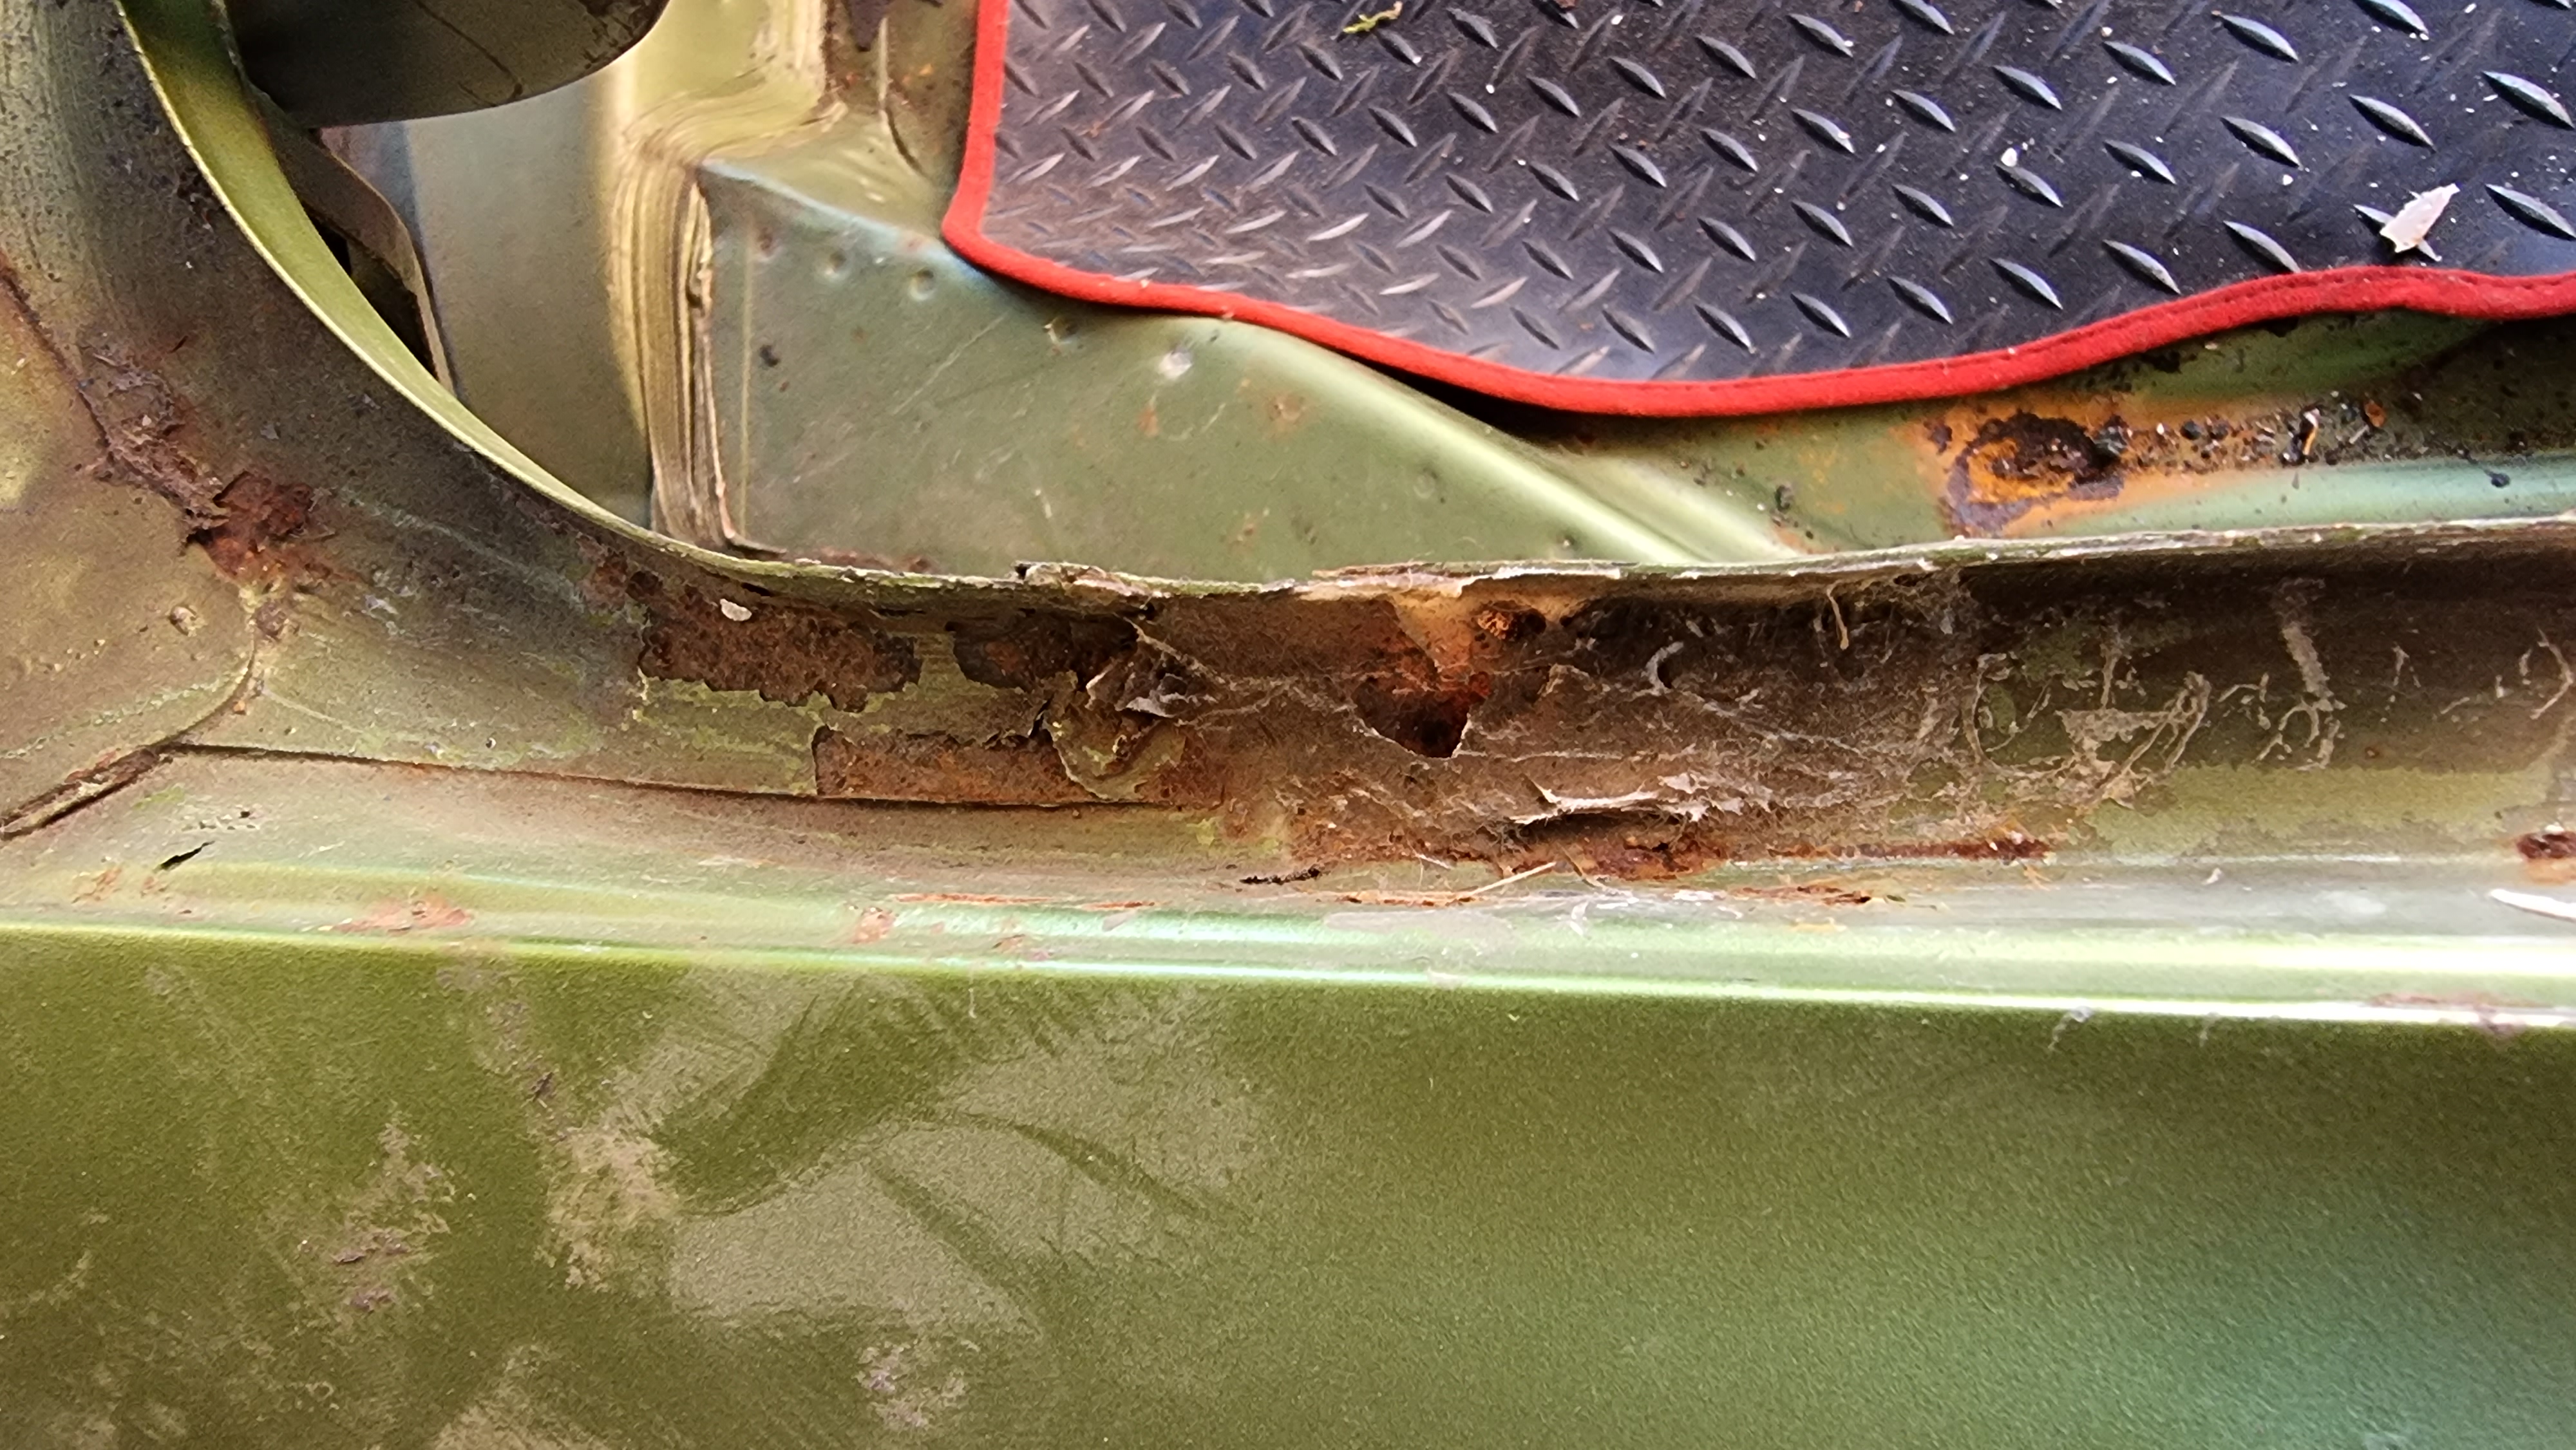
Closer inspection
Mmmm, there's a couple of holes at the bottom of the 'A' post on this side too
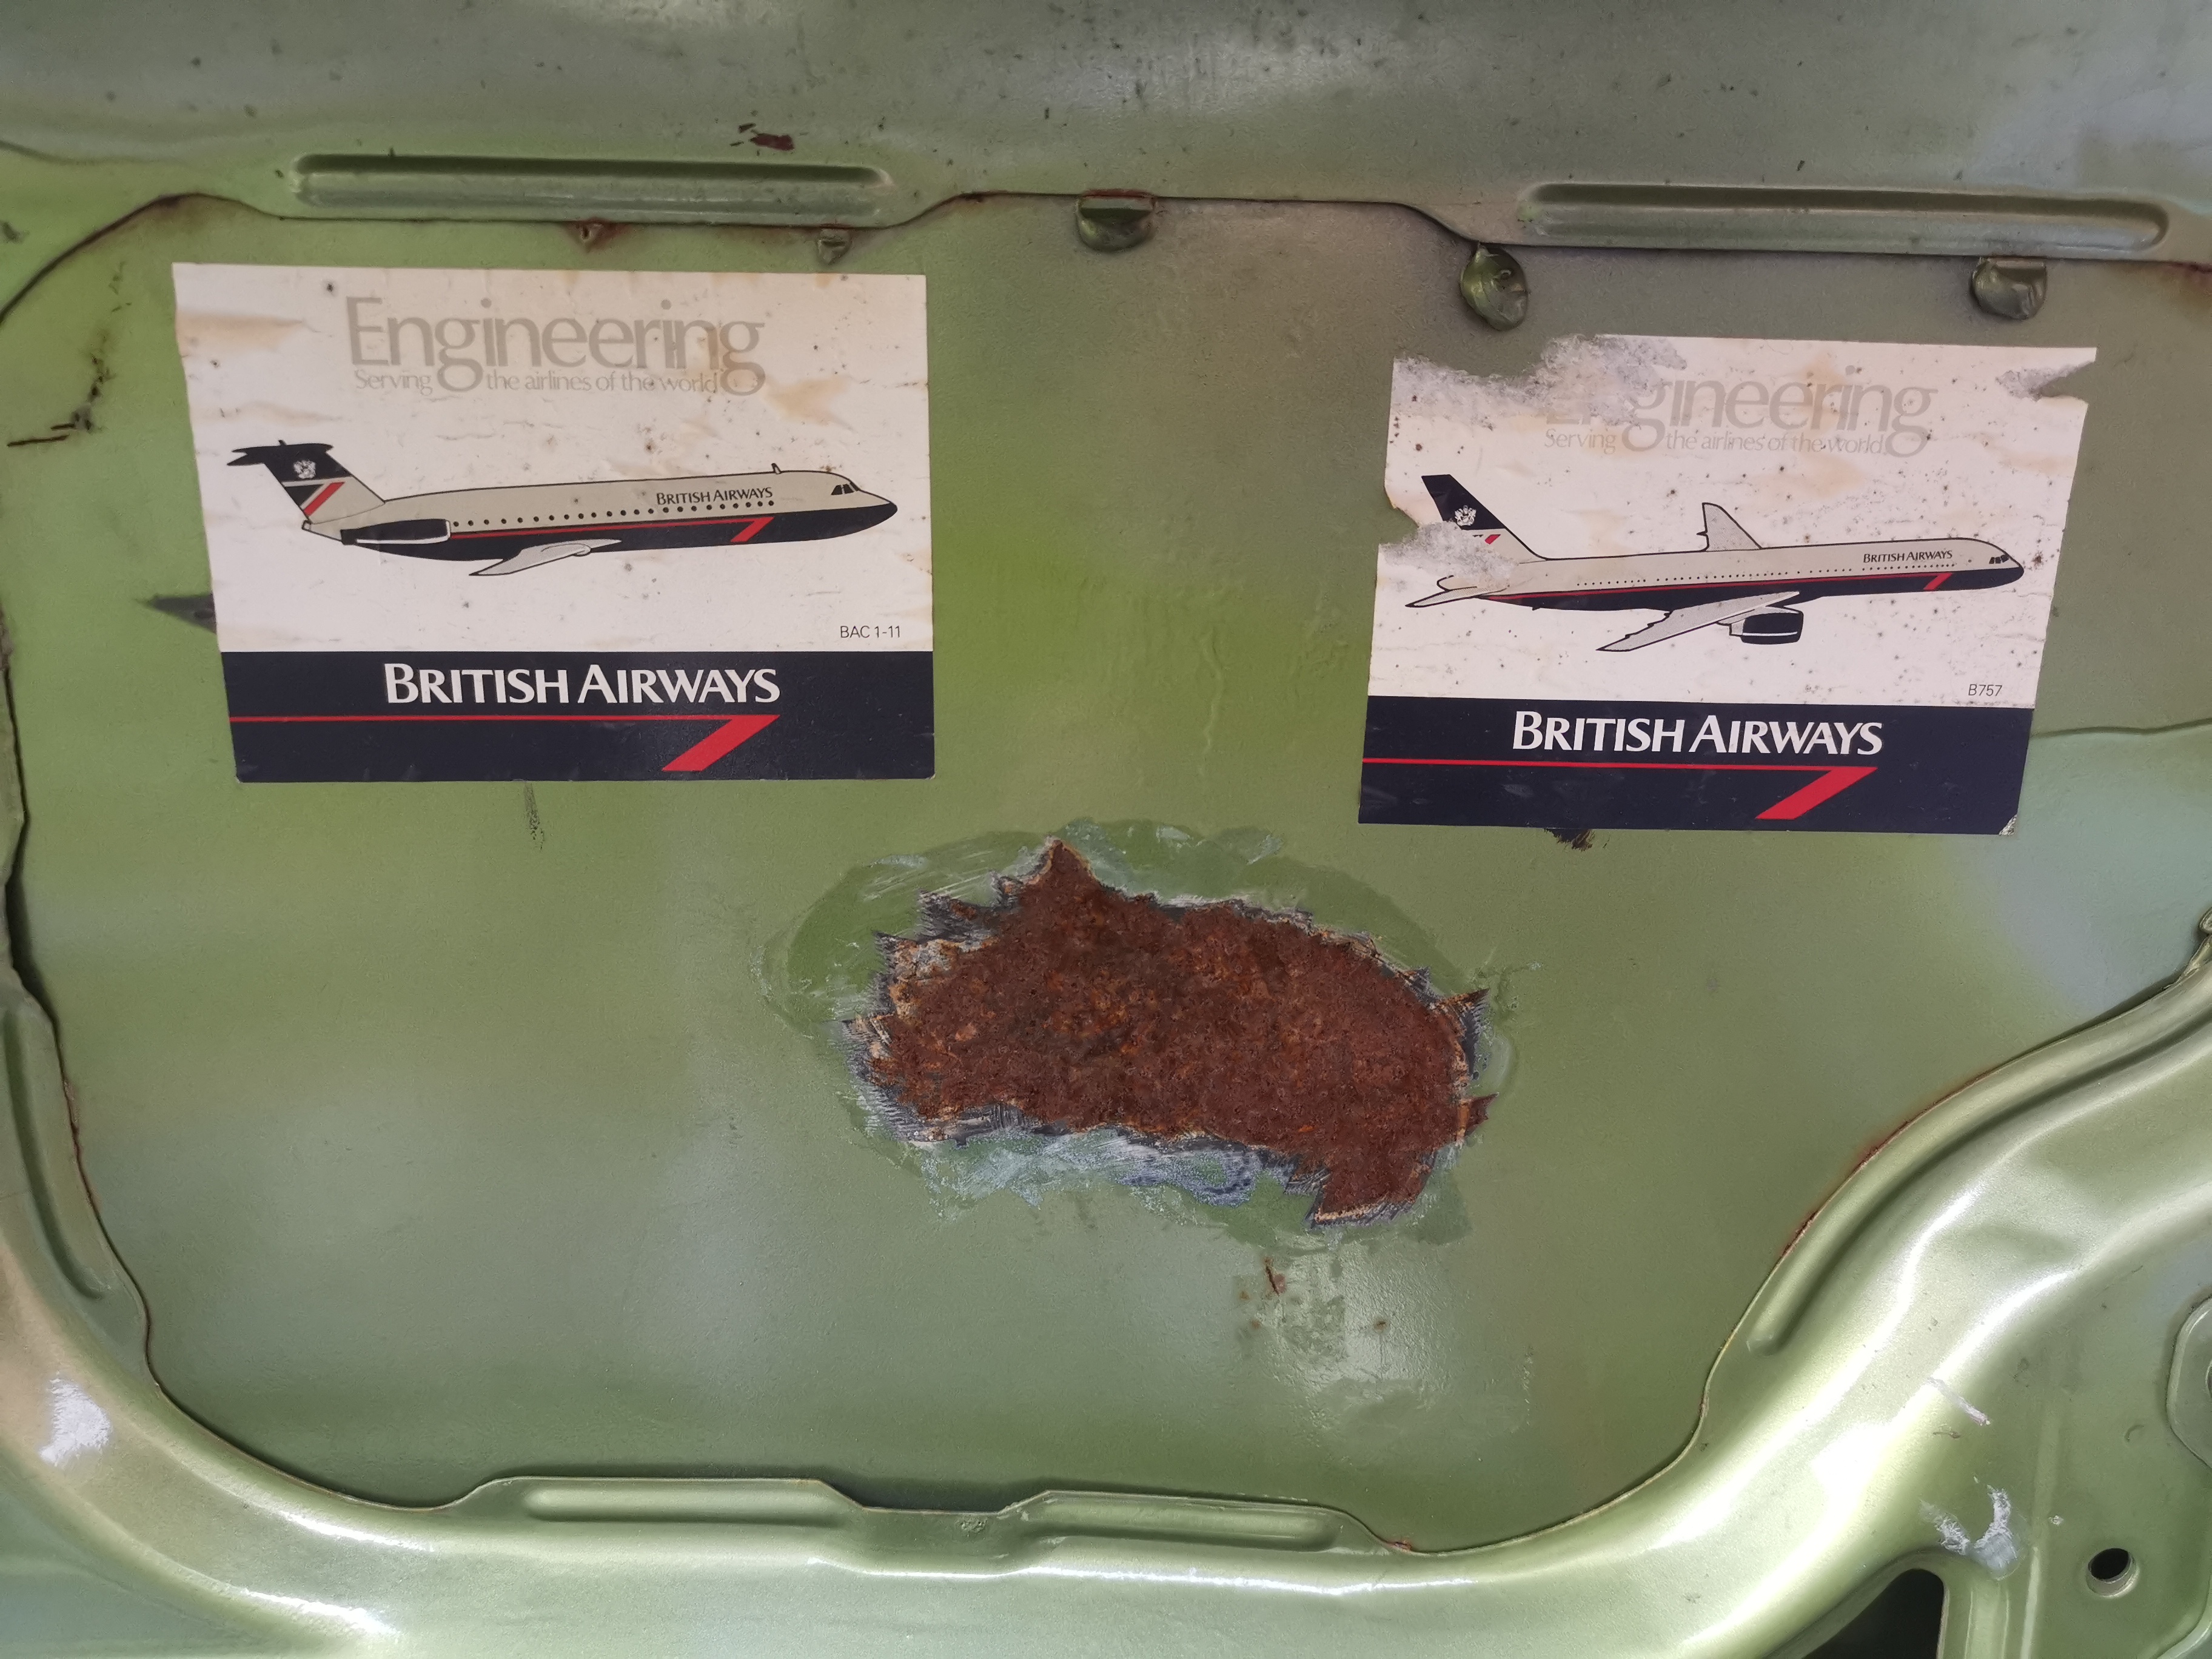
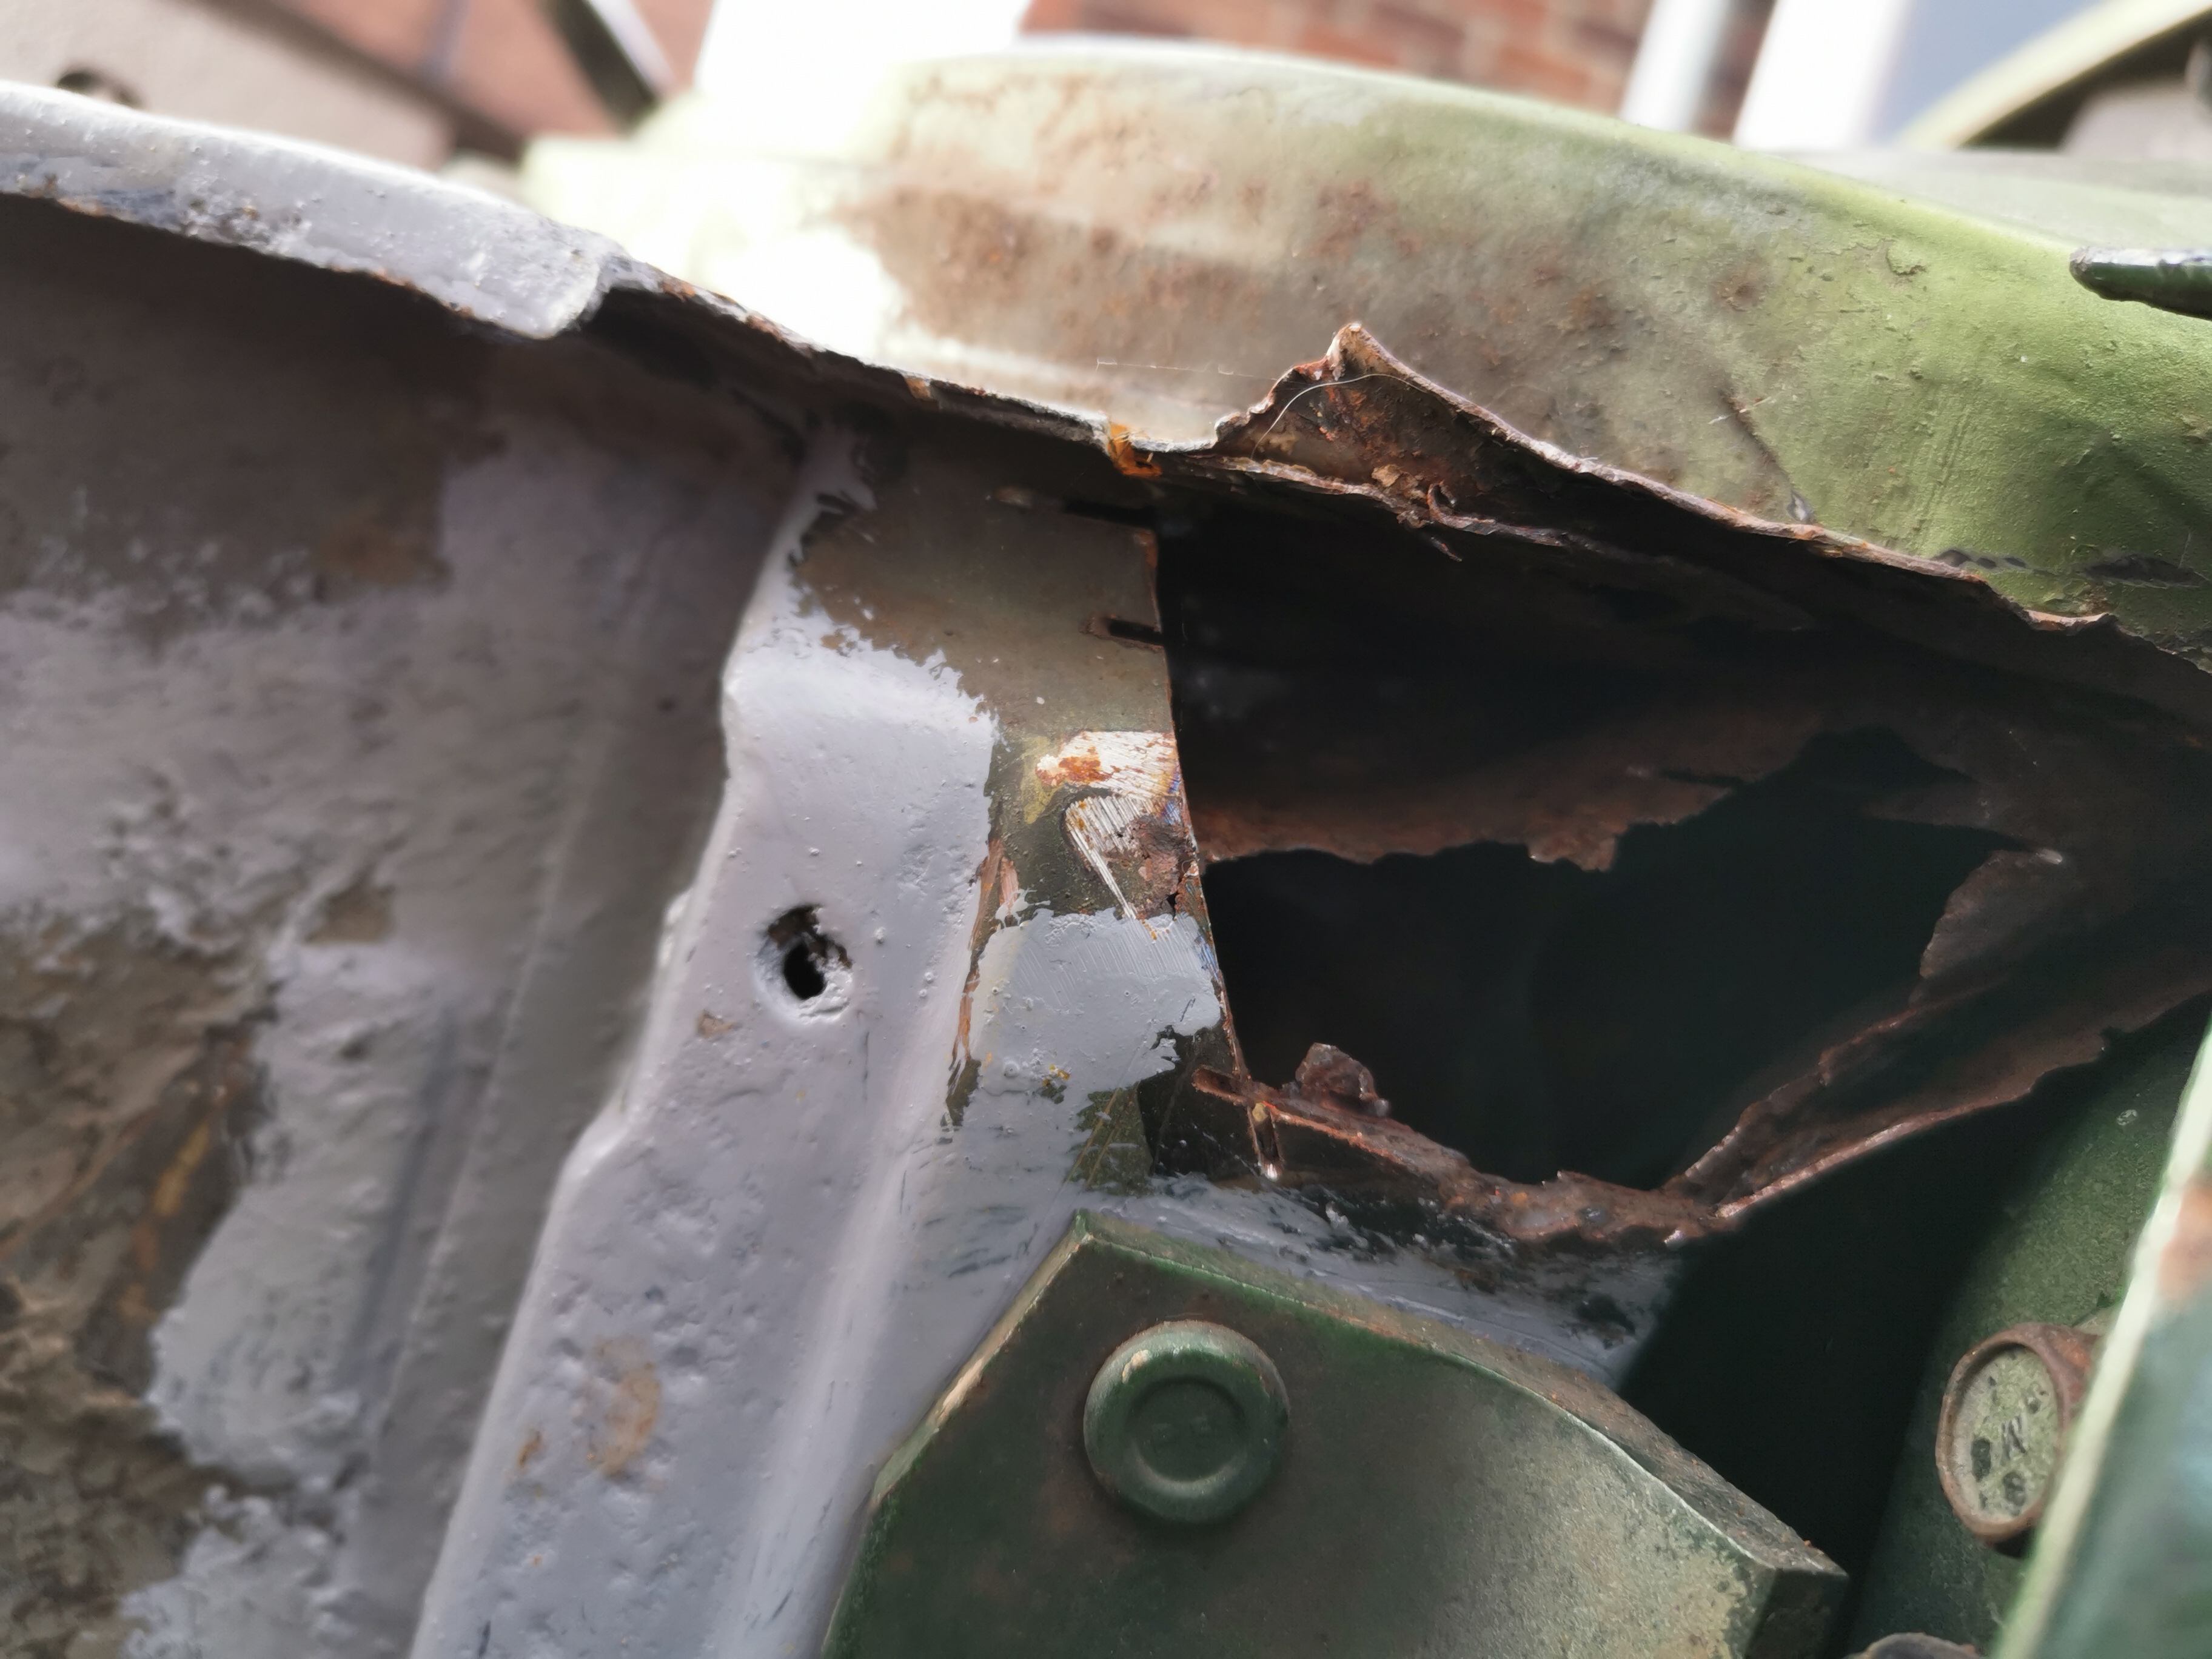
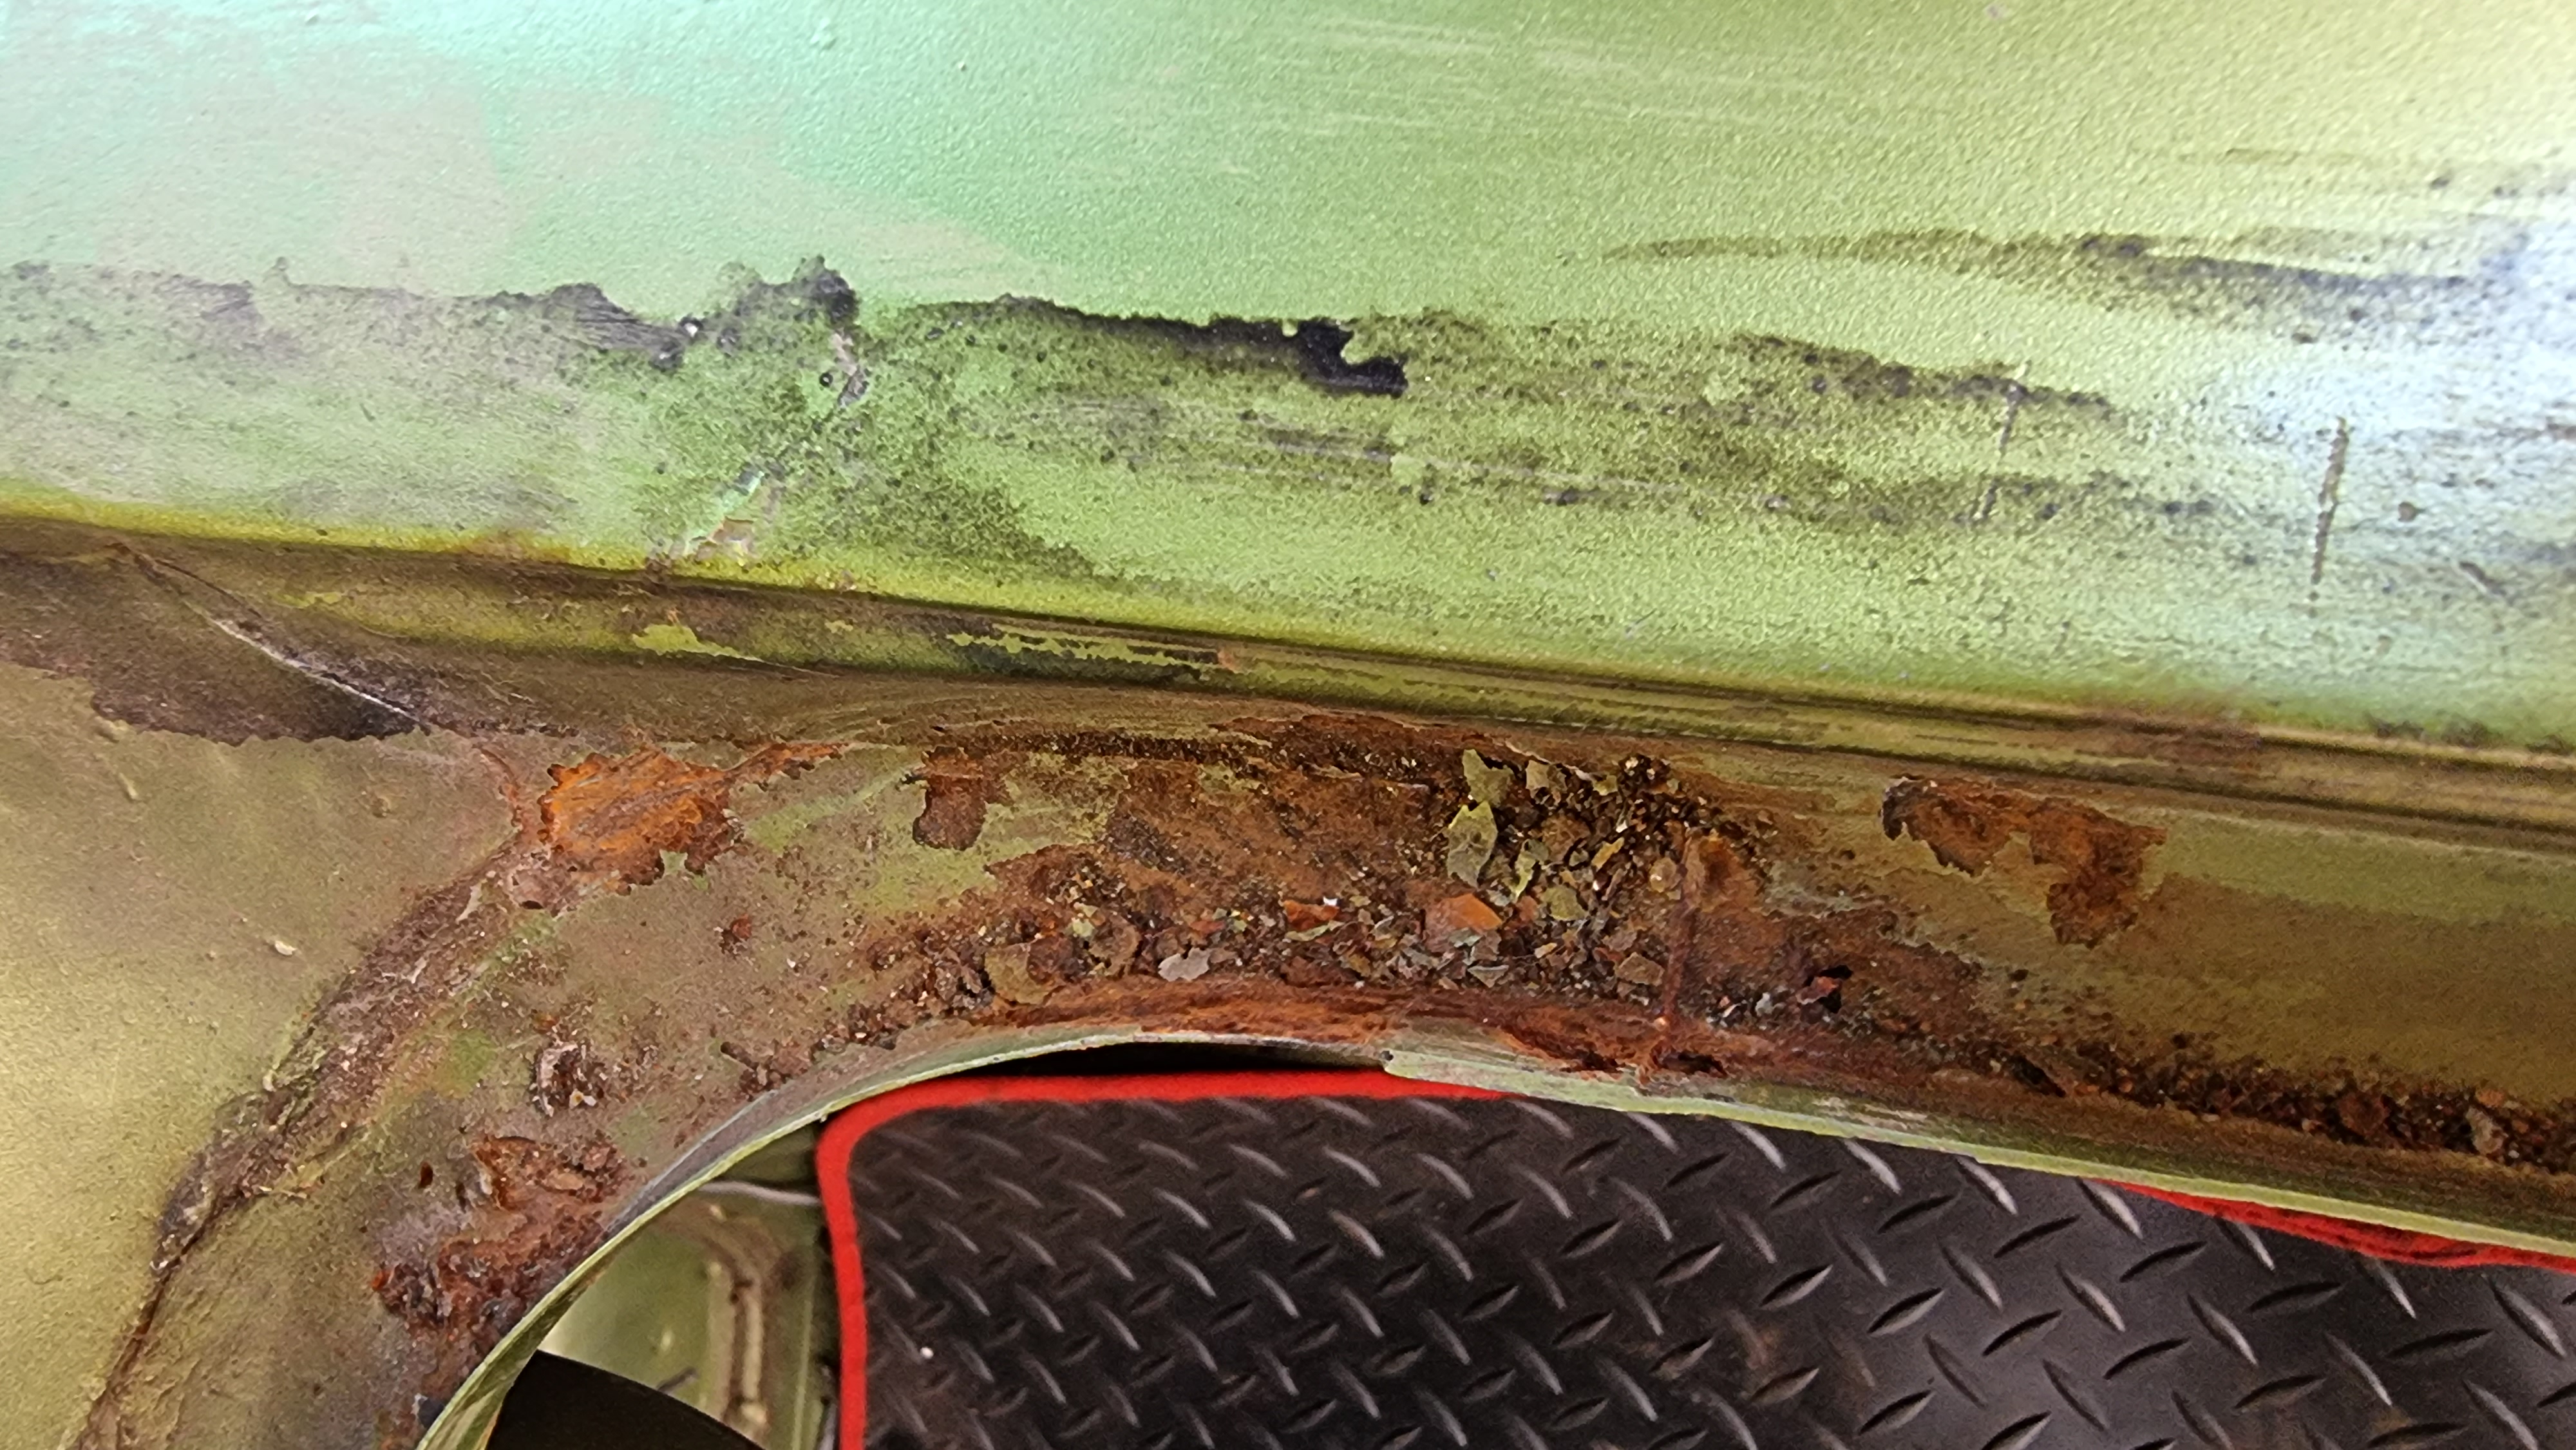
Closer inspection
Interesting stickers under the boot lid. Seems like maybe a previous owner might have been an aircraft engineer at Gatwick airport. There's also another burnt area under there.
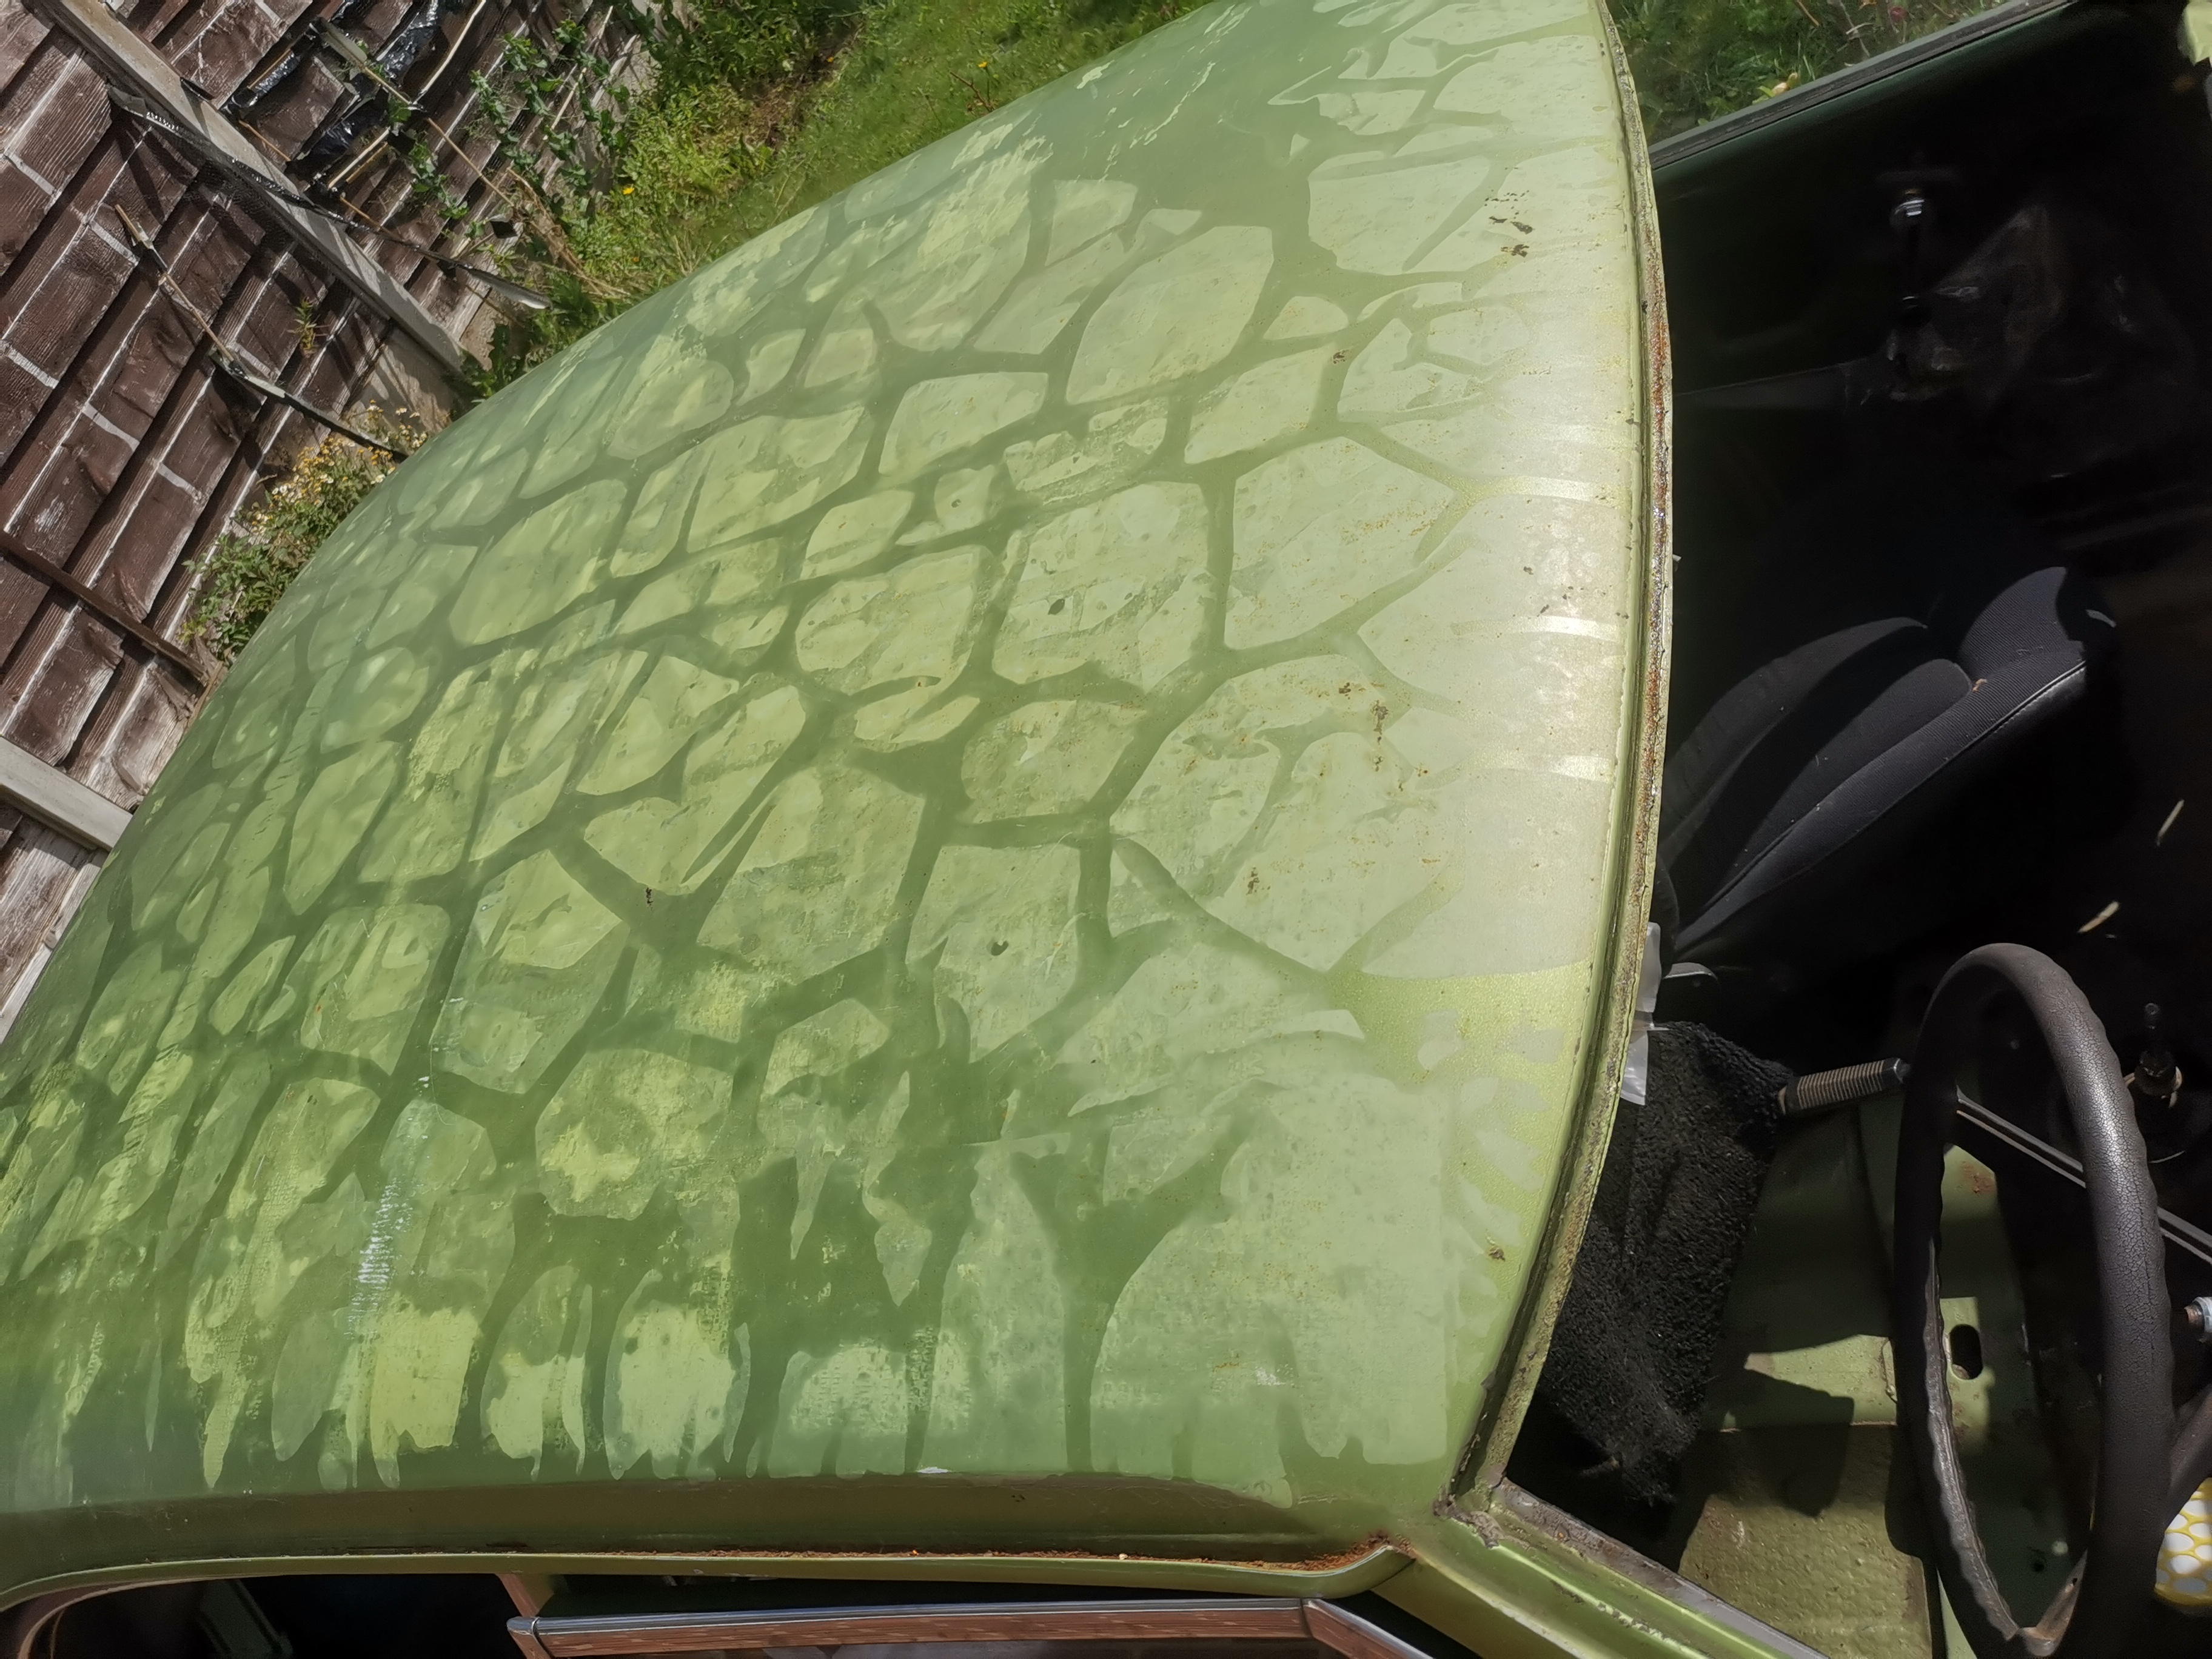
Roof
This entertaining pattern is due to water getting under the tarp that I had it covered with over the winter. I quite like it to be honest, I might just lacquer over it...
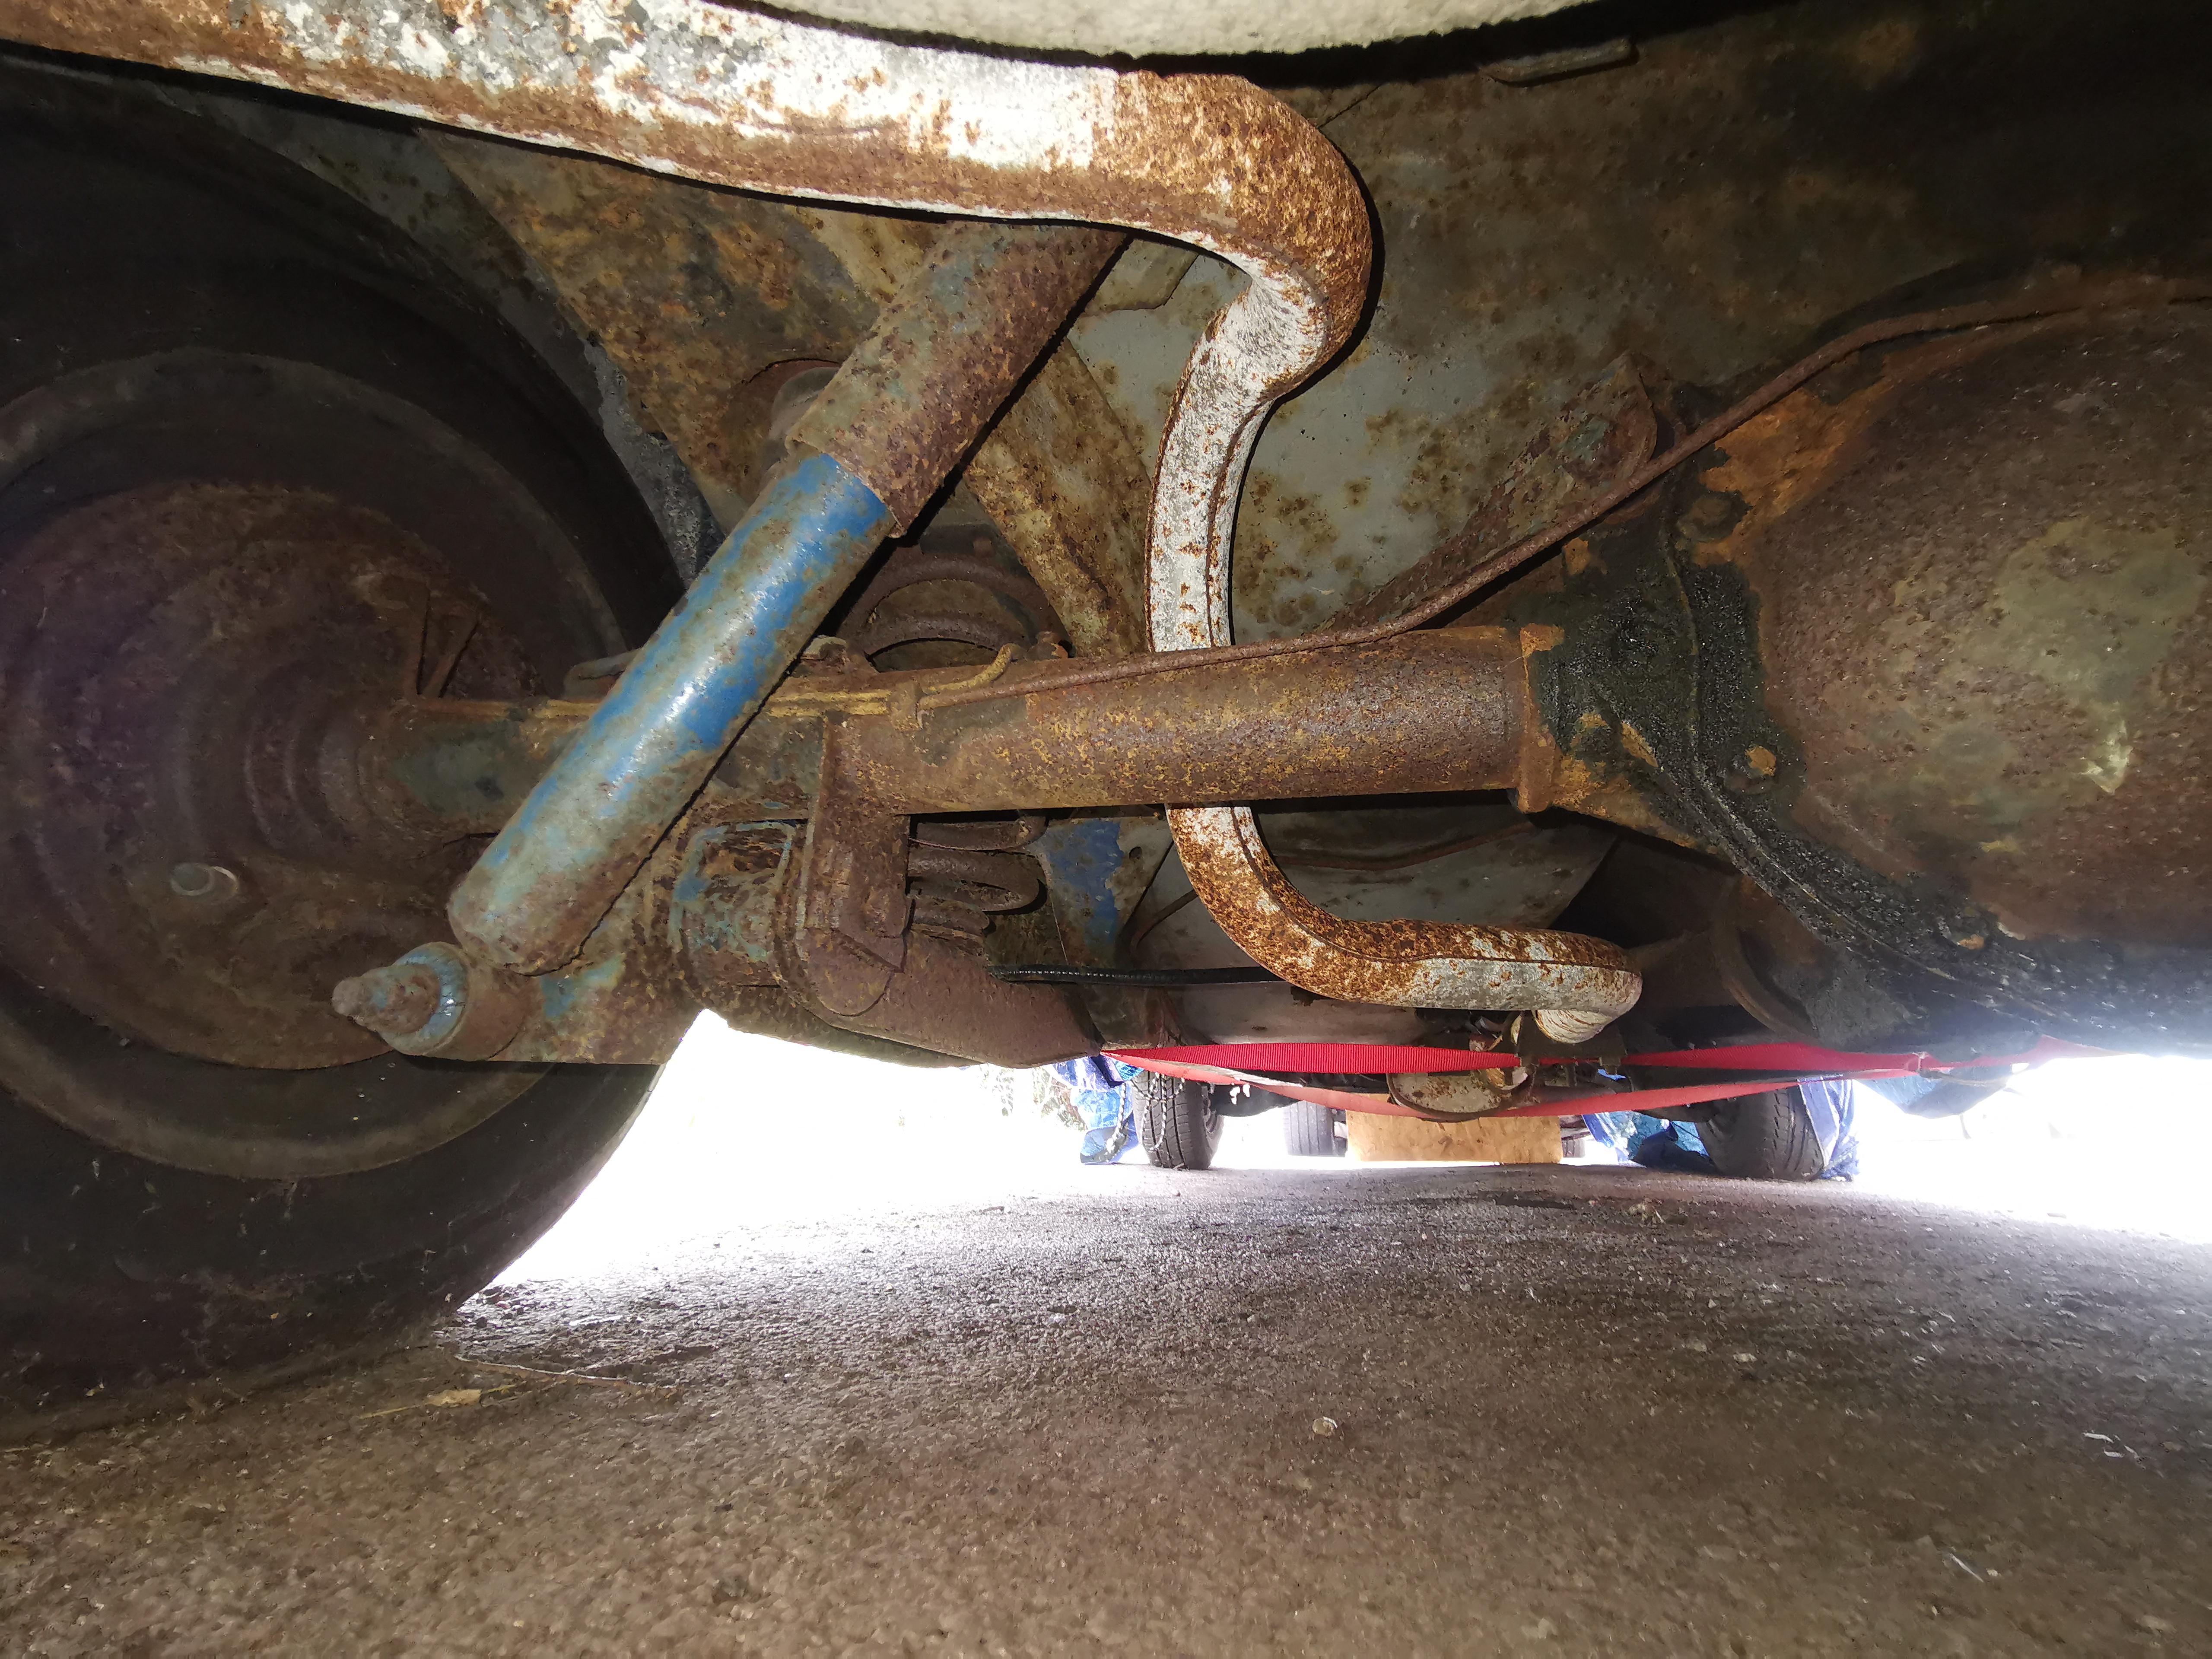
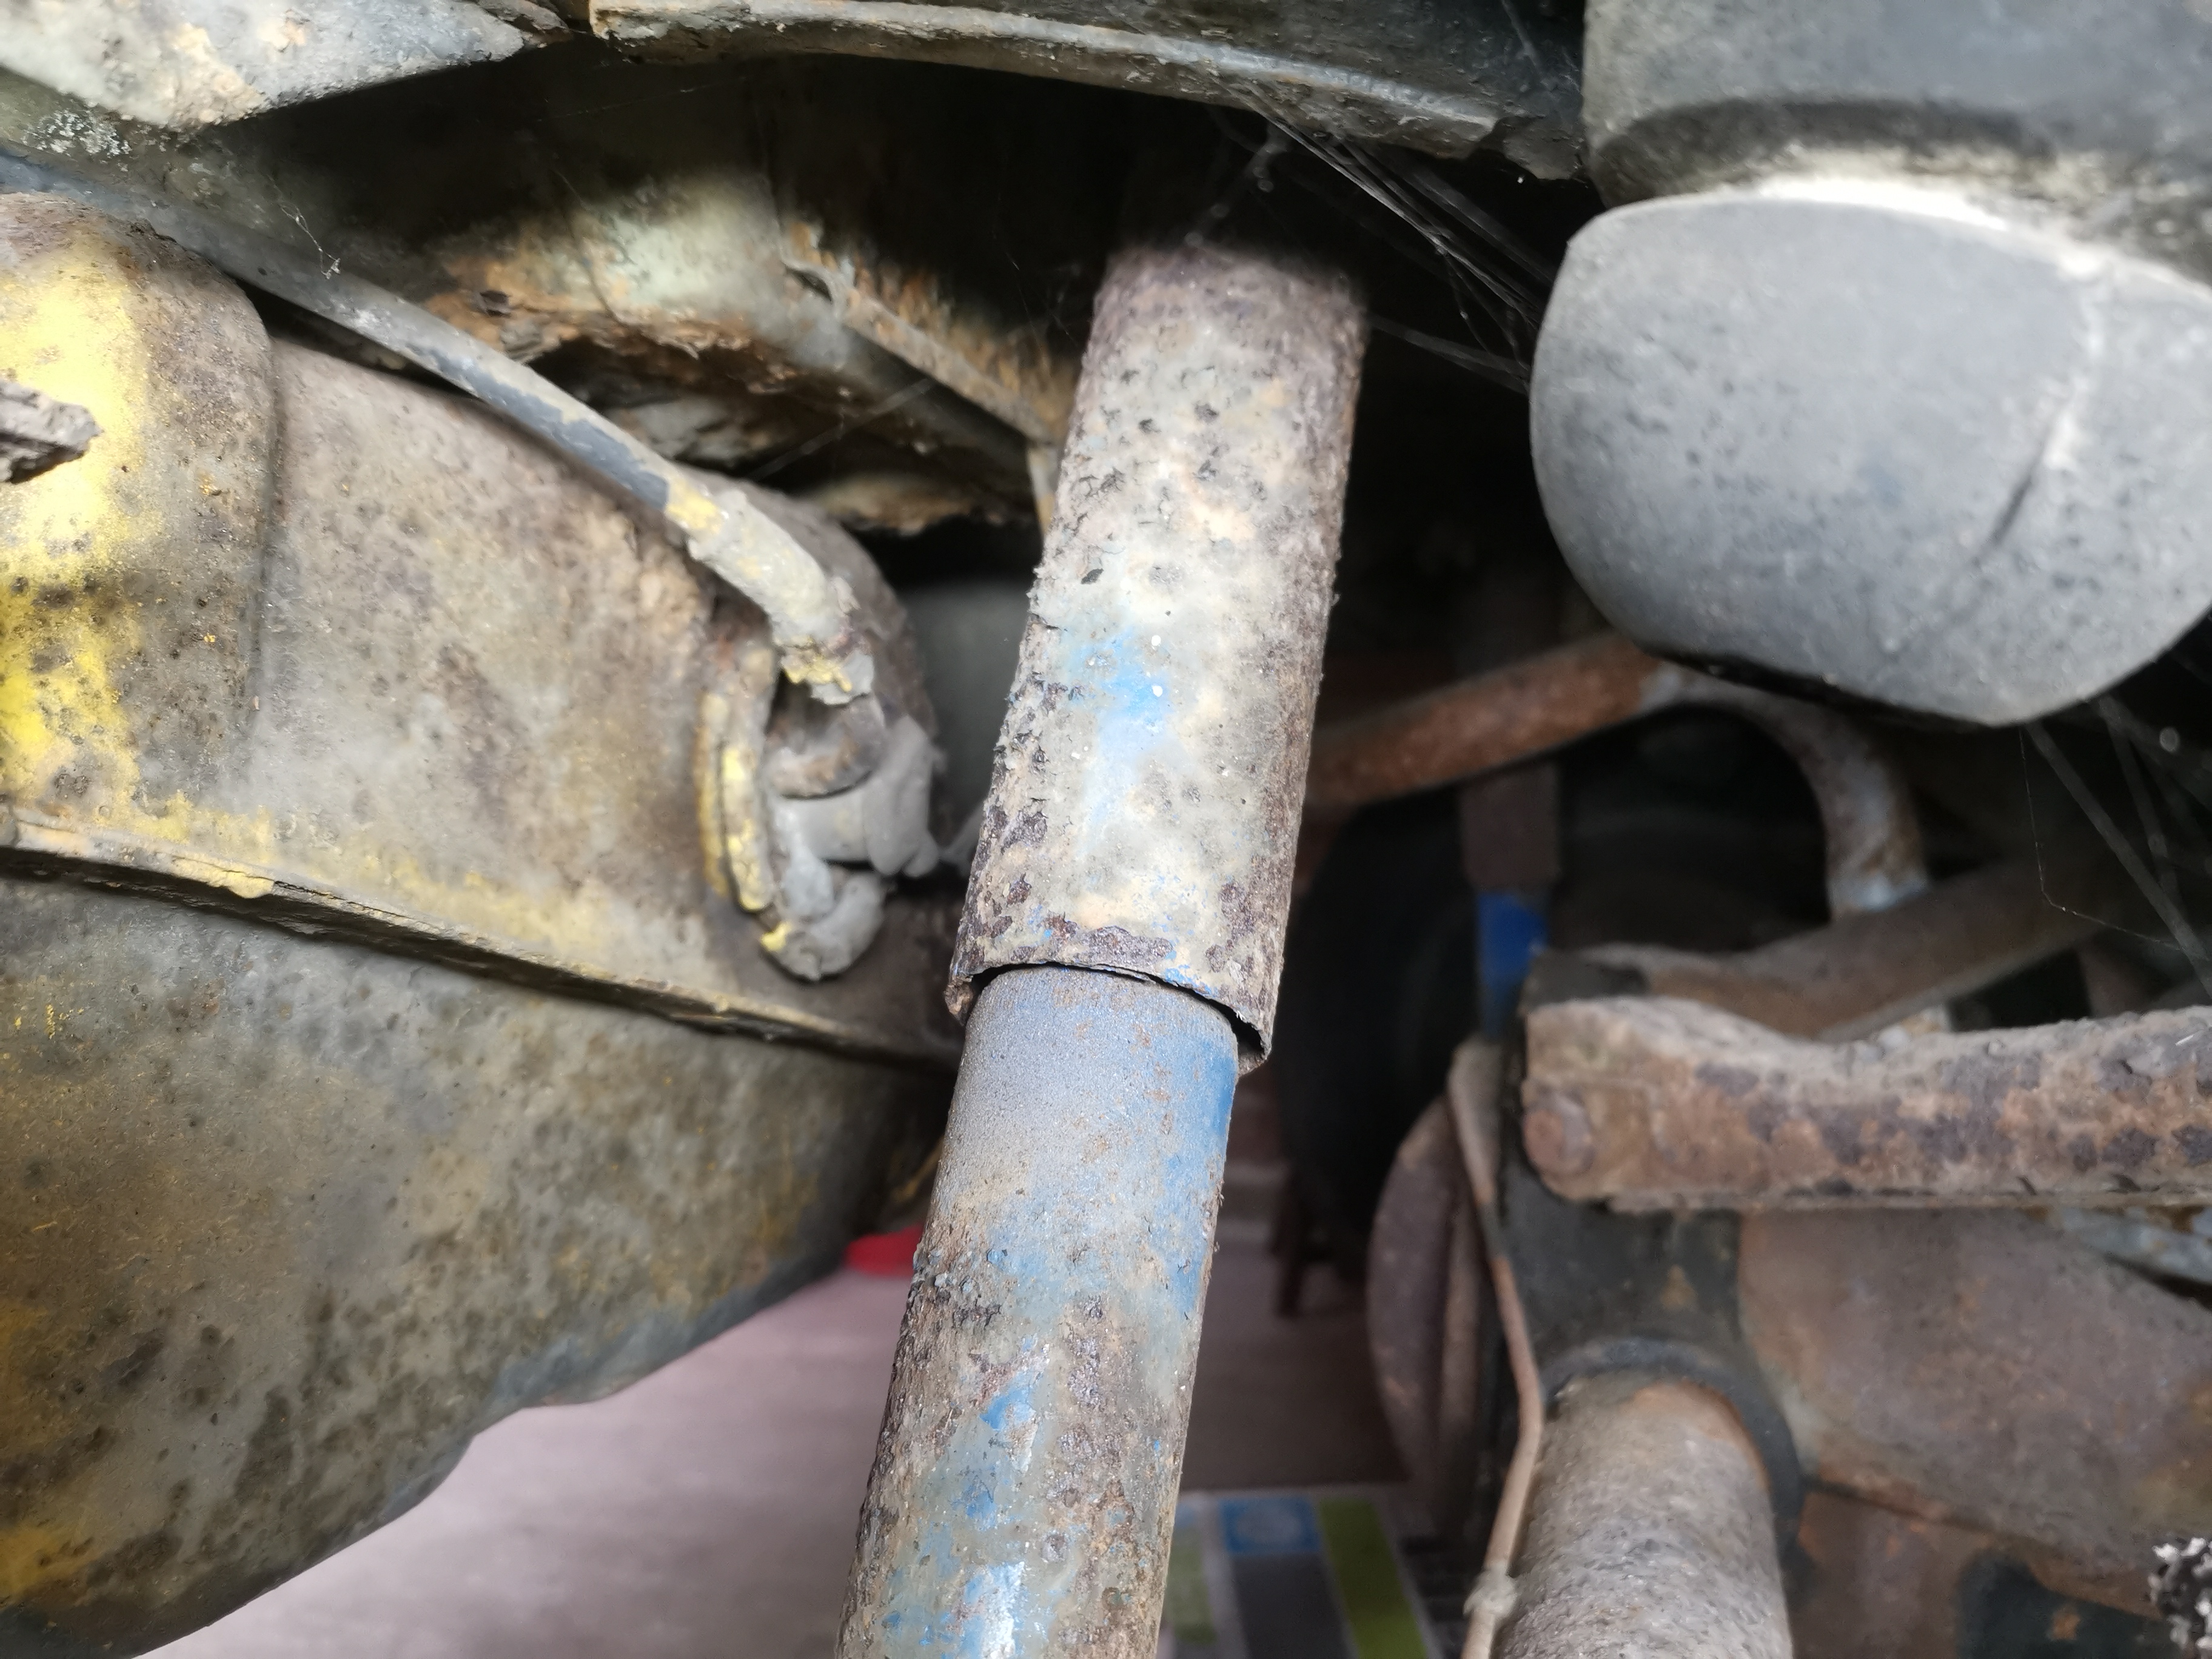
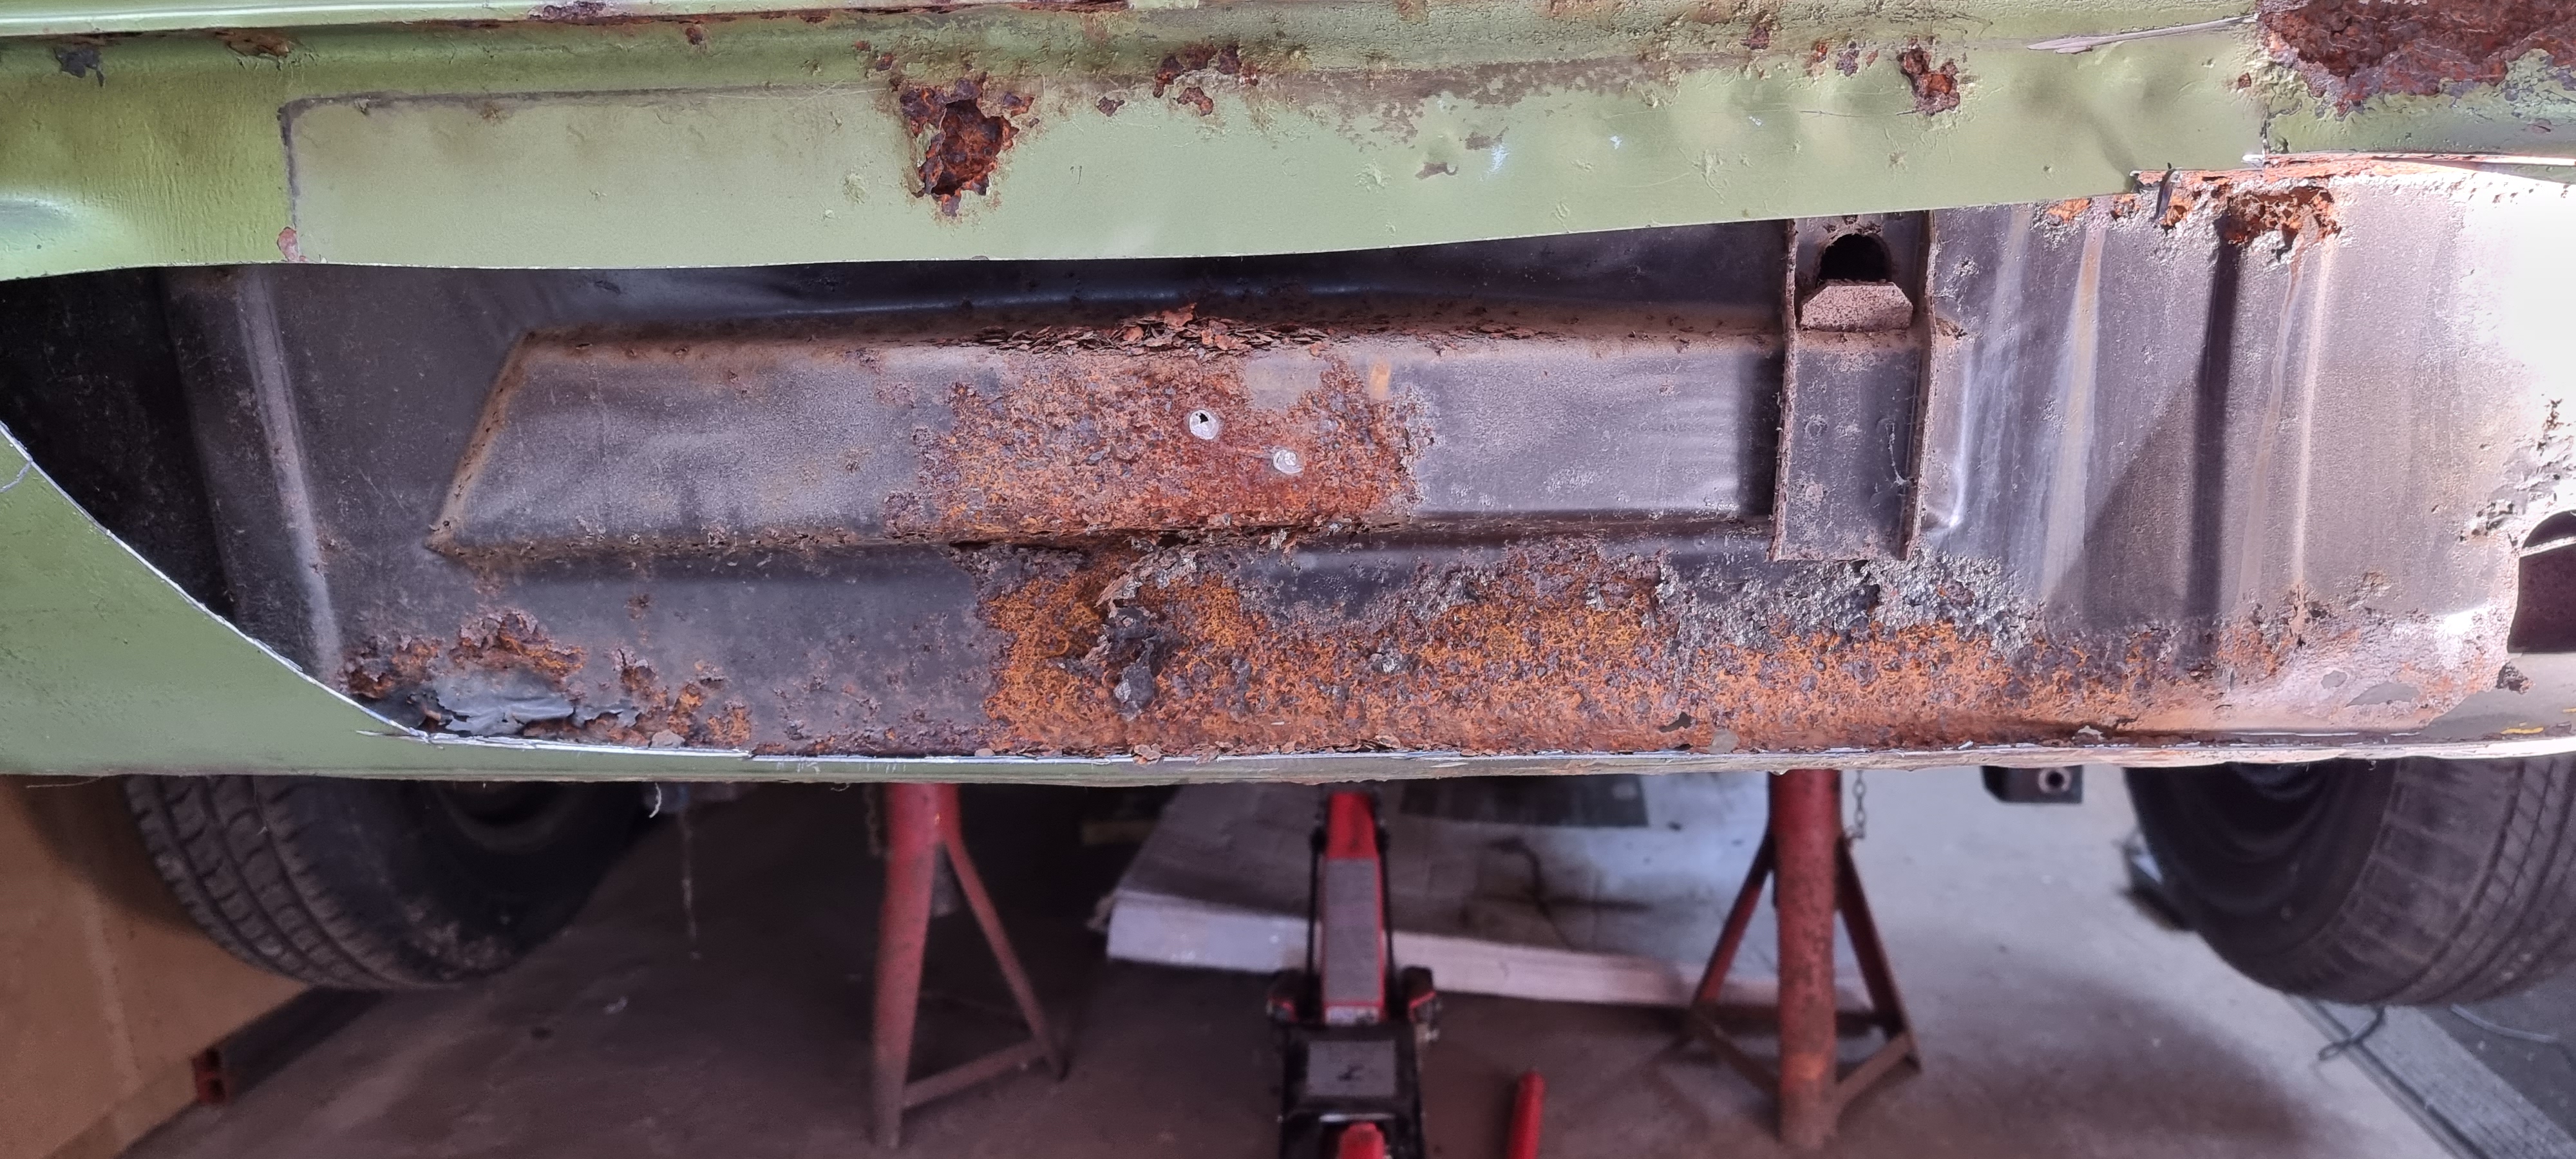
A look underneath
Going to need some serious work. I'm not looking forward to working upside down!
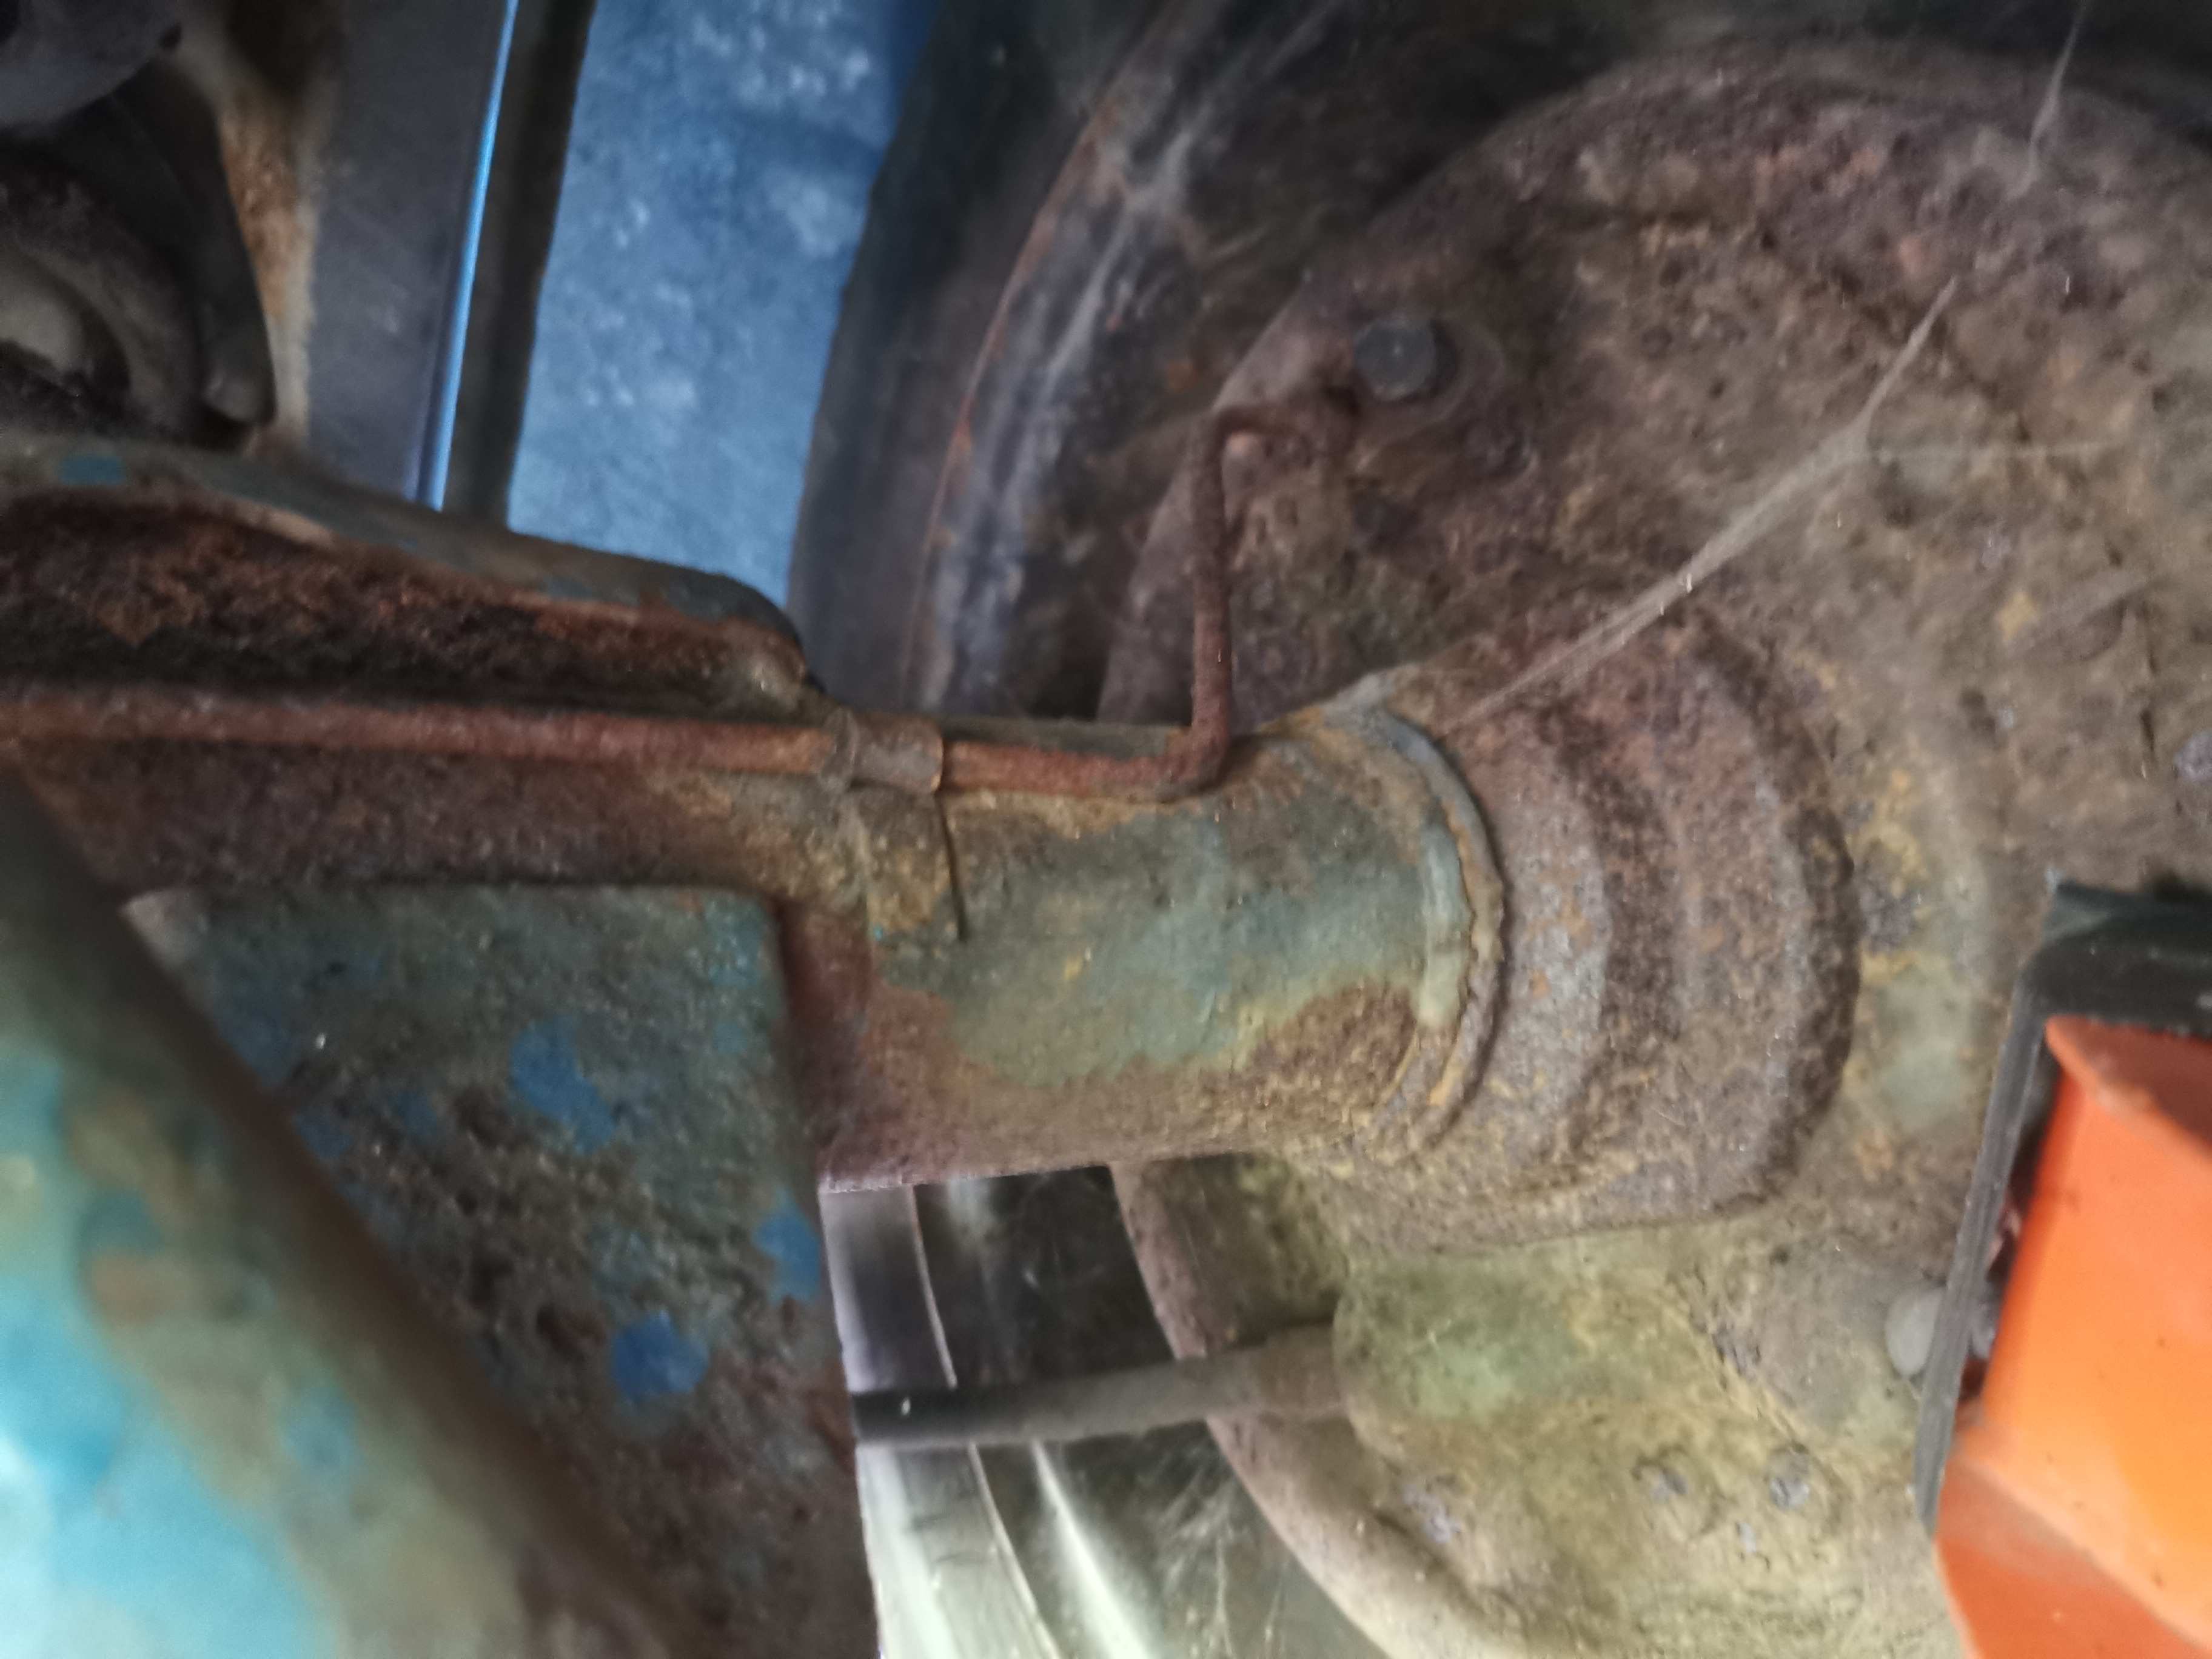
A look underneath
Mmmm, looks a bit rusty... and full of cobwebs...
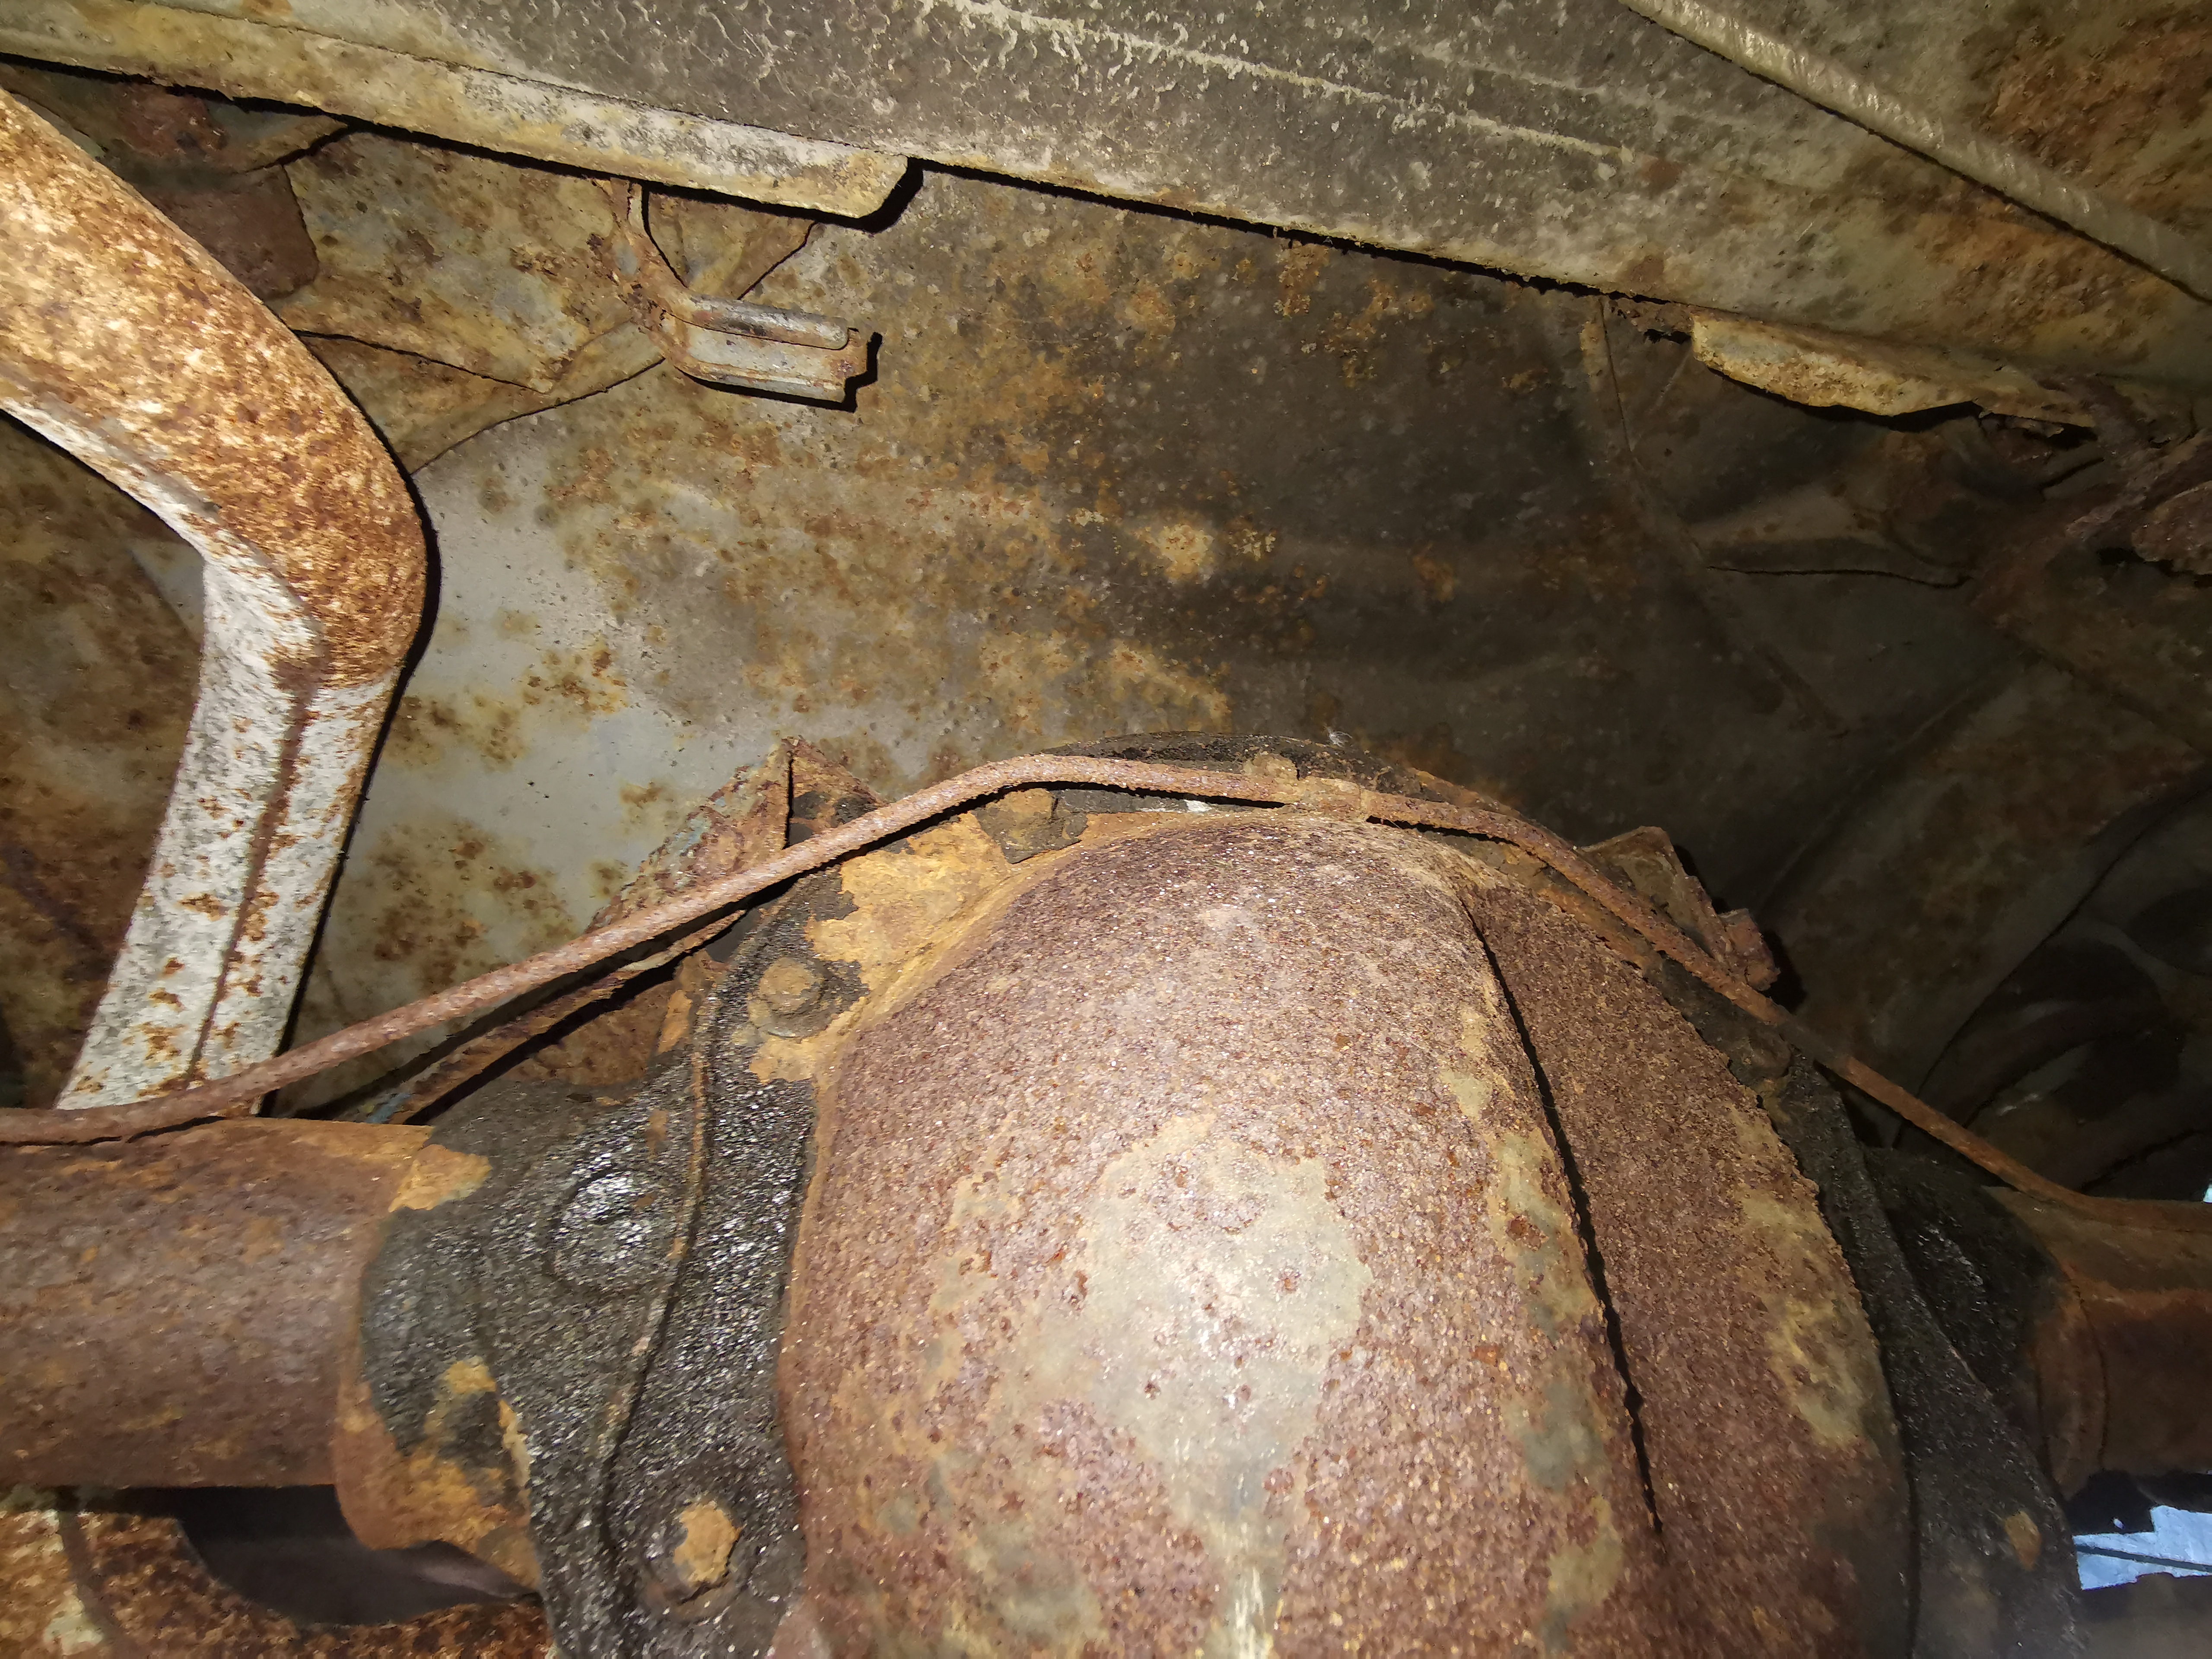
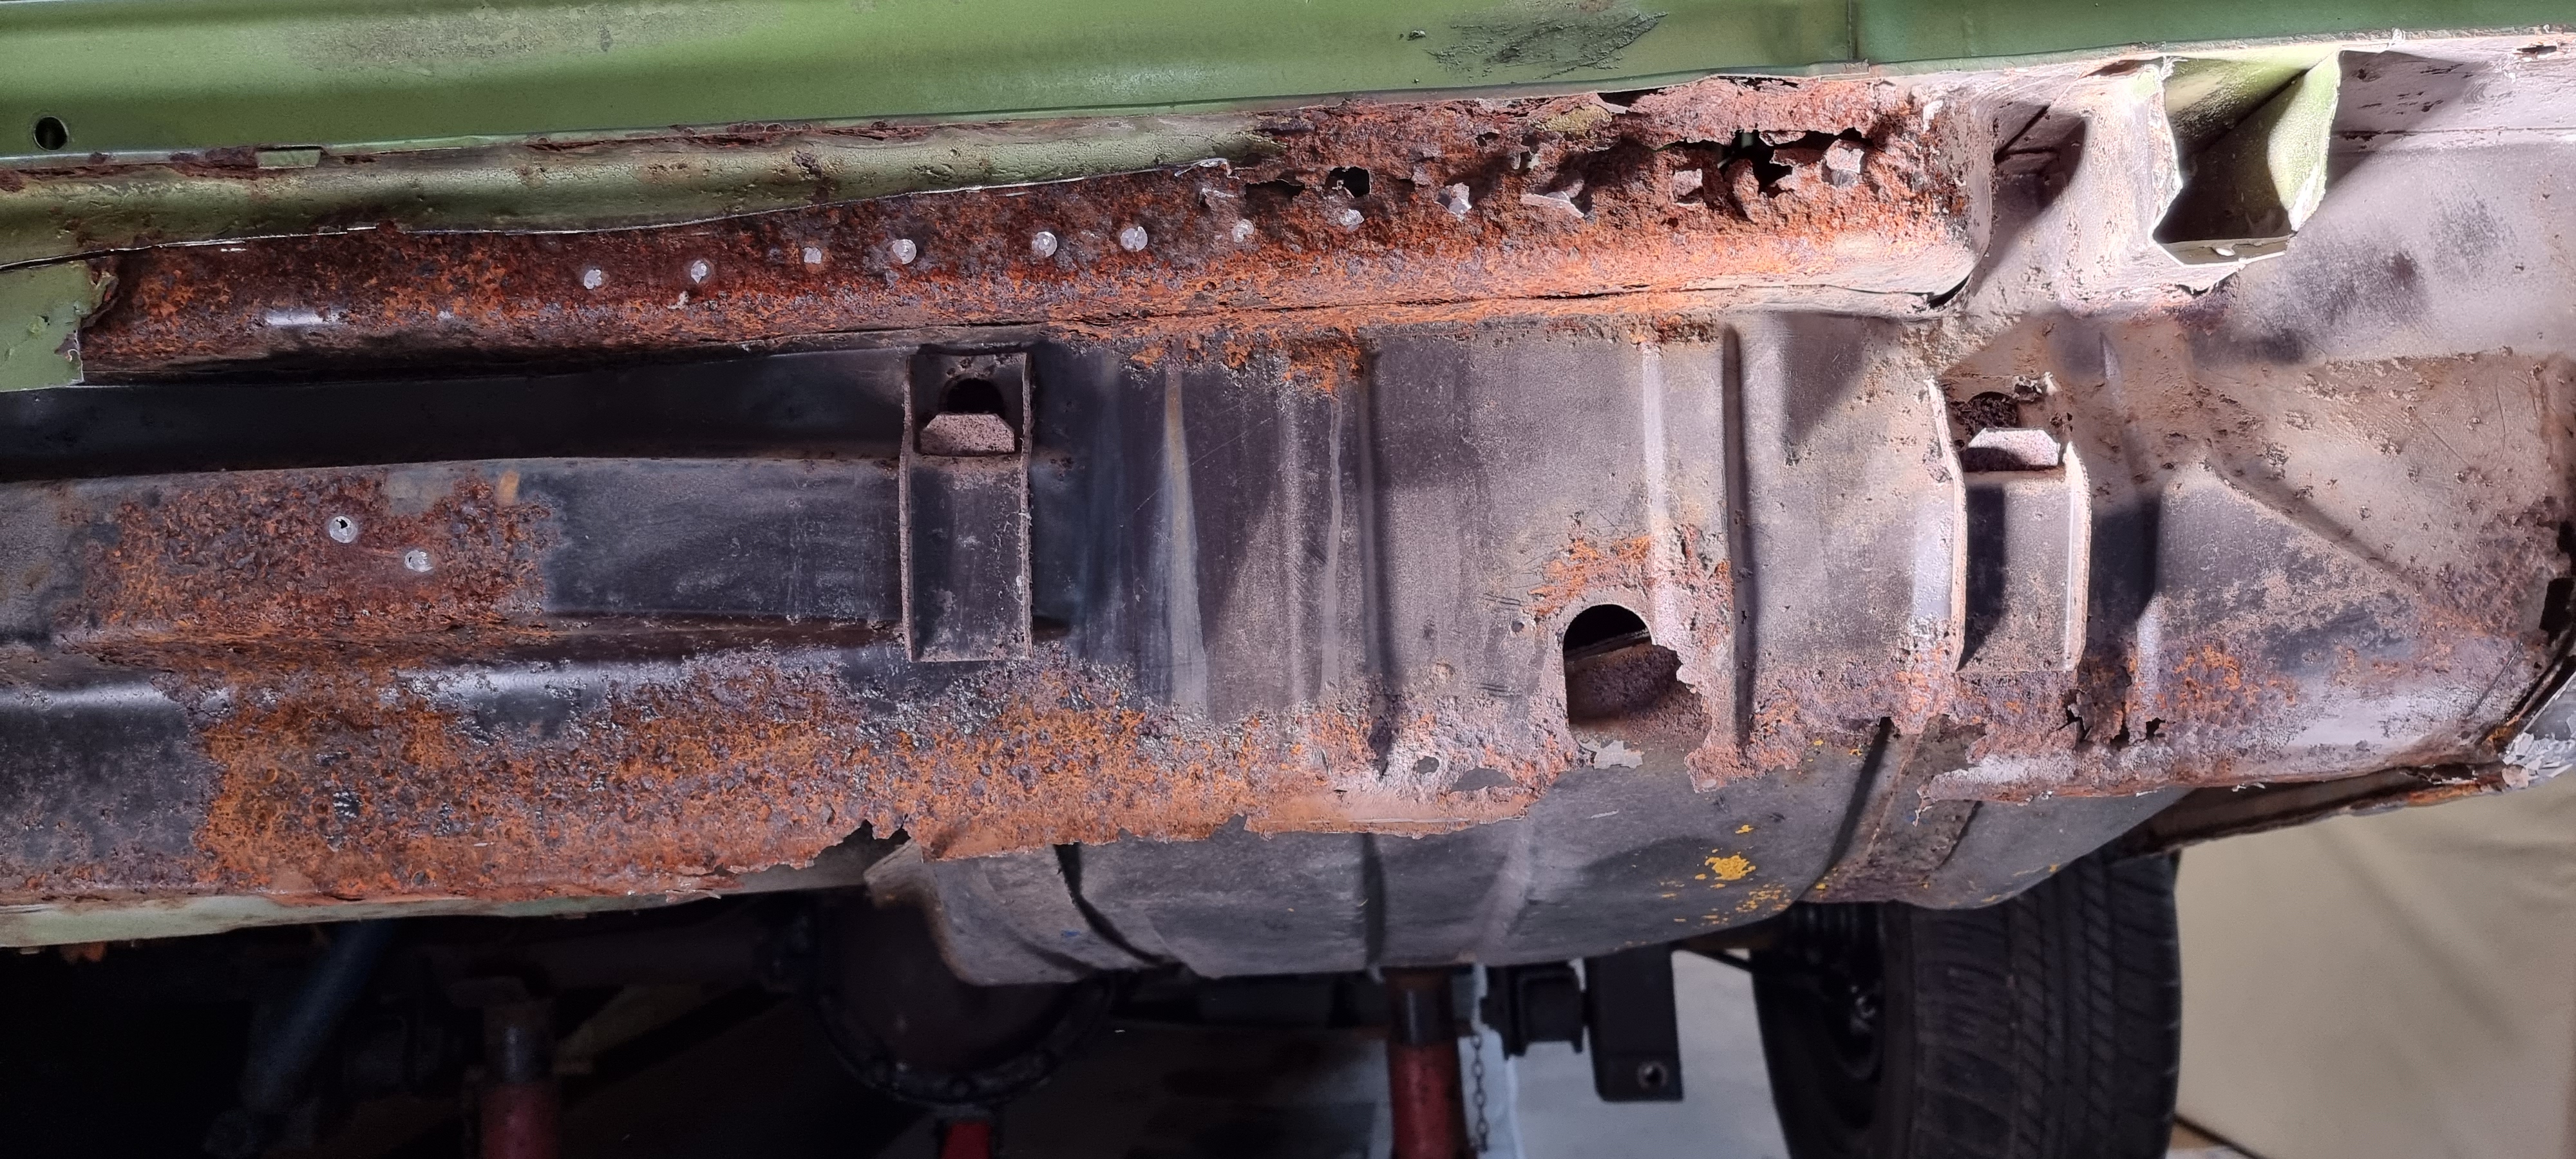
A look underneath
Oh dear, lots of rust.
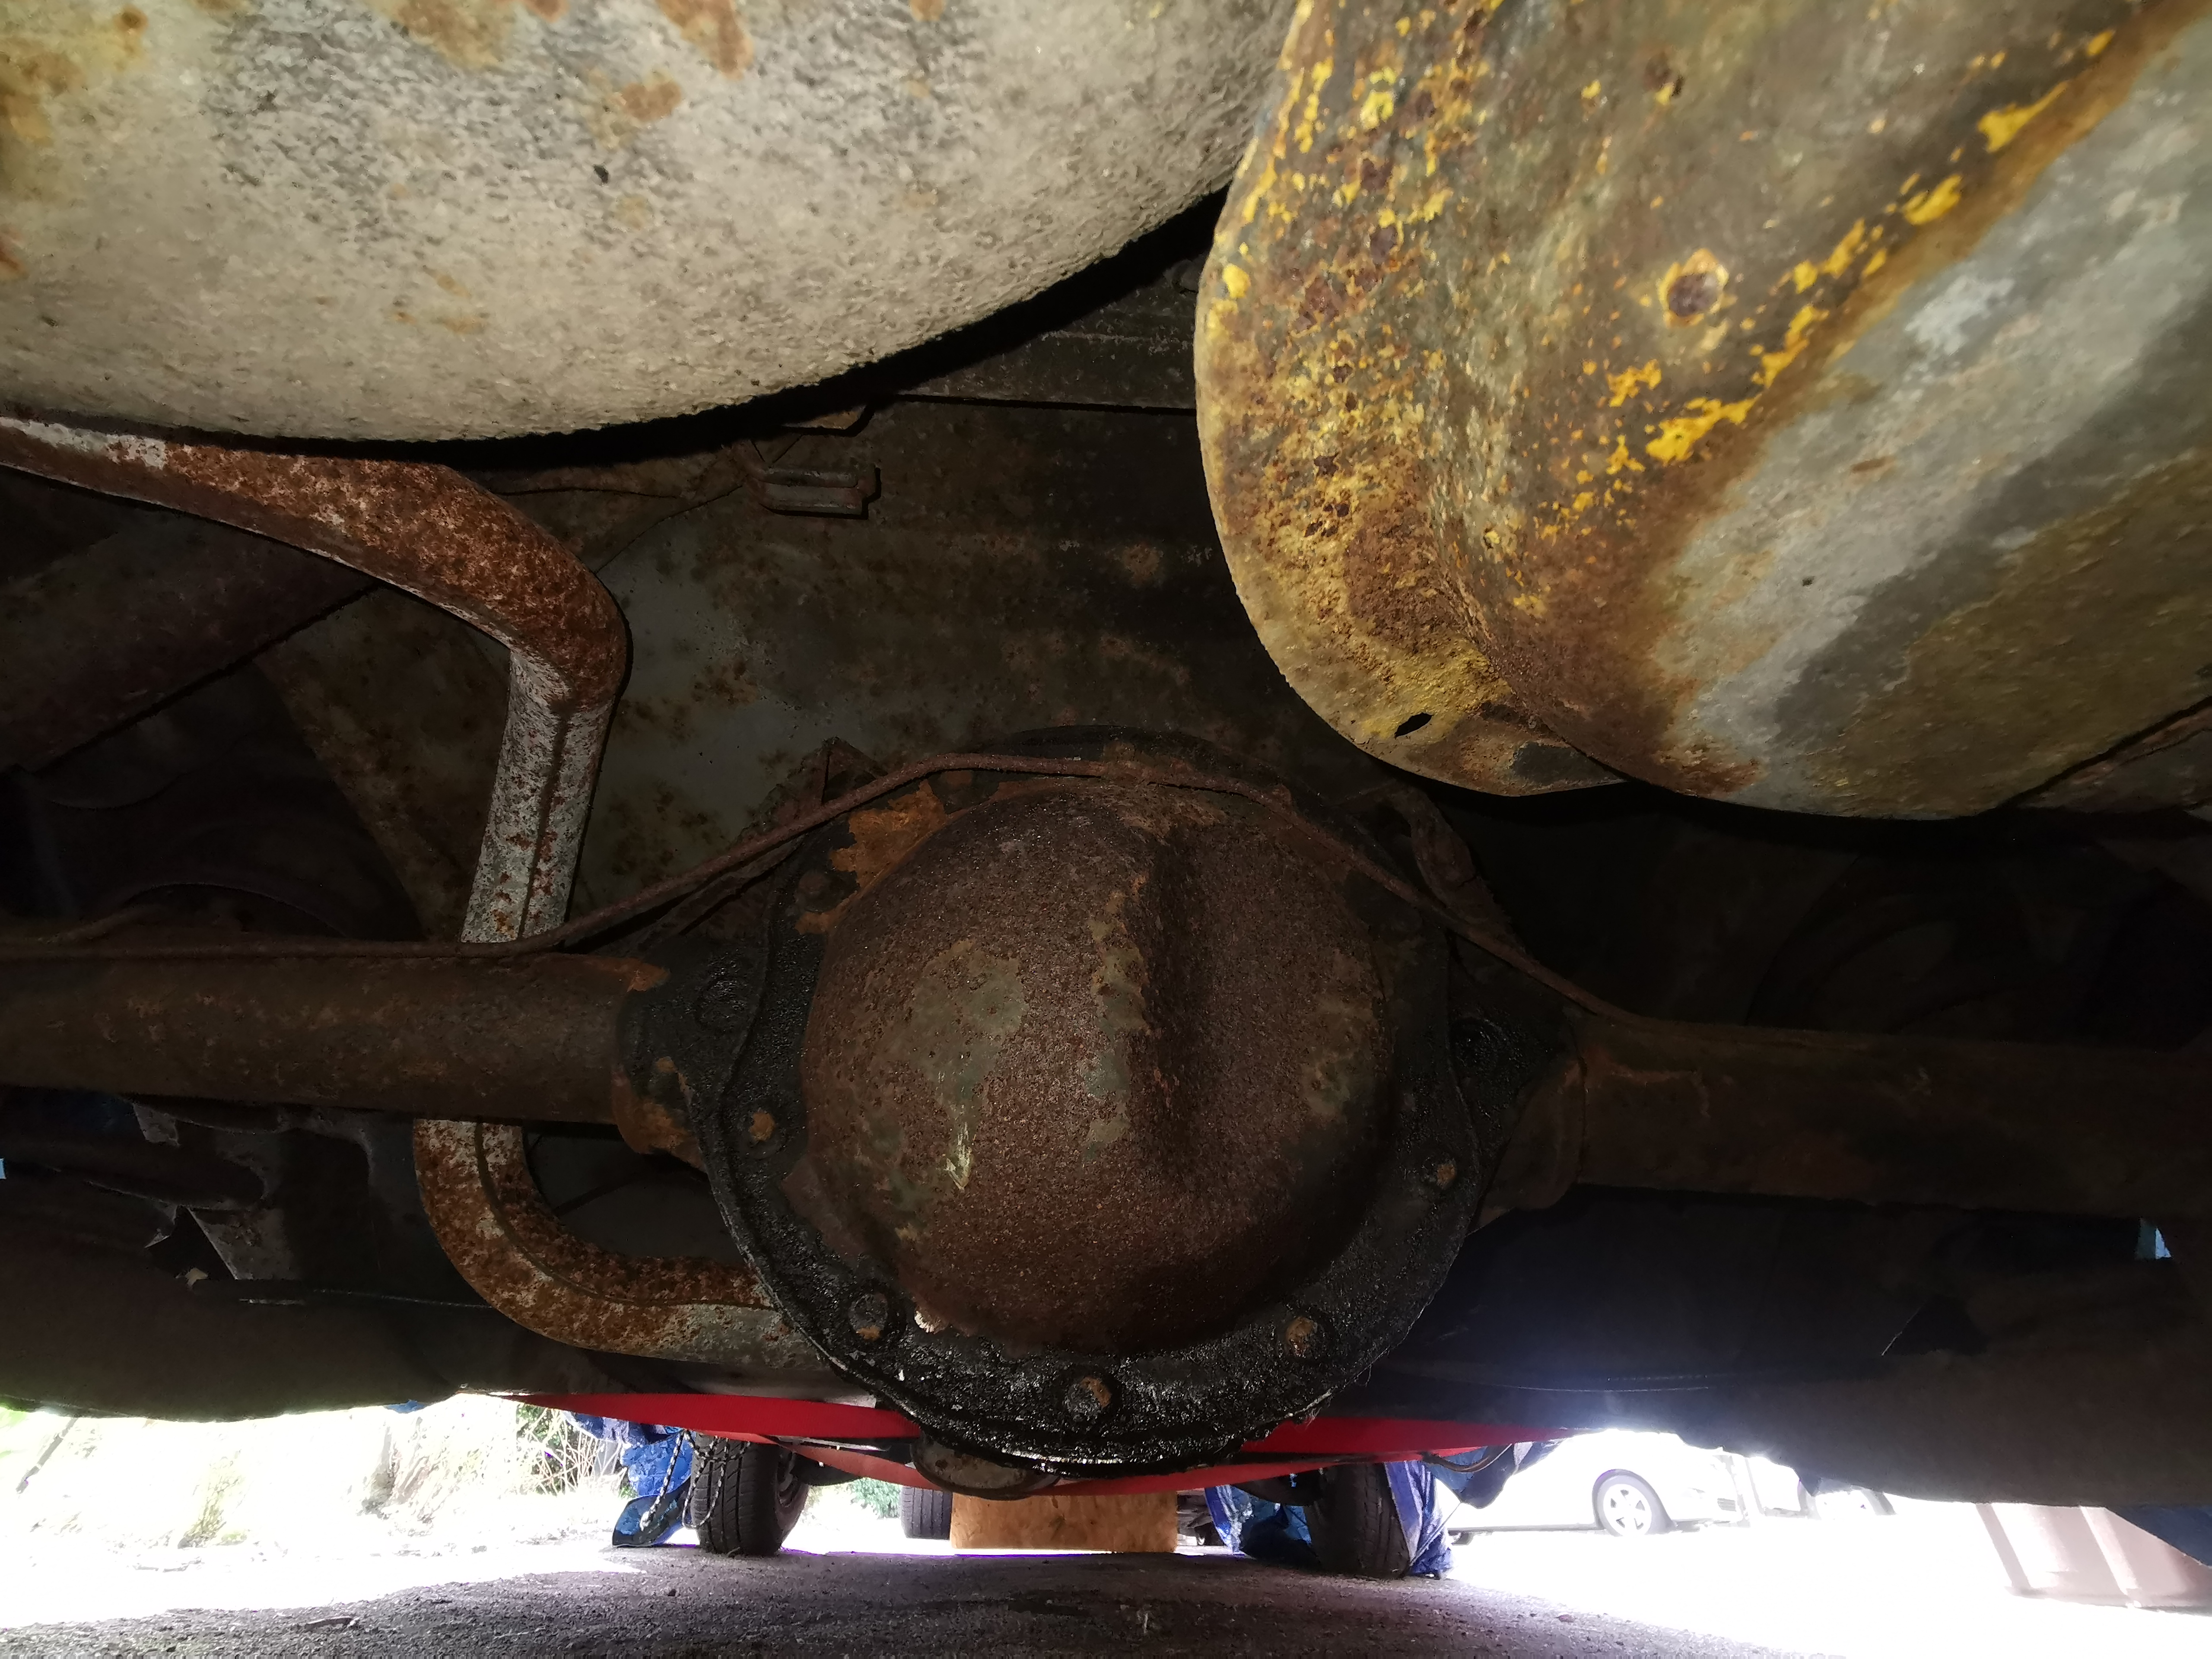
A look underneath
The exhaust and fuel tank are also rusty.
A look underneath
Another view of the petrol tank.
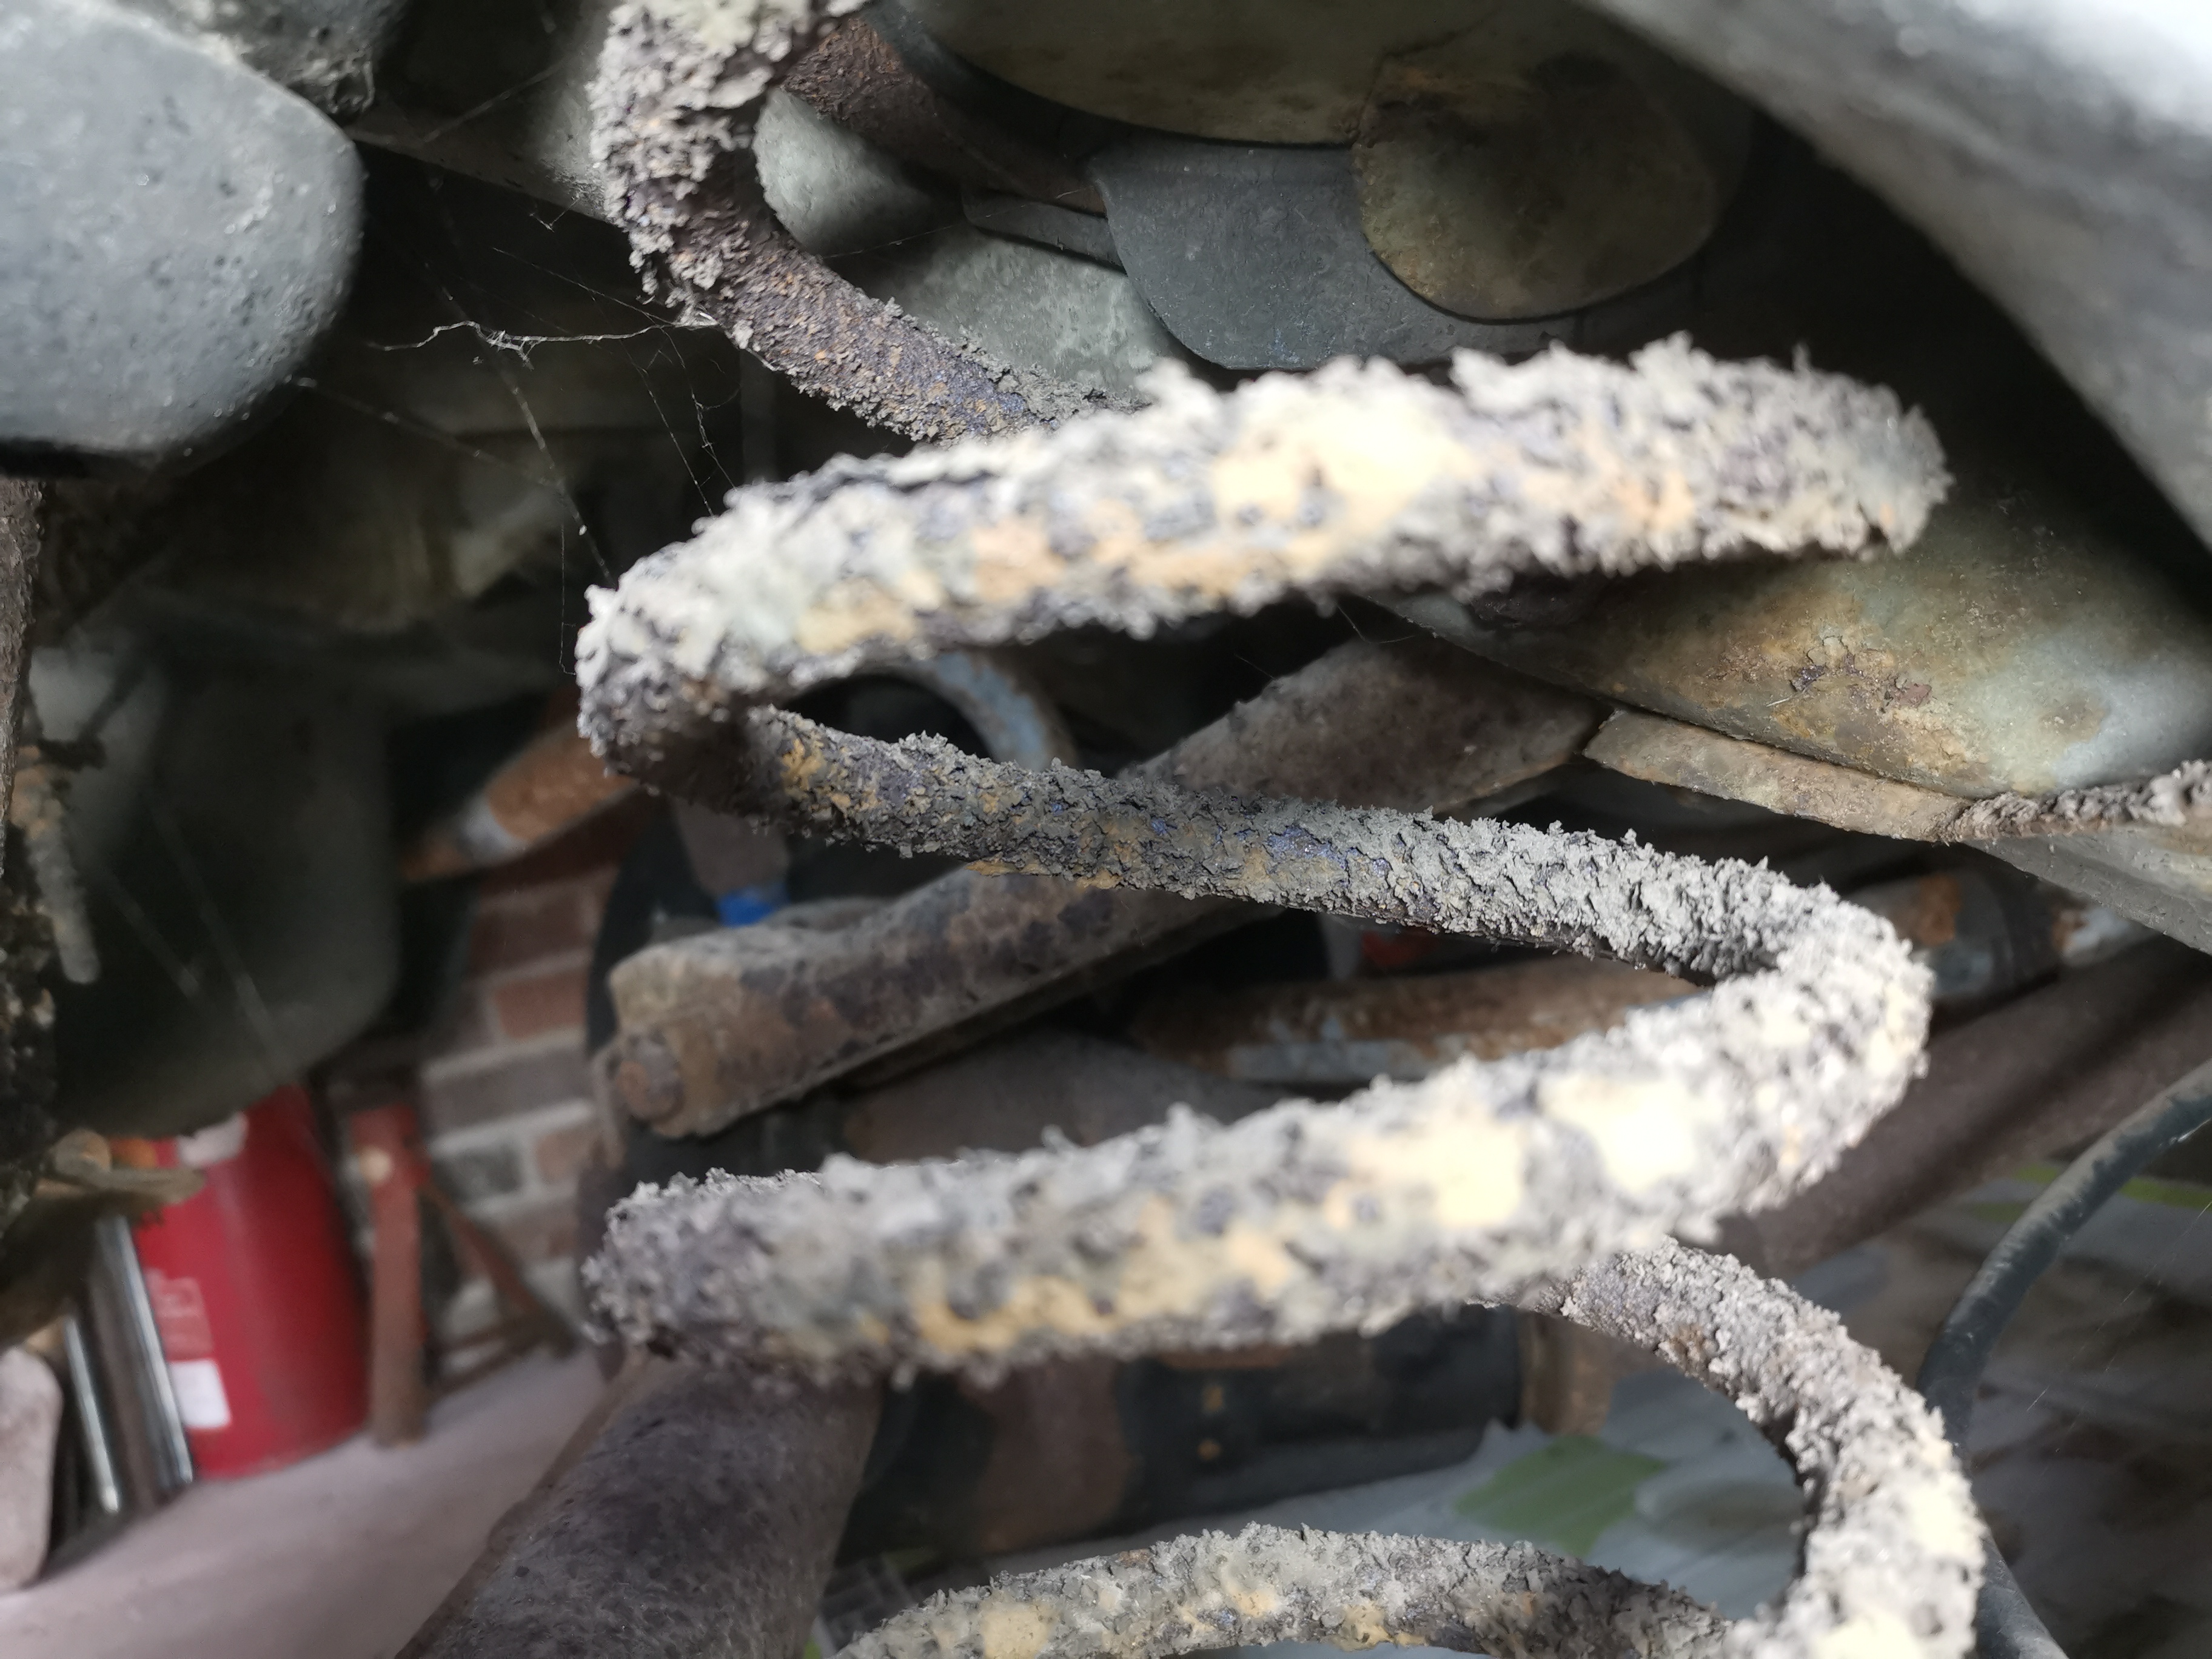
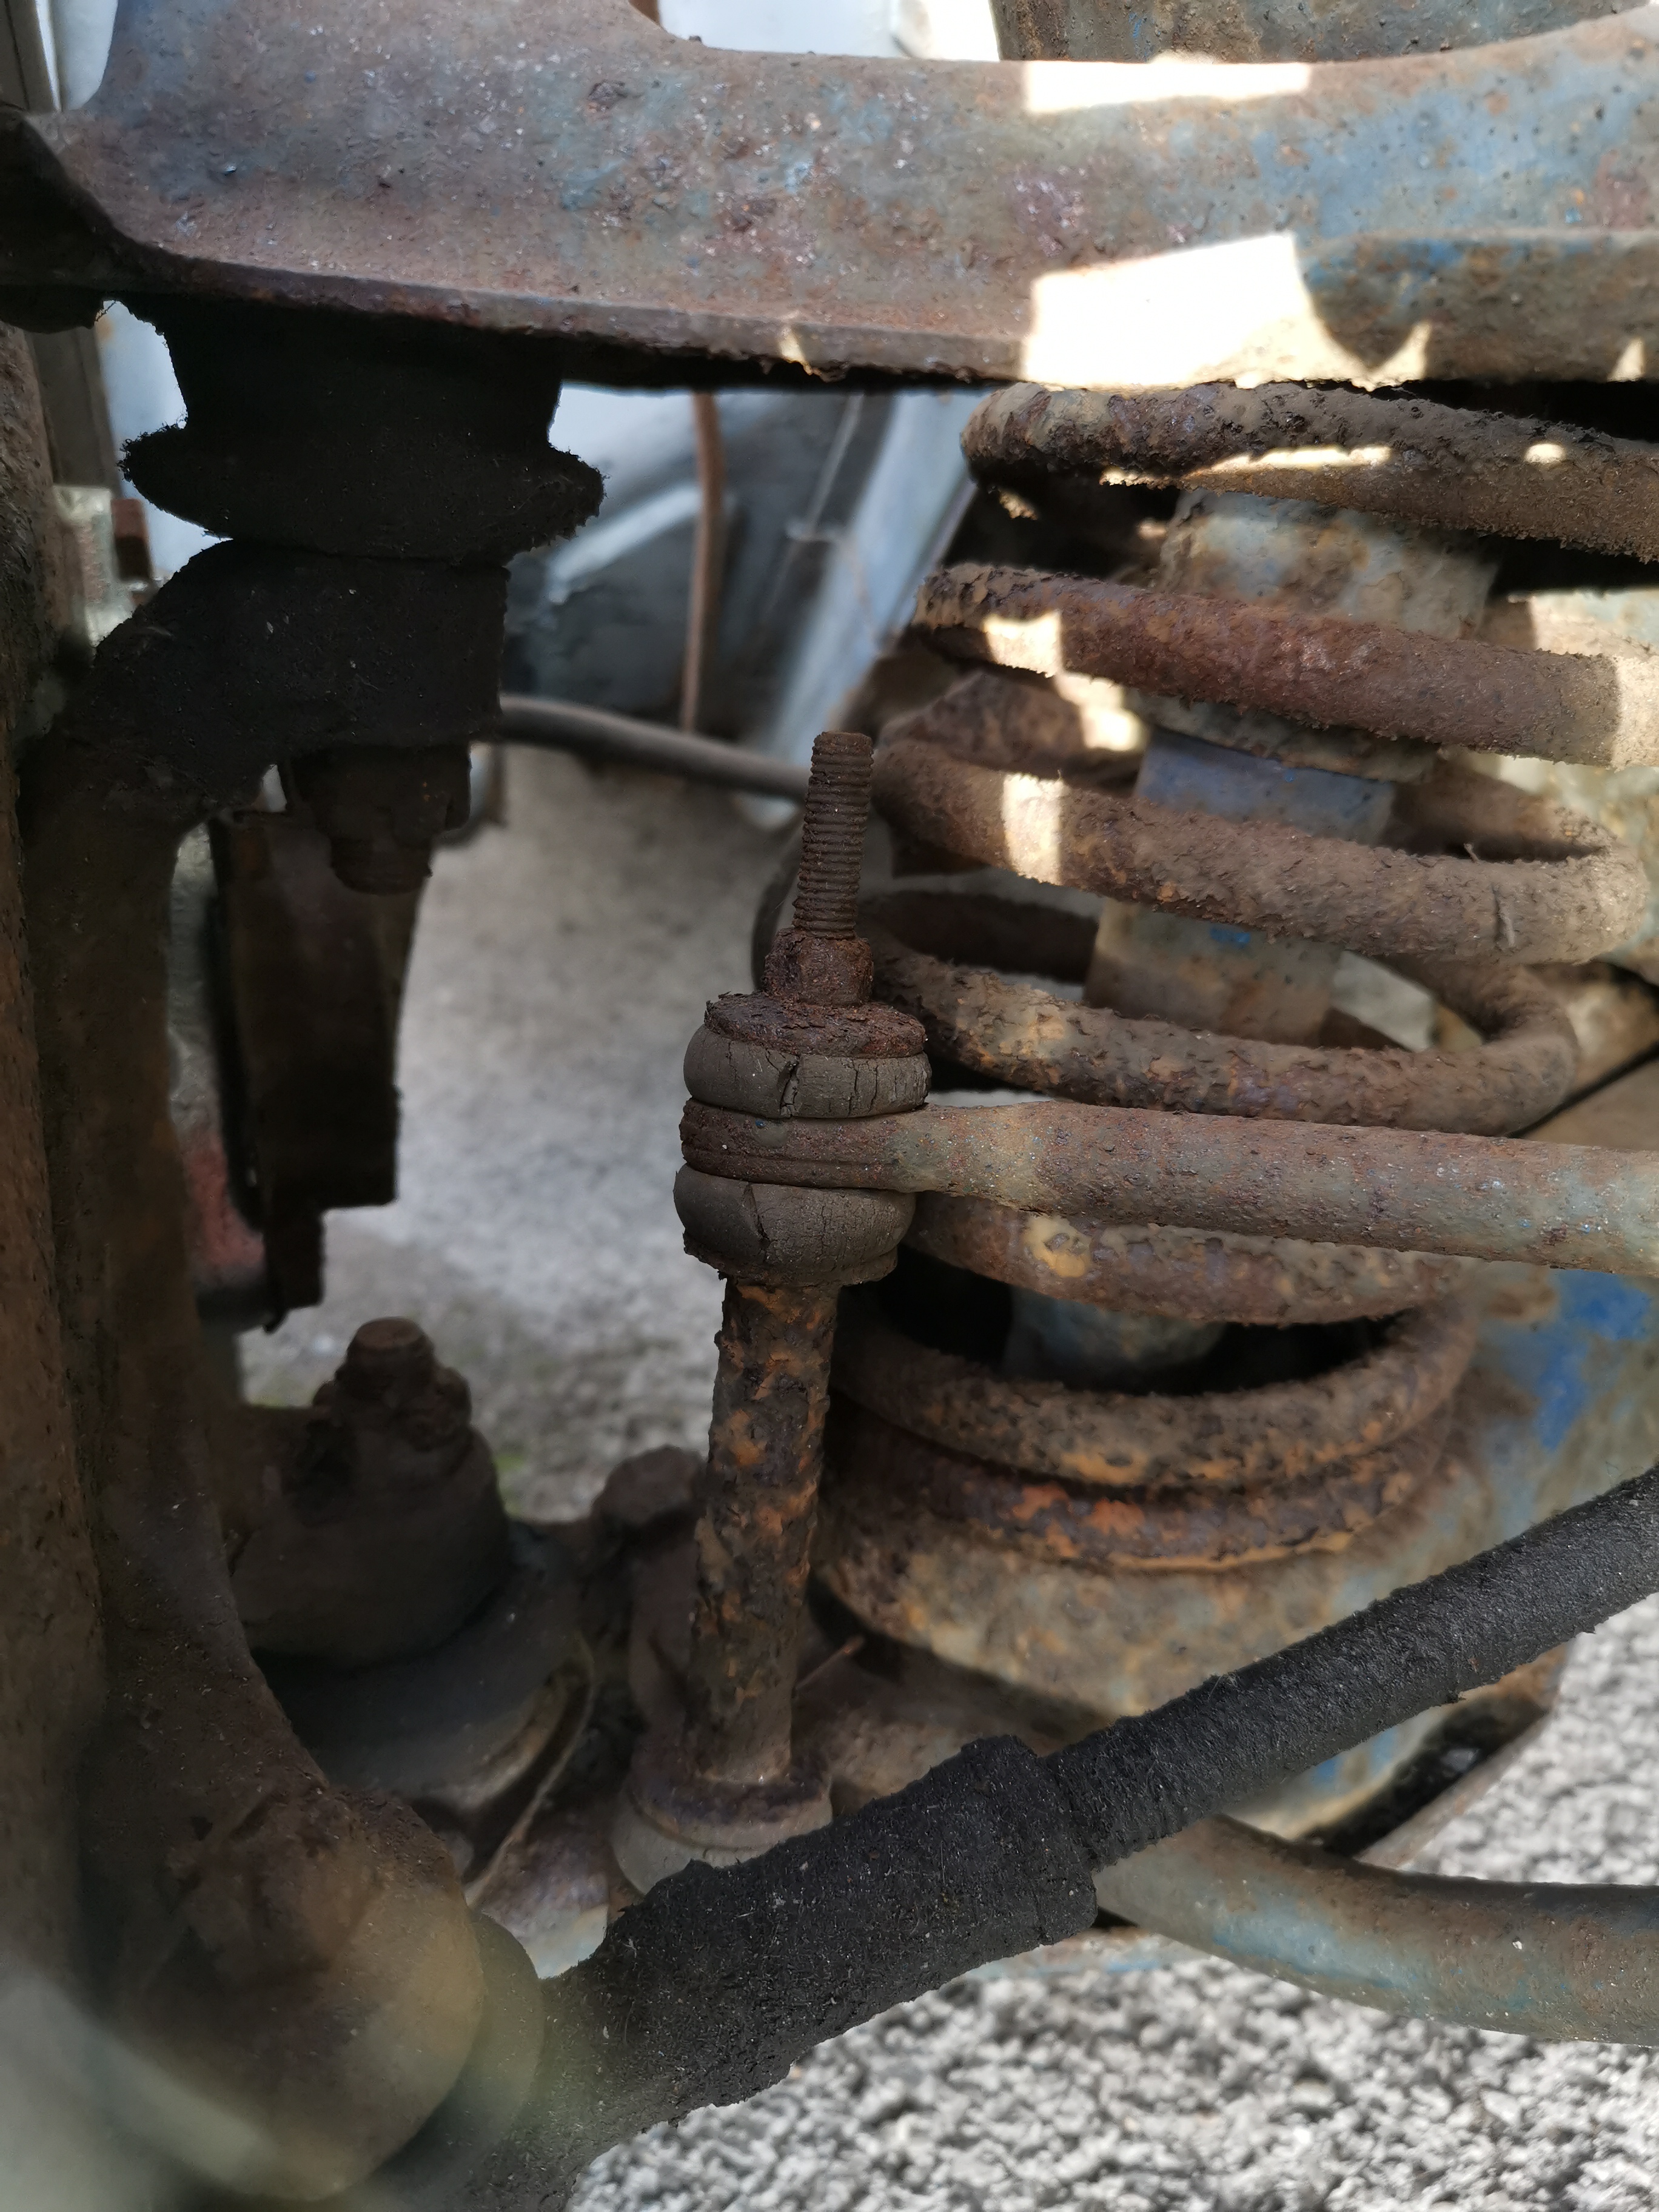
A look underneath
Springs look a bit crusty
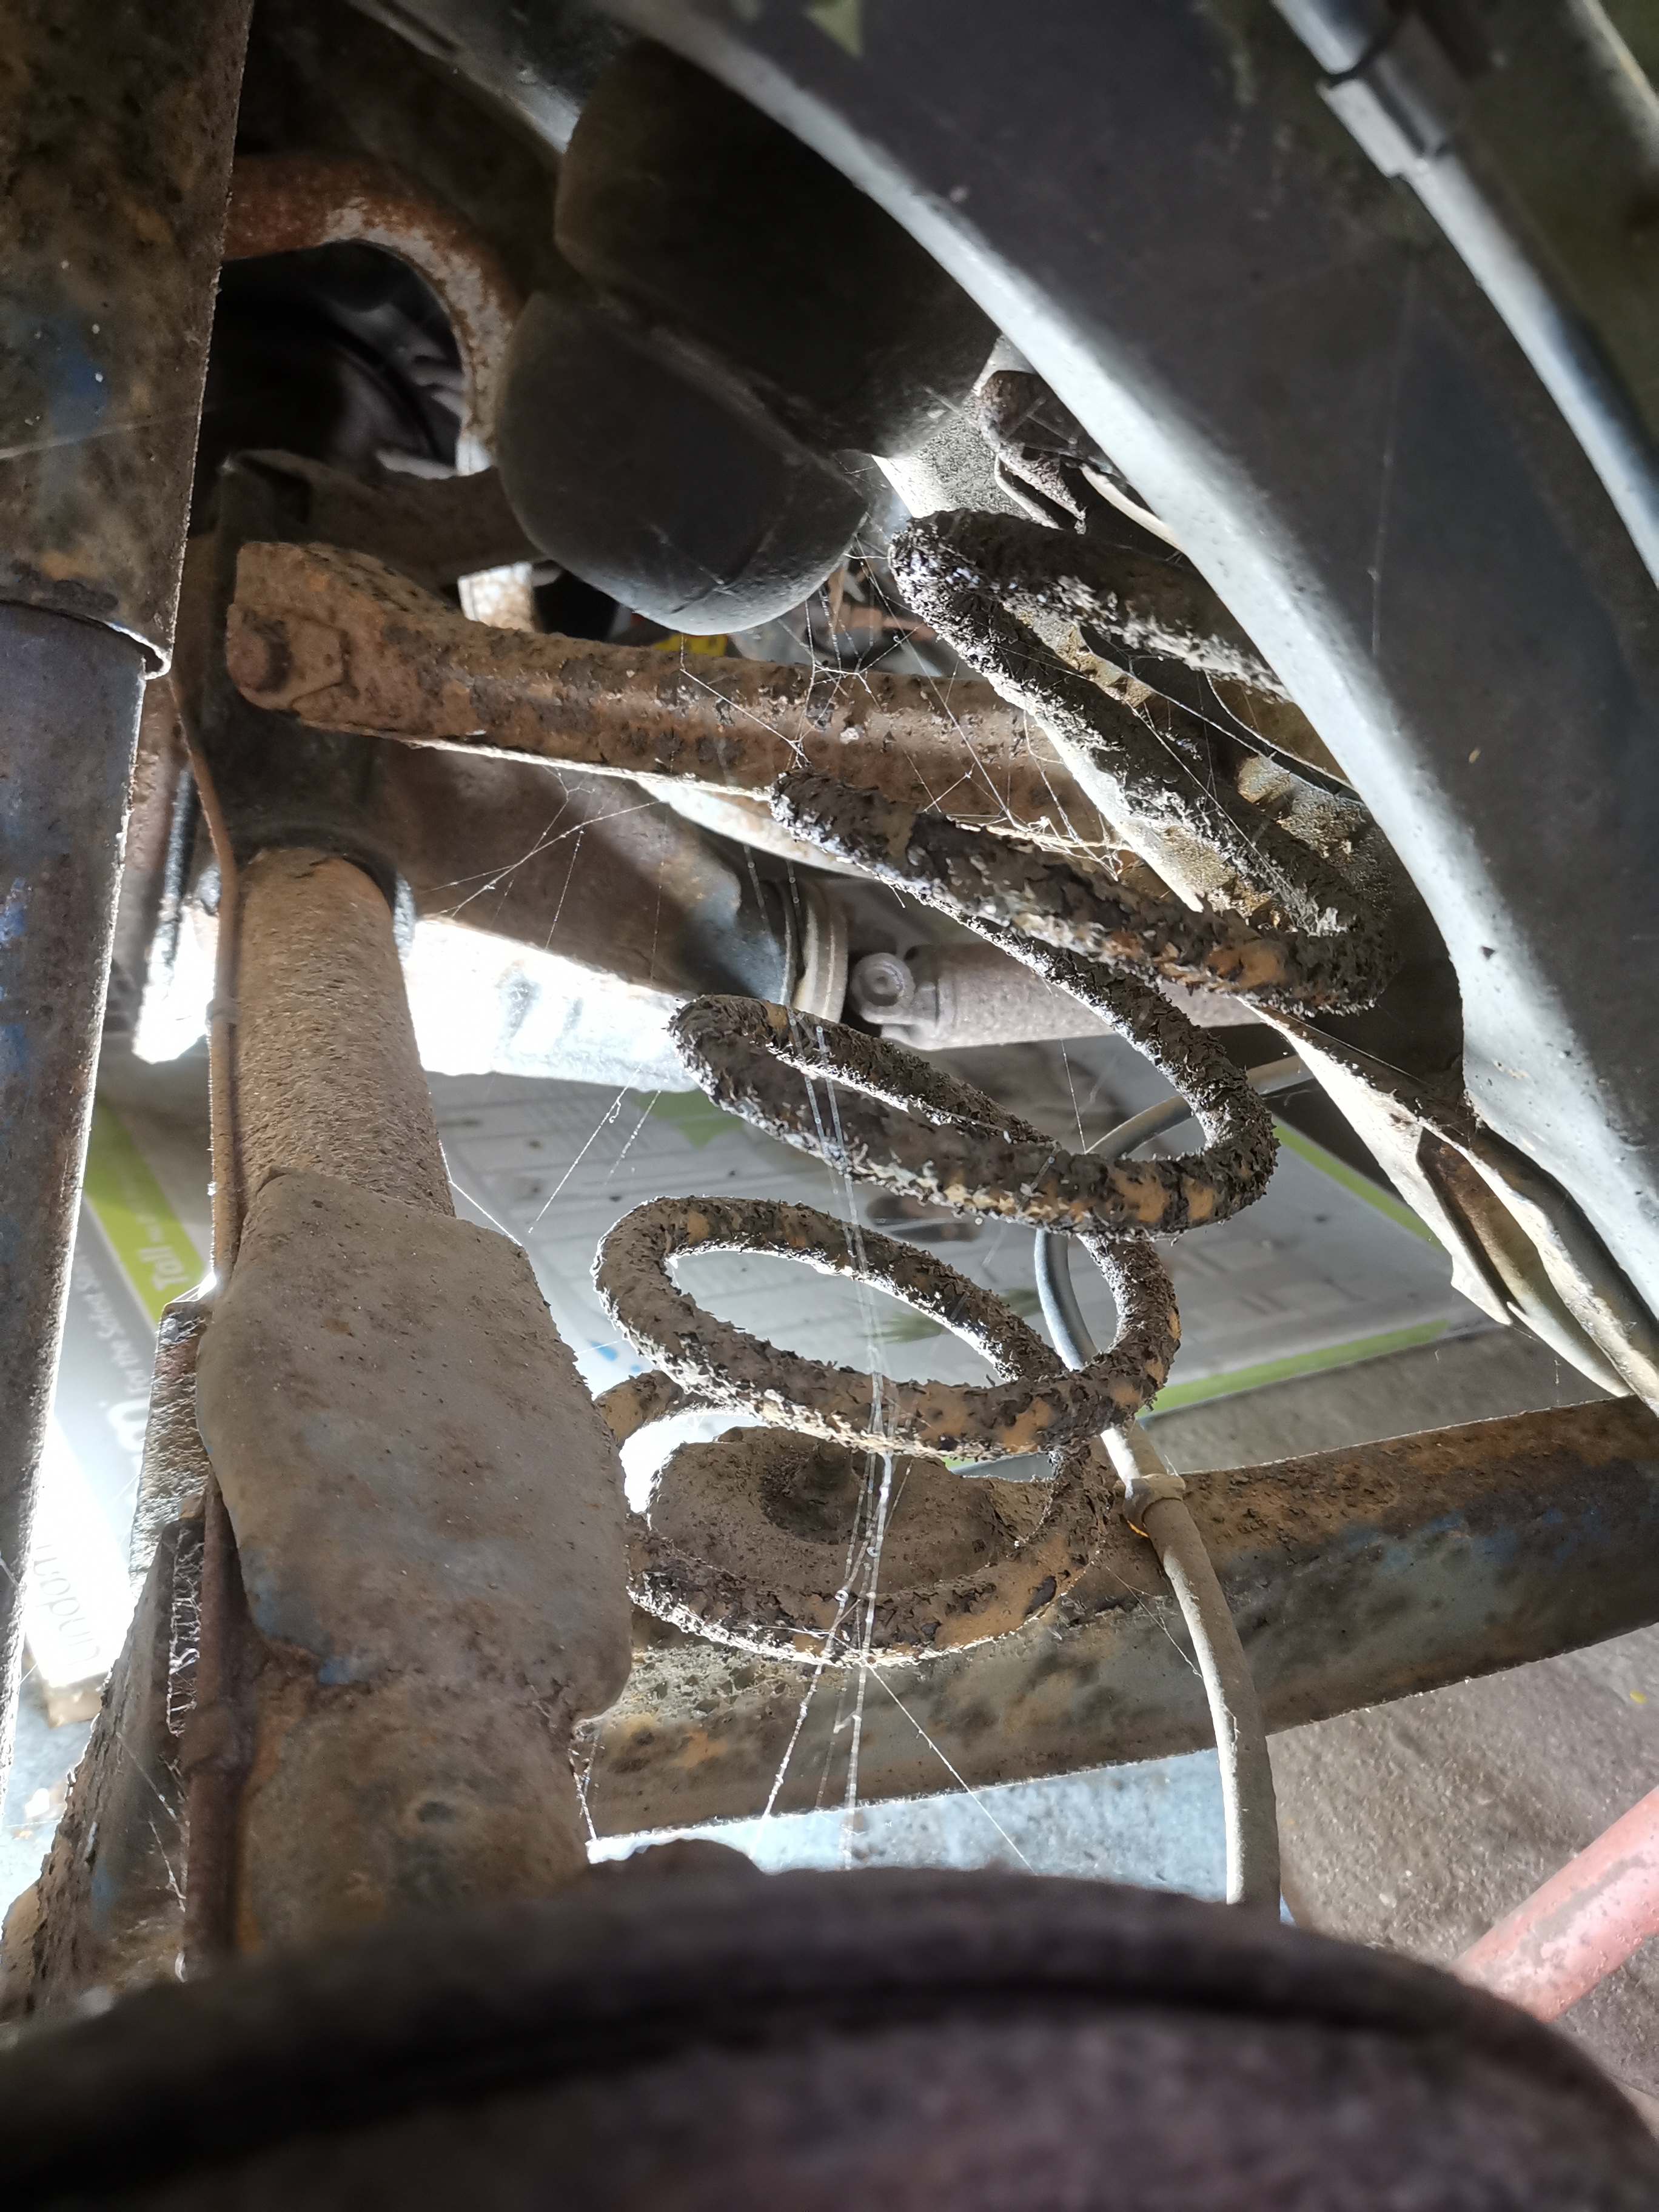
A look underneath
And more cobwebs!

Spare wheel well
The usual place for old cars to rust is the spare wheel well, and this one is no exception.
Closer inspection
Another area of damage on the rear valance covered in body filler.
Closer inspection
The water hoses are completely blocked up. Not good news!
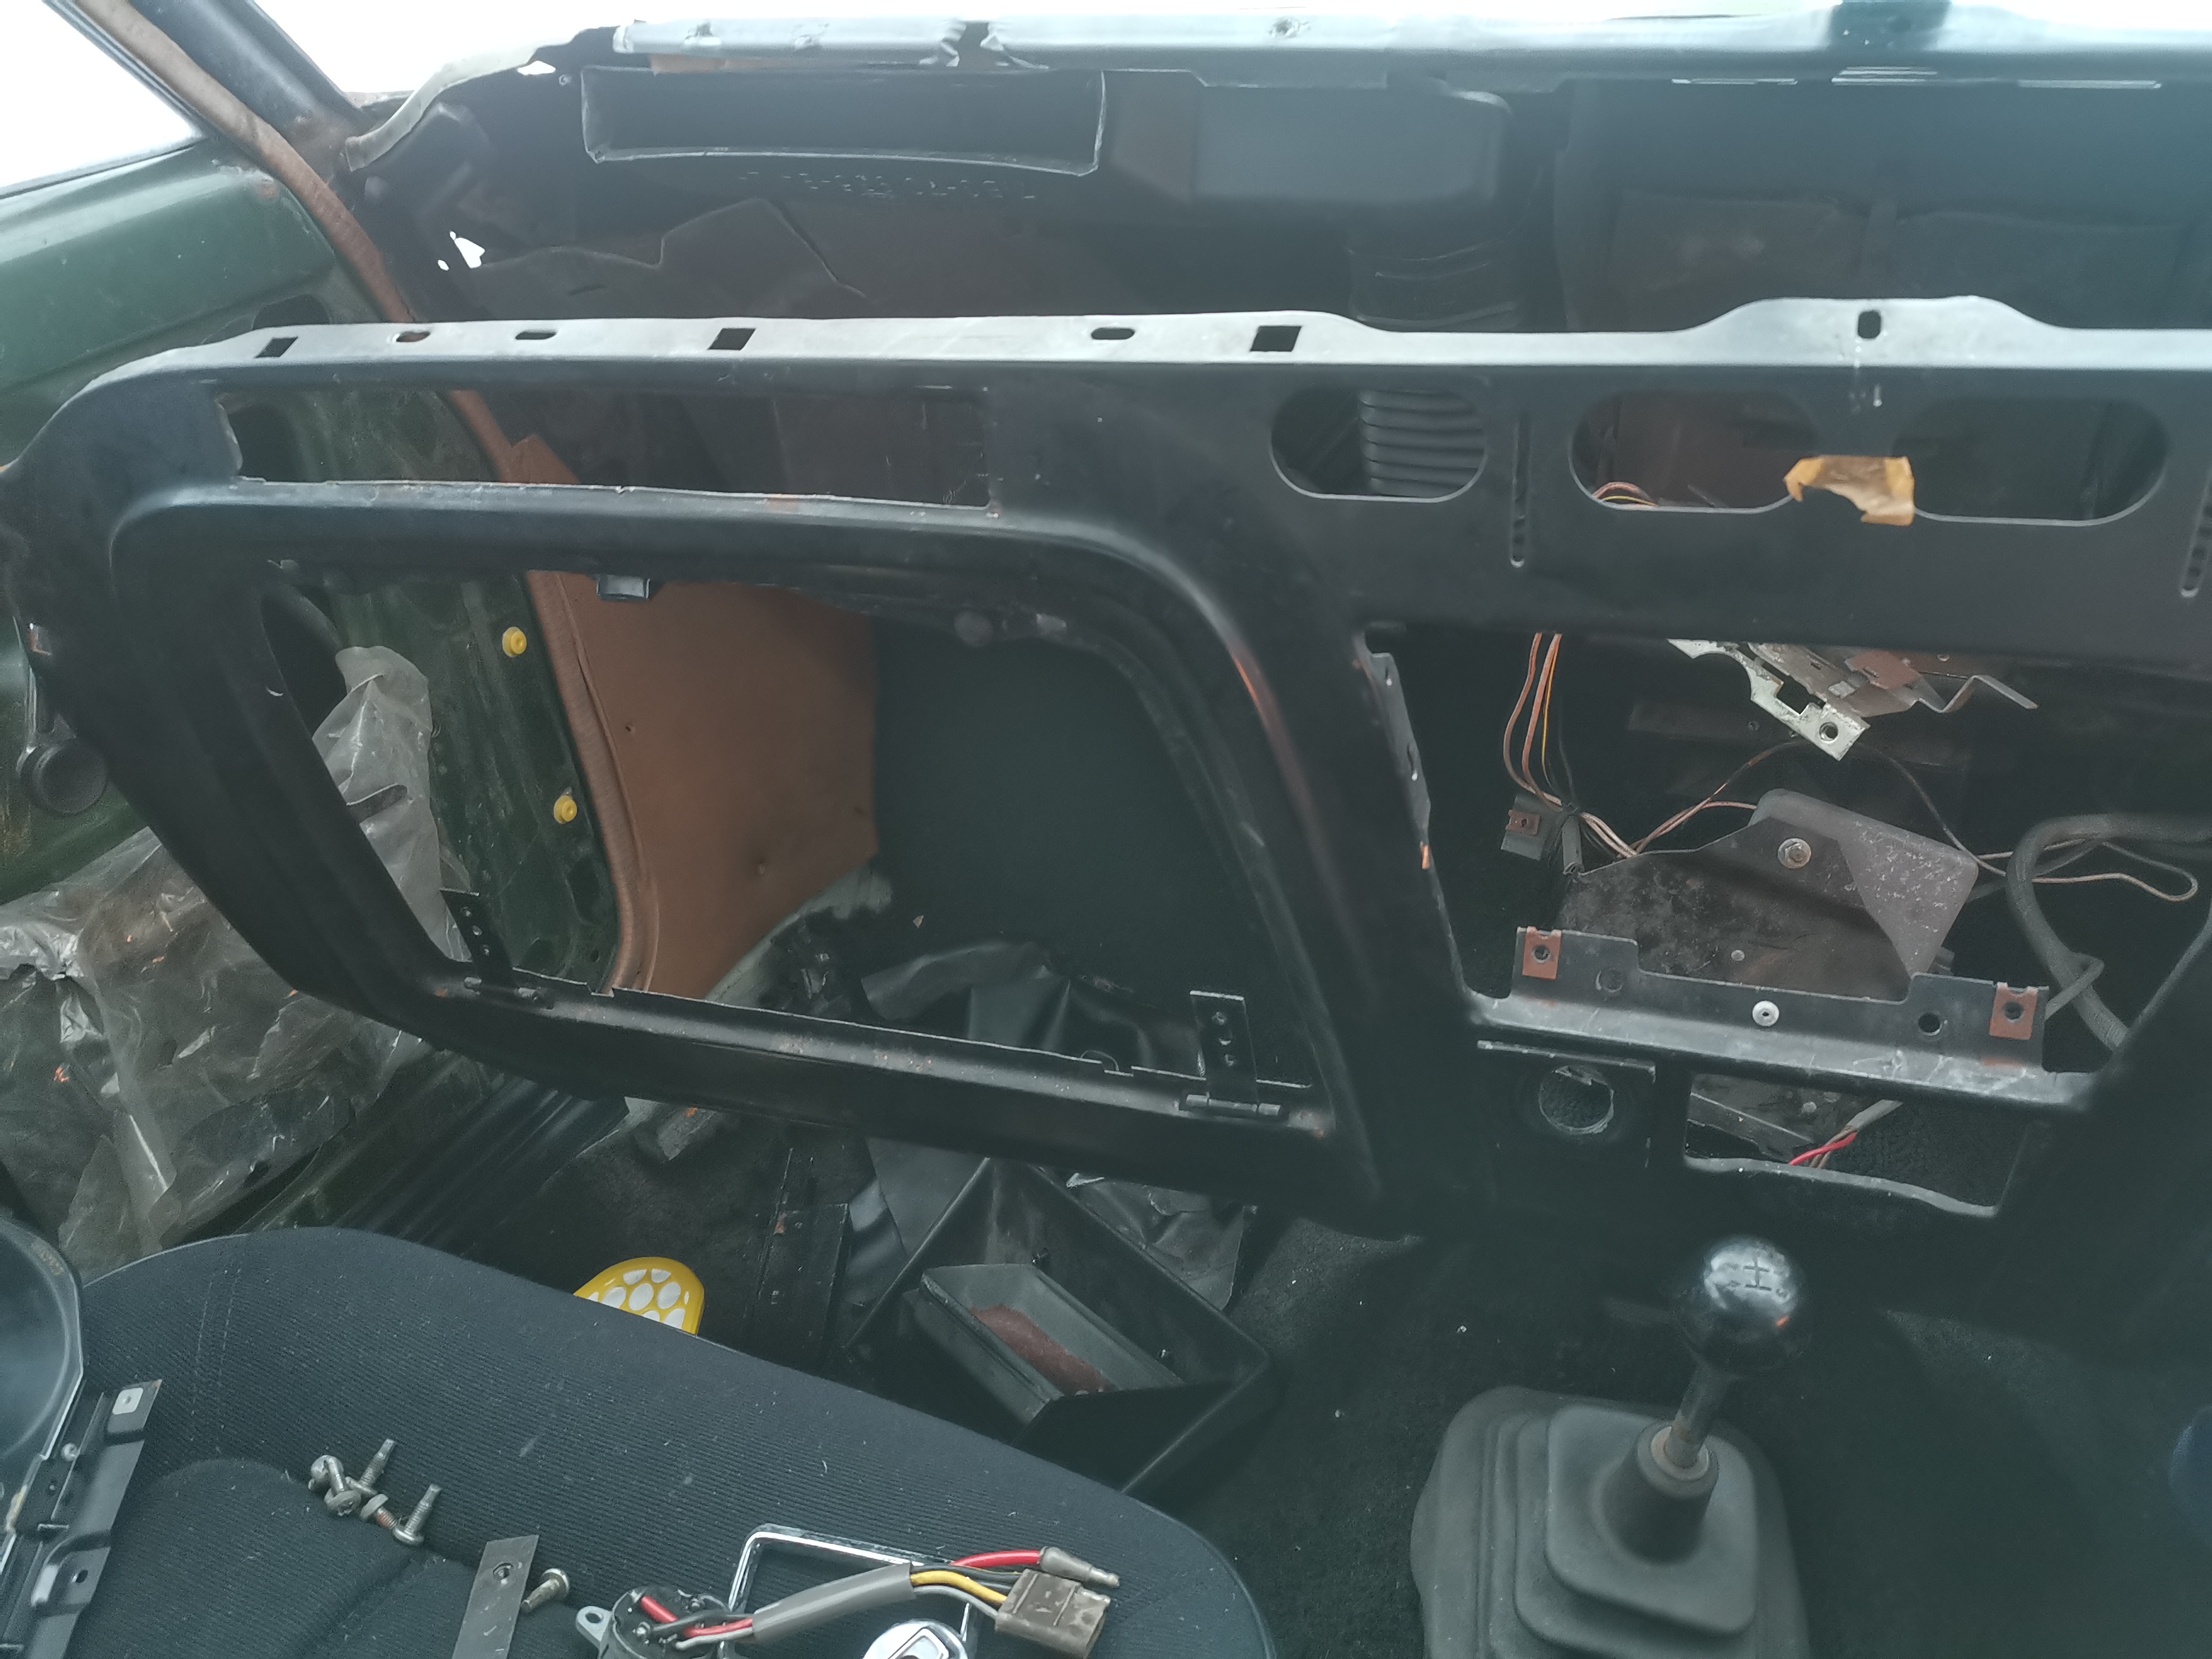
Dashboard removal
Disassembly of the dashboard.
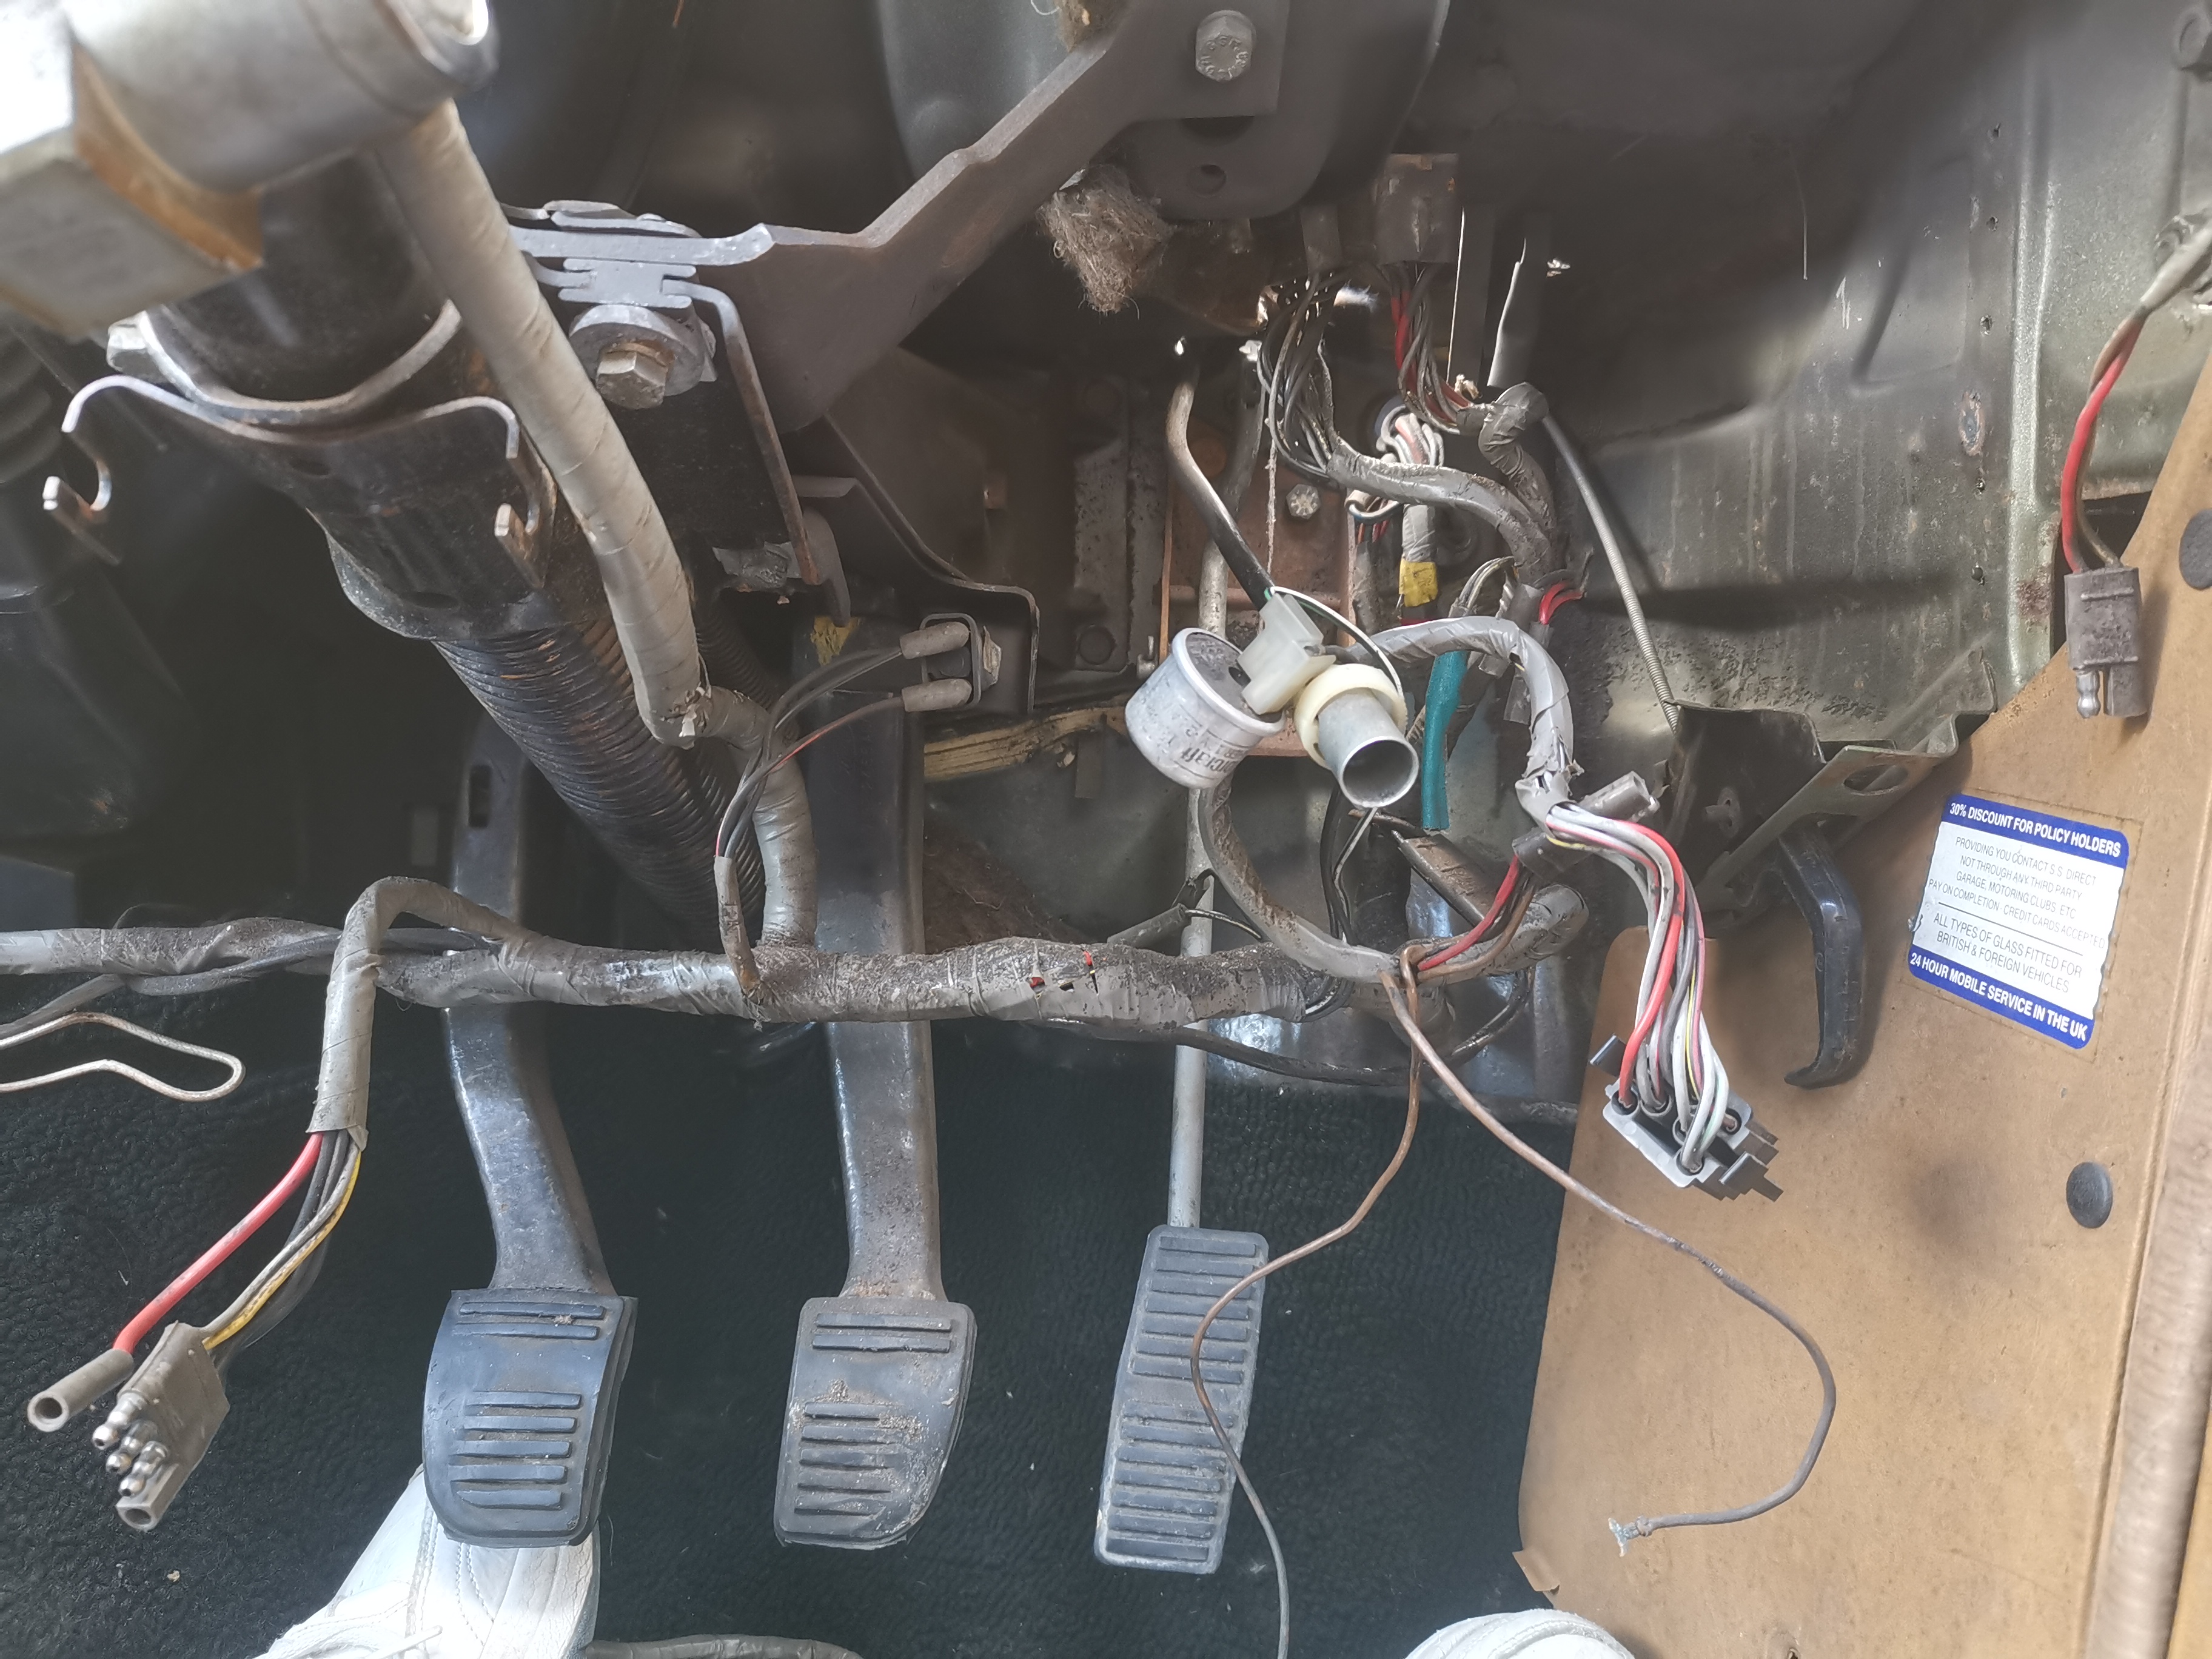
Dashboard removal
Disconnected wires everywhere, and none of them labeled!
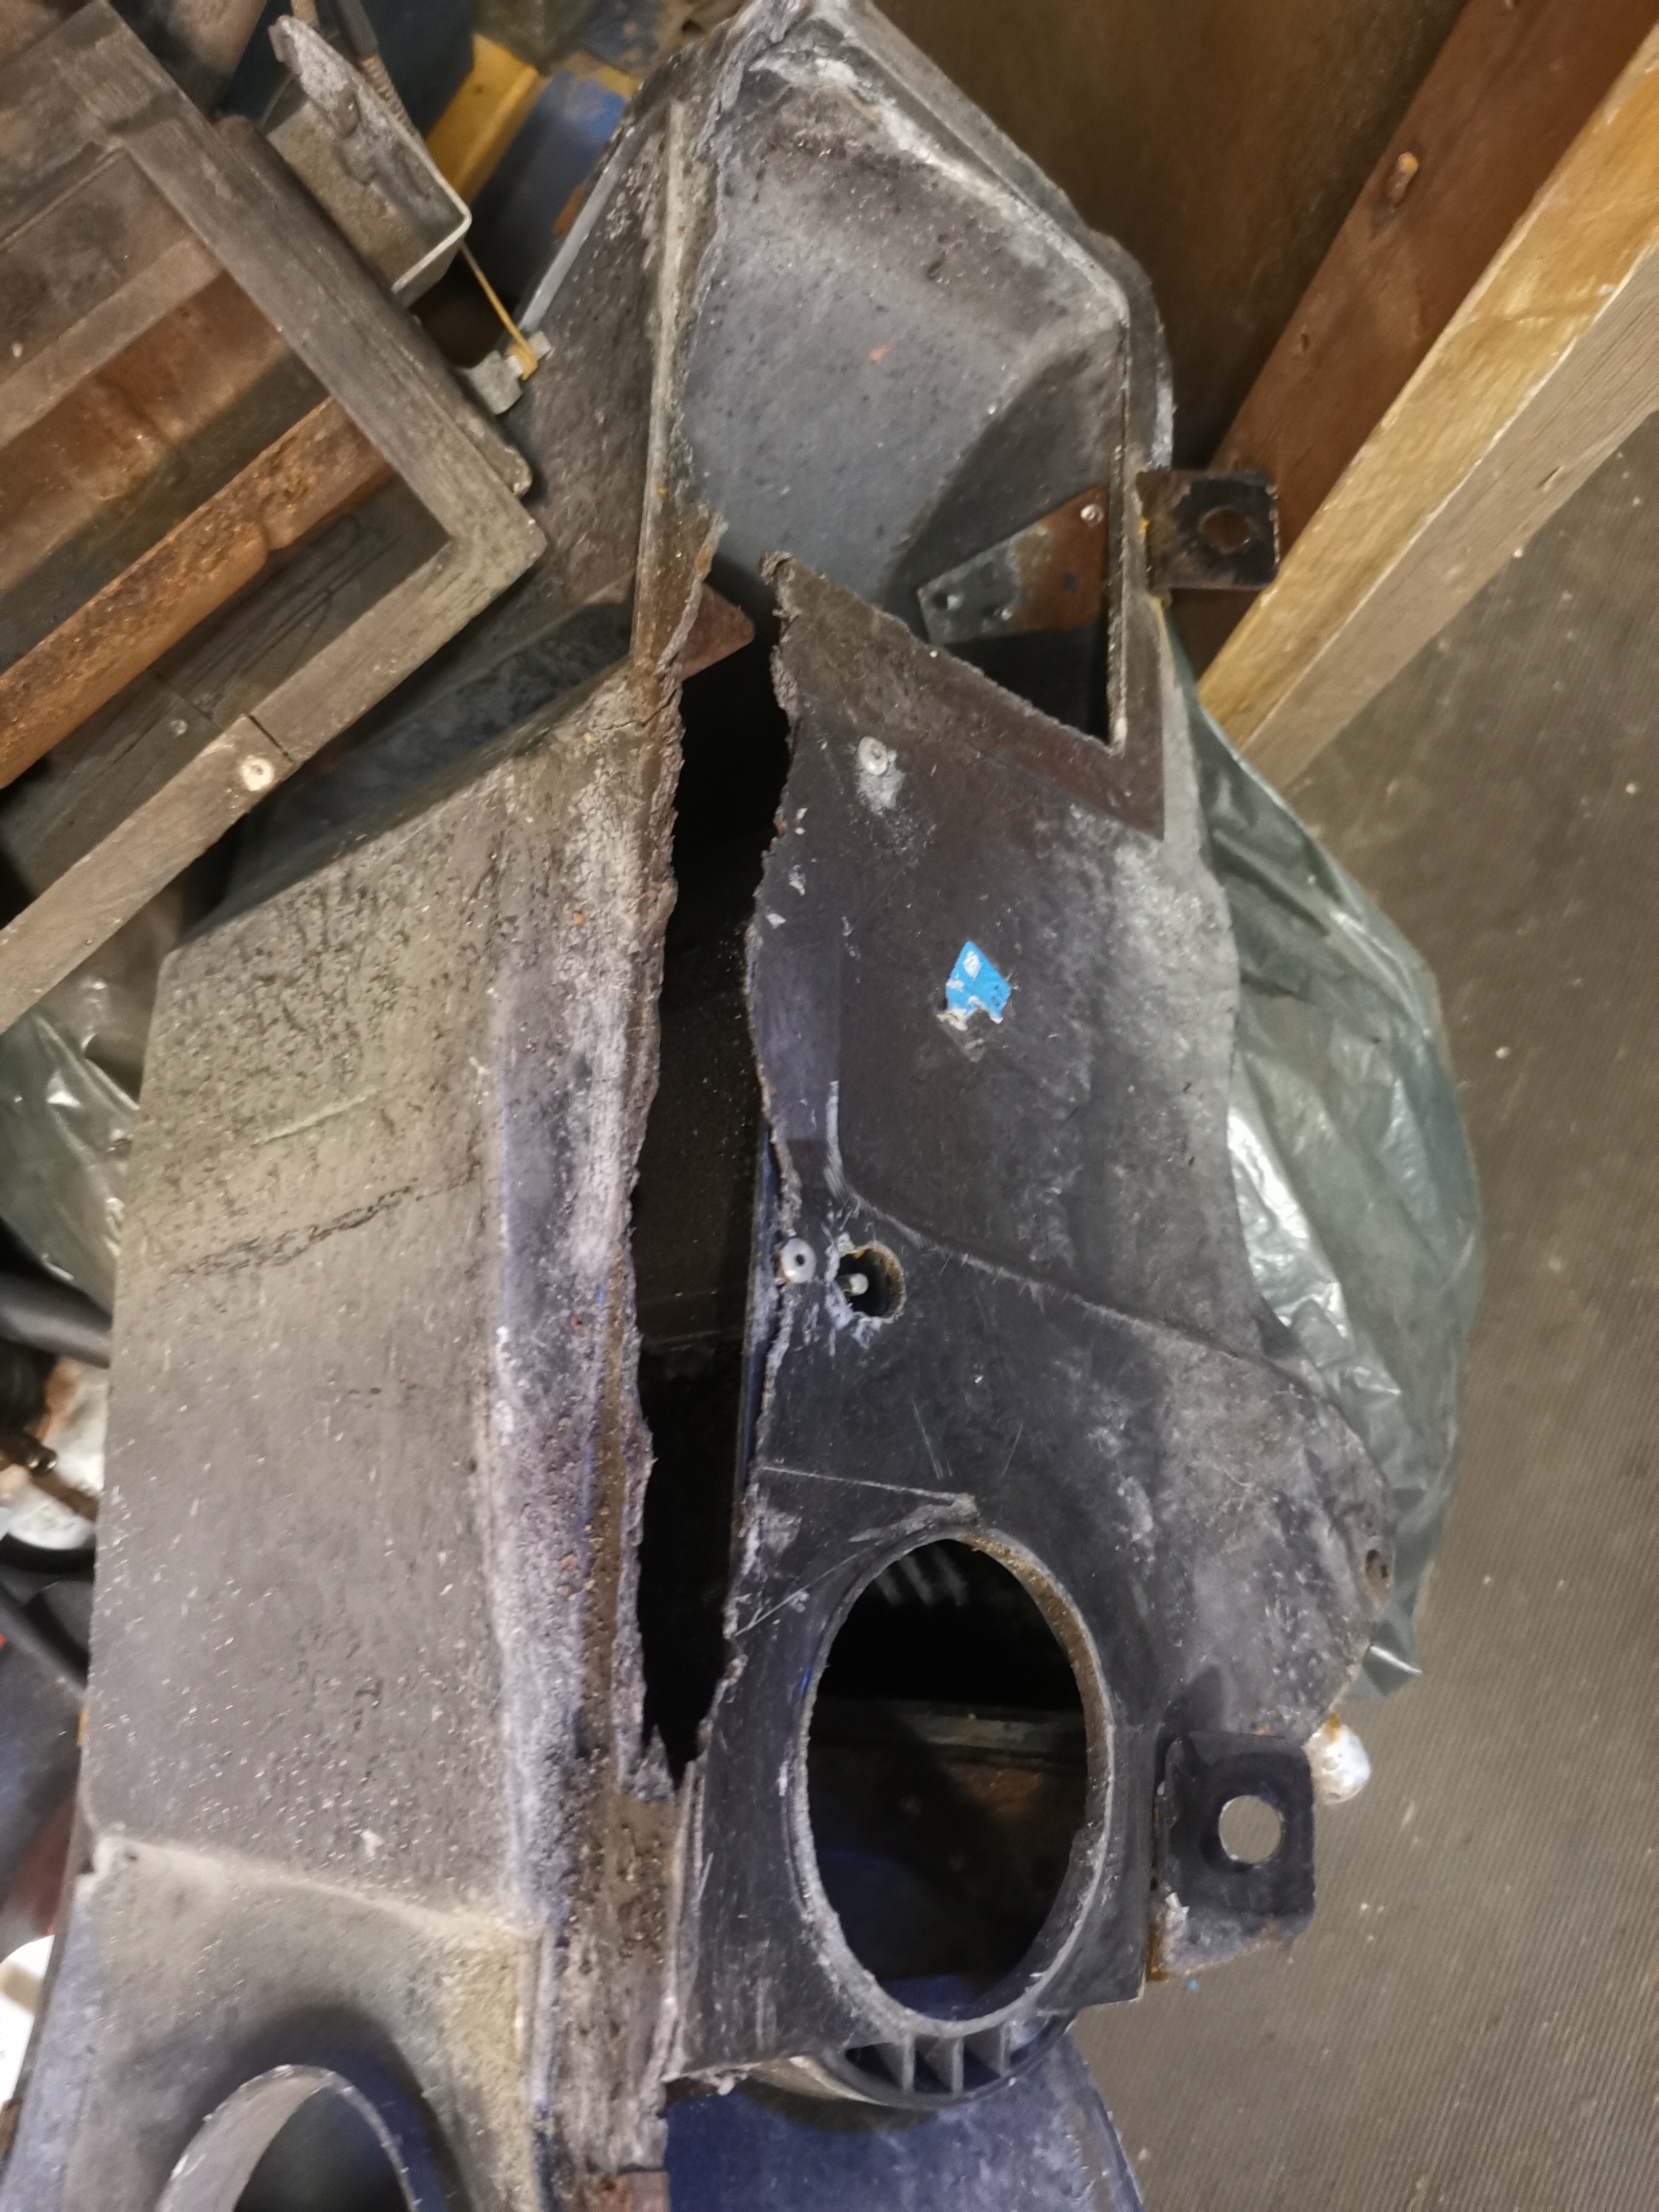
Heater box
When I removed the heater box I found it was all rotten and disintegrating. Looks like I need a new one!
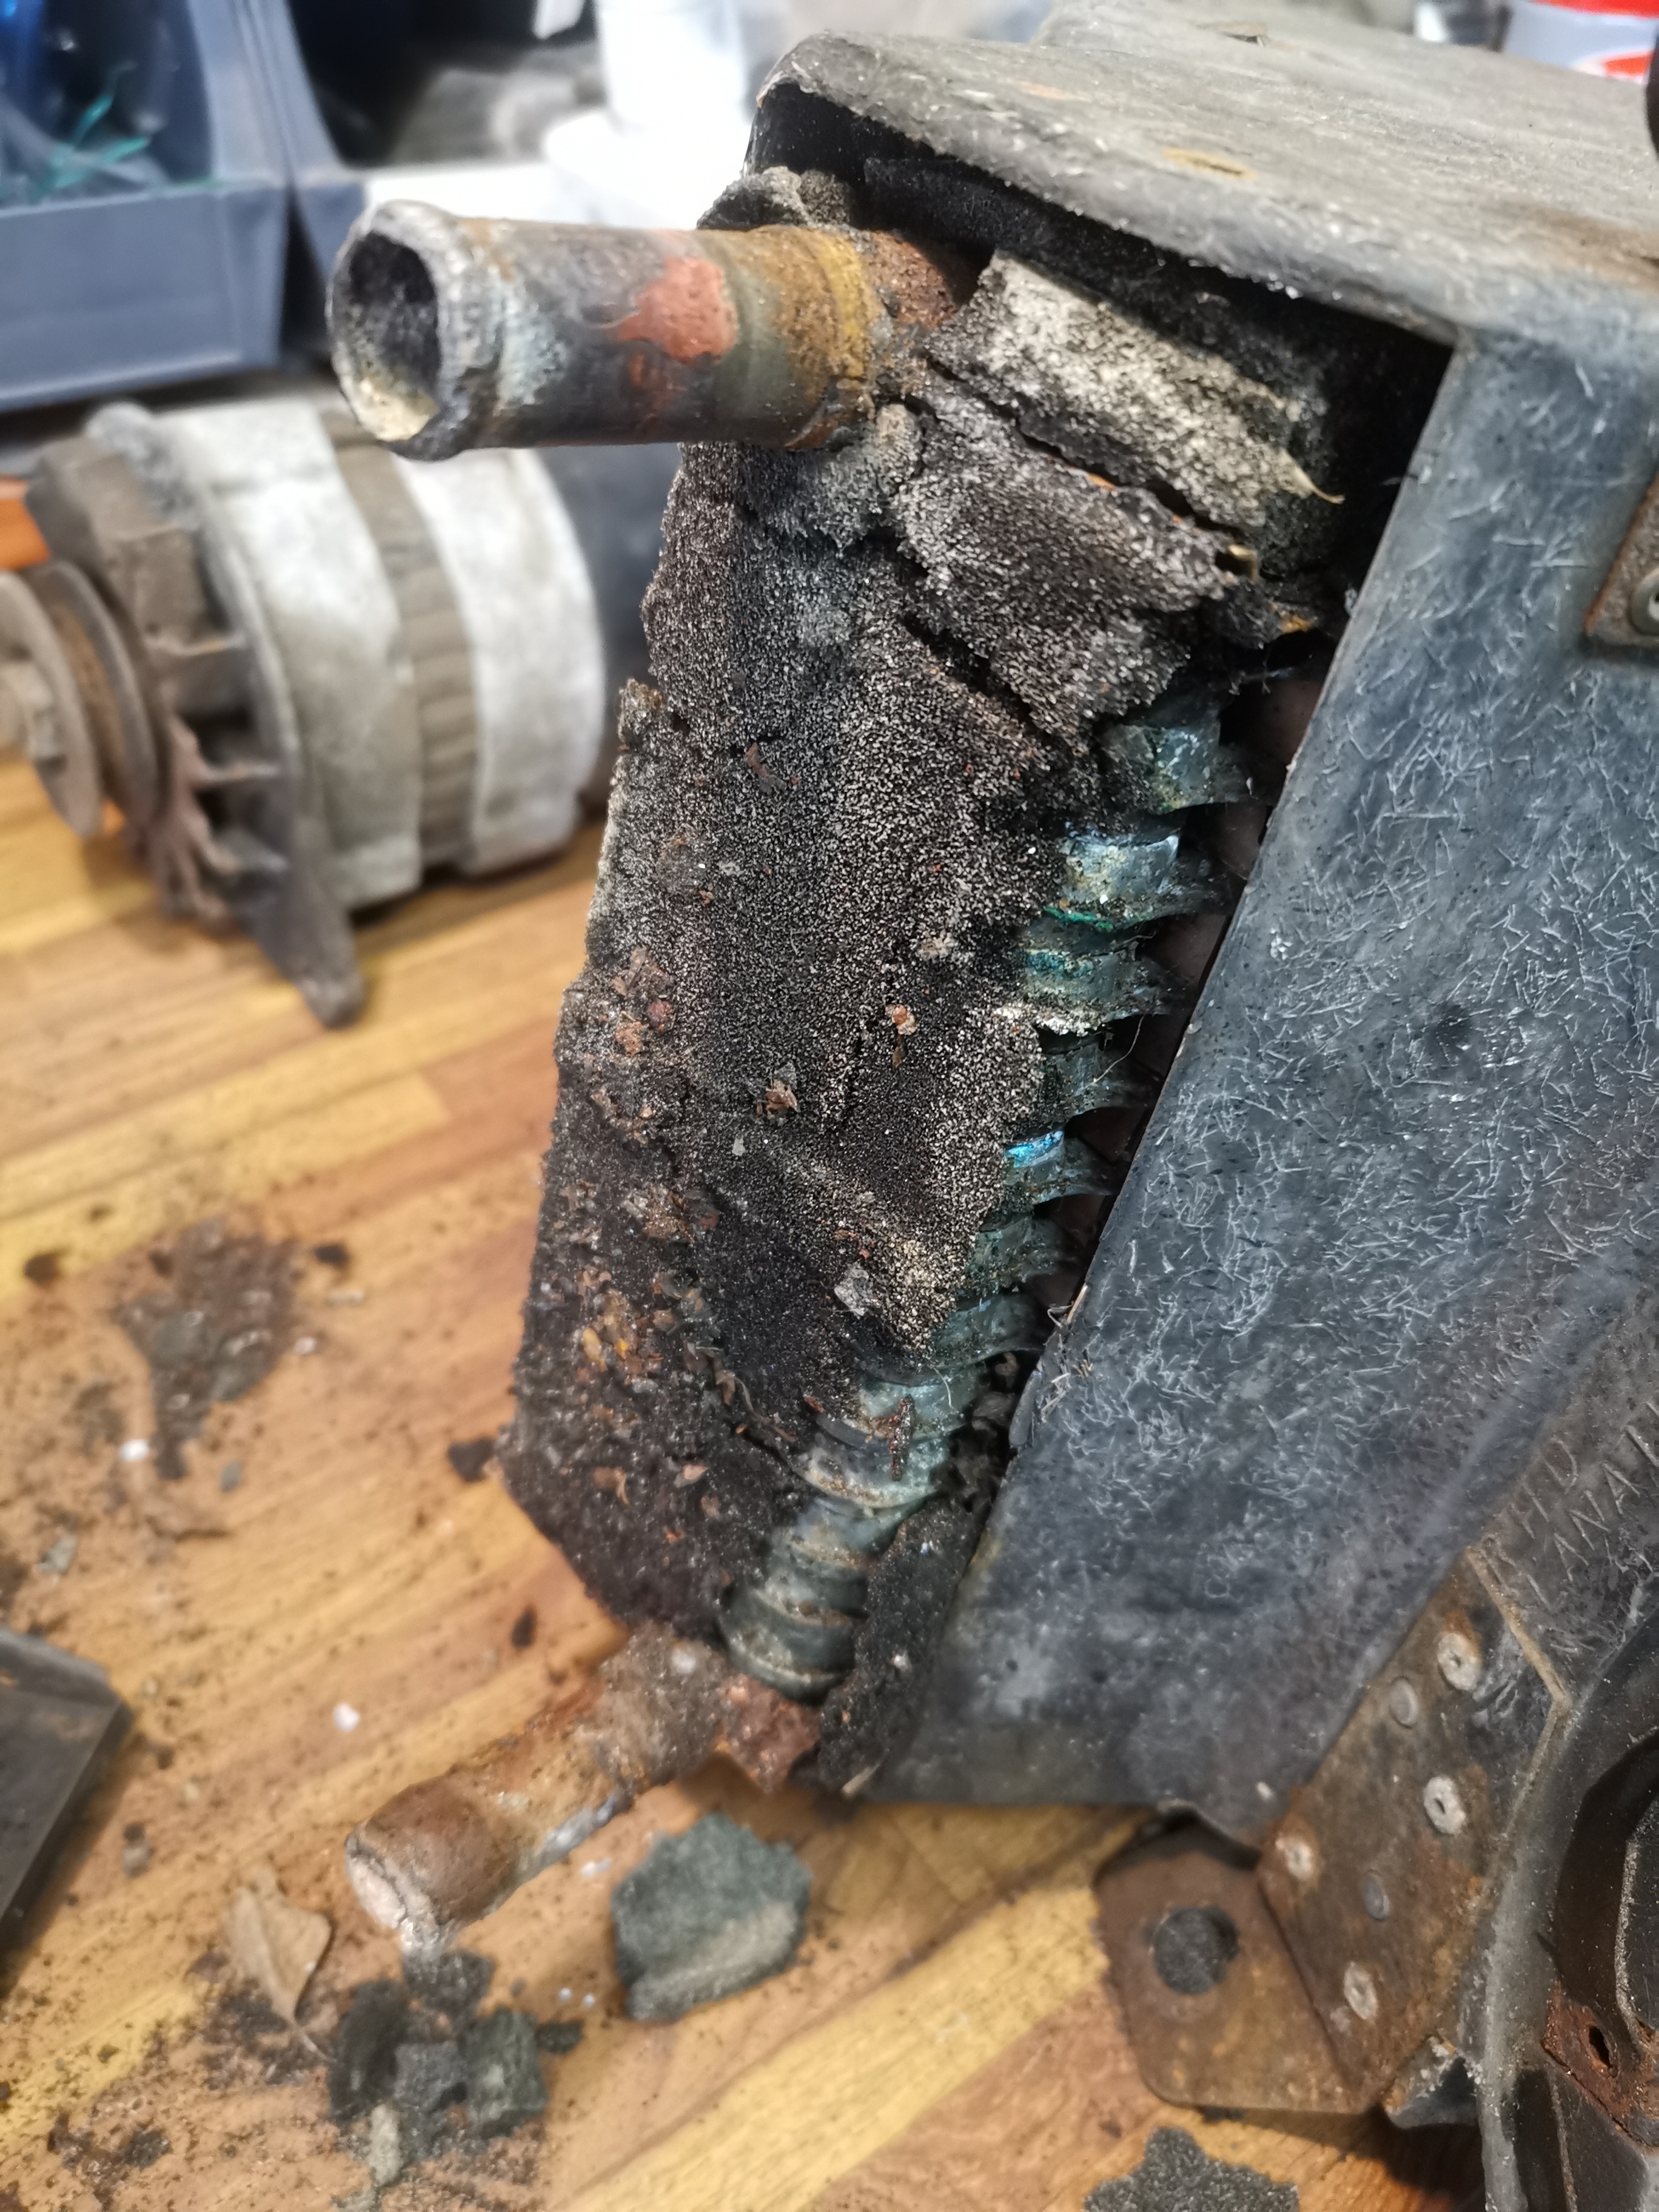
Heater matrix
When I removed the matrix from the heater I found this mess! Lots of disintegrated insulation and corrosion! How many leaks are there going to be??
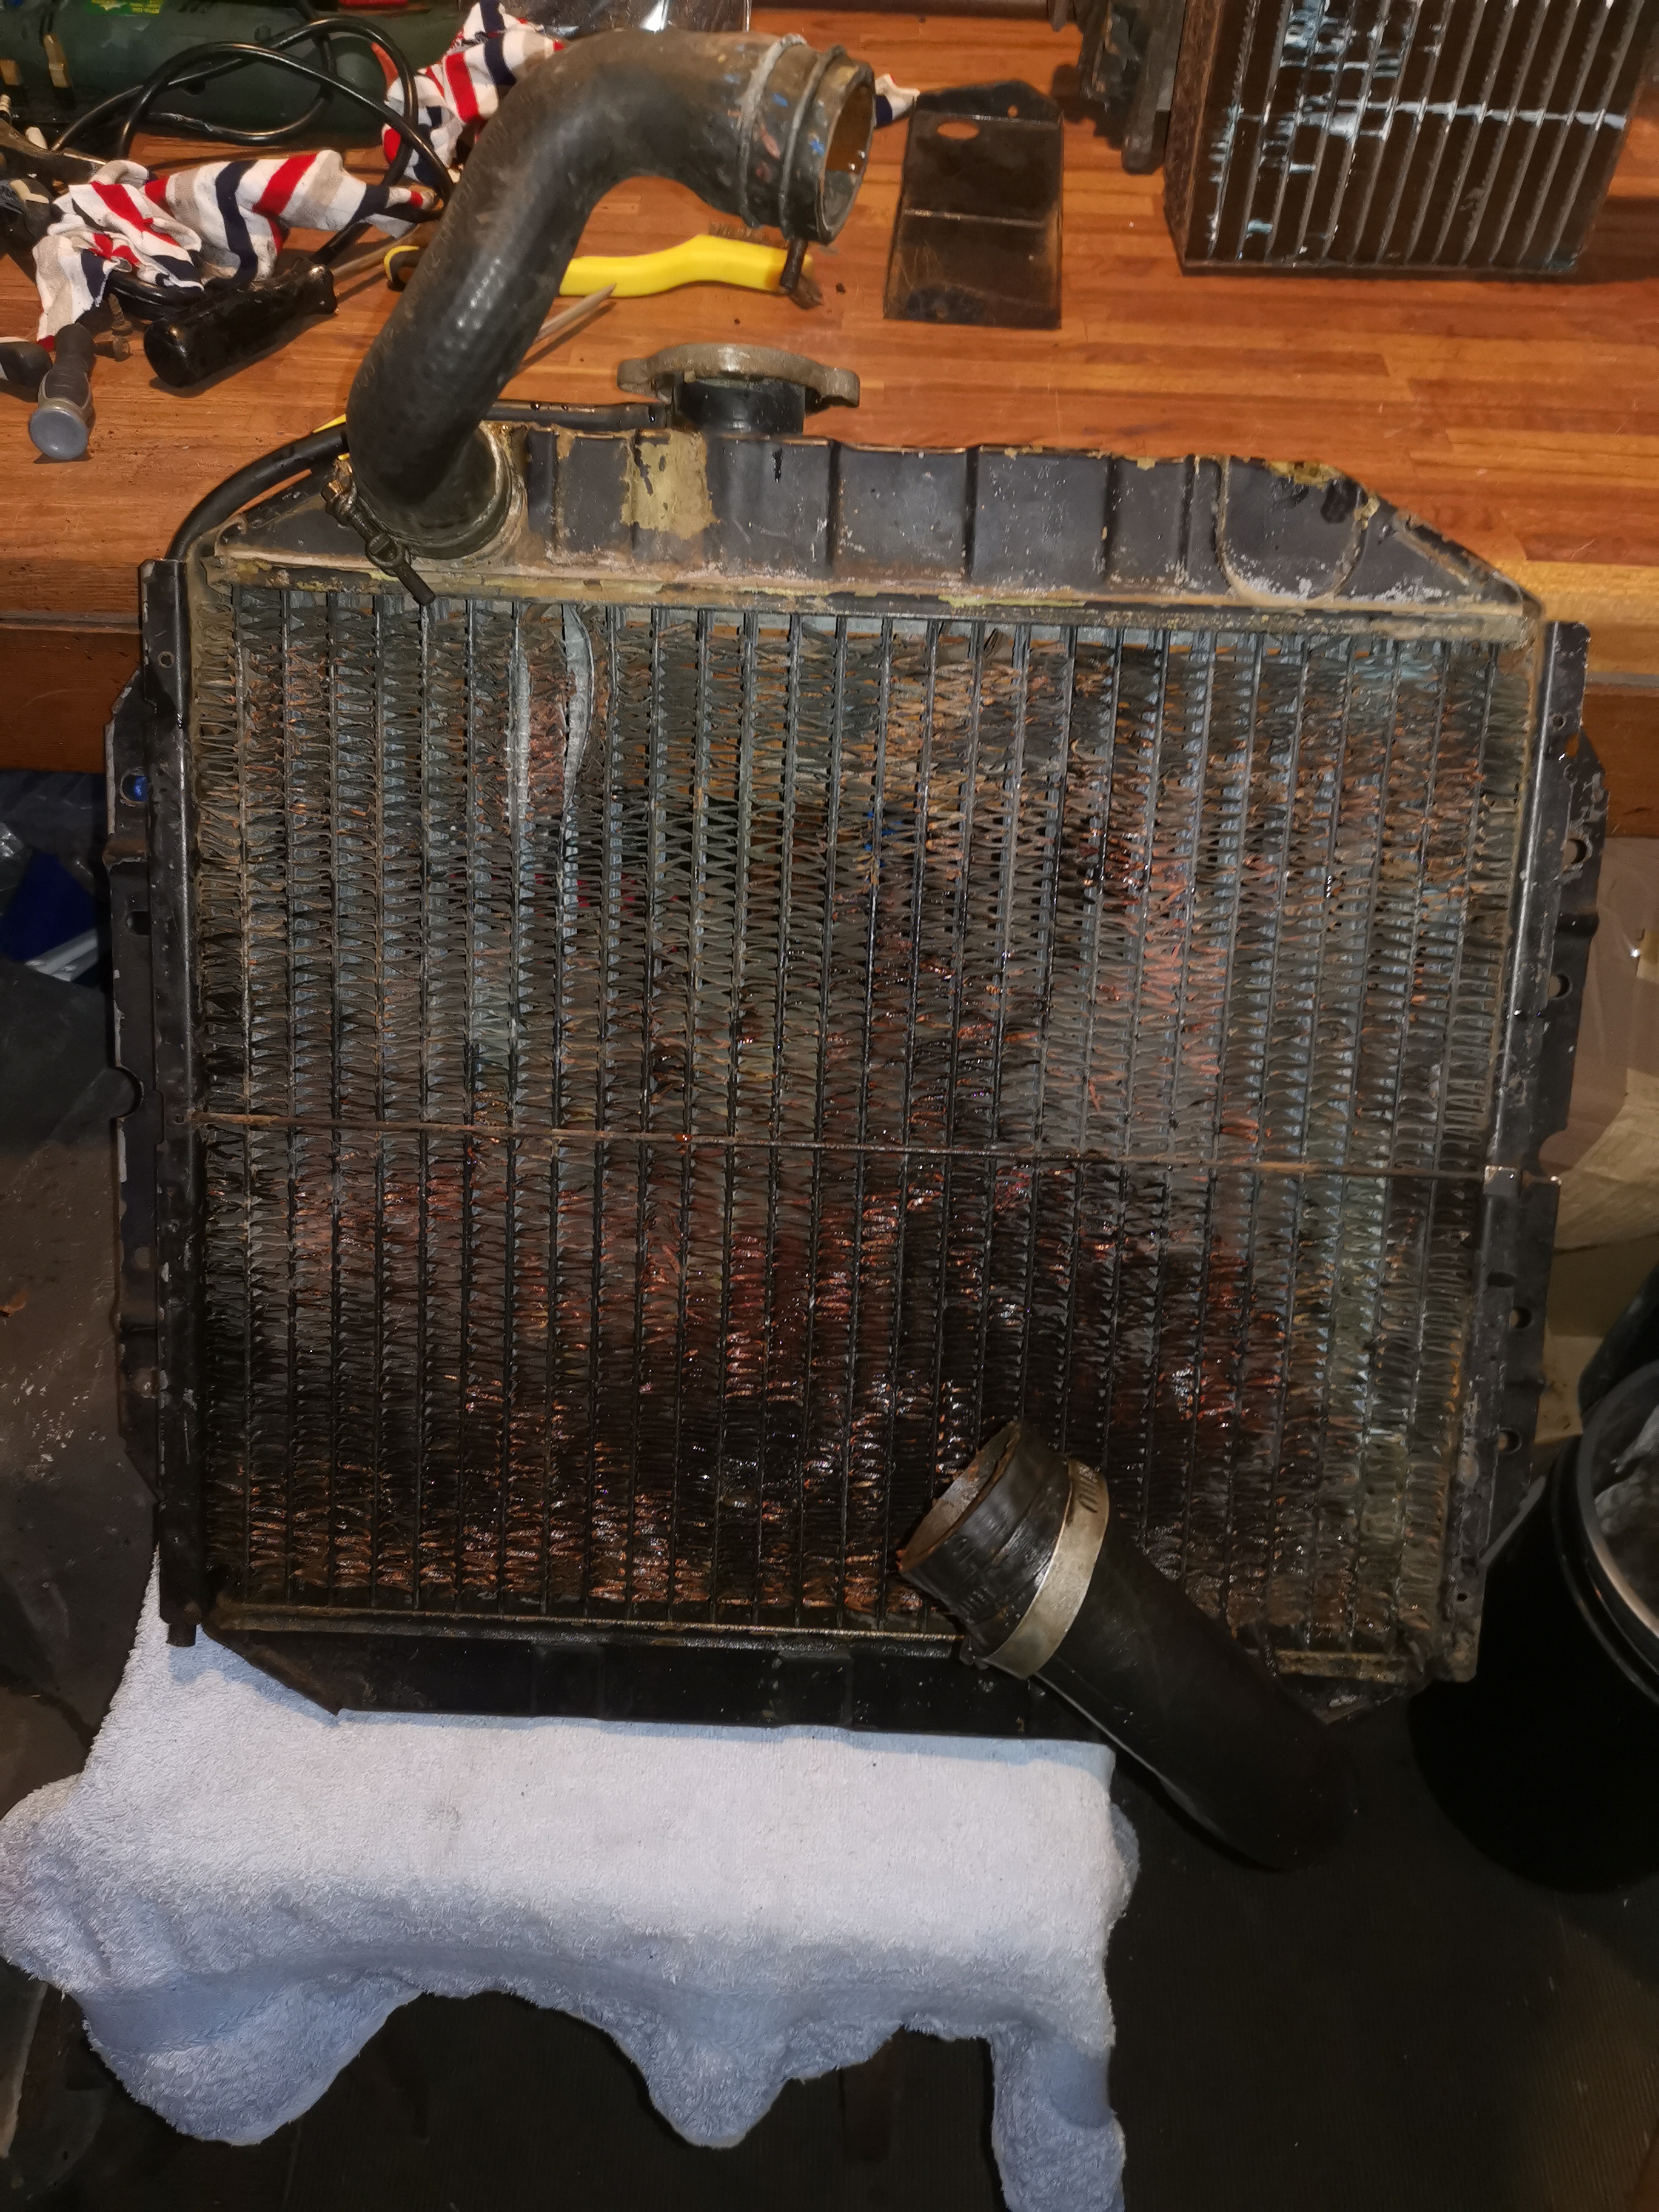
Radiator
The main radiator was in a bad way too! I don't know if this will be worth renovating or if it's yet another part that'll need replacing.
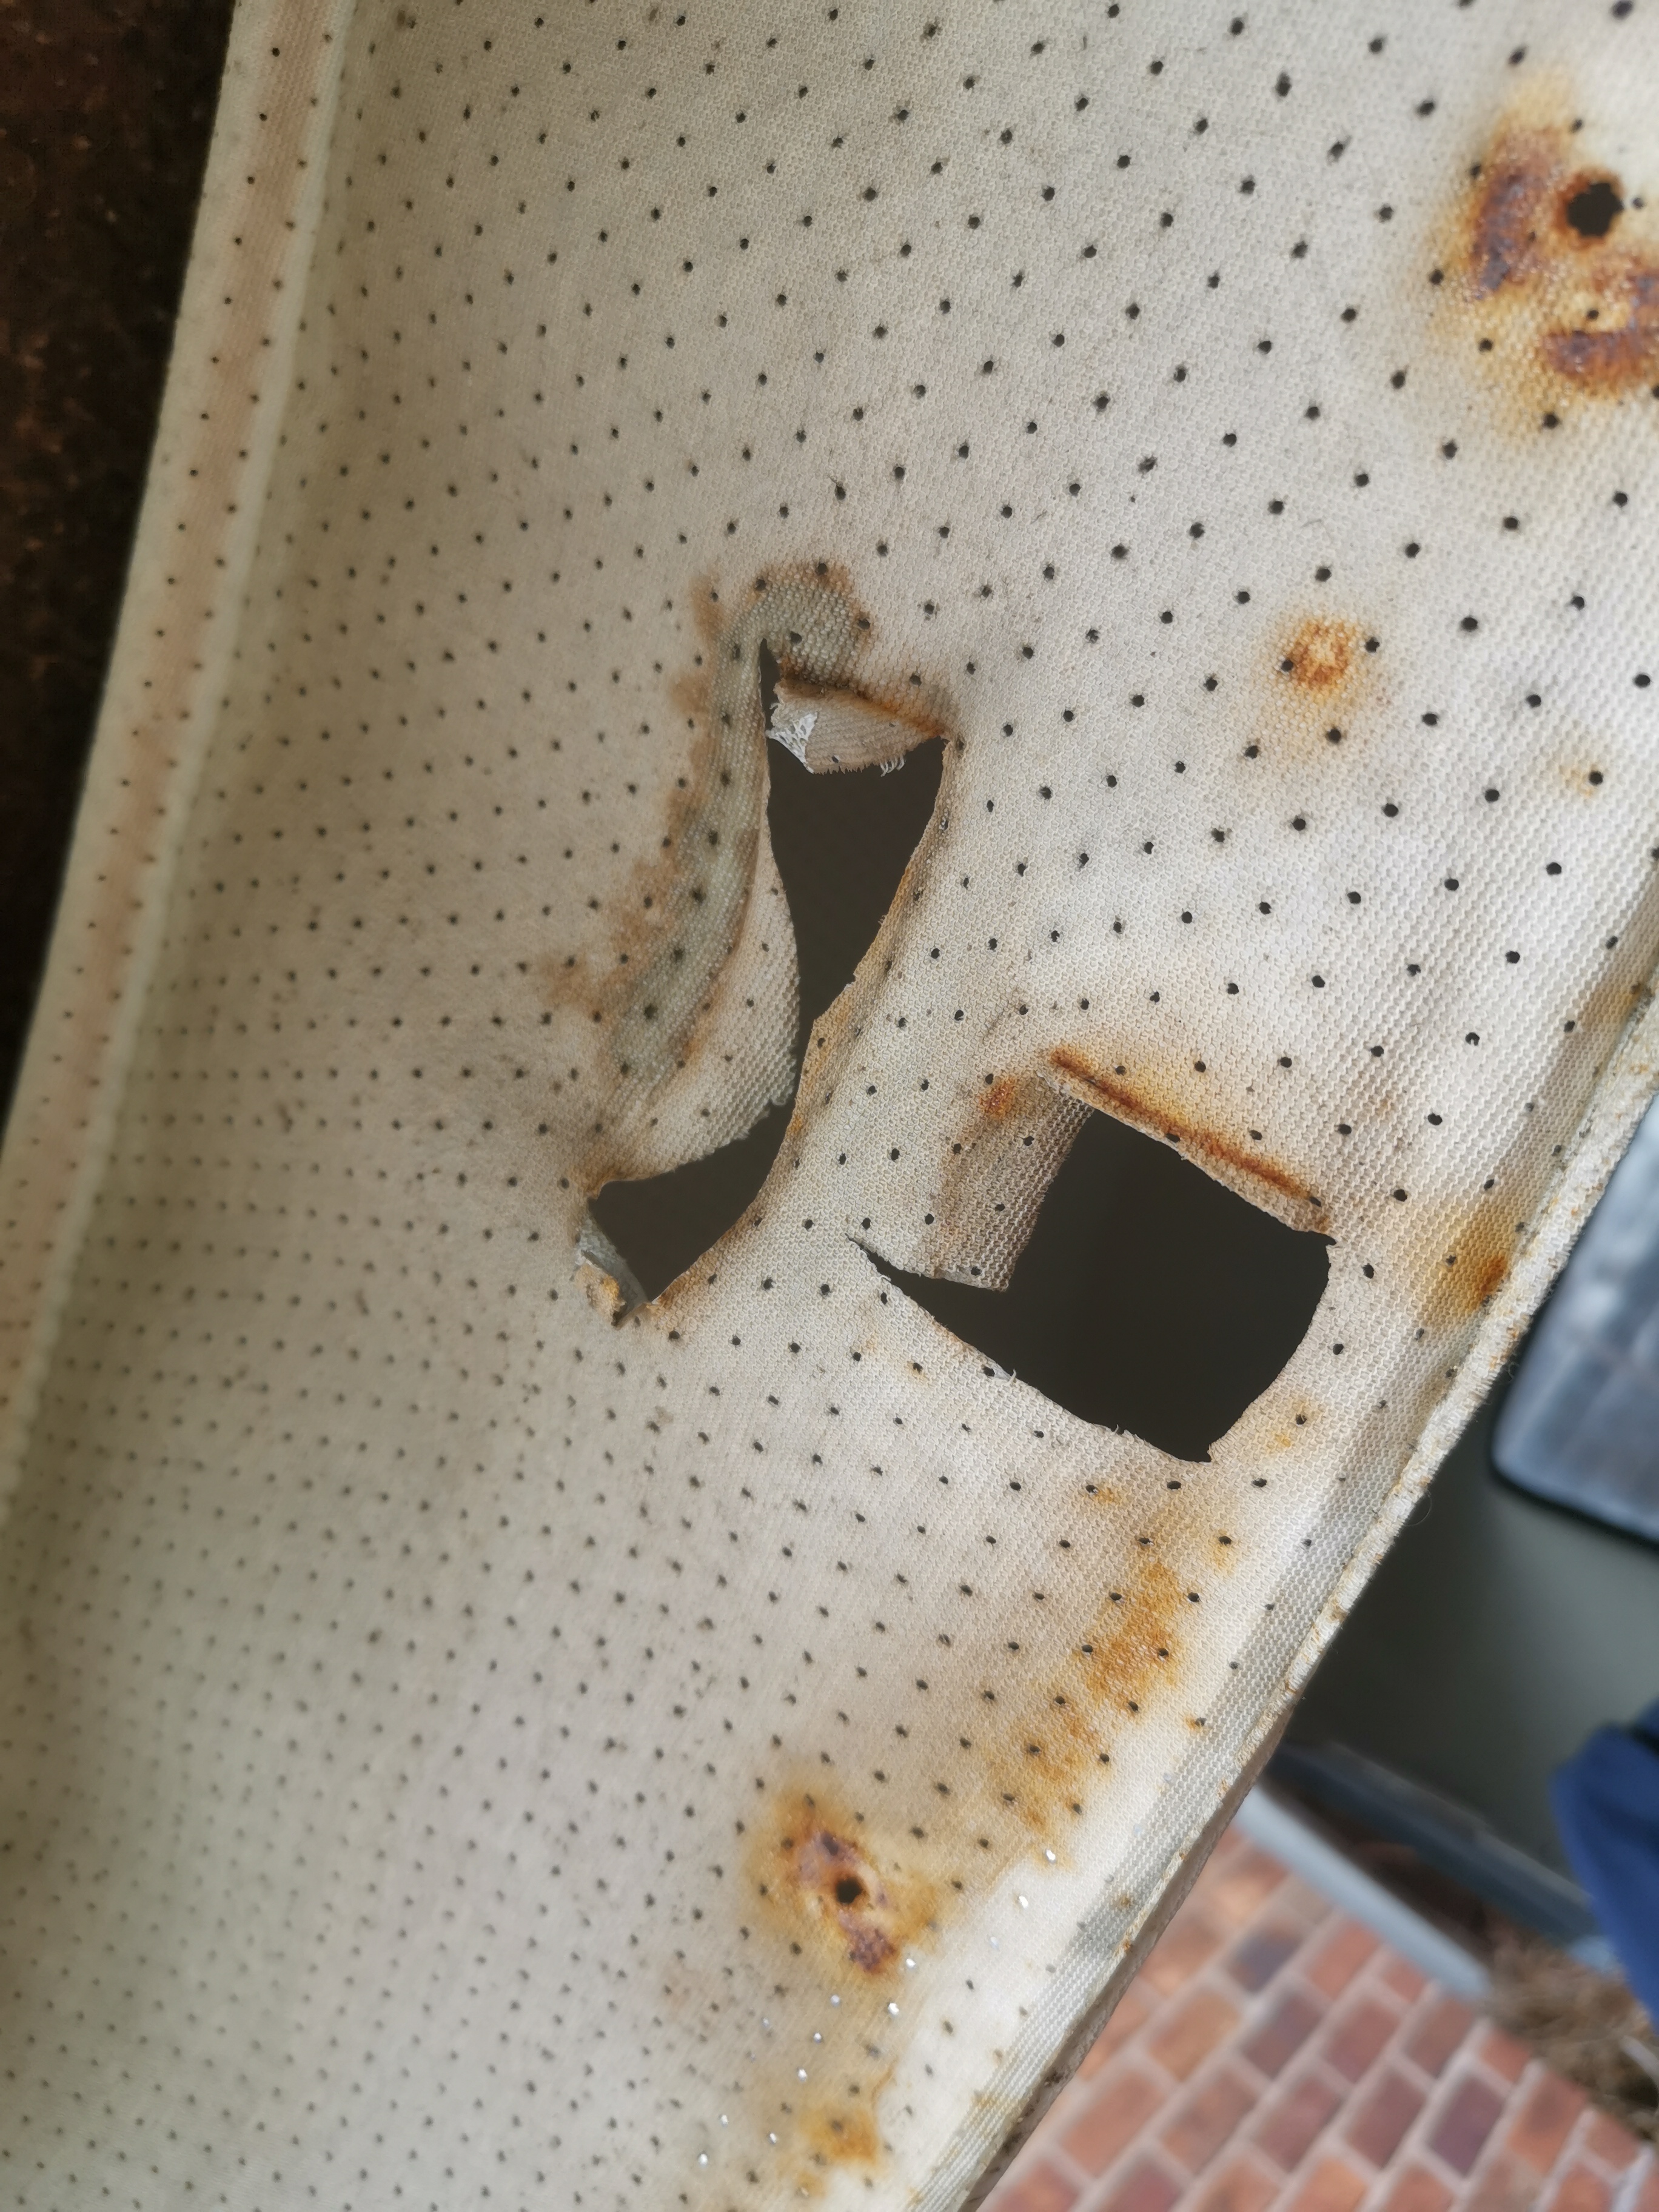
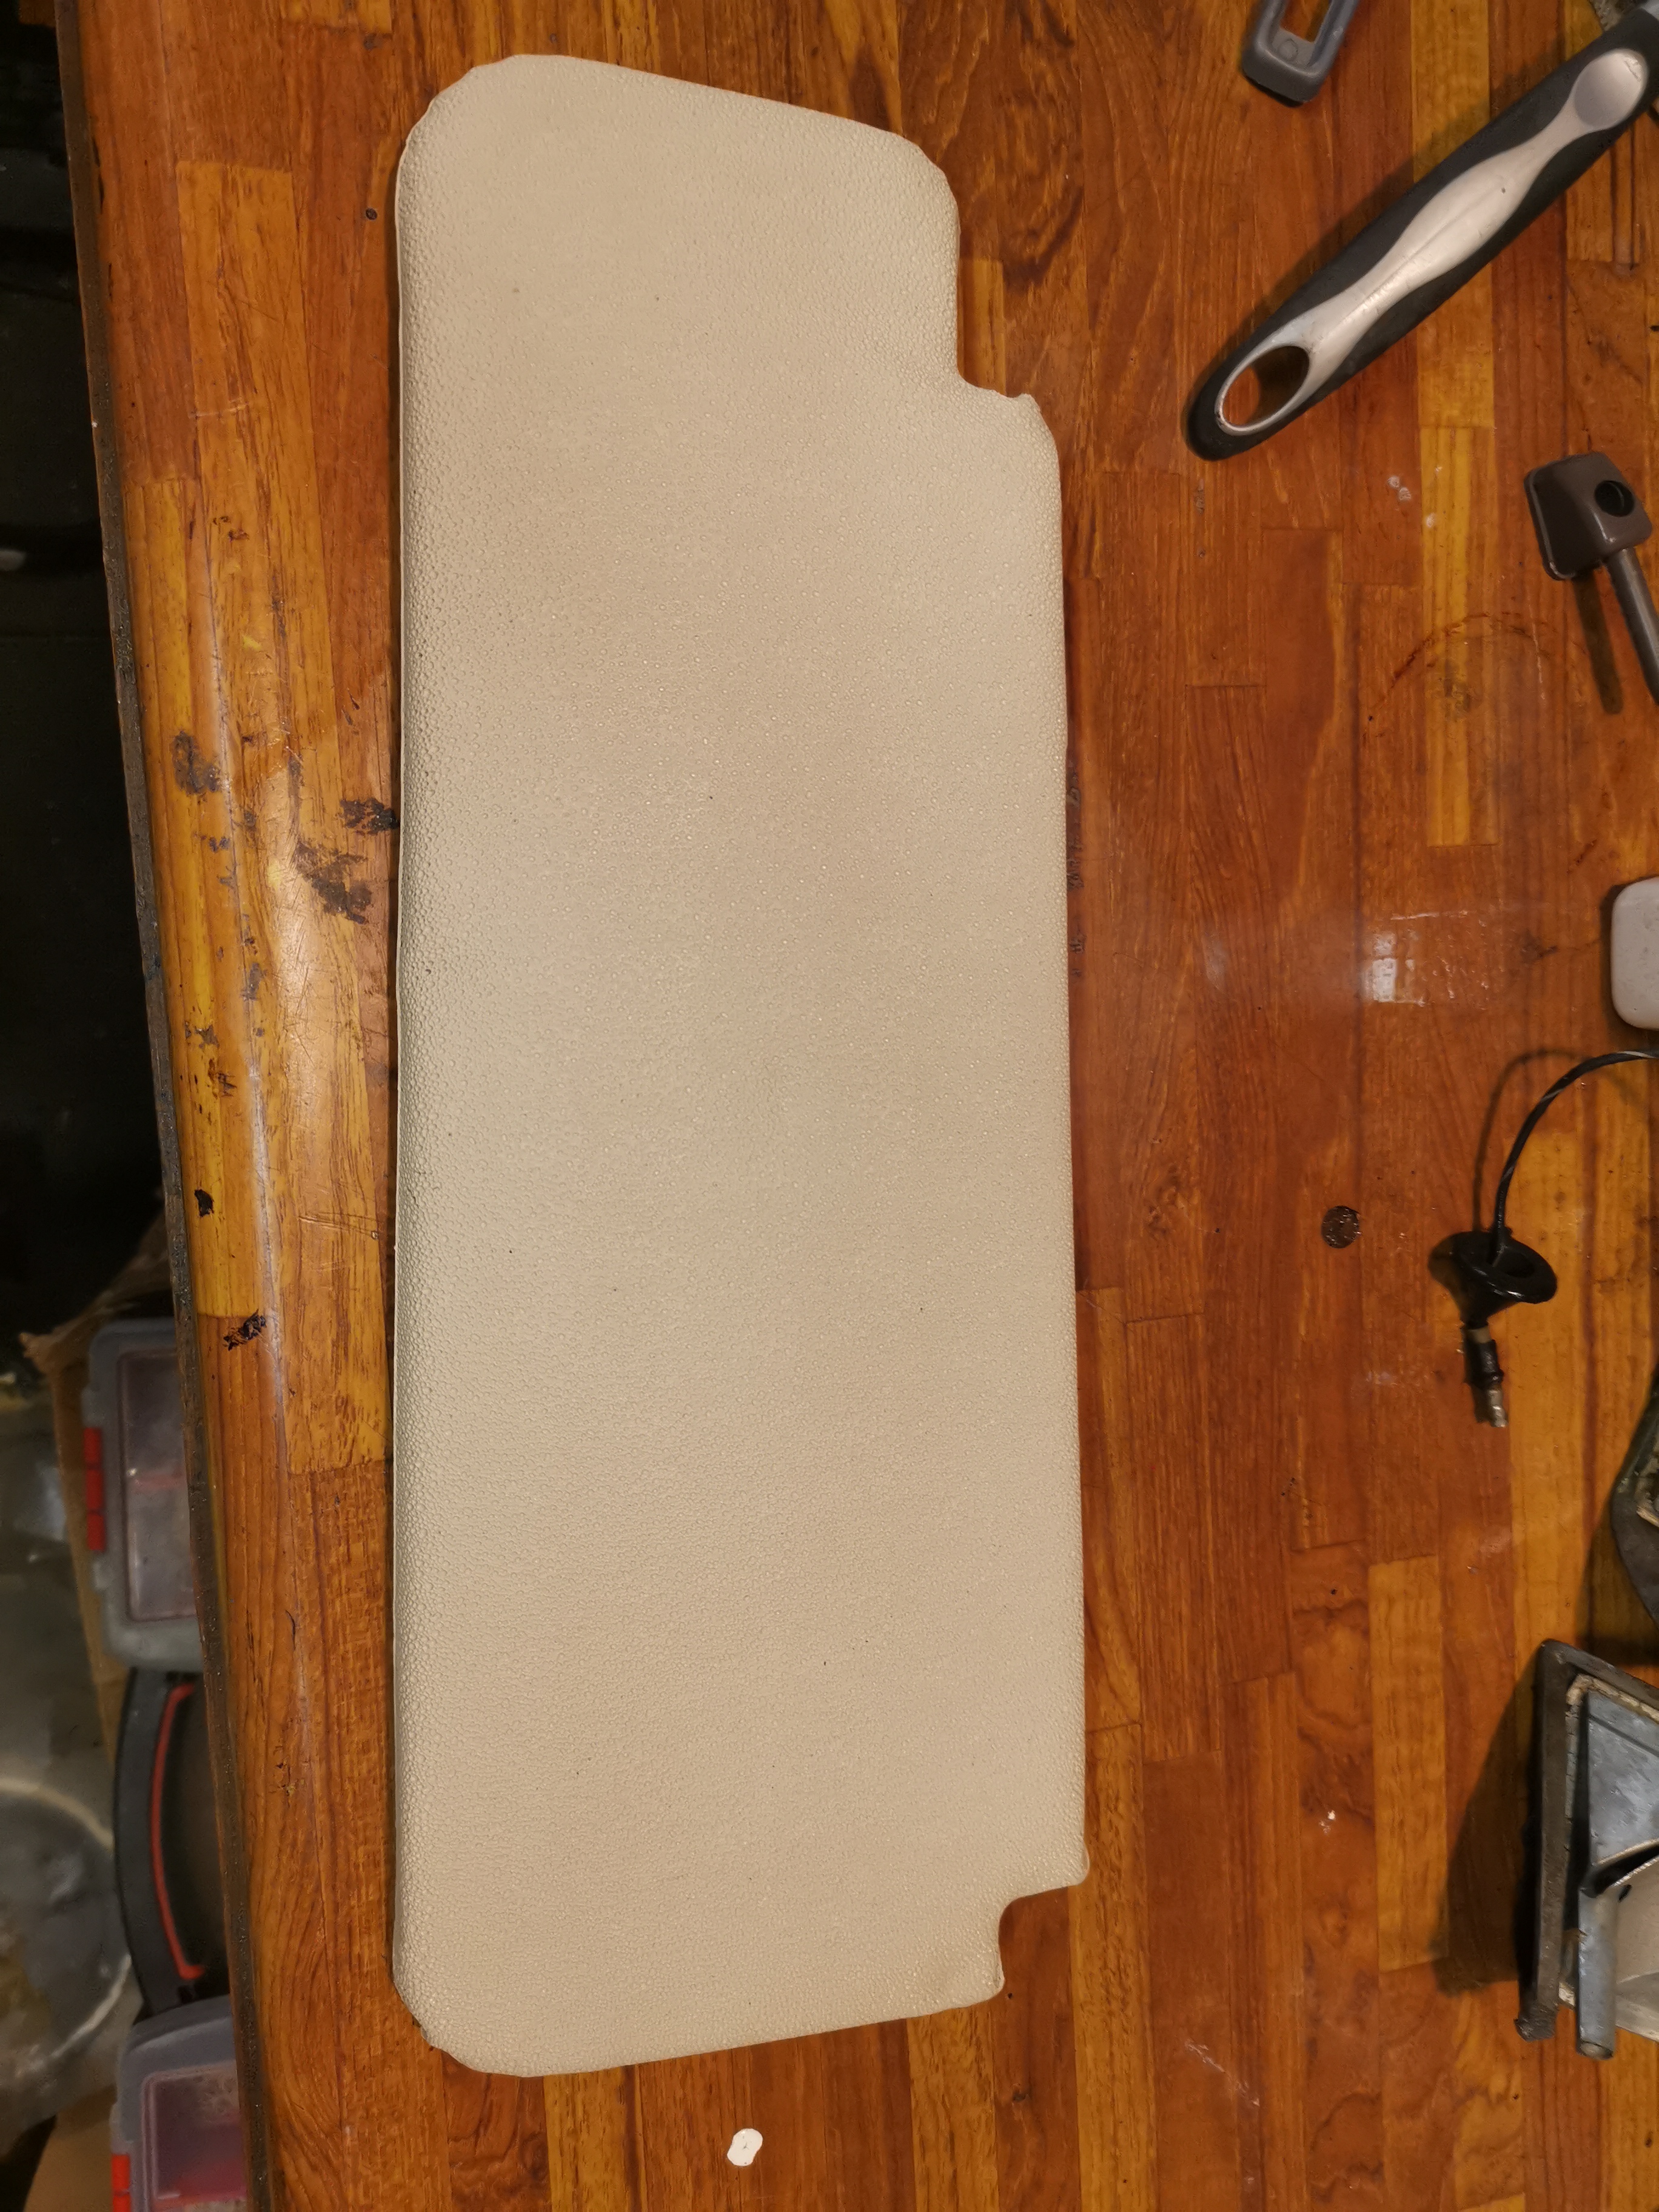
Headlining
The headlining was all torn and stained. Definitely going to need a new replacement one.
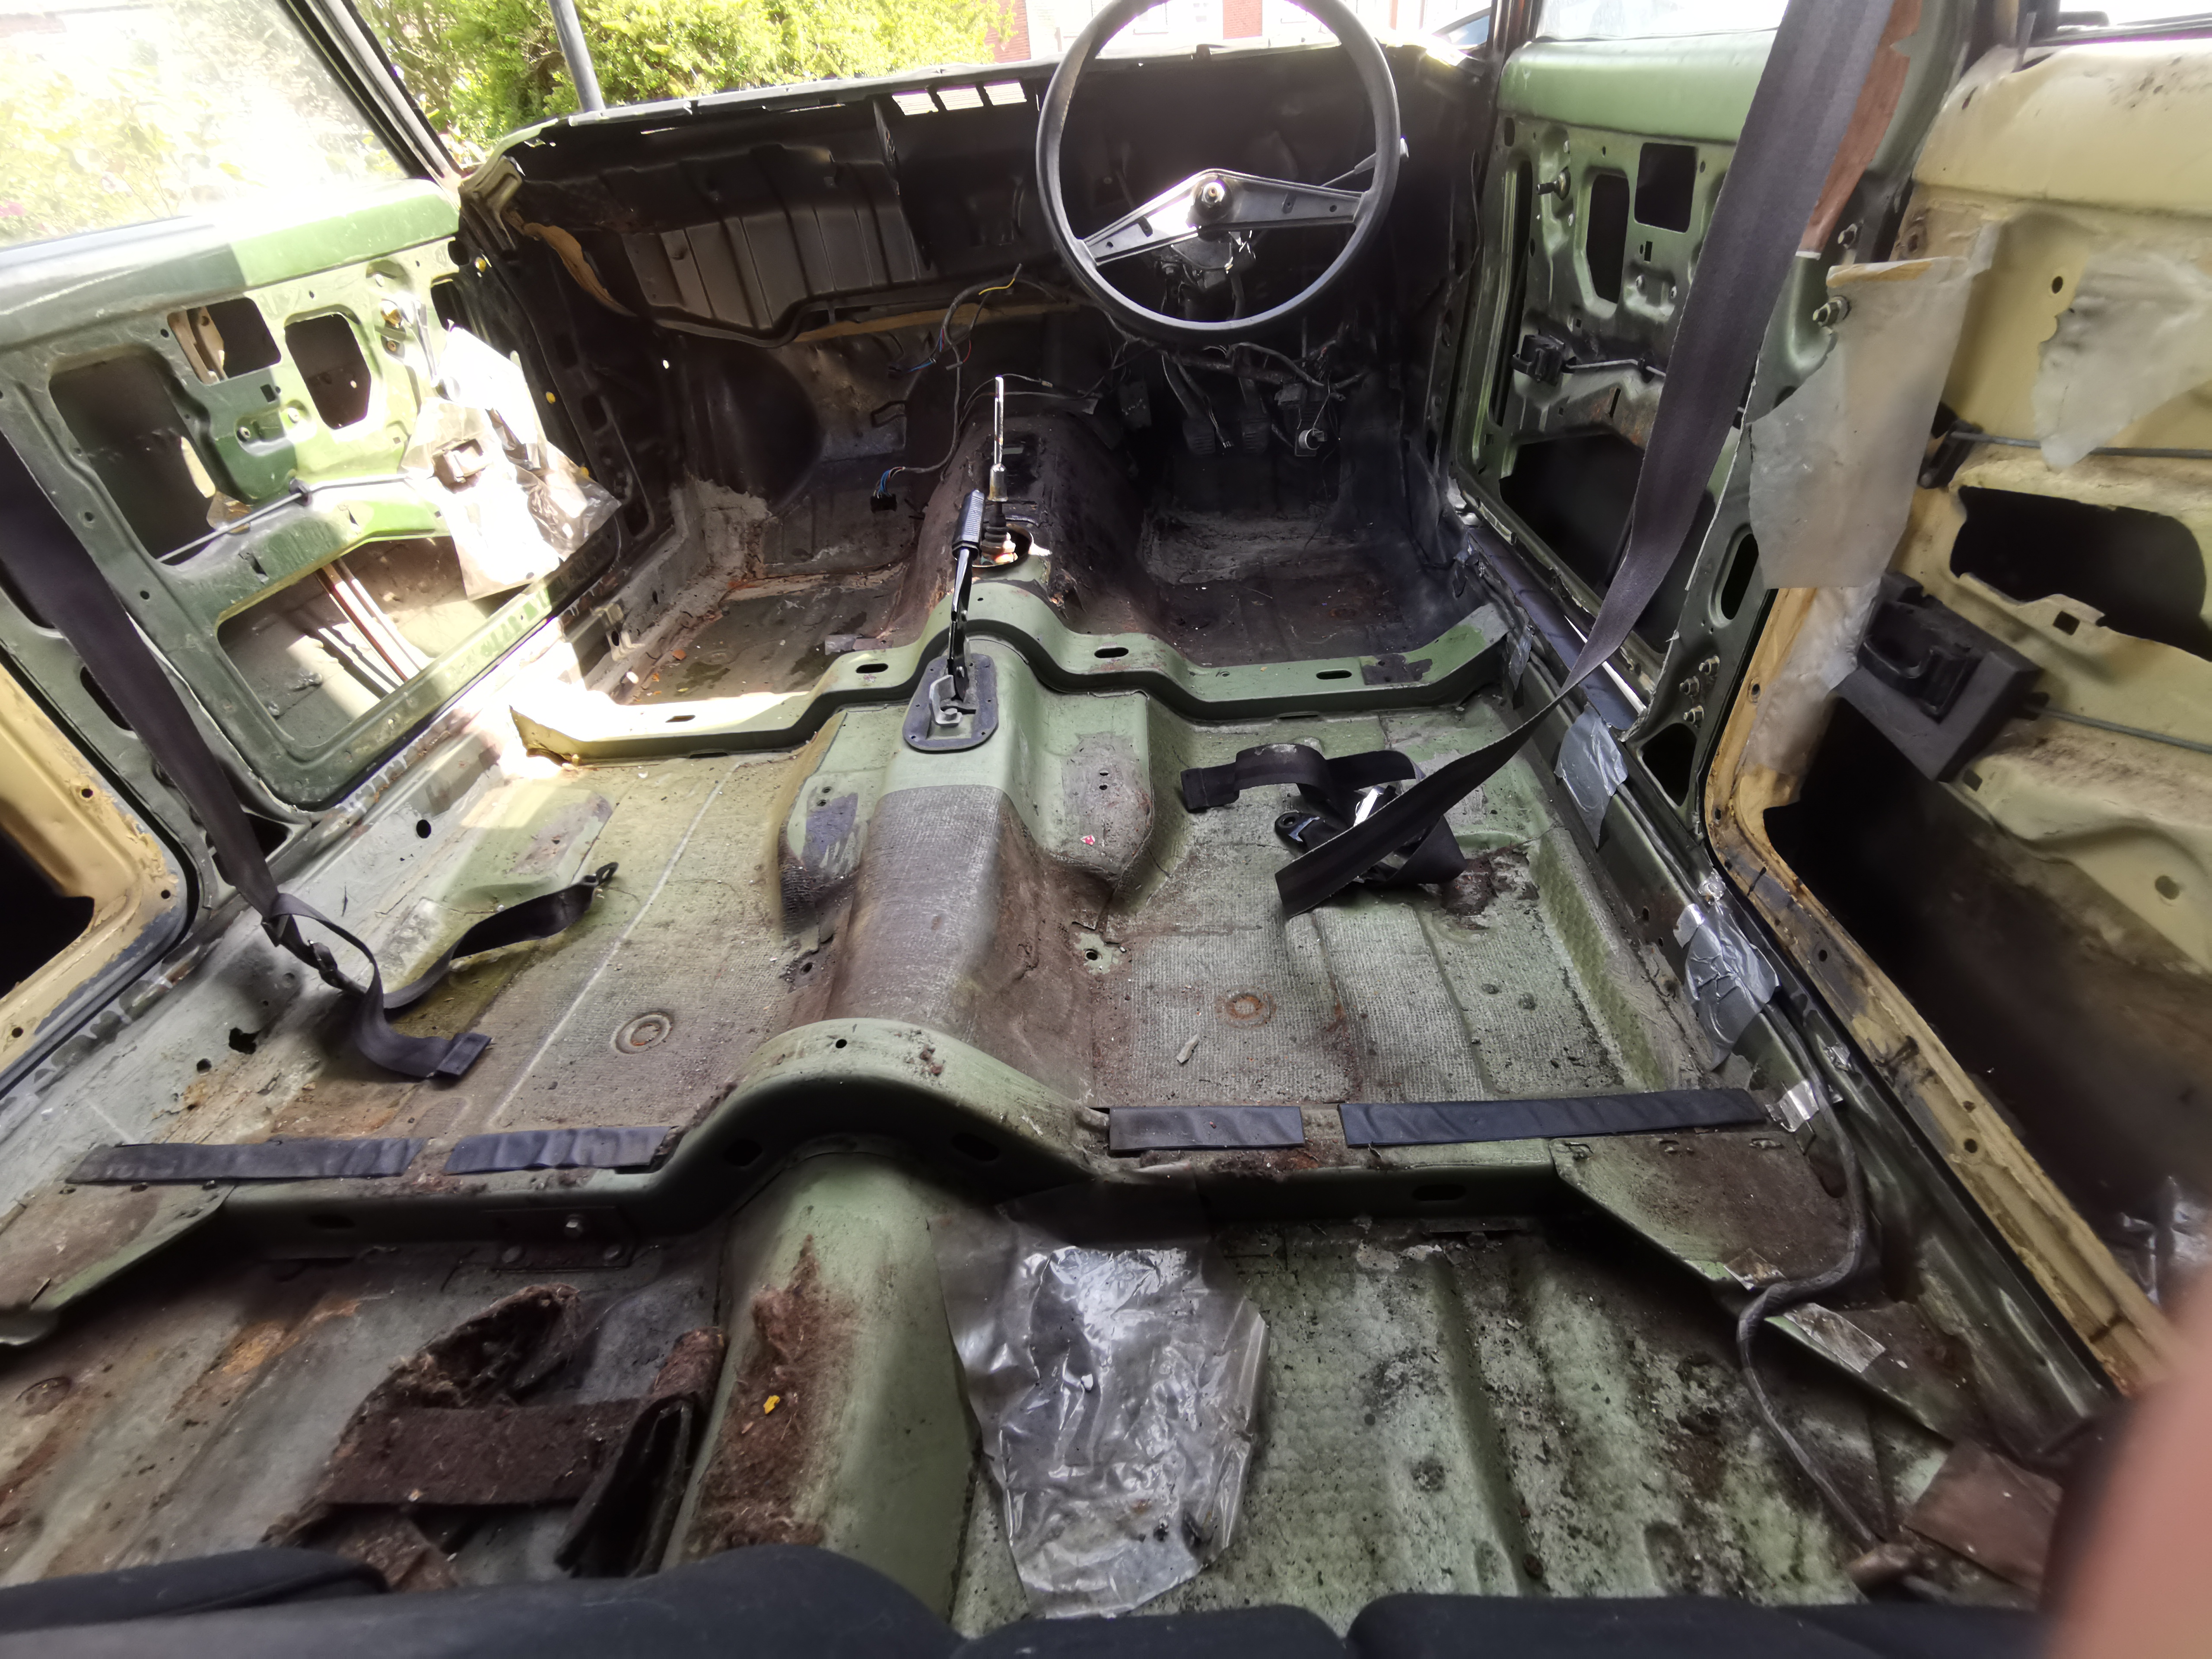
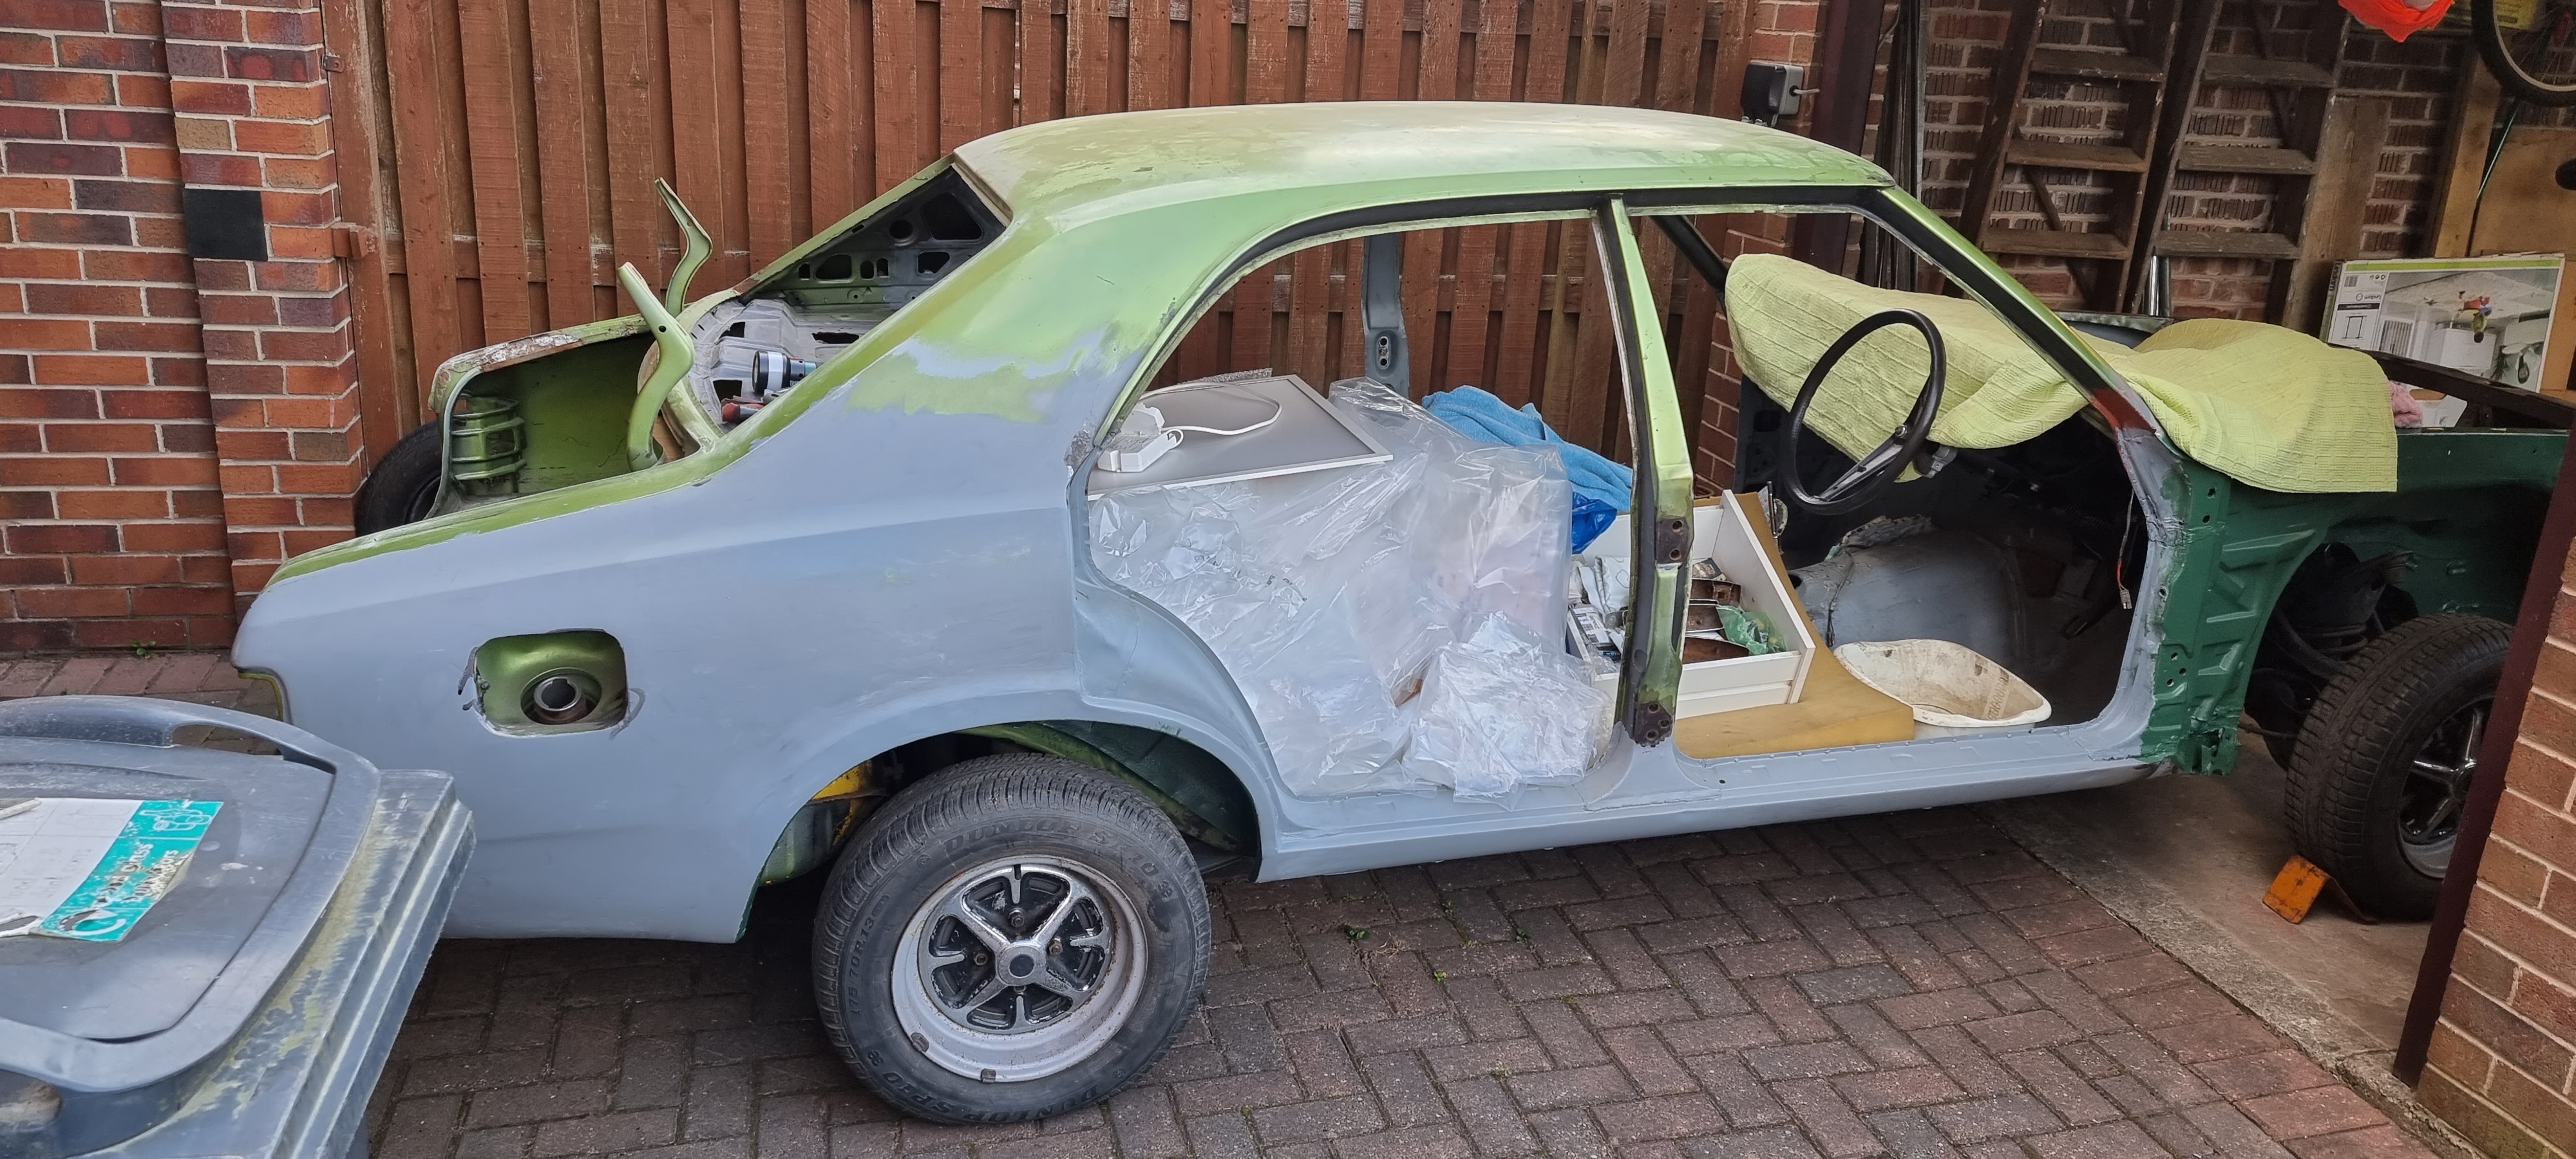
Interior stripped
Starting to be able to see what's what.
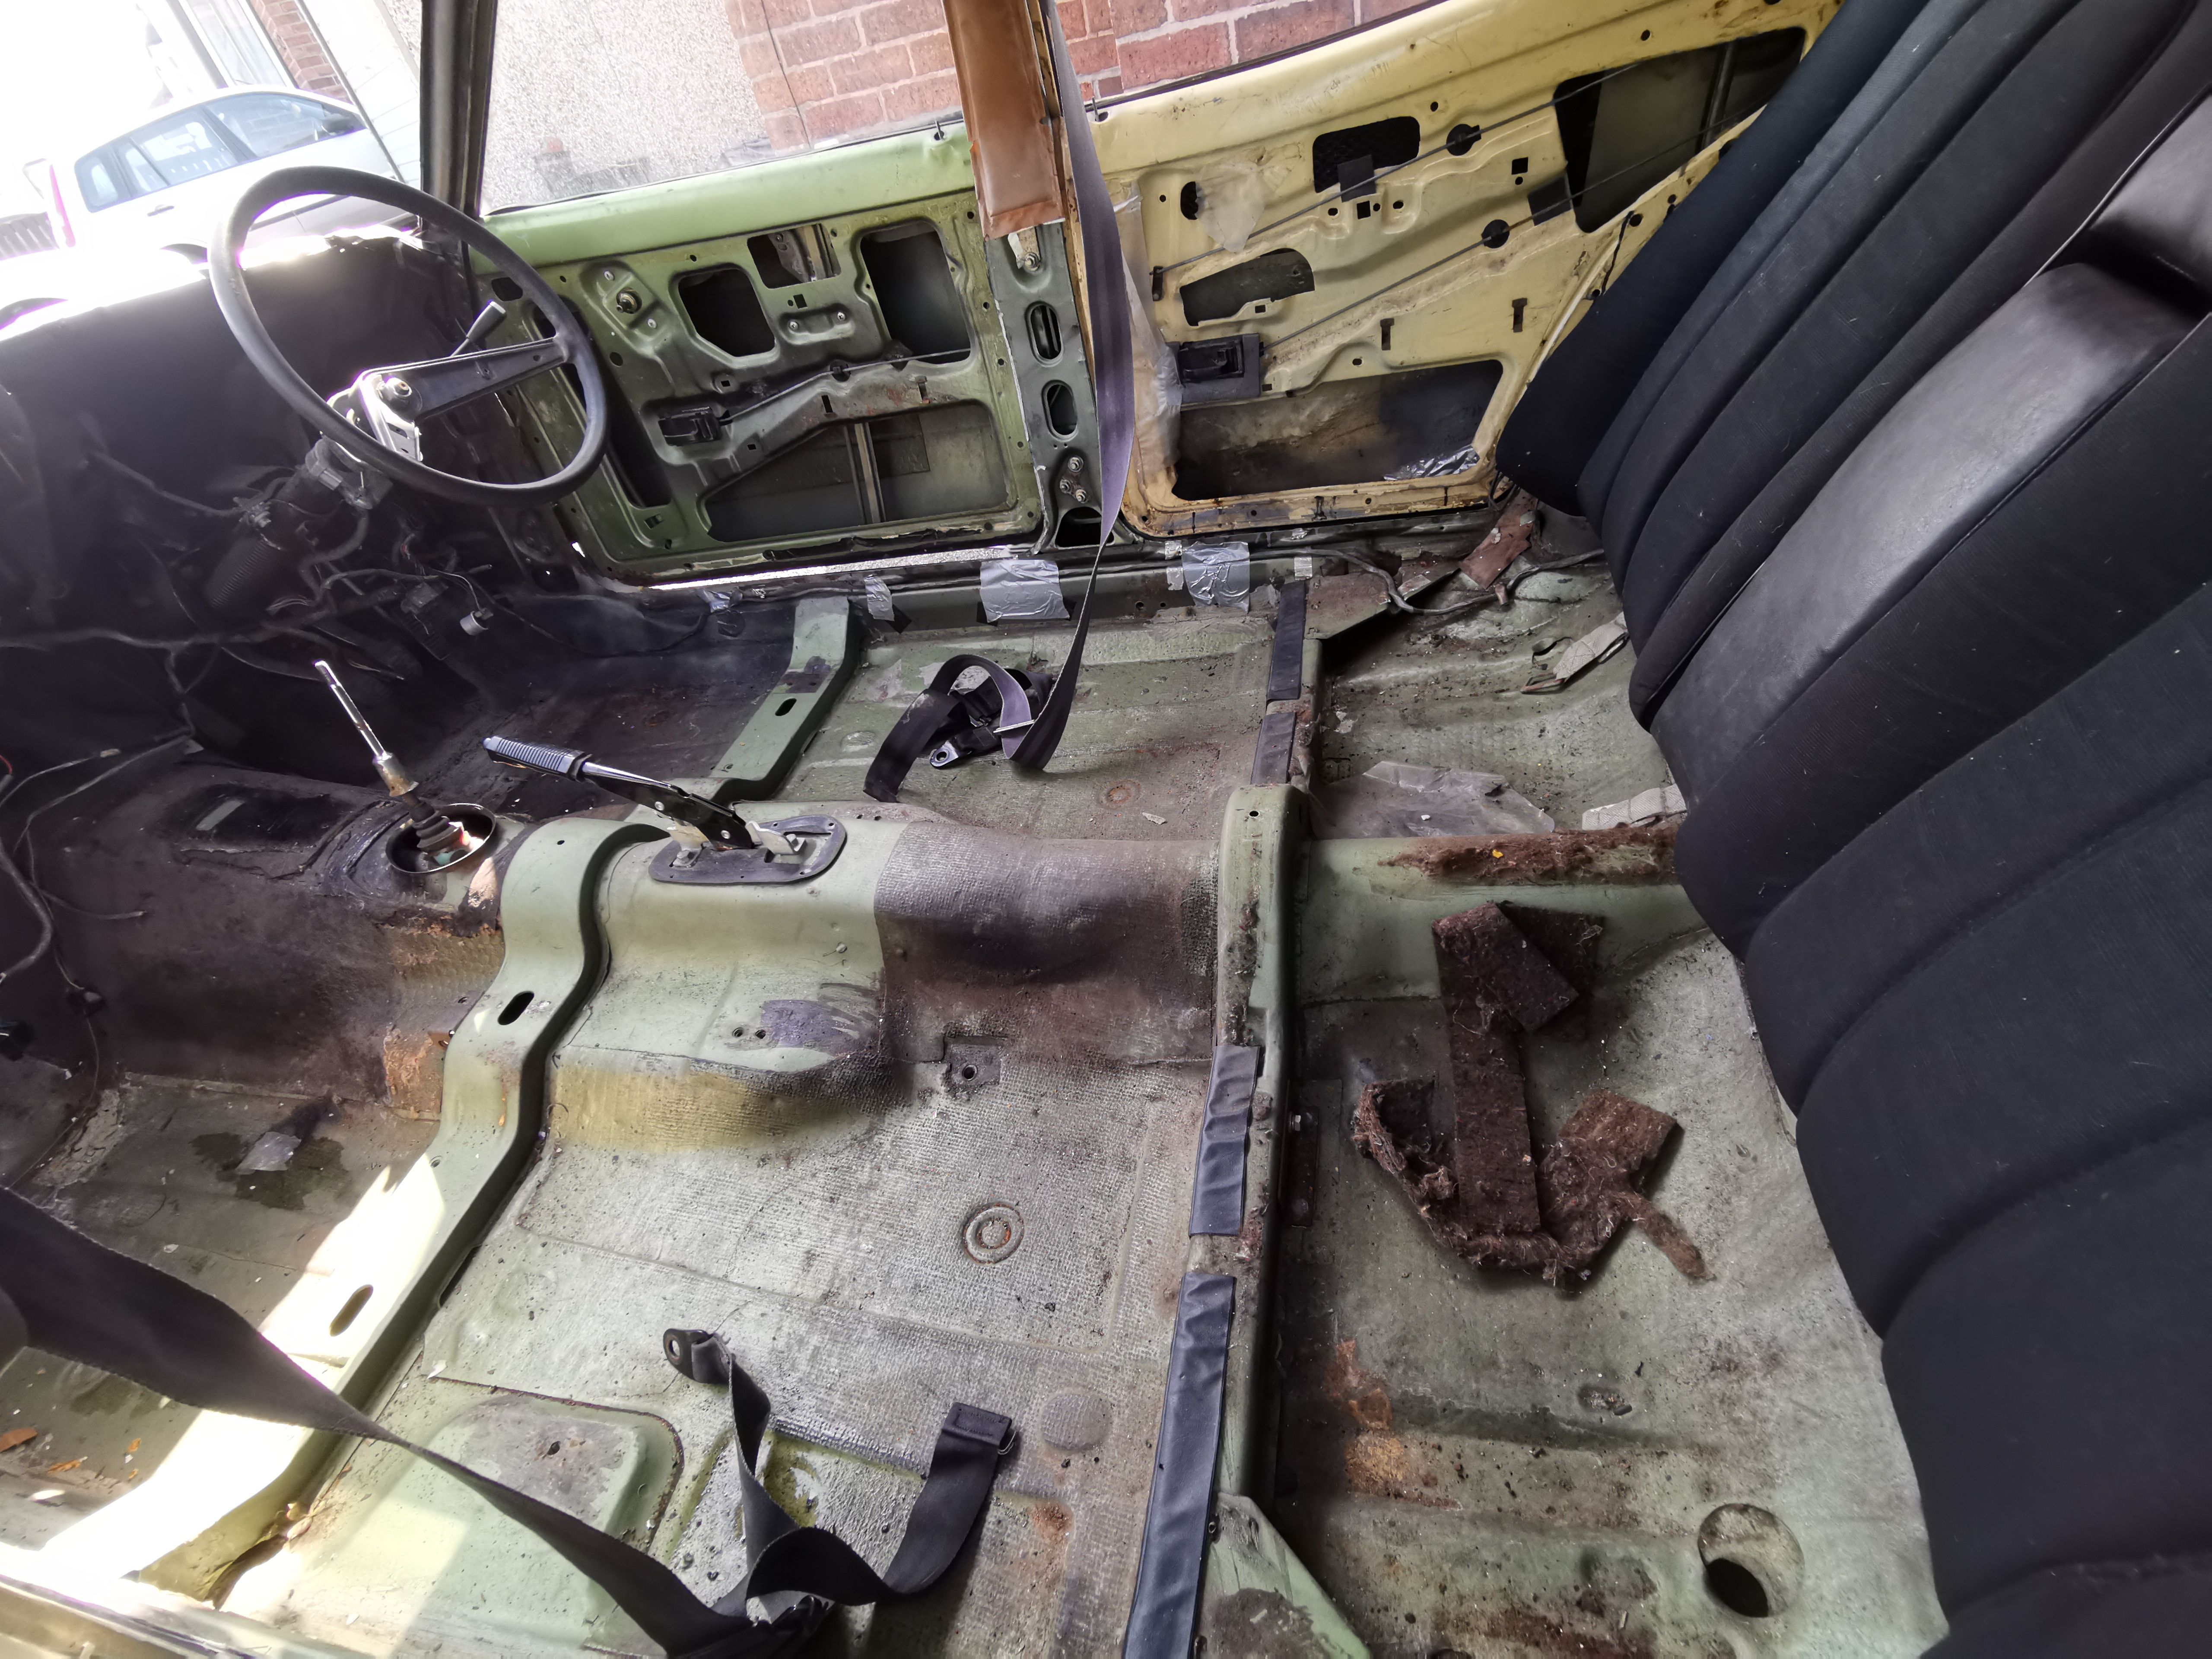
Interior stripped
Starting to be able to see what's what.
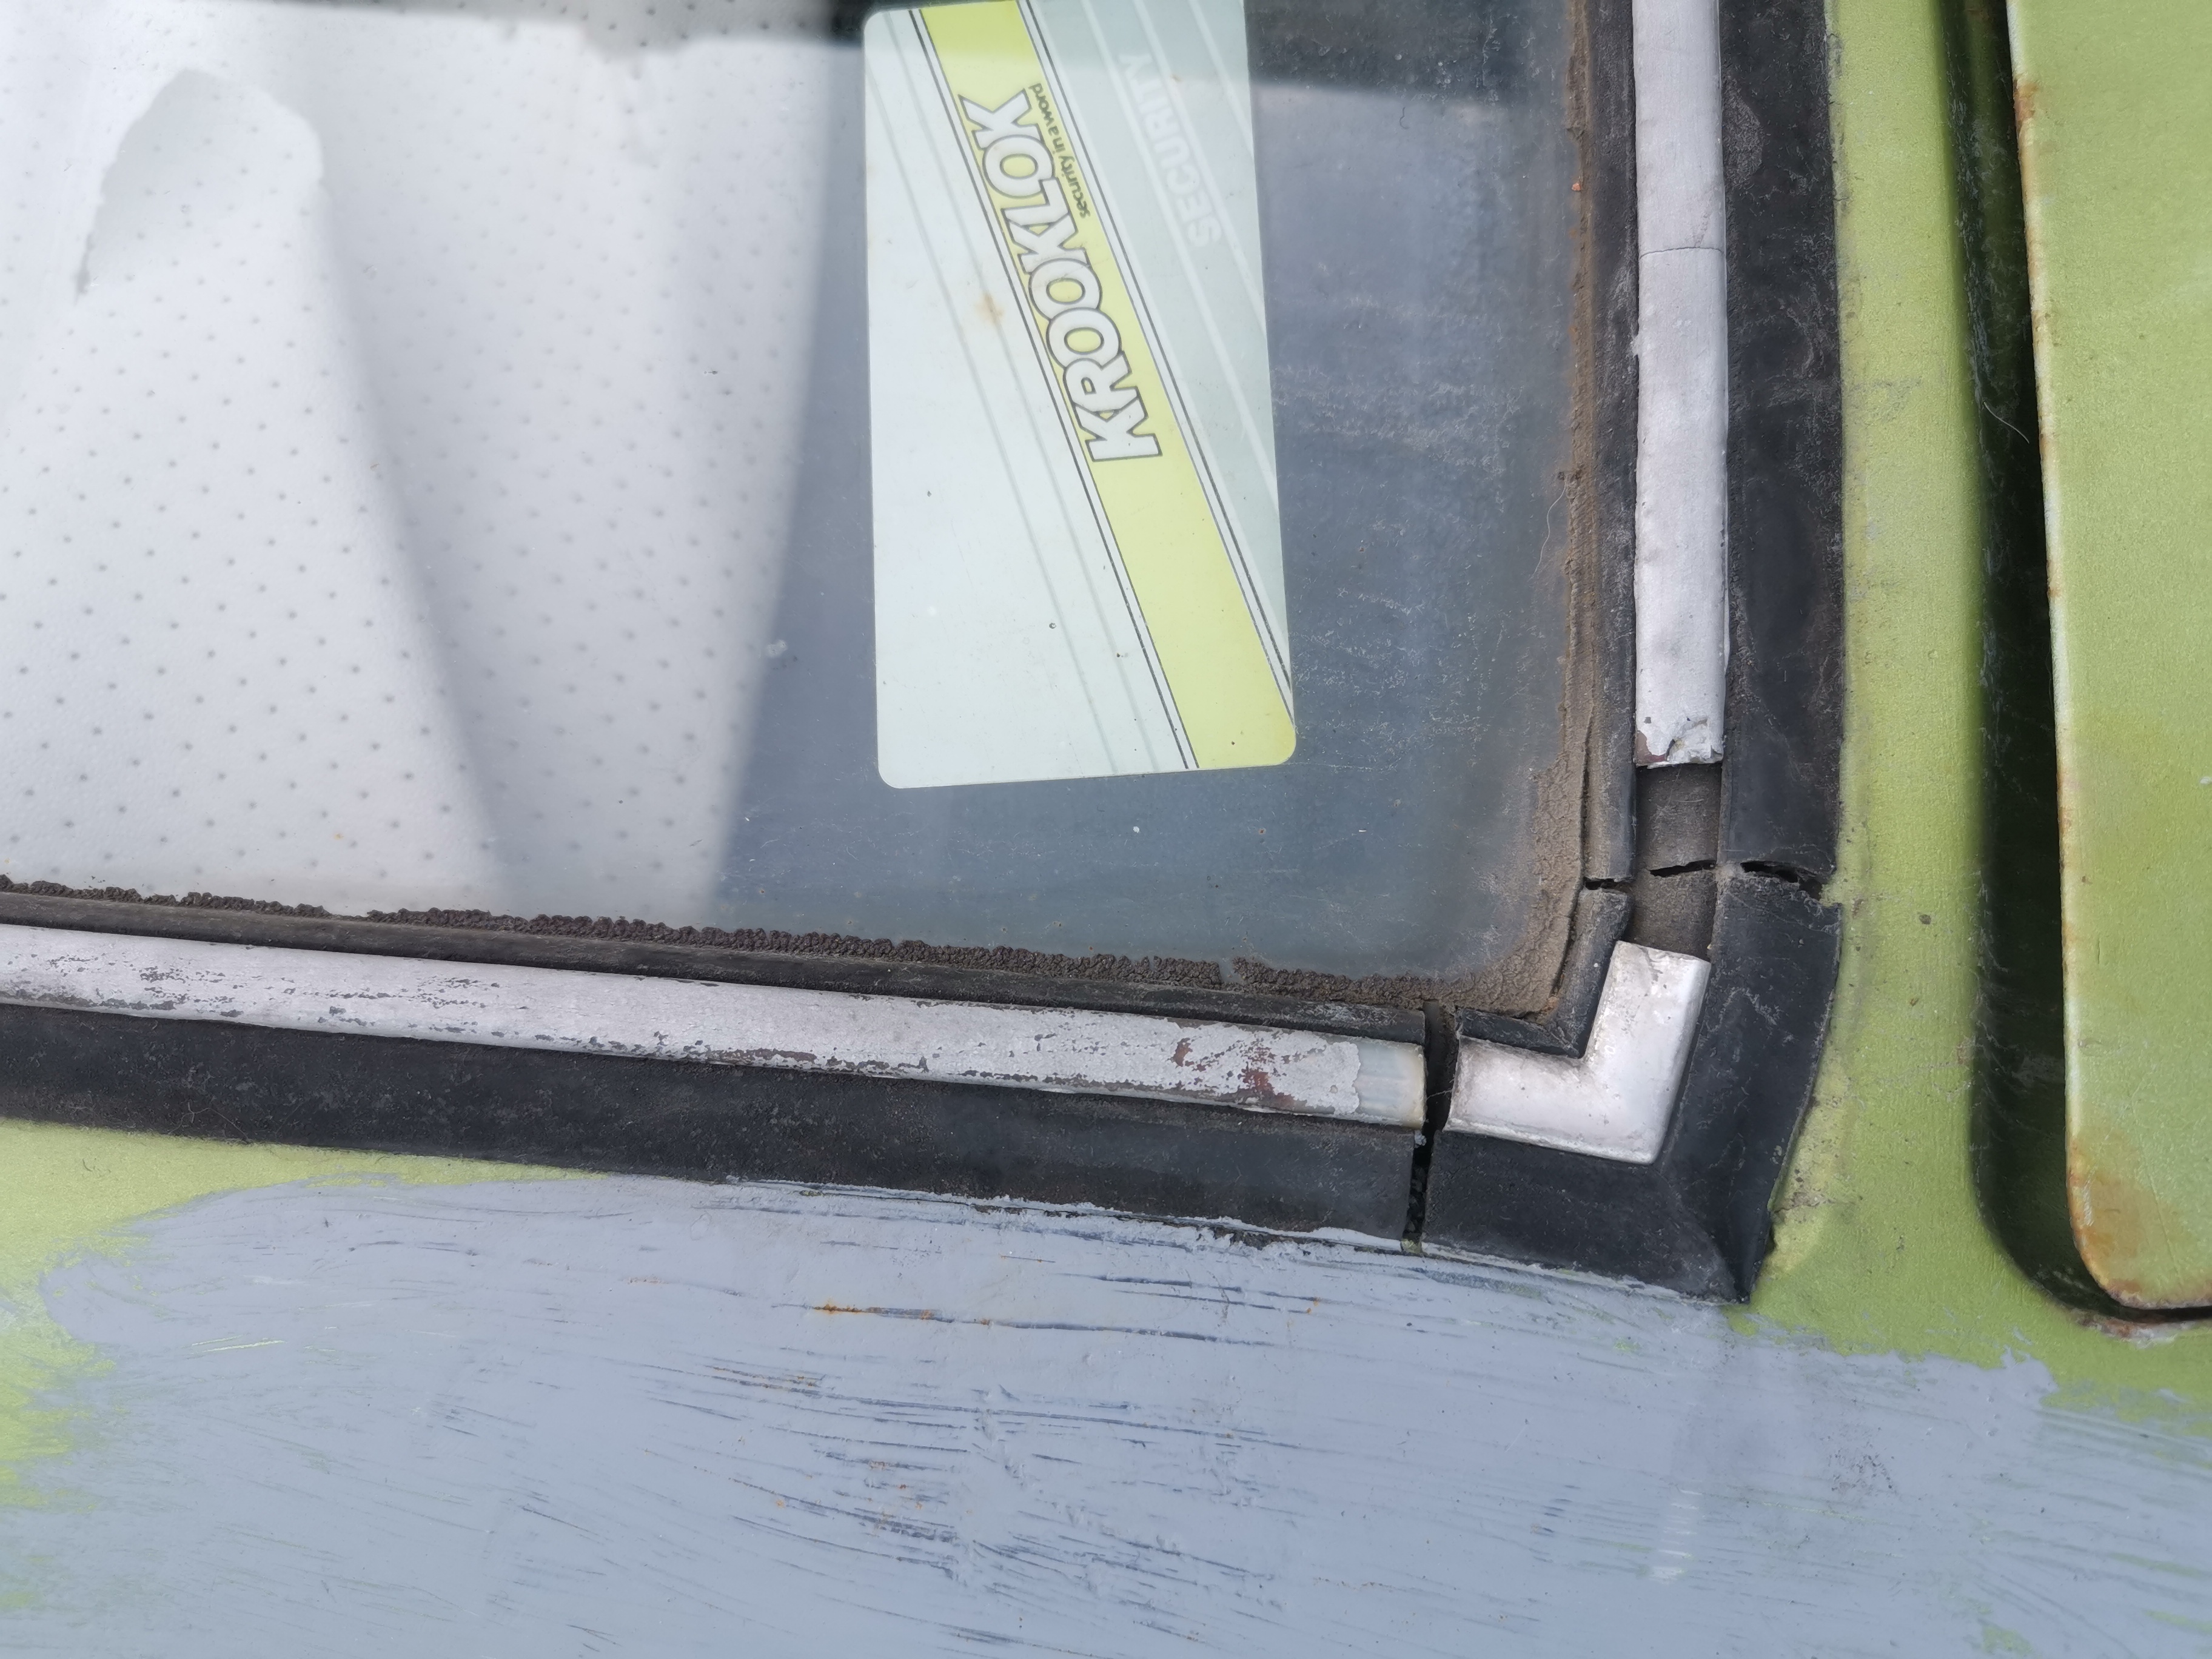
Rear window seals
Those seals are going to need replacing too.
Scuttle repair
The offside scuttle had been 'repaired' by a previous owner. Actually it looks like the new panel has just been welded in place over the top of the old panel. I might have to take it back off and start again.
Inner wing top
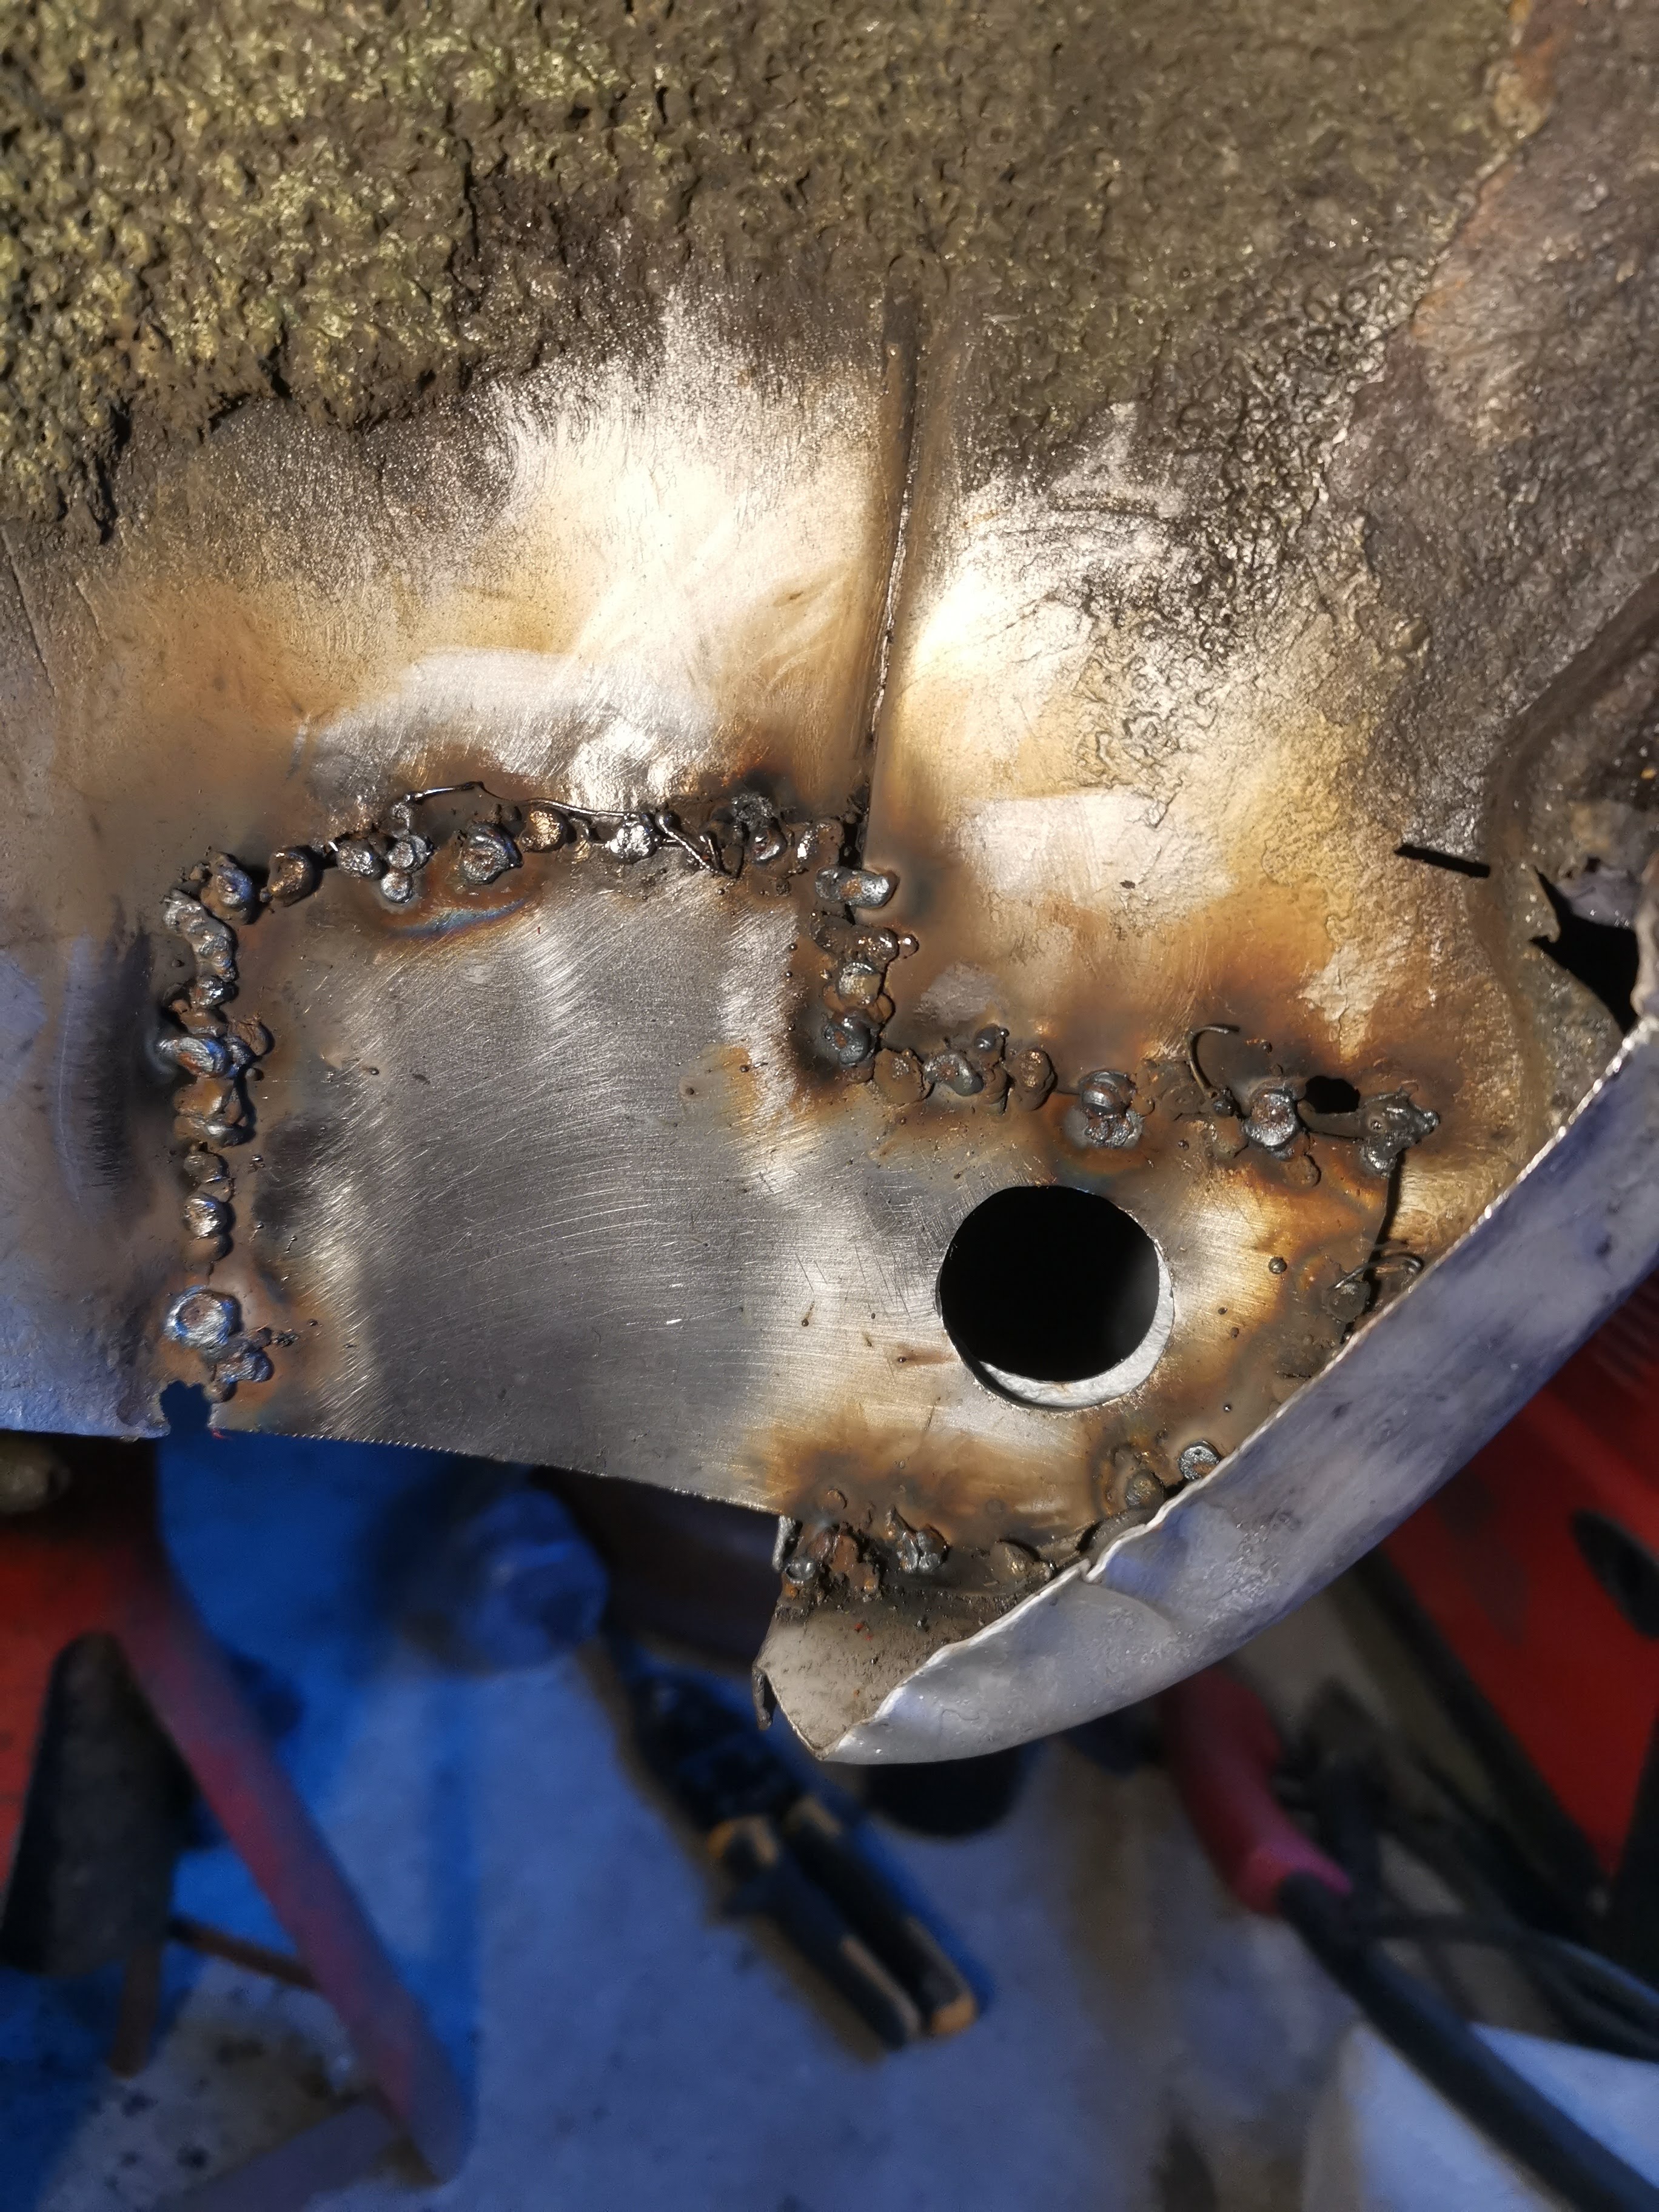
This section needs replacing as it's where the outer wing fastens to the inner.
Inner wing top
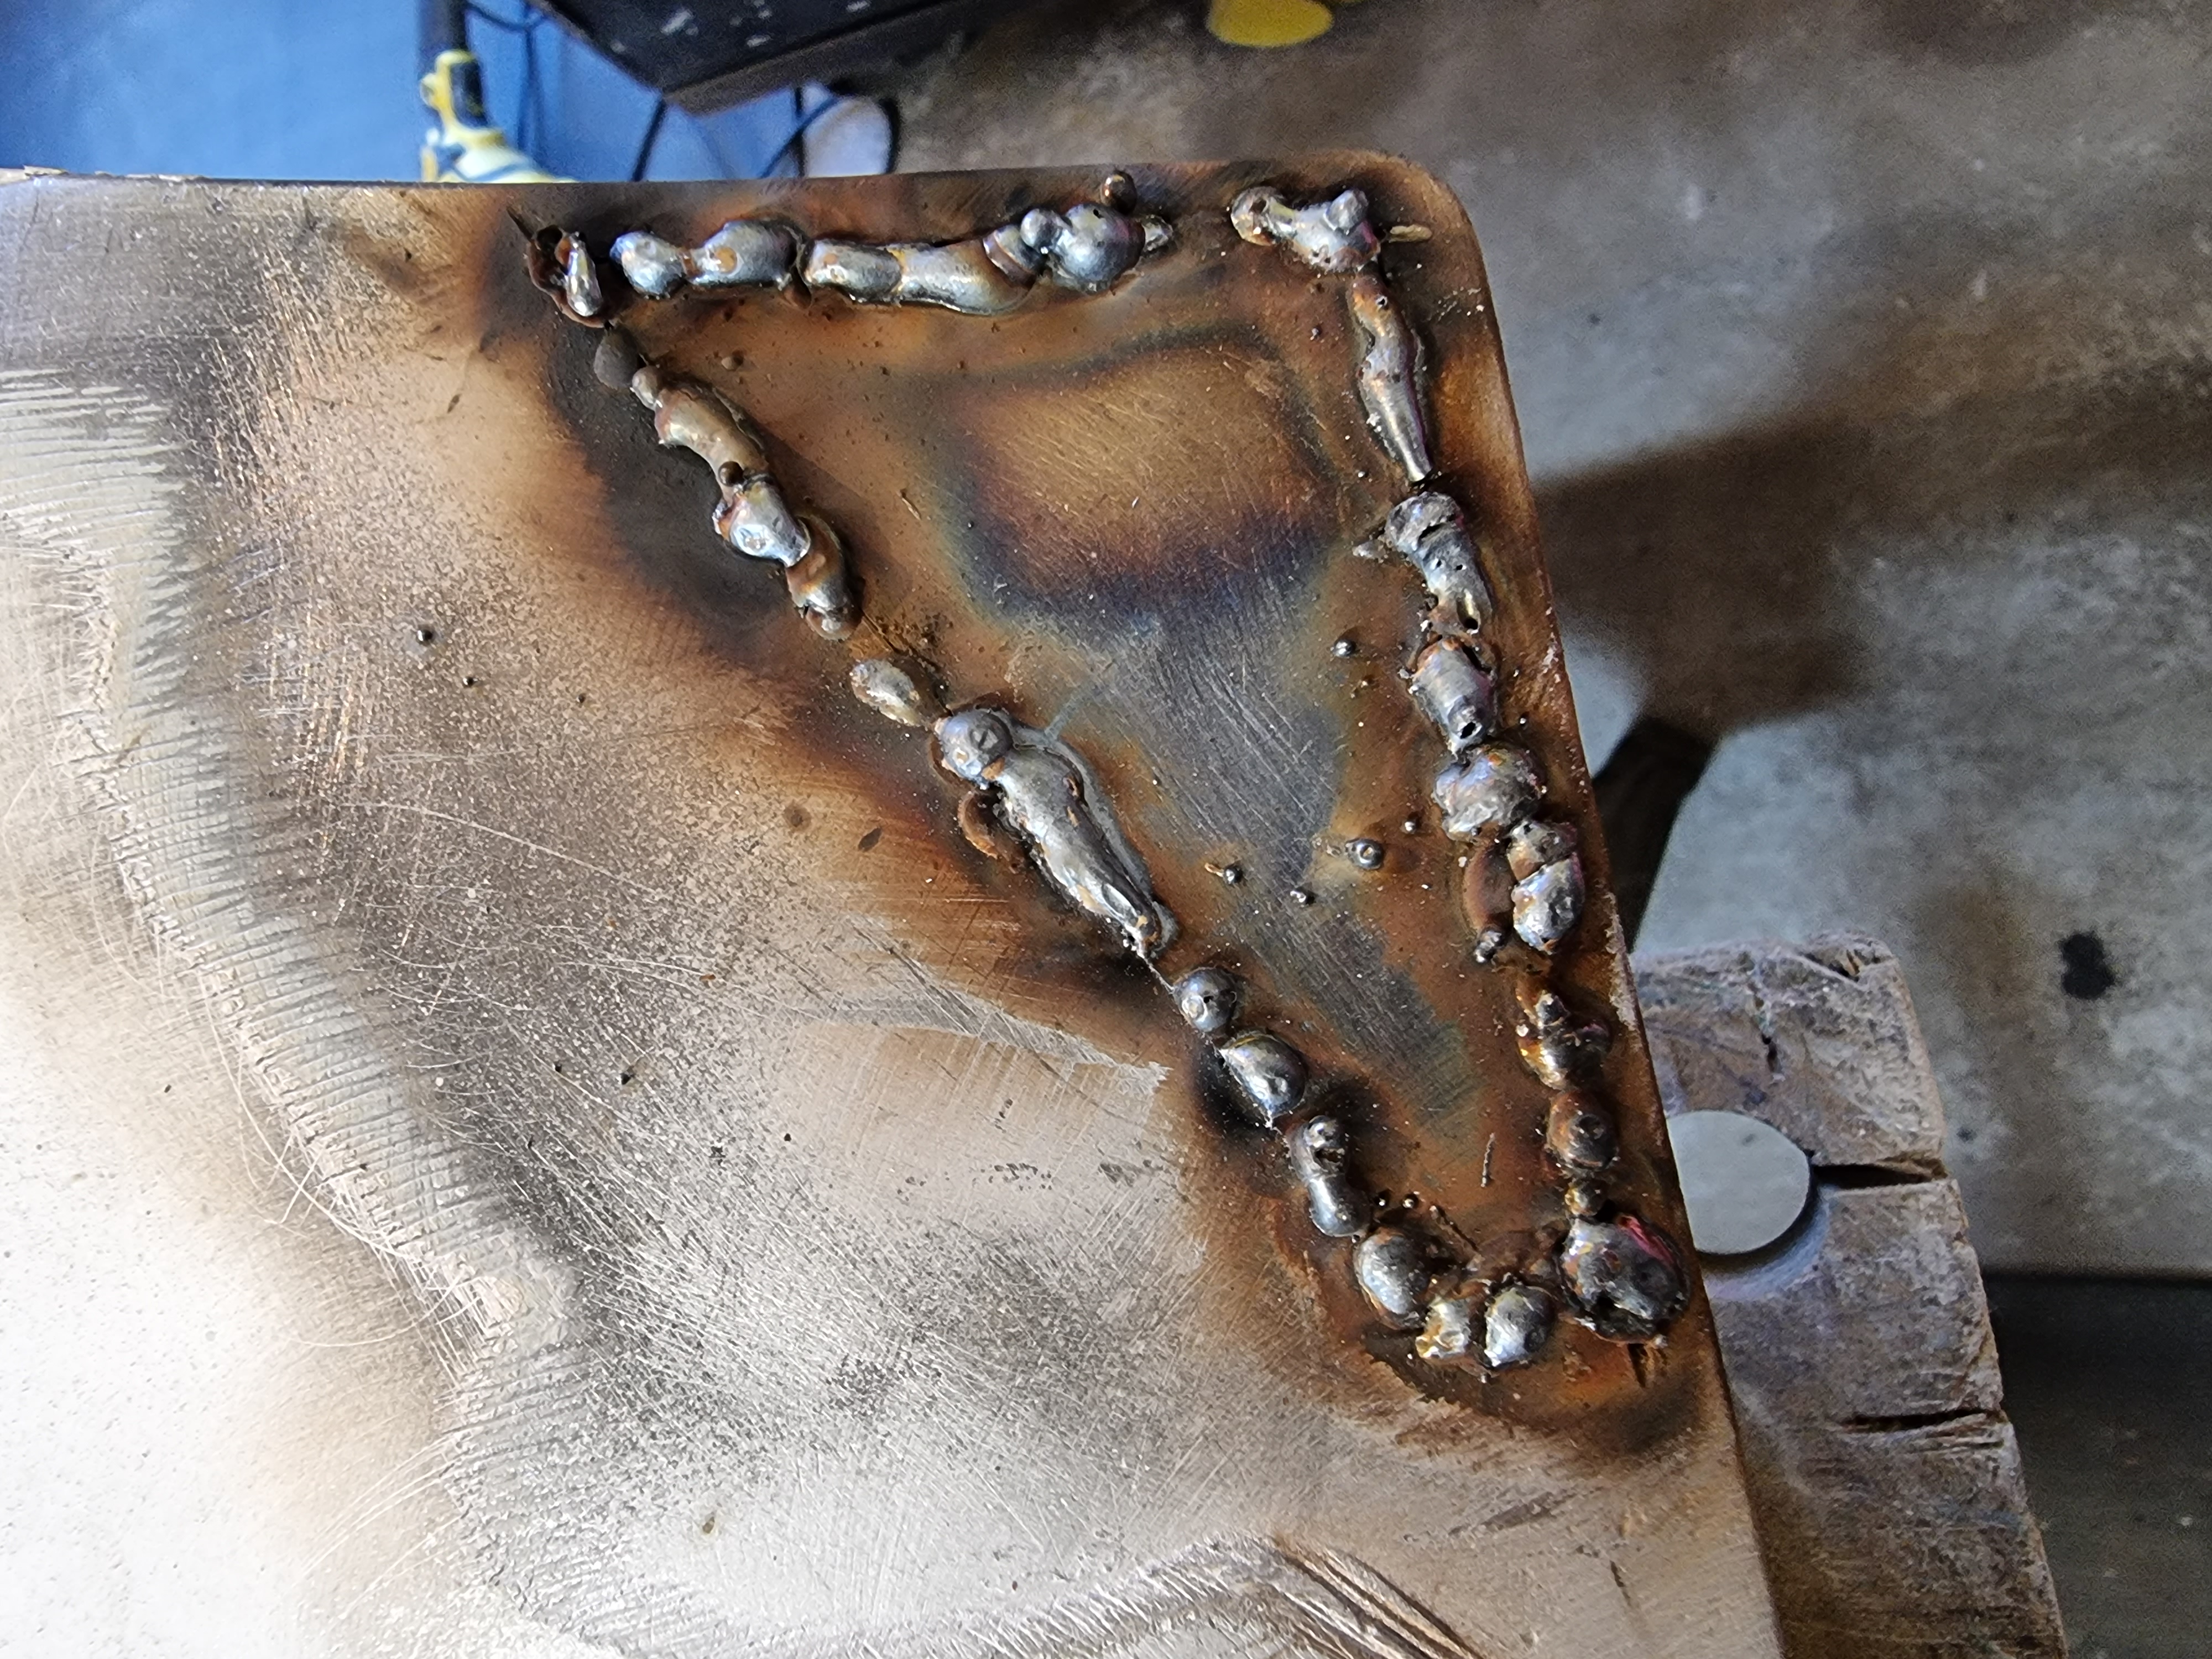
I cut the whole rusty section out and fabricated a new section. My first attempt at creating a repair panel. Small though it is.

Slam panel
All that horrible black paint was stripped off to reveal bare metal in surprisingly good condition.
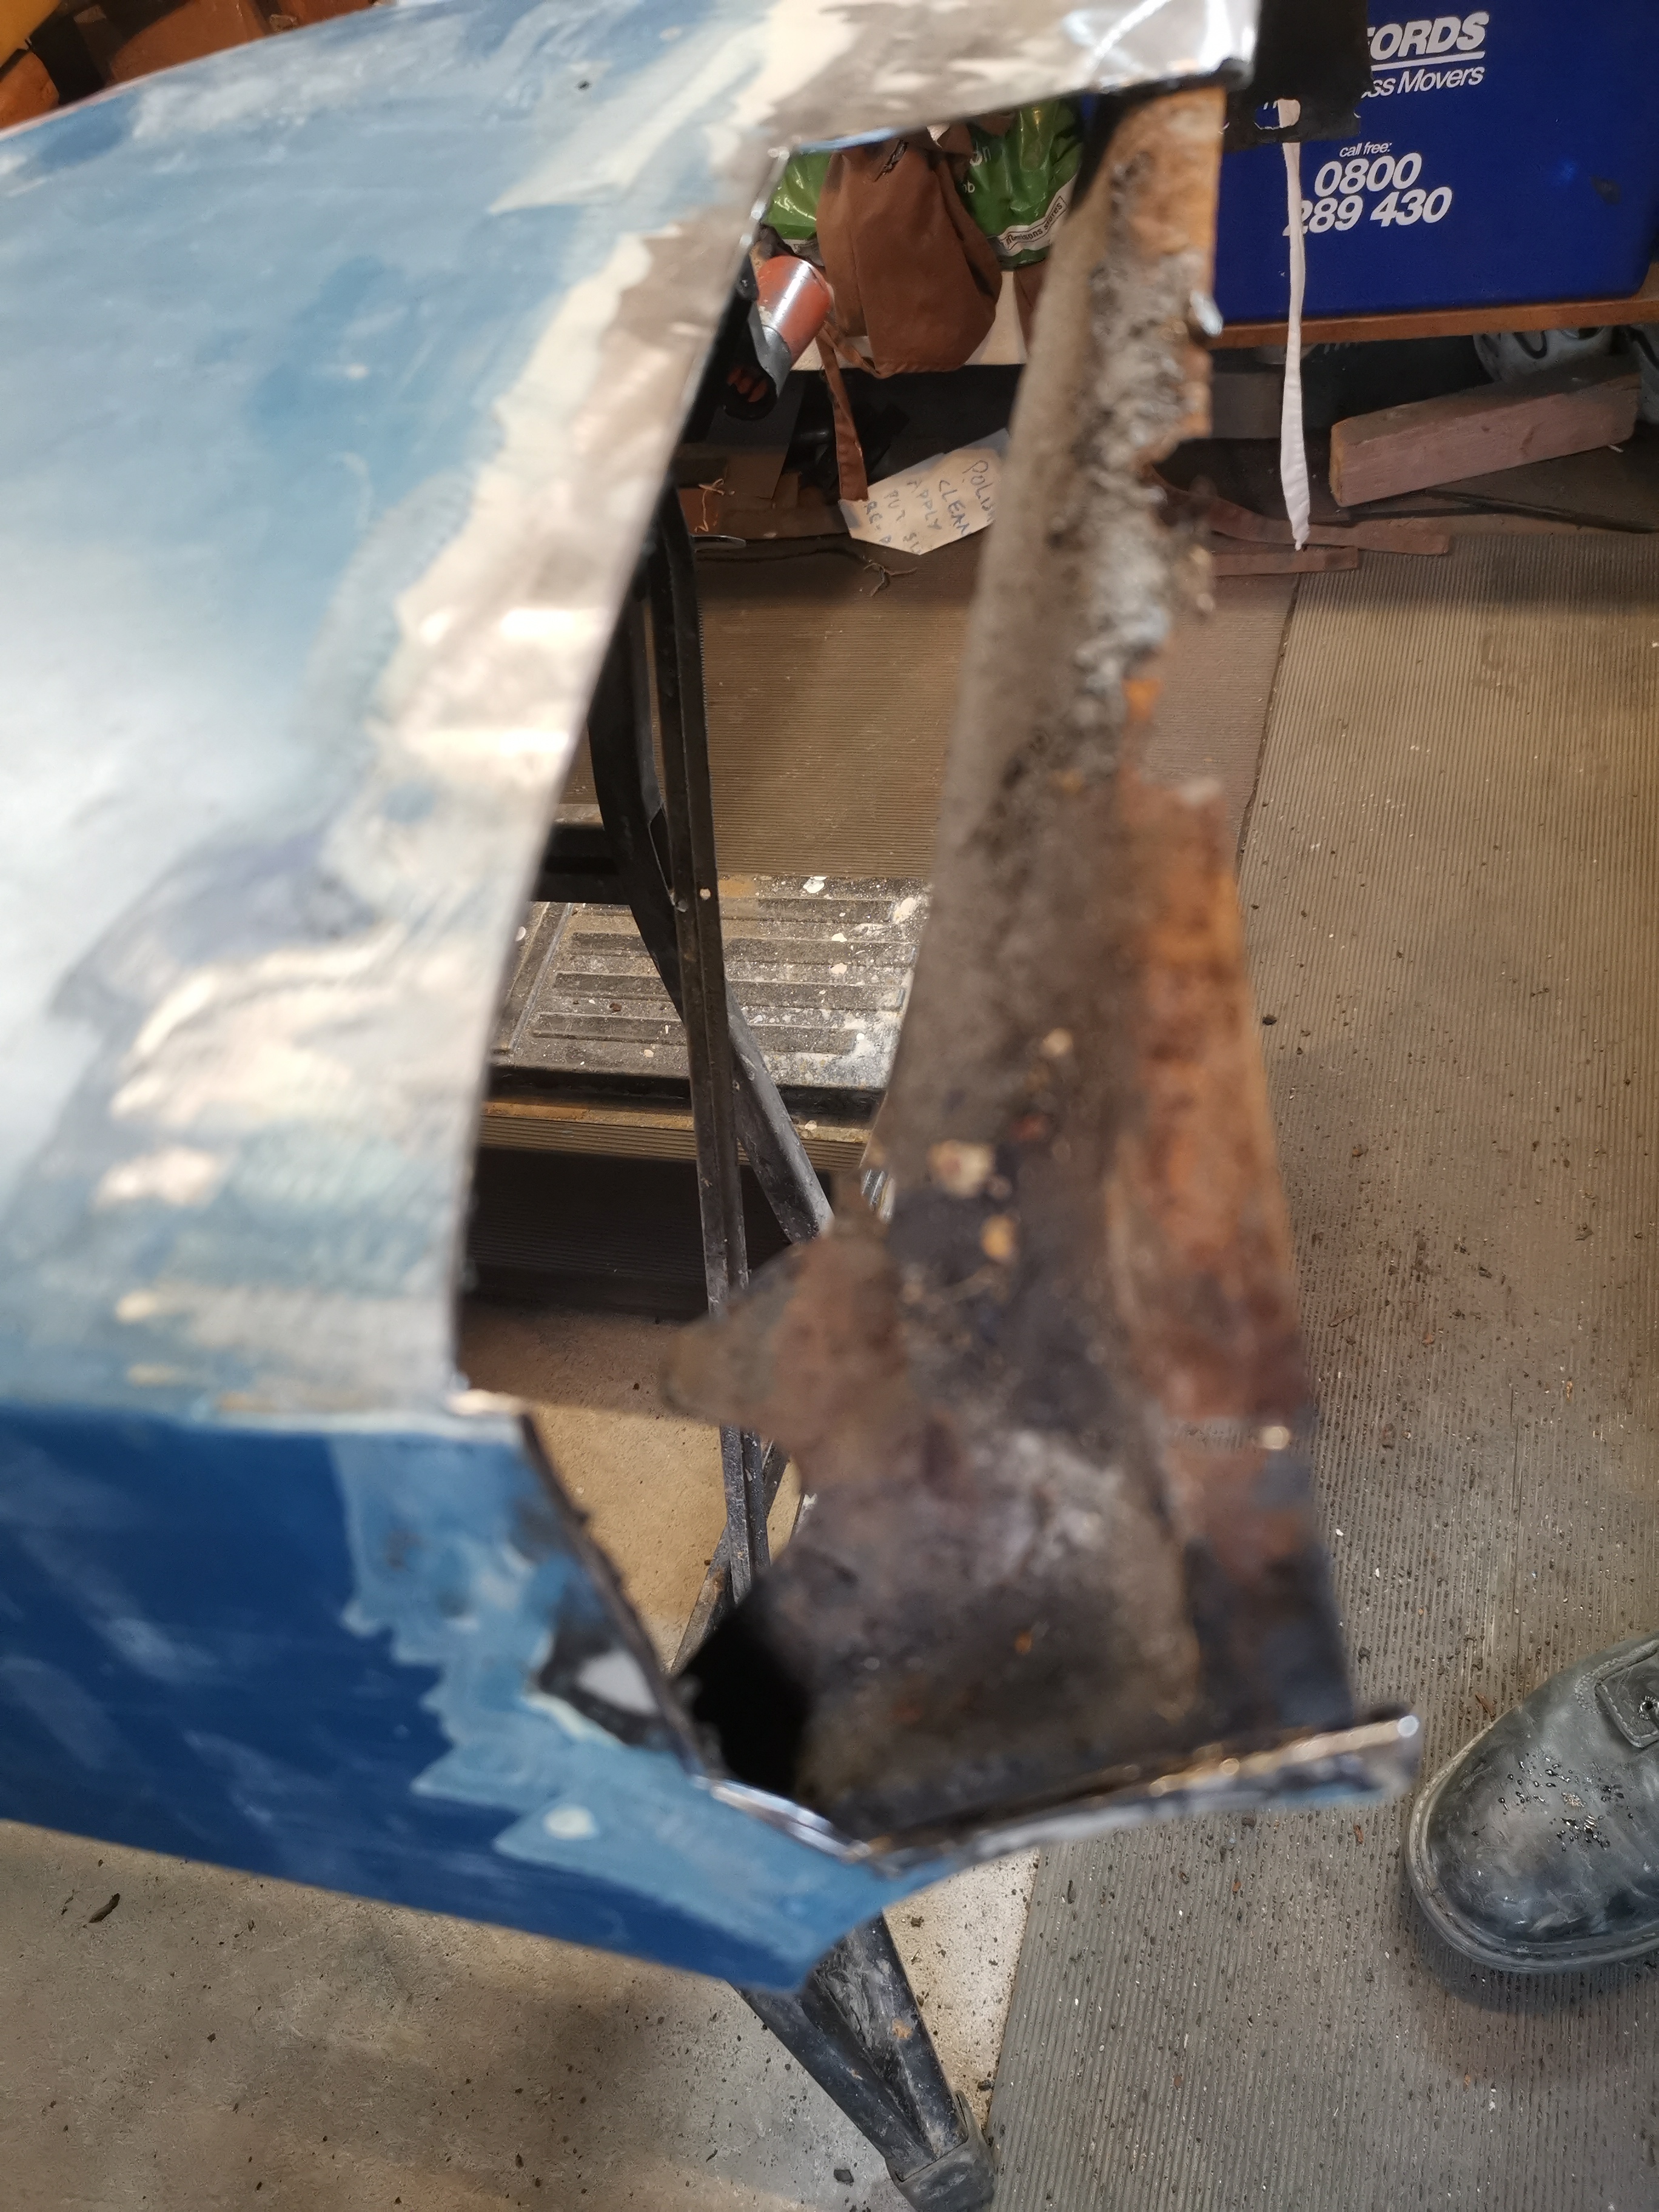
Front valance
The same can't be said of the front valance! There are dints and damage a plenty and you can't get to the back of it to beat it back into shape. It's going to have to come off and a new one fitted I think.
Dashboard
Dashboard out. There's a few areas that need attention before repainting.

Front seat back
I hope the marks on the back of the seat will clean off.
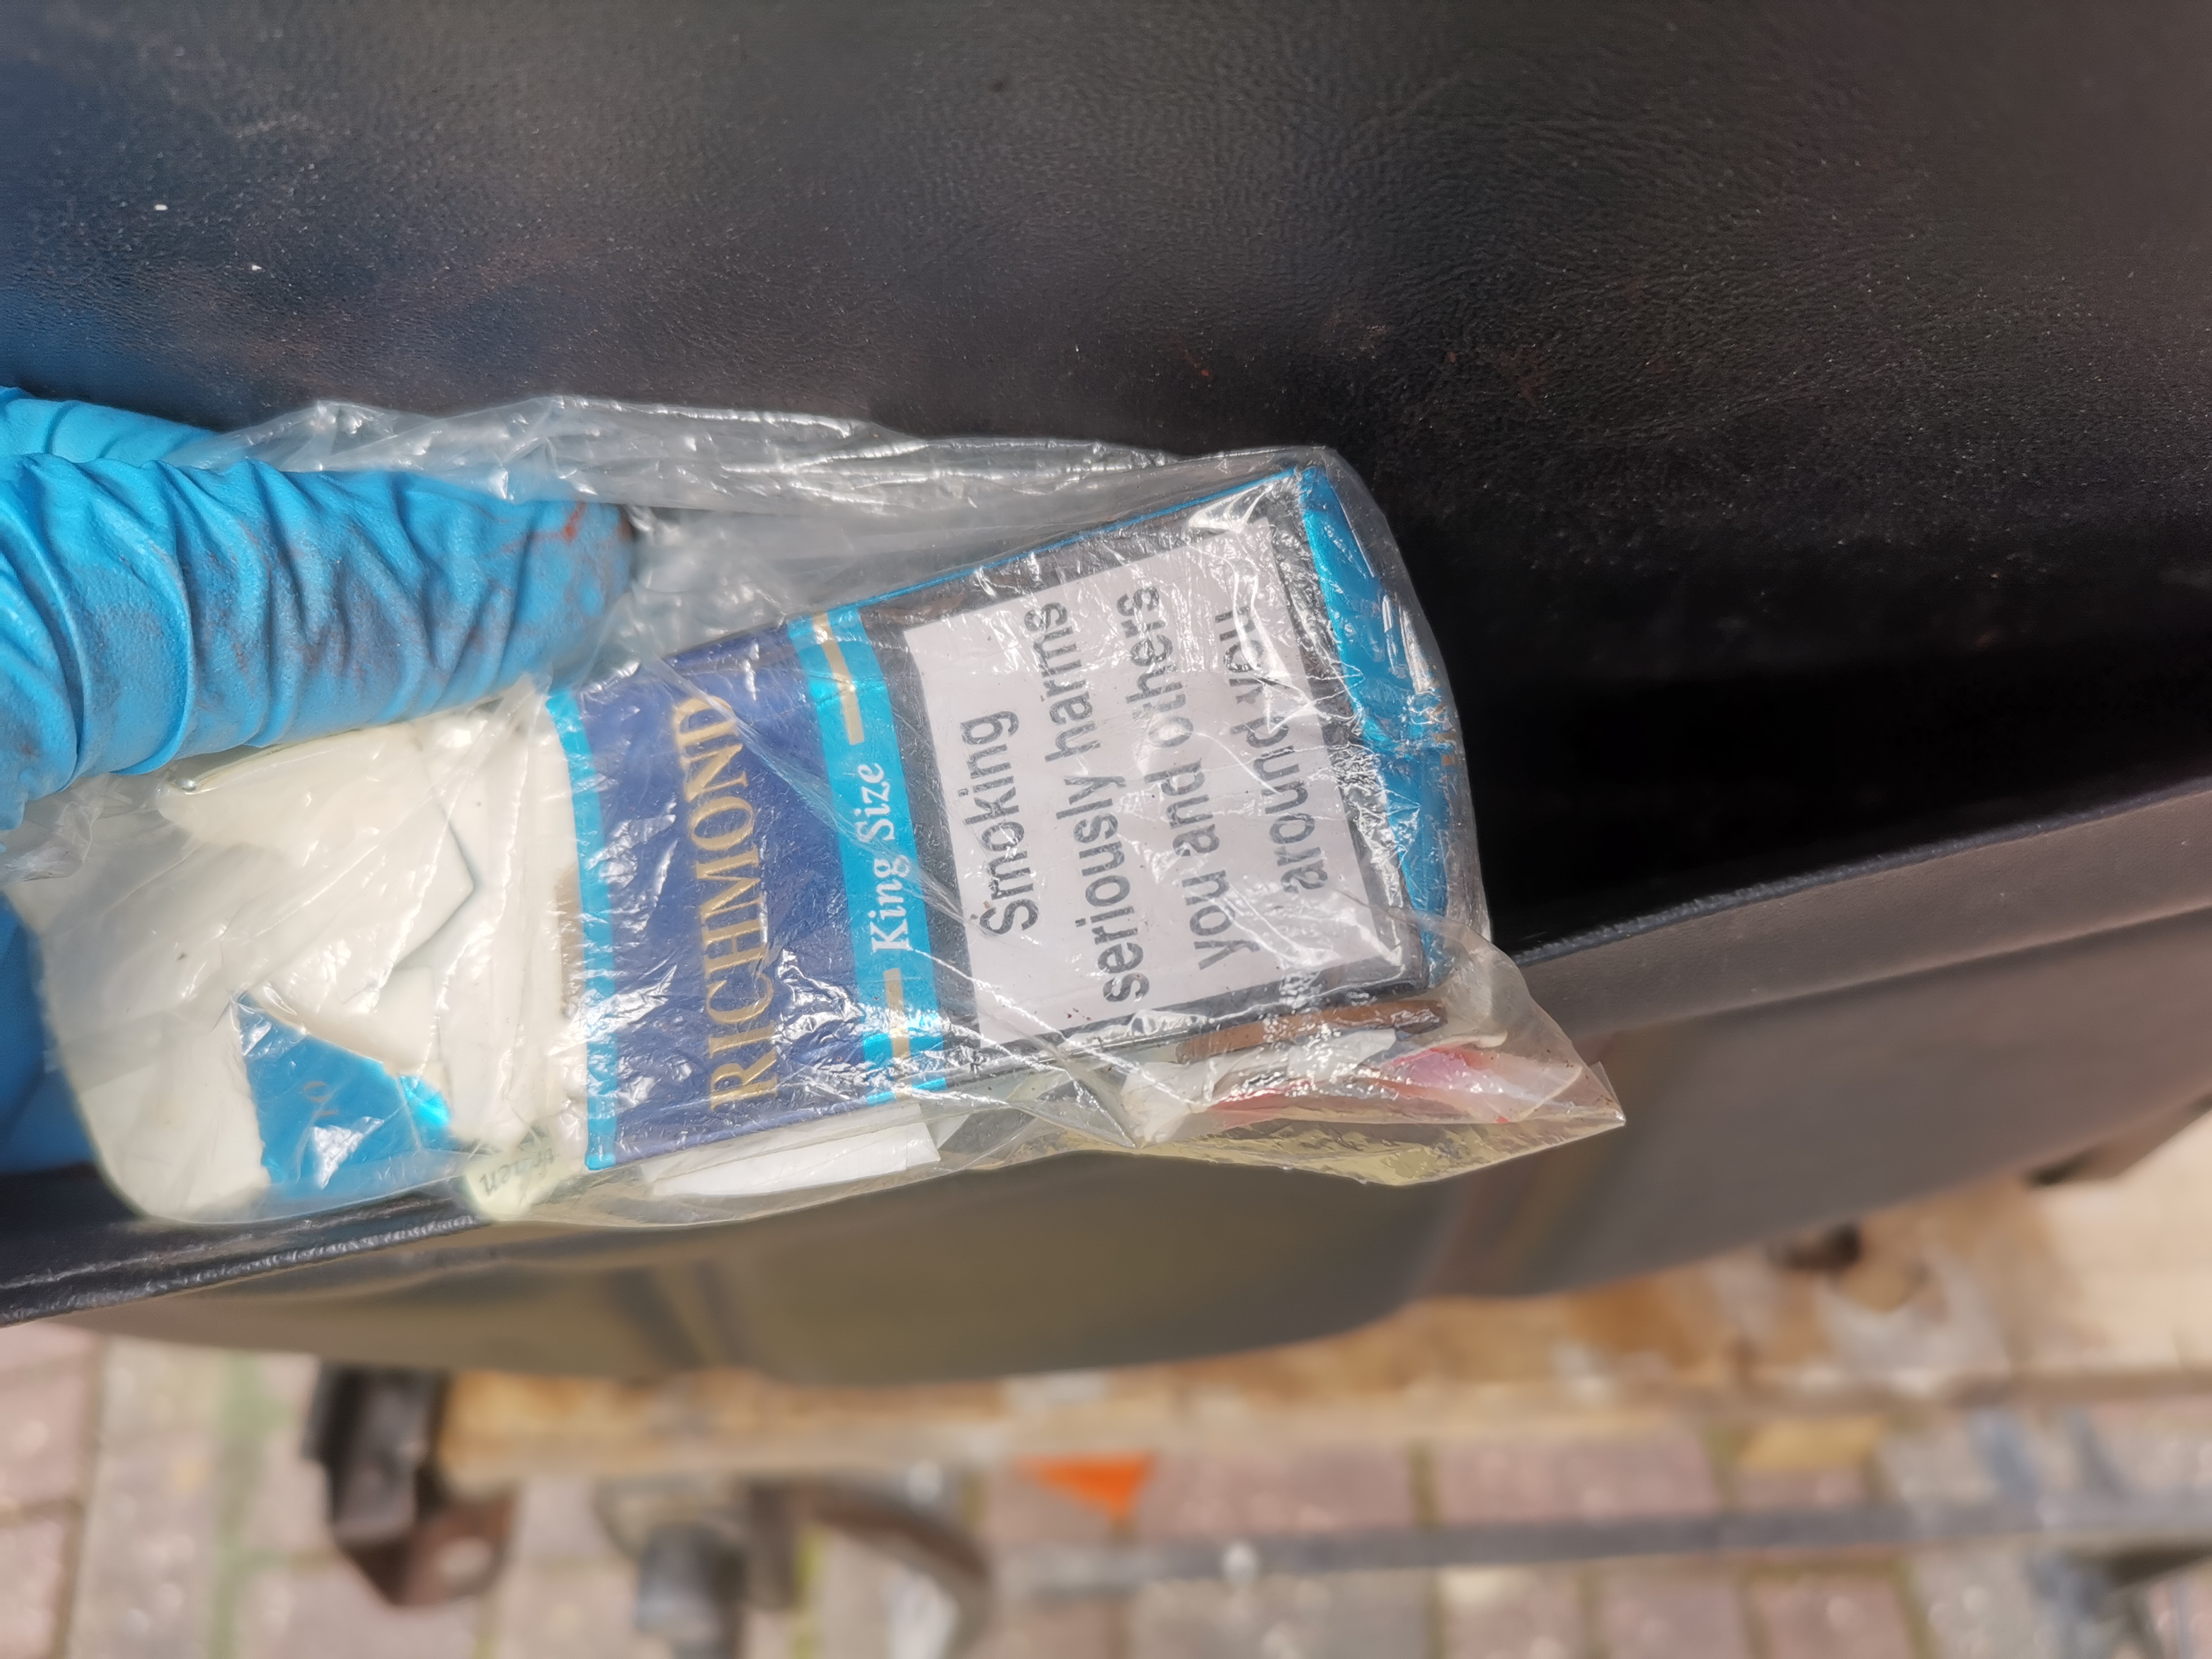
Front seat back
Digging into the pocket I found an old cigarette packet. A throwback to a different age I guess.
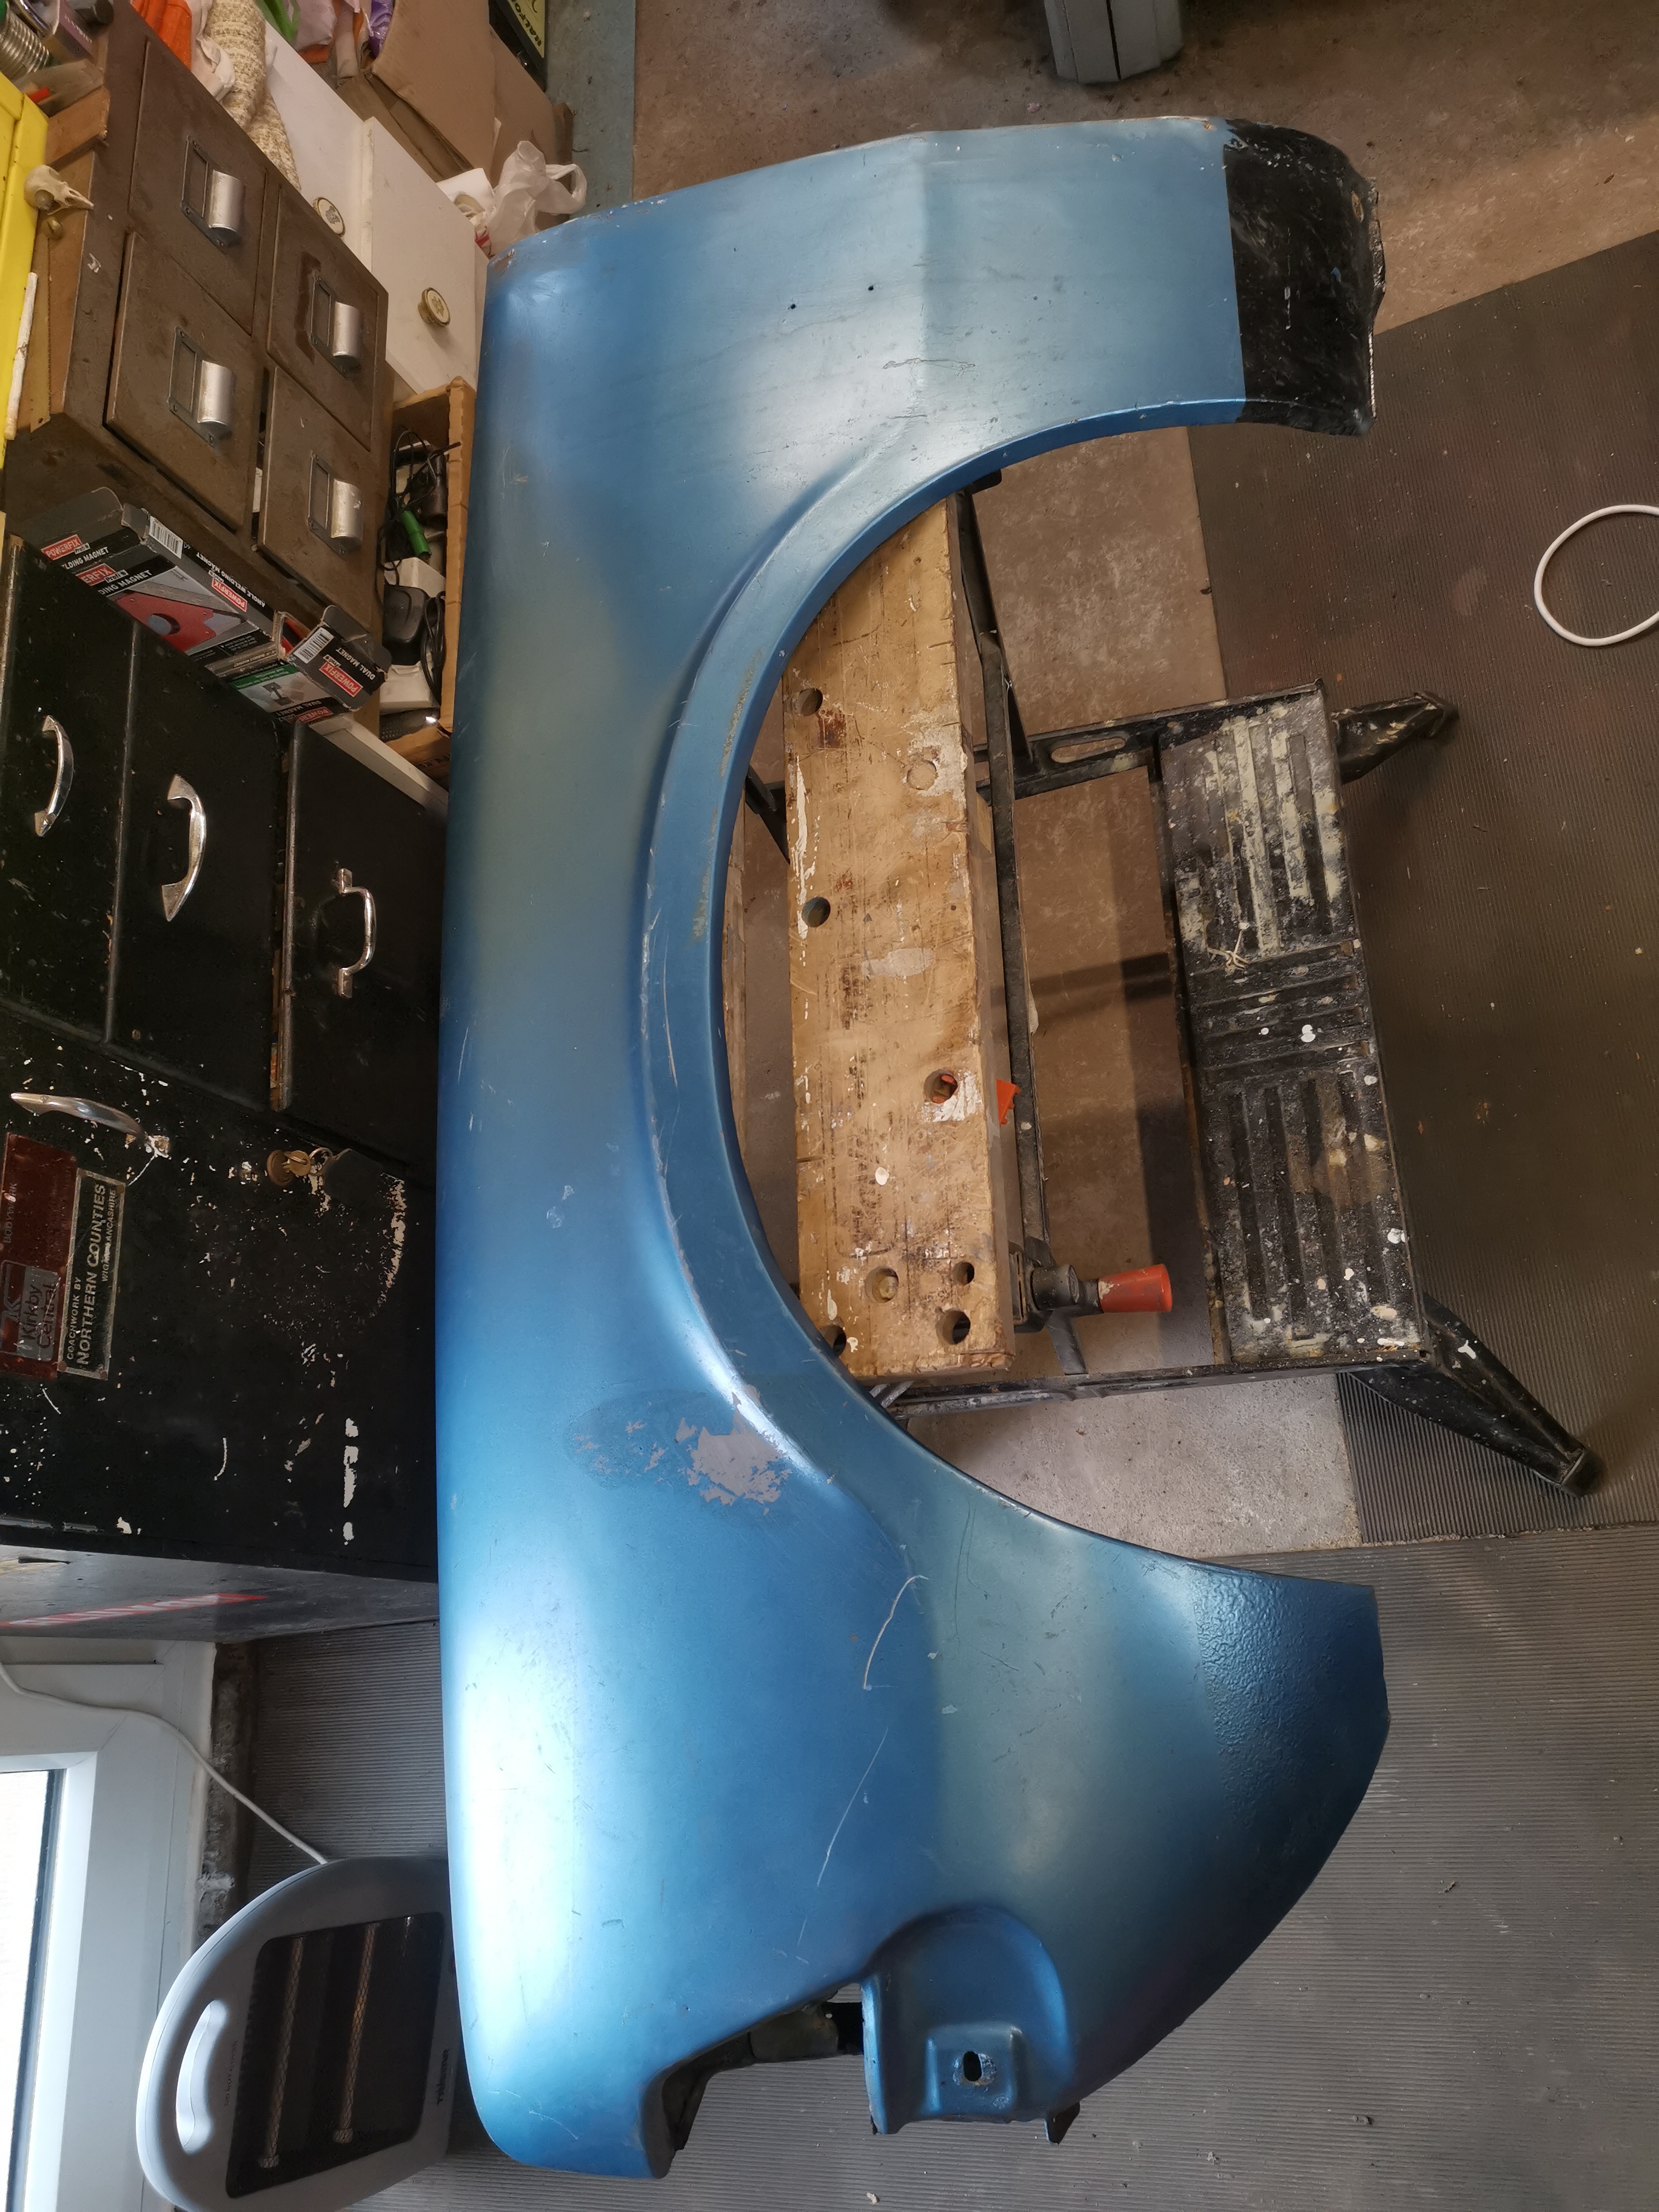
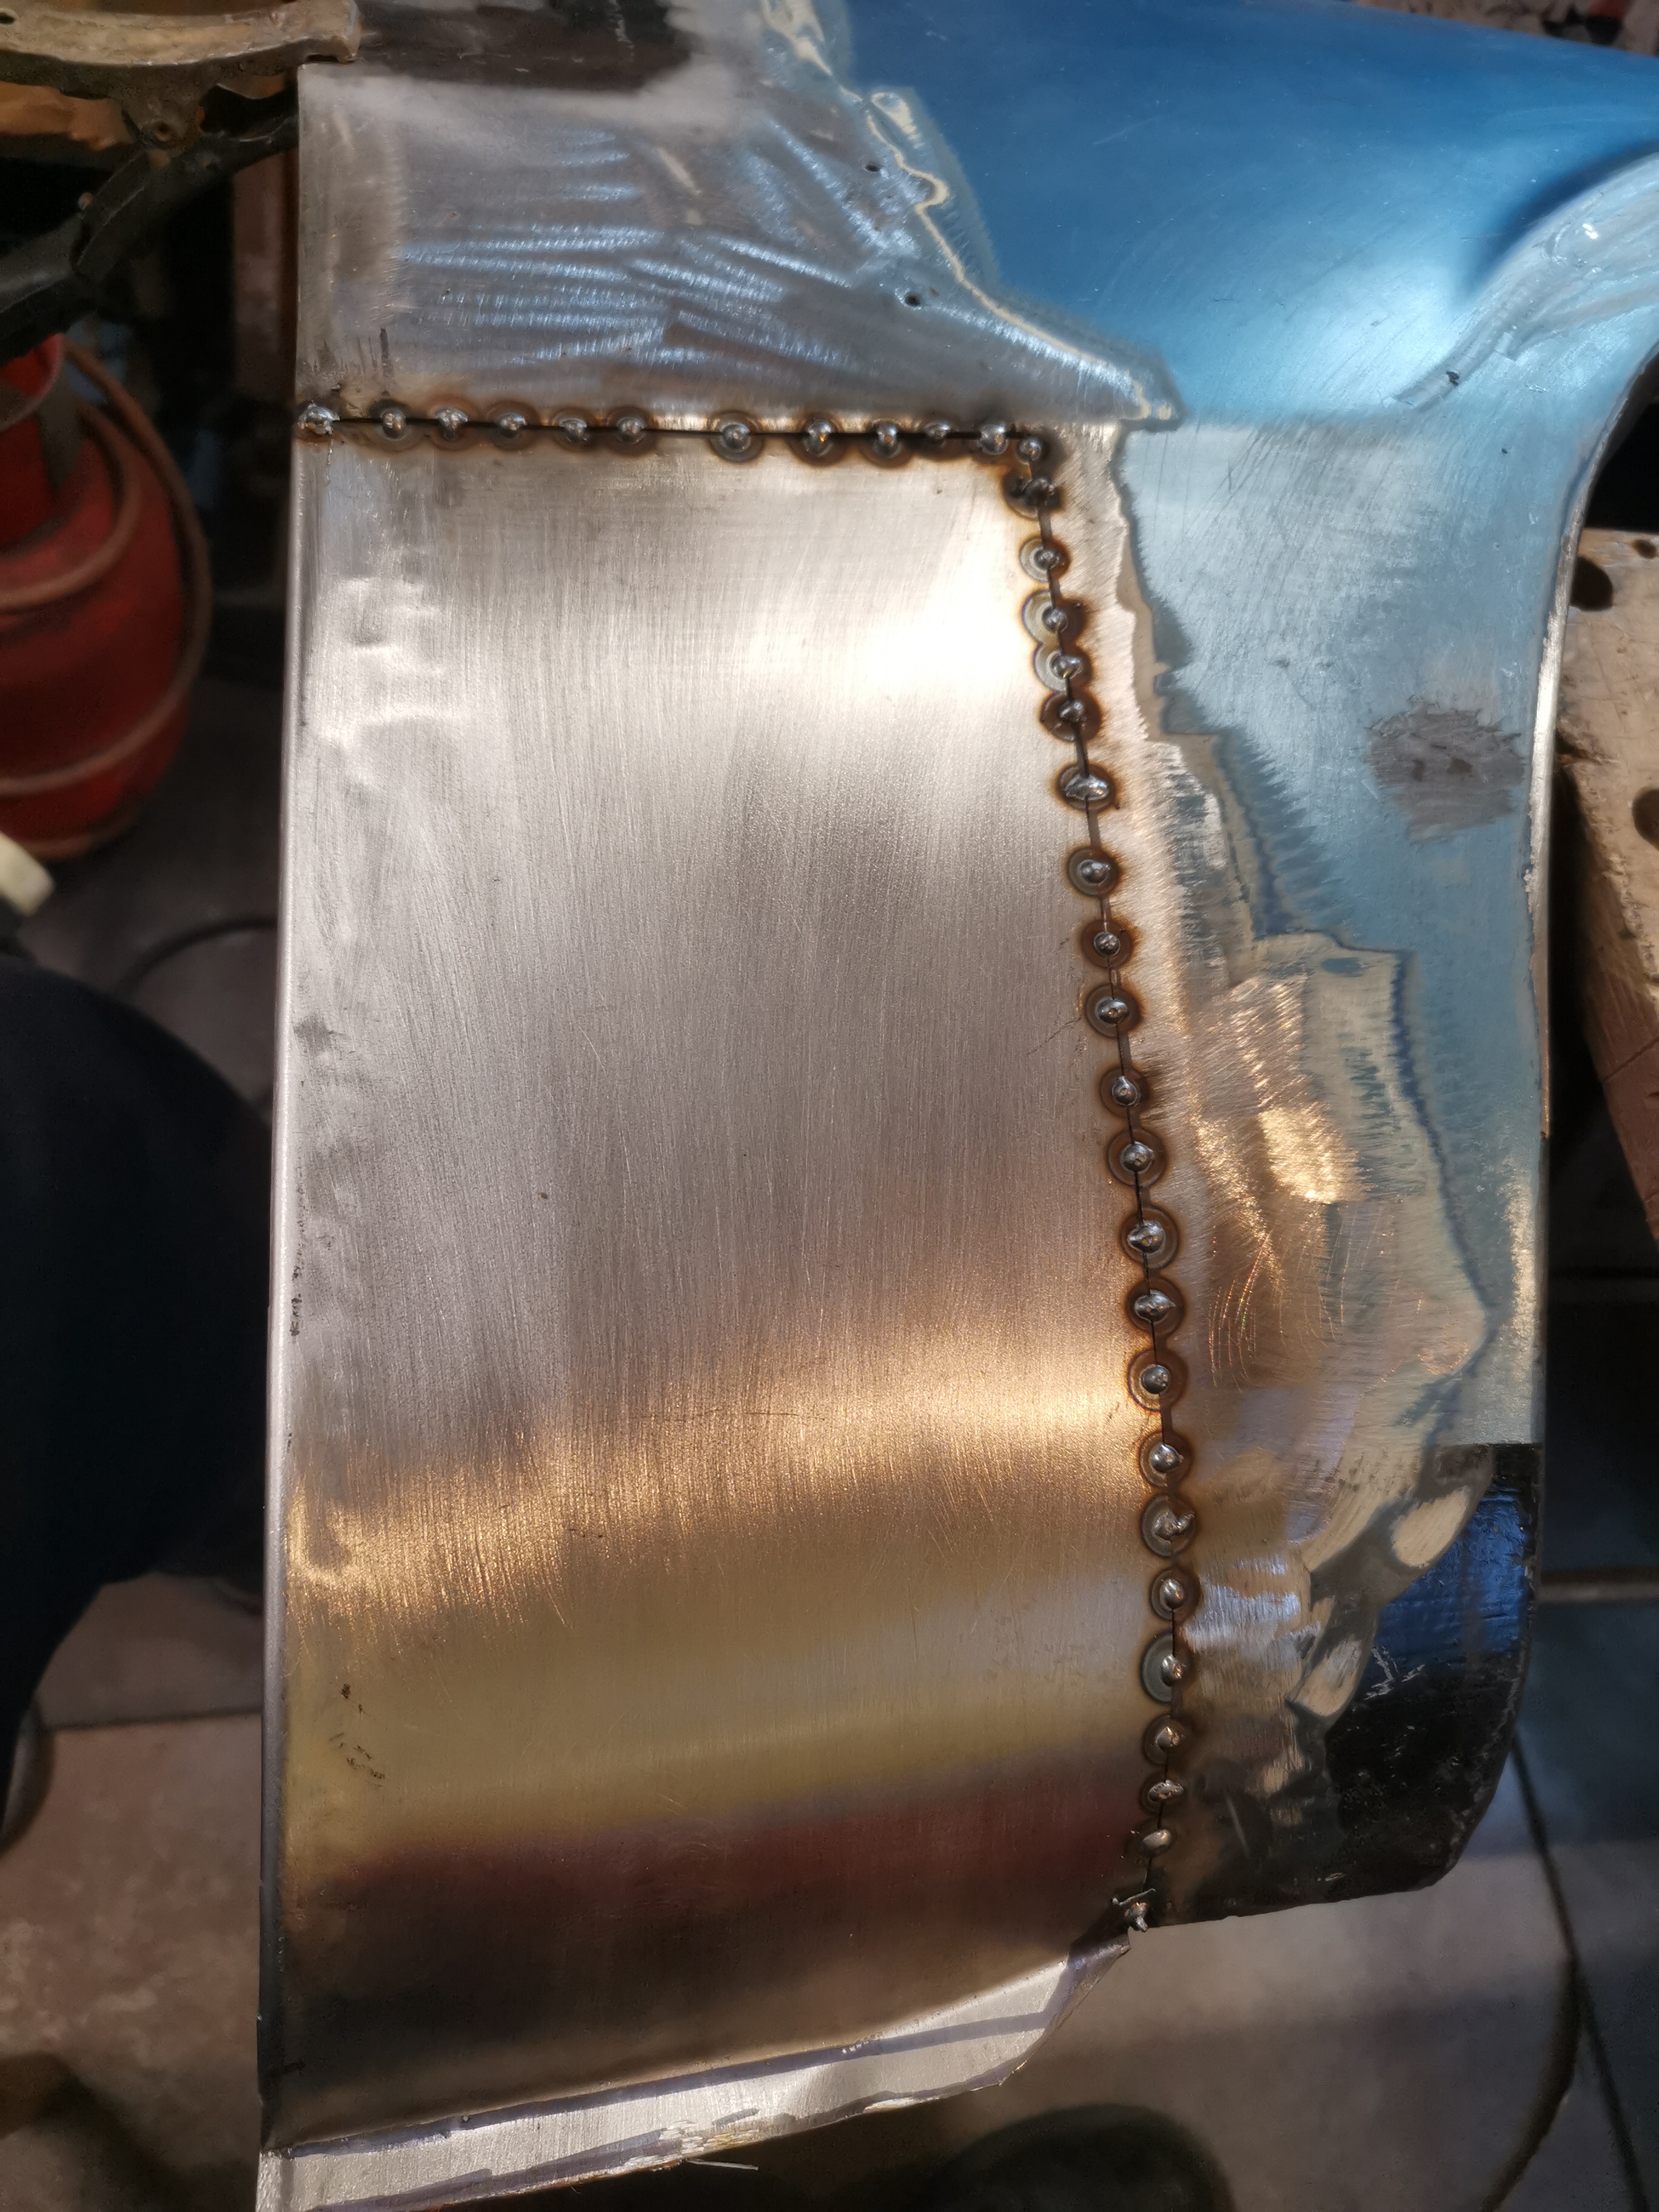
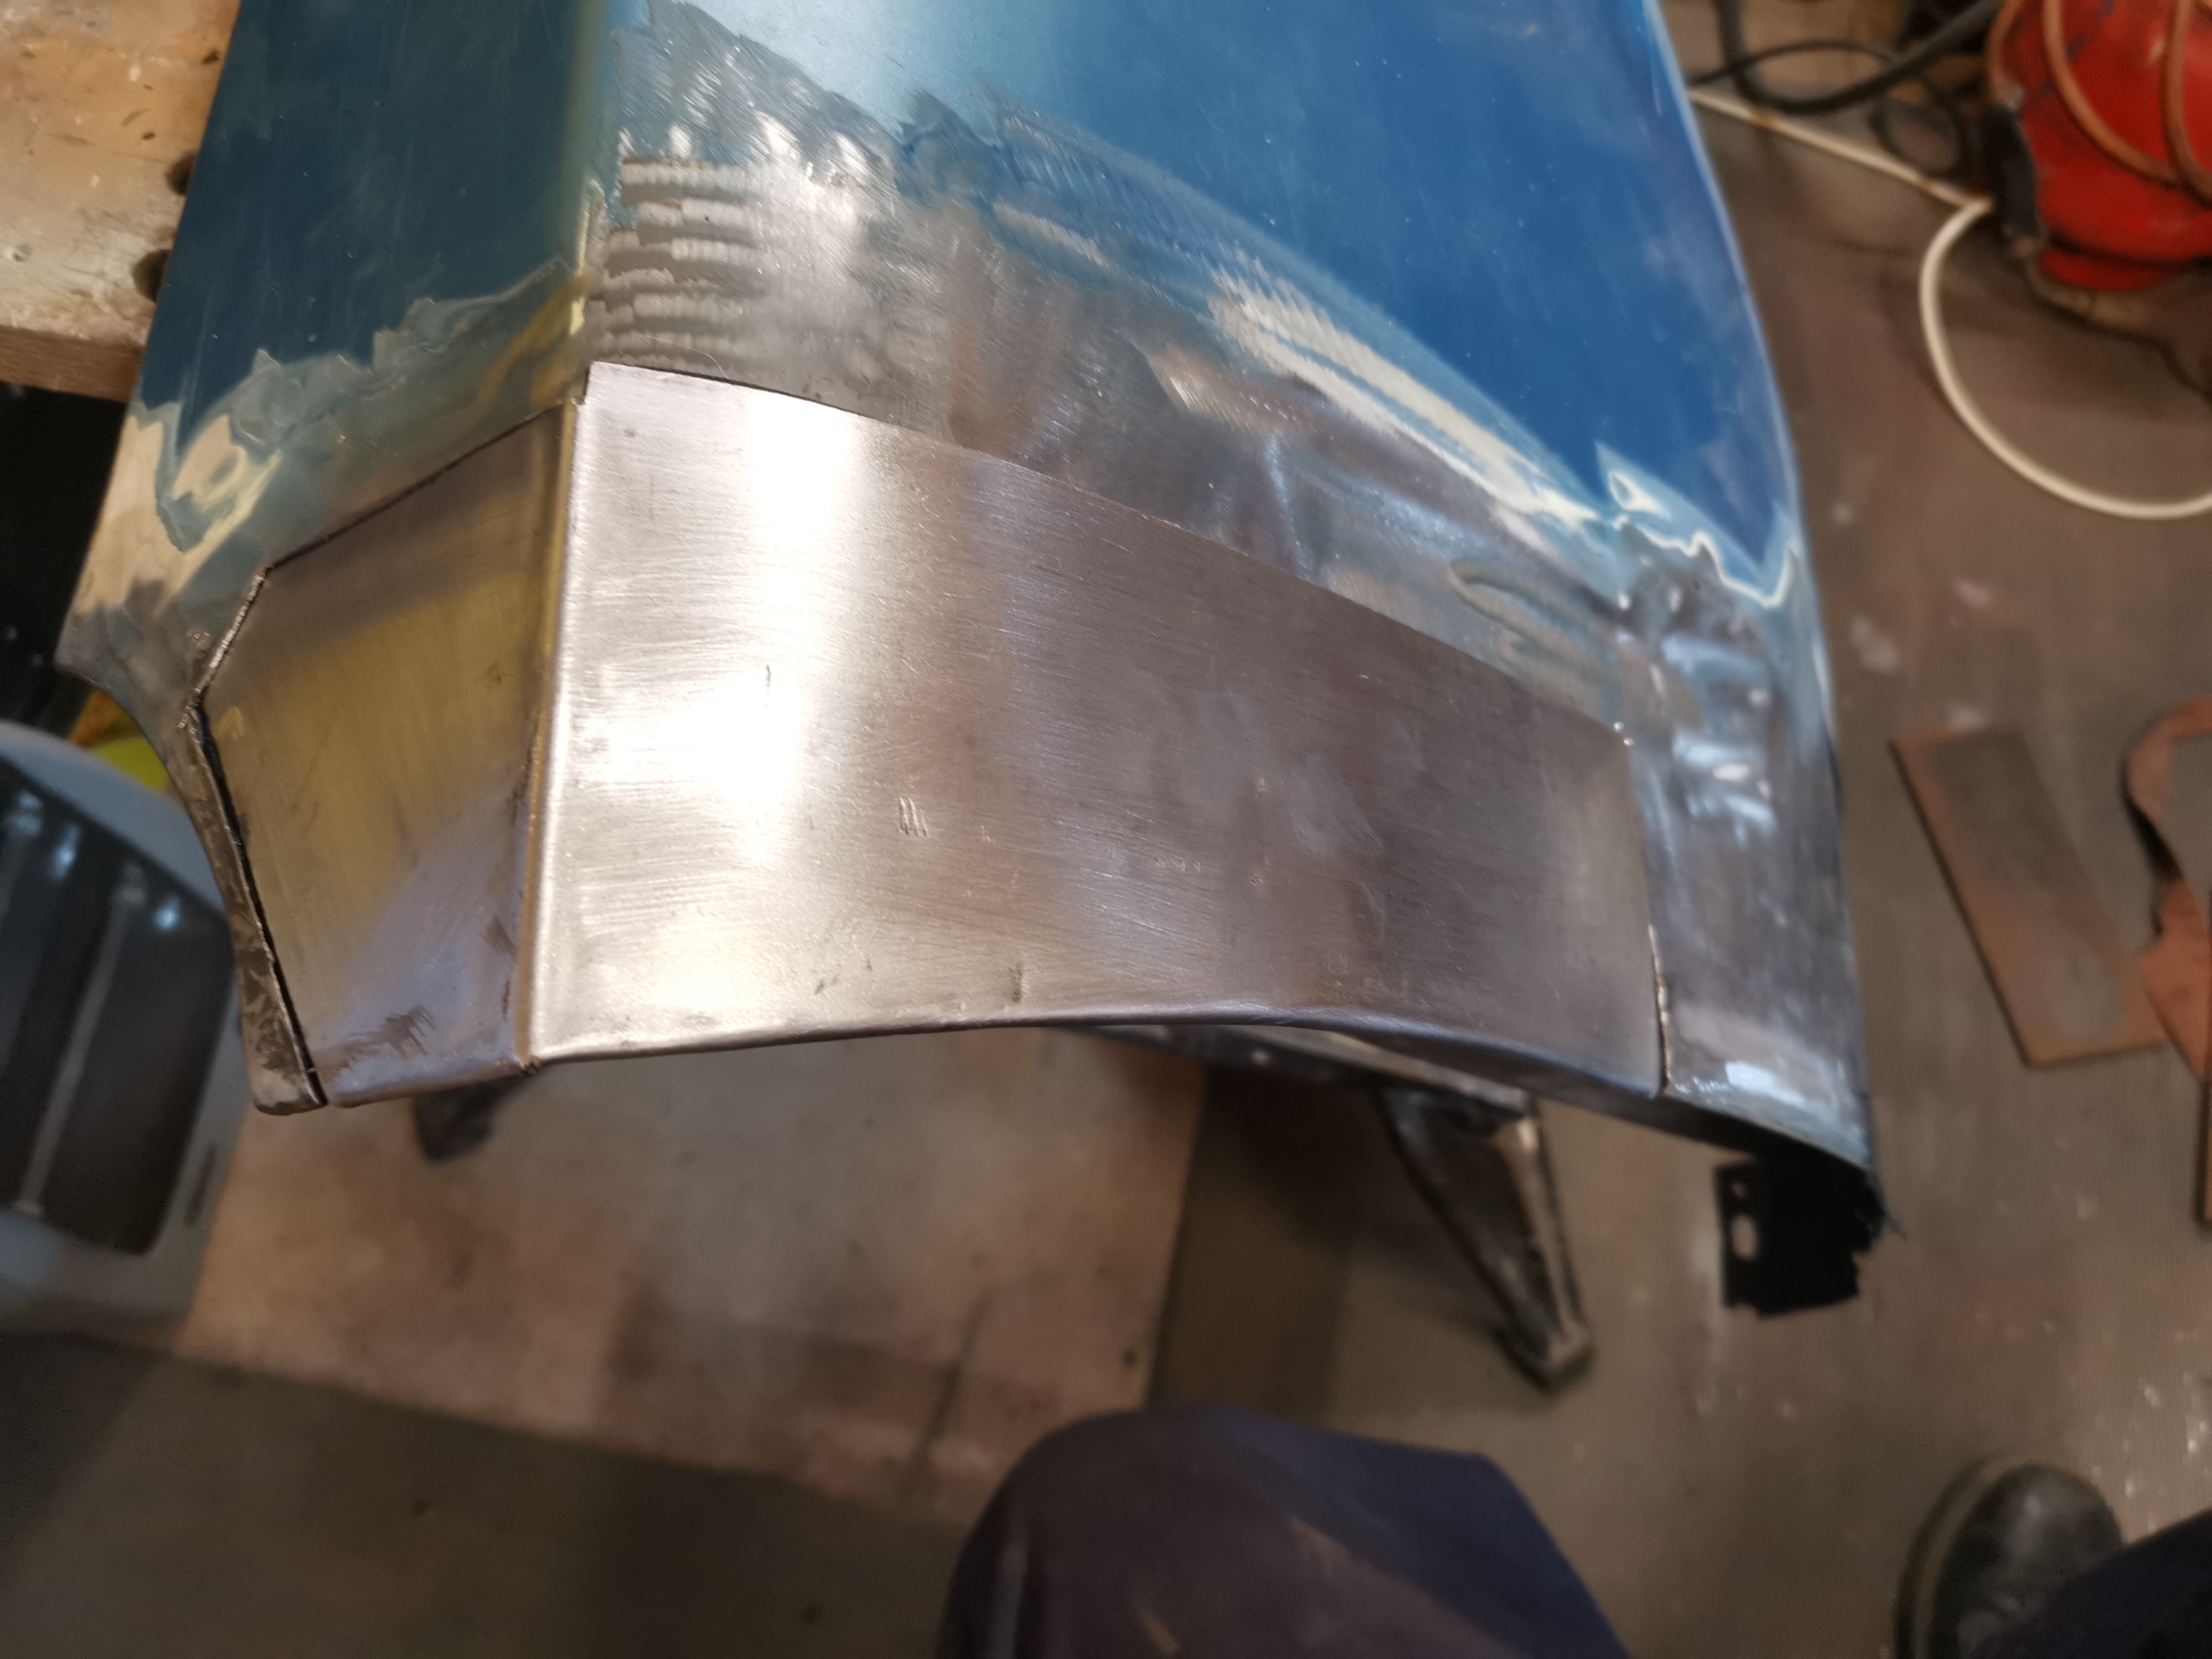
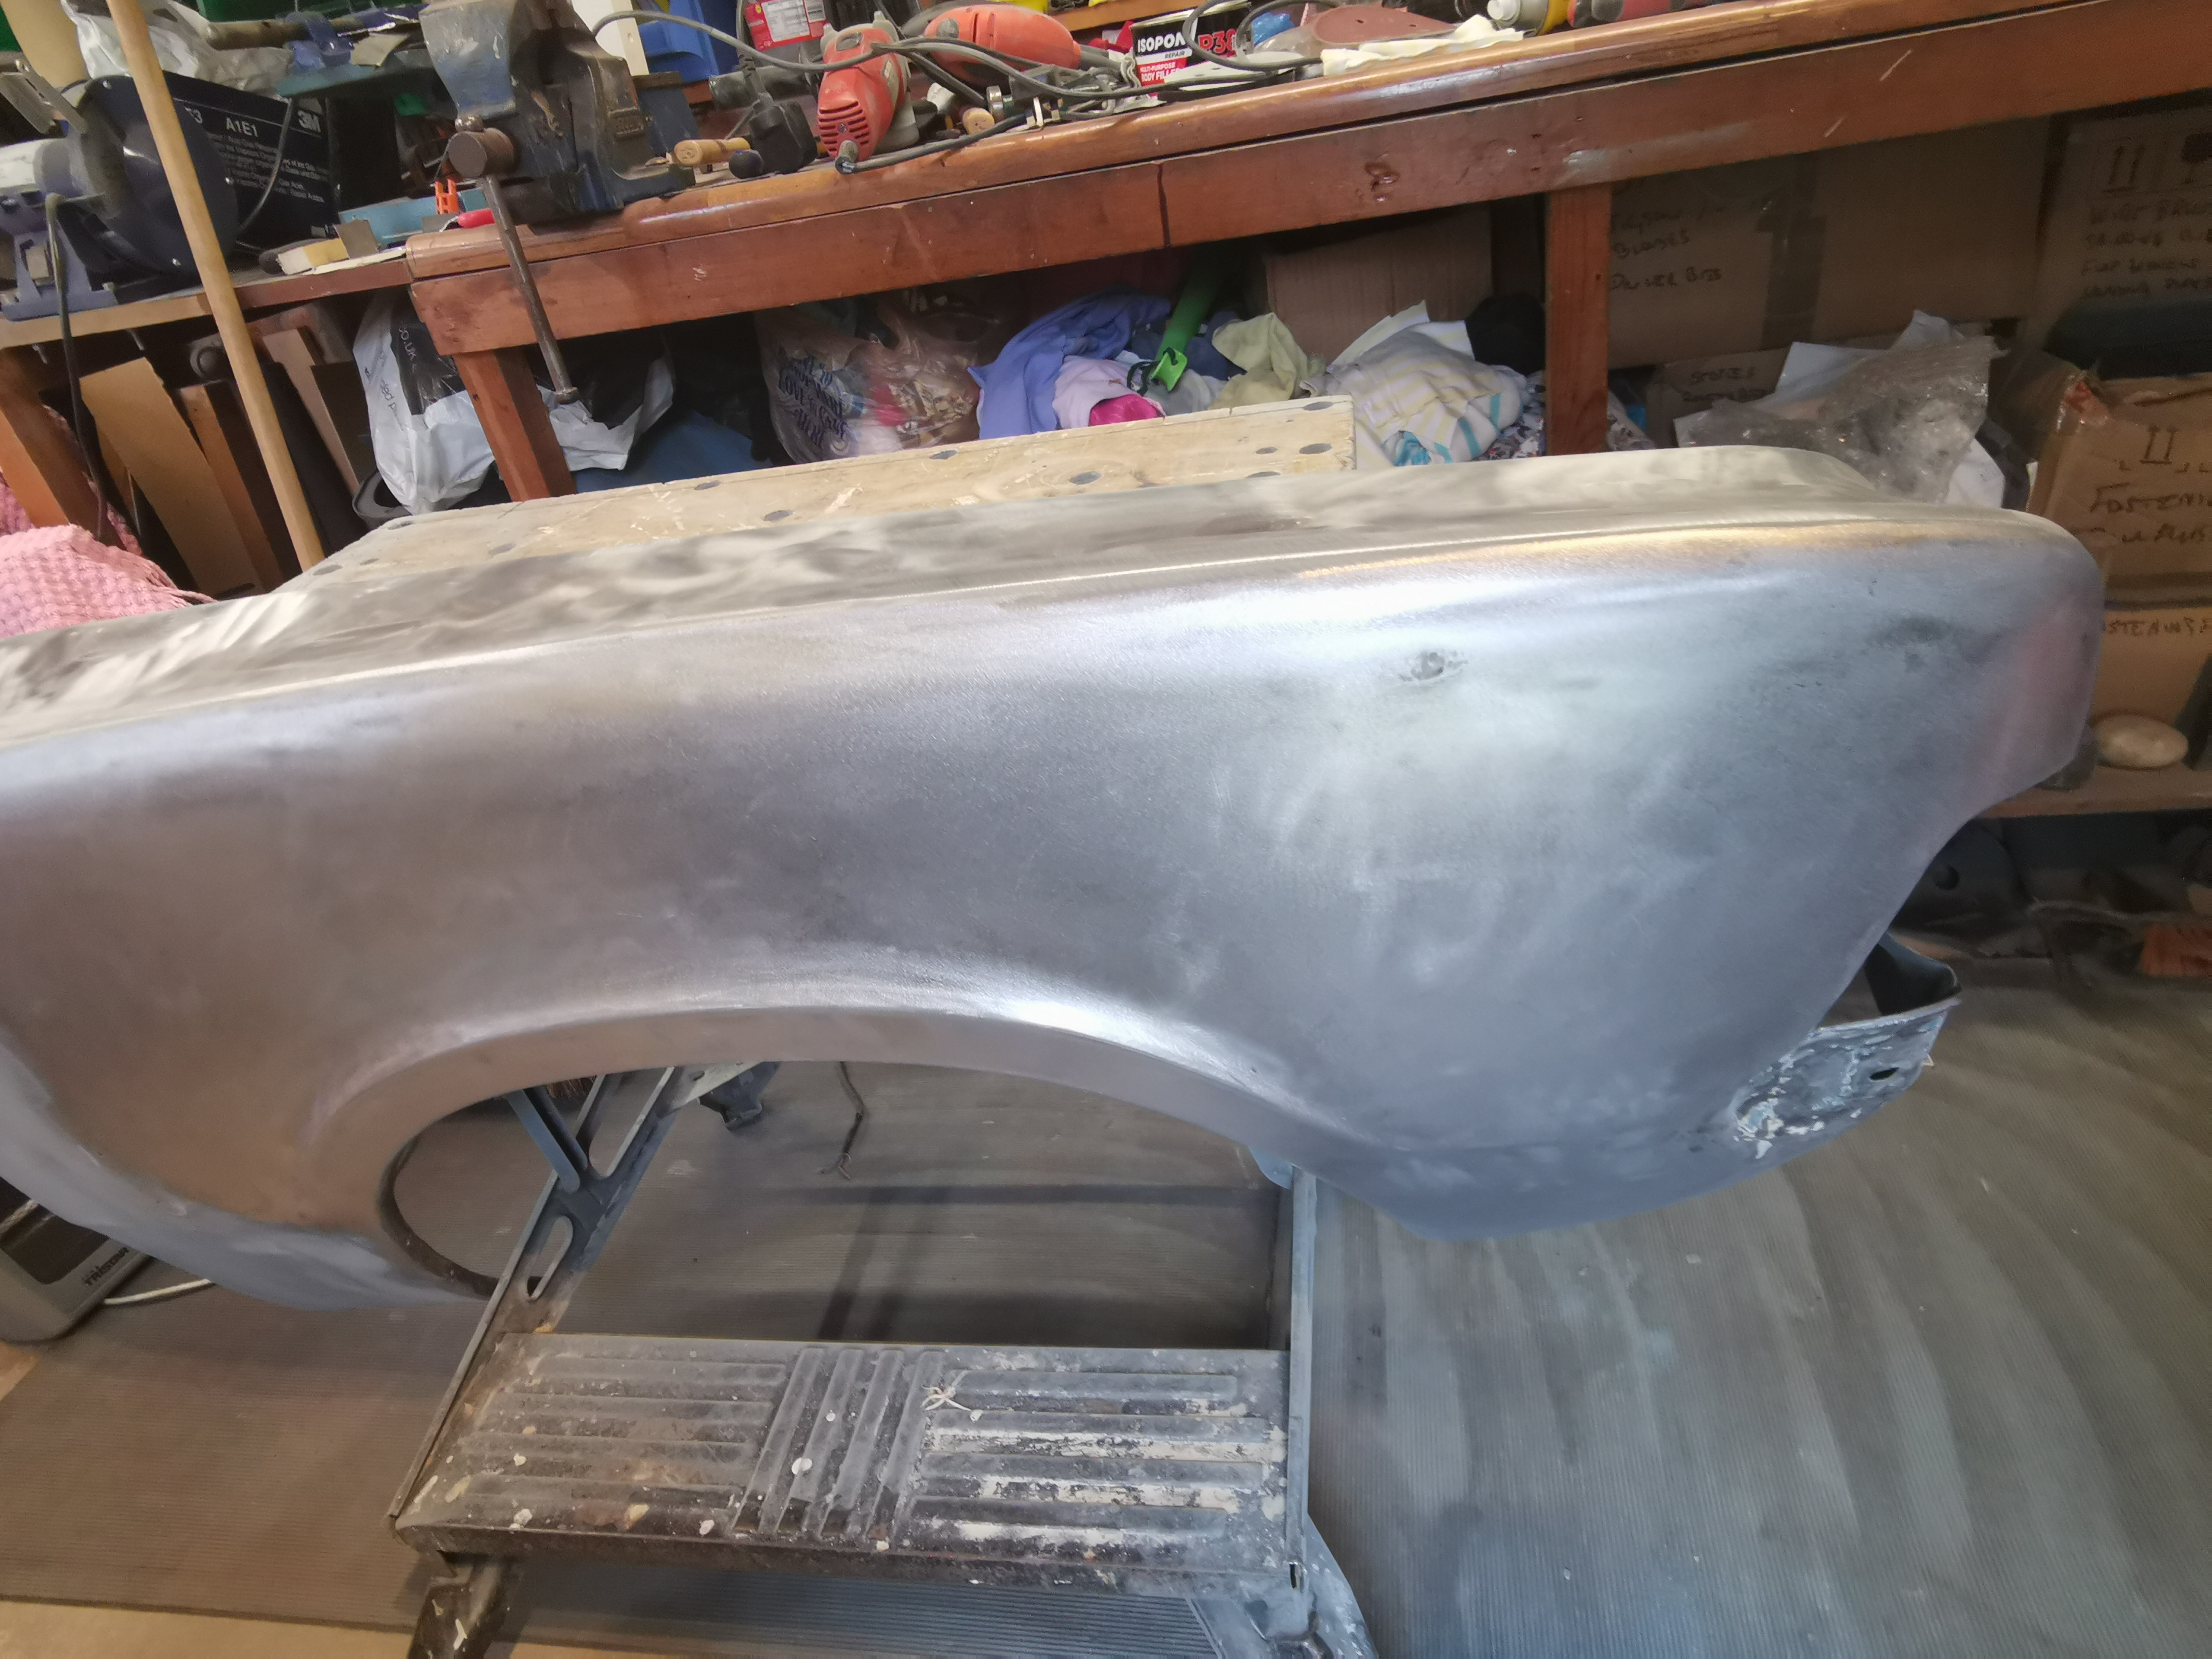
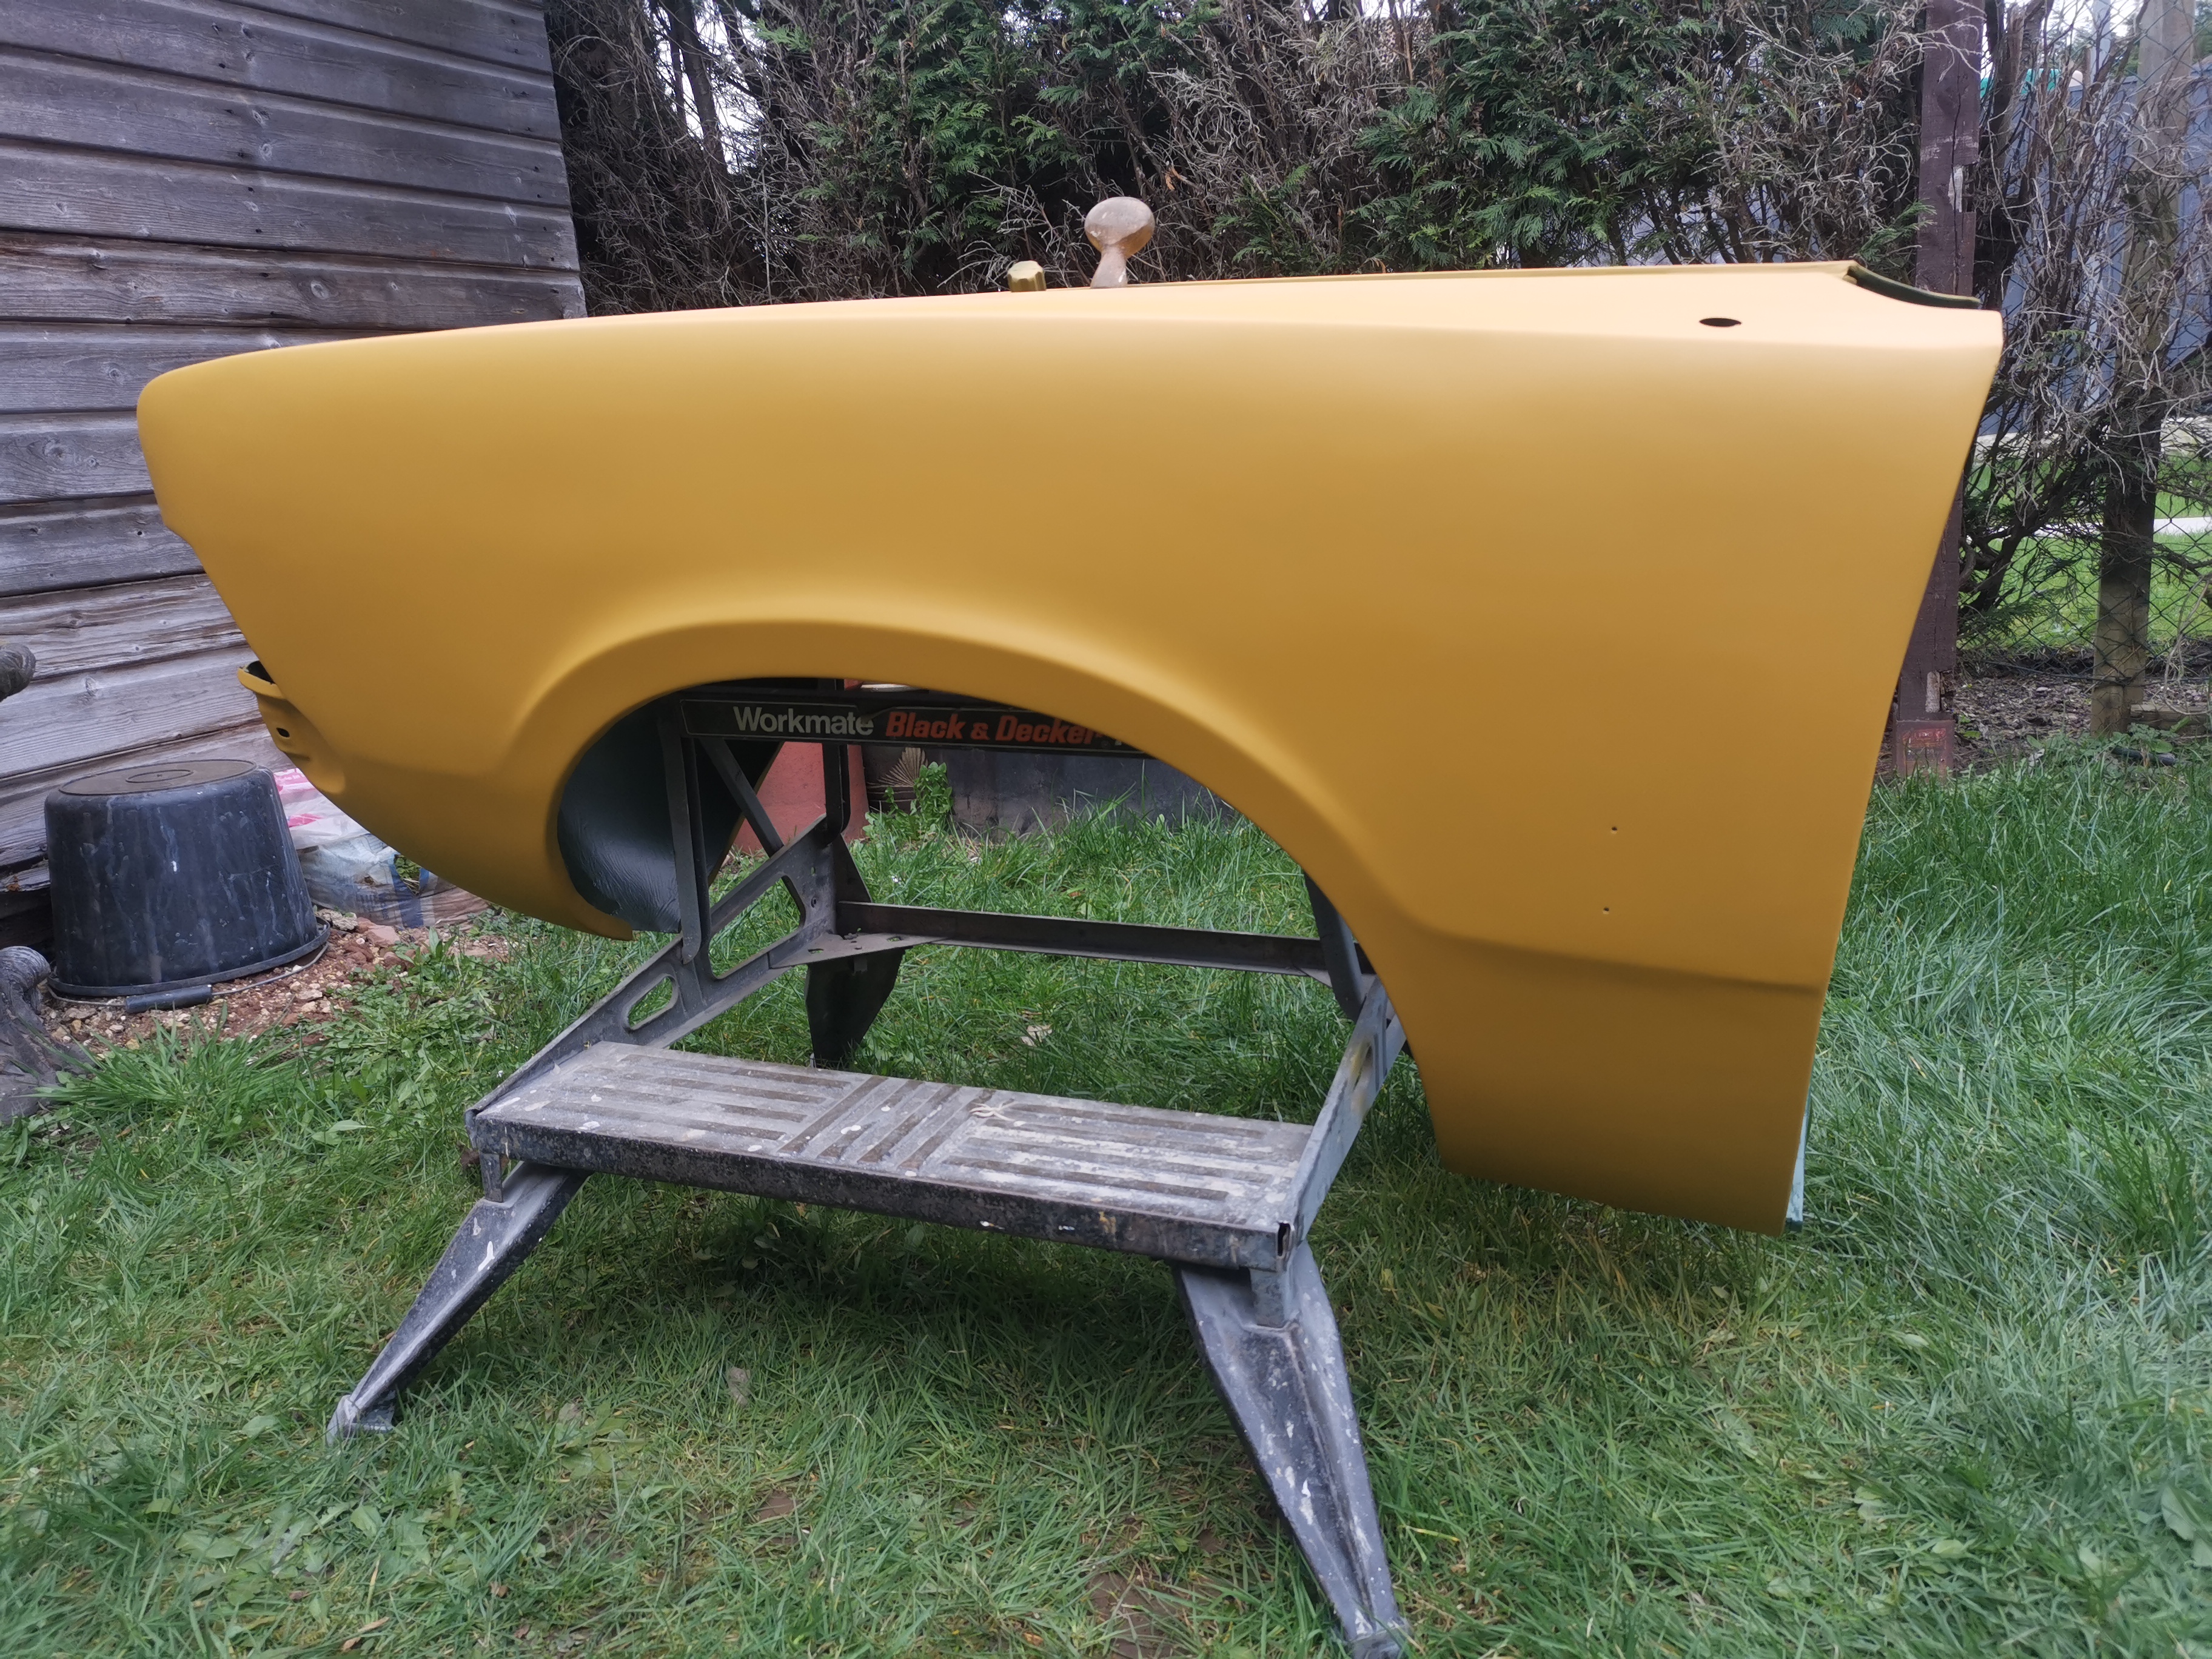
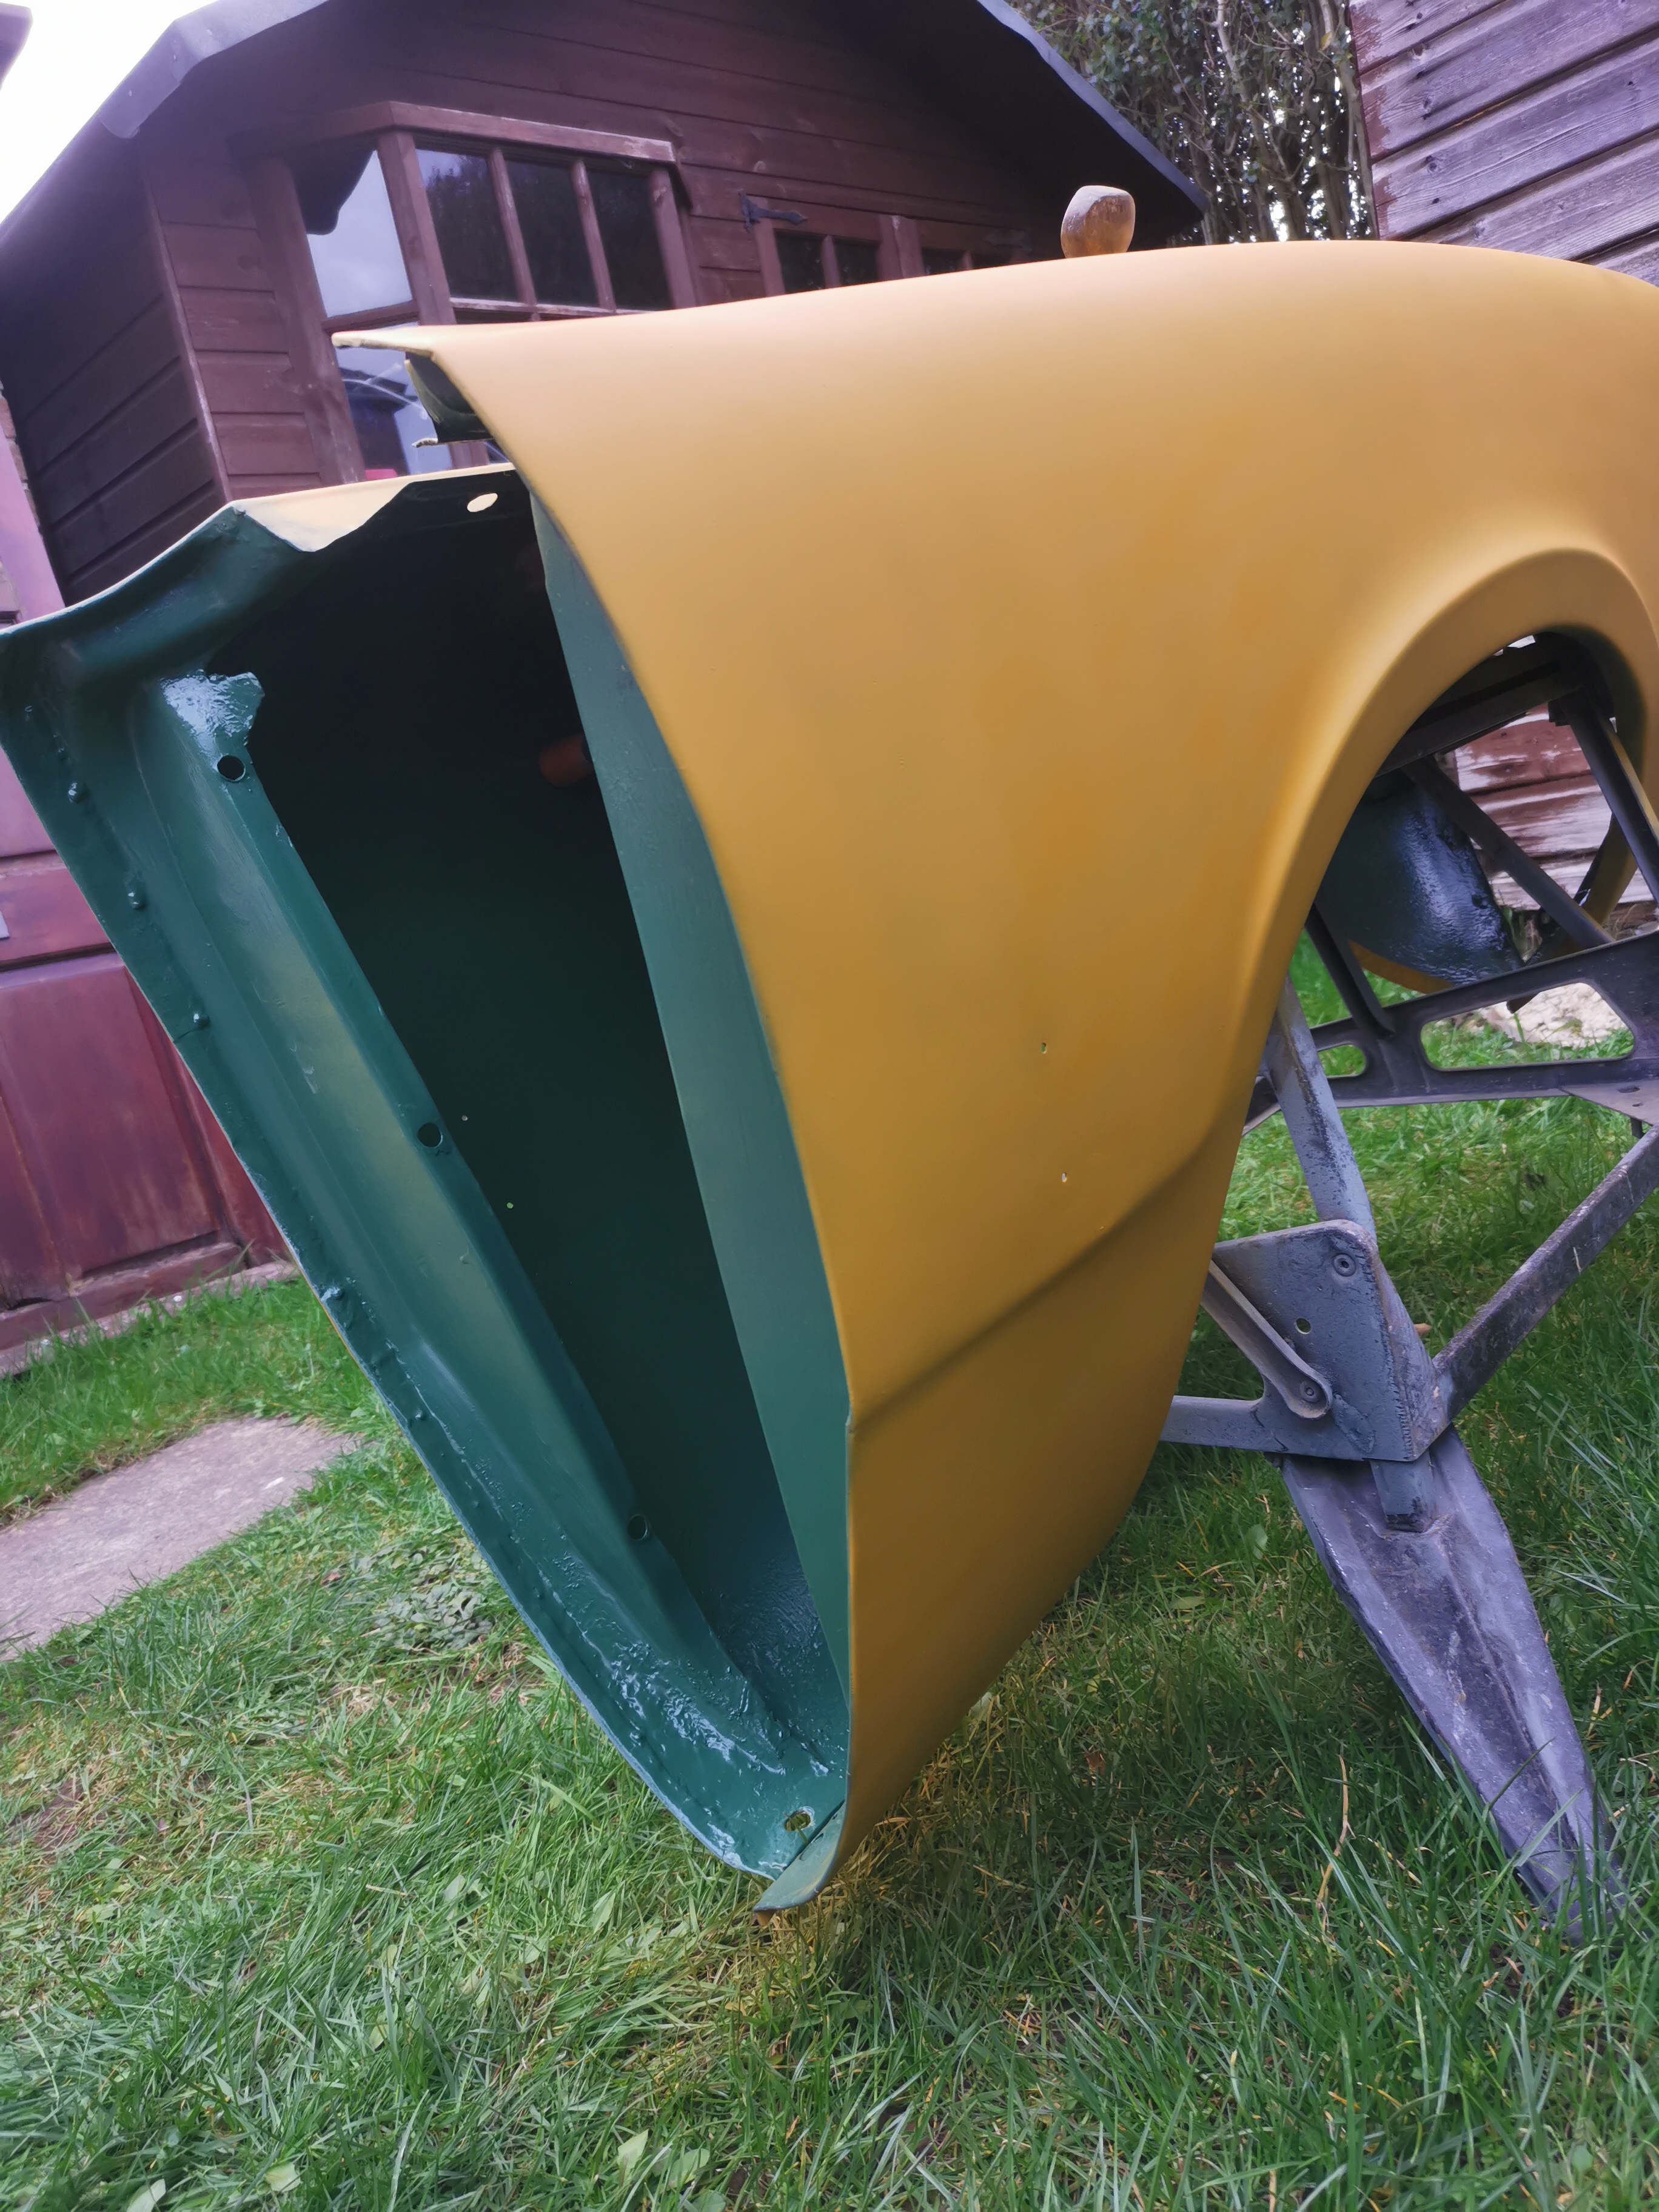
Front wings
With the state of the original front wings I decided to invest in some newer ones.
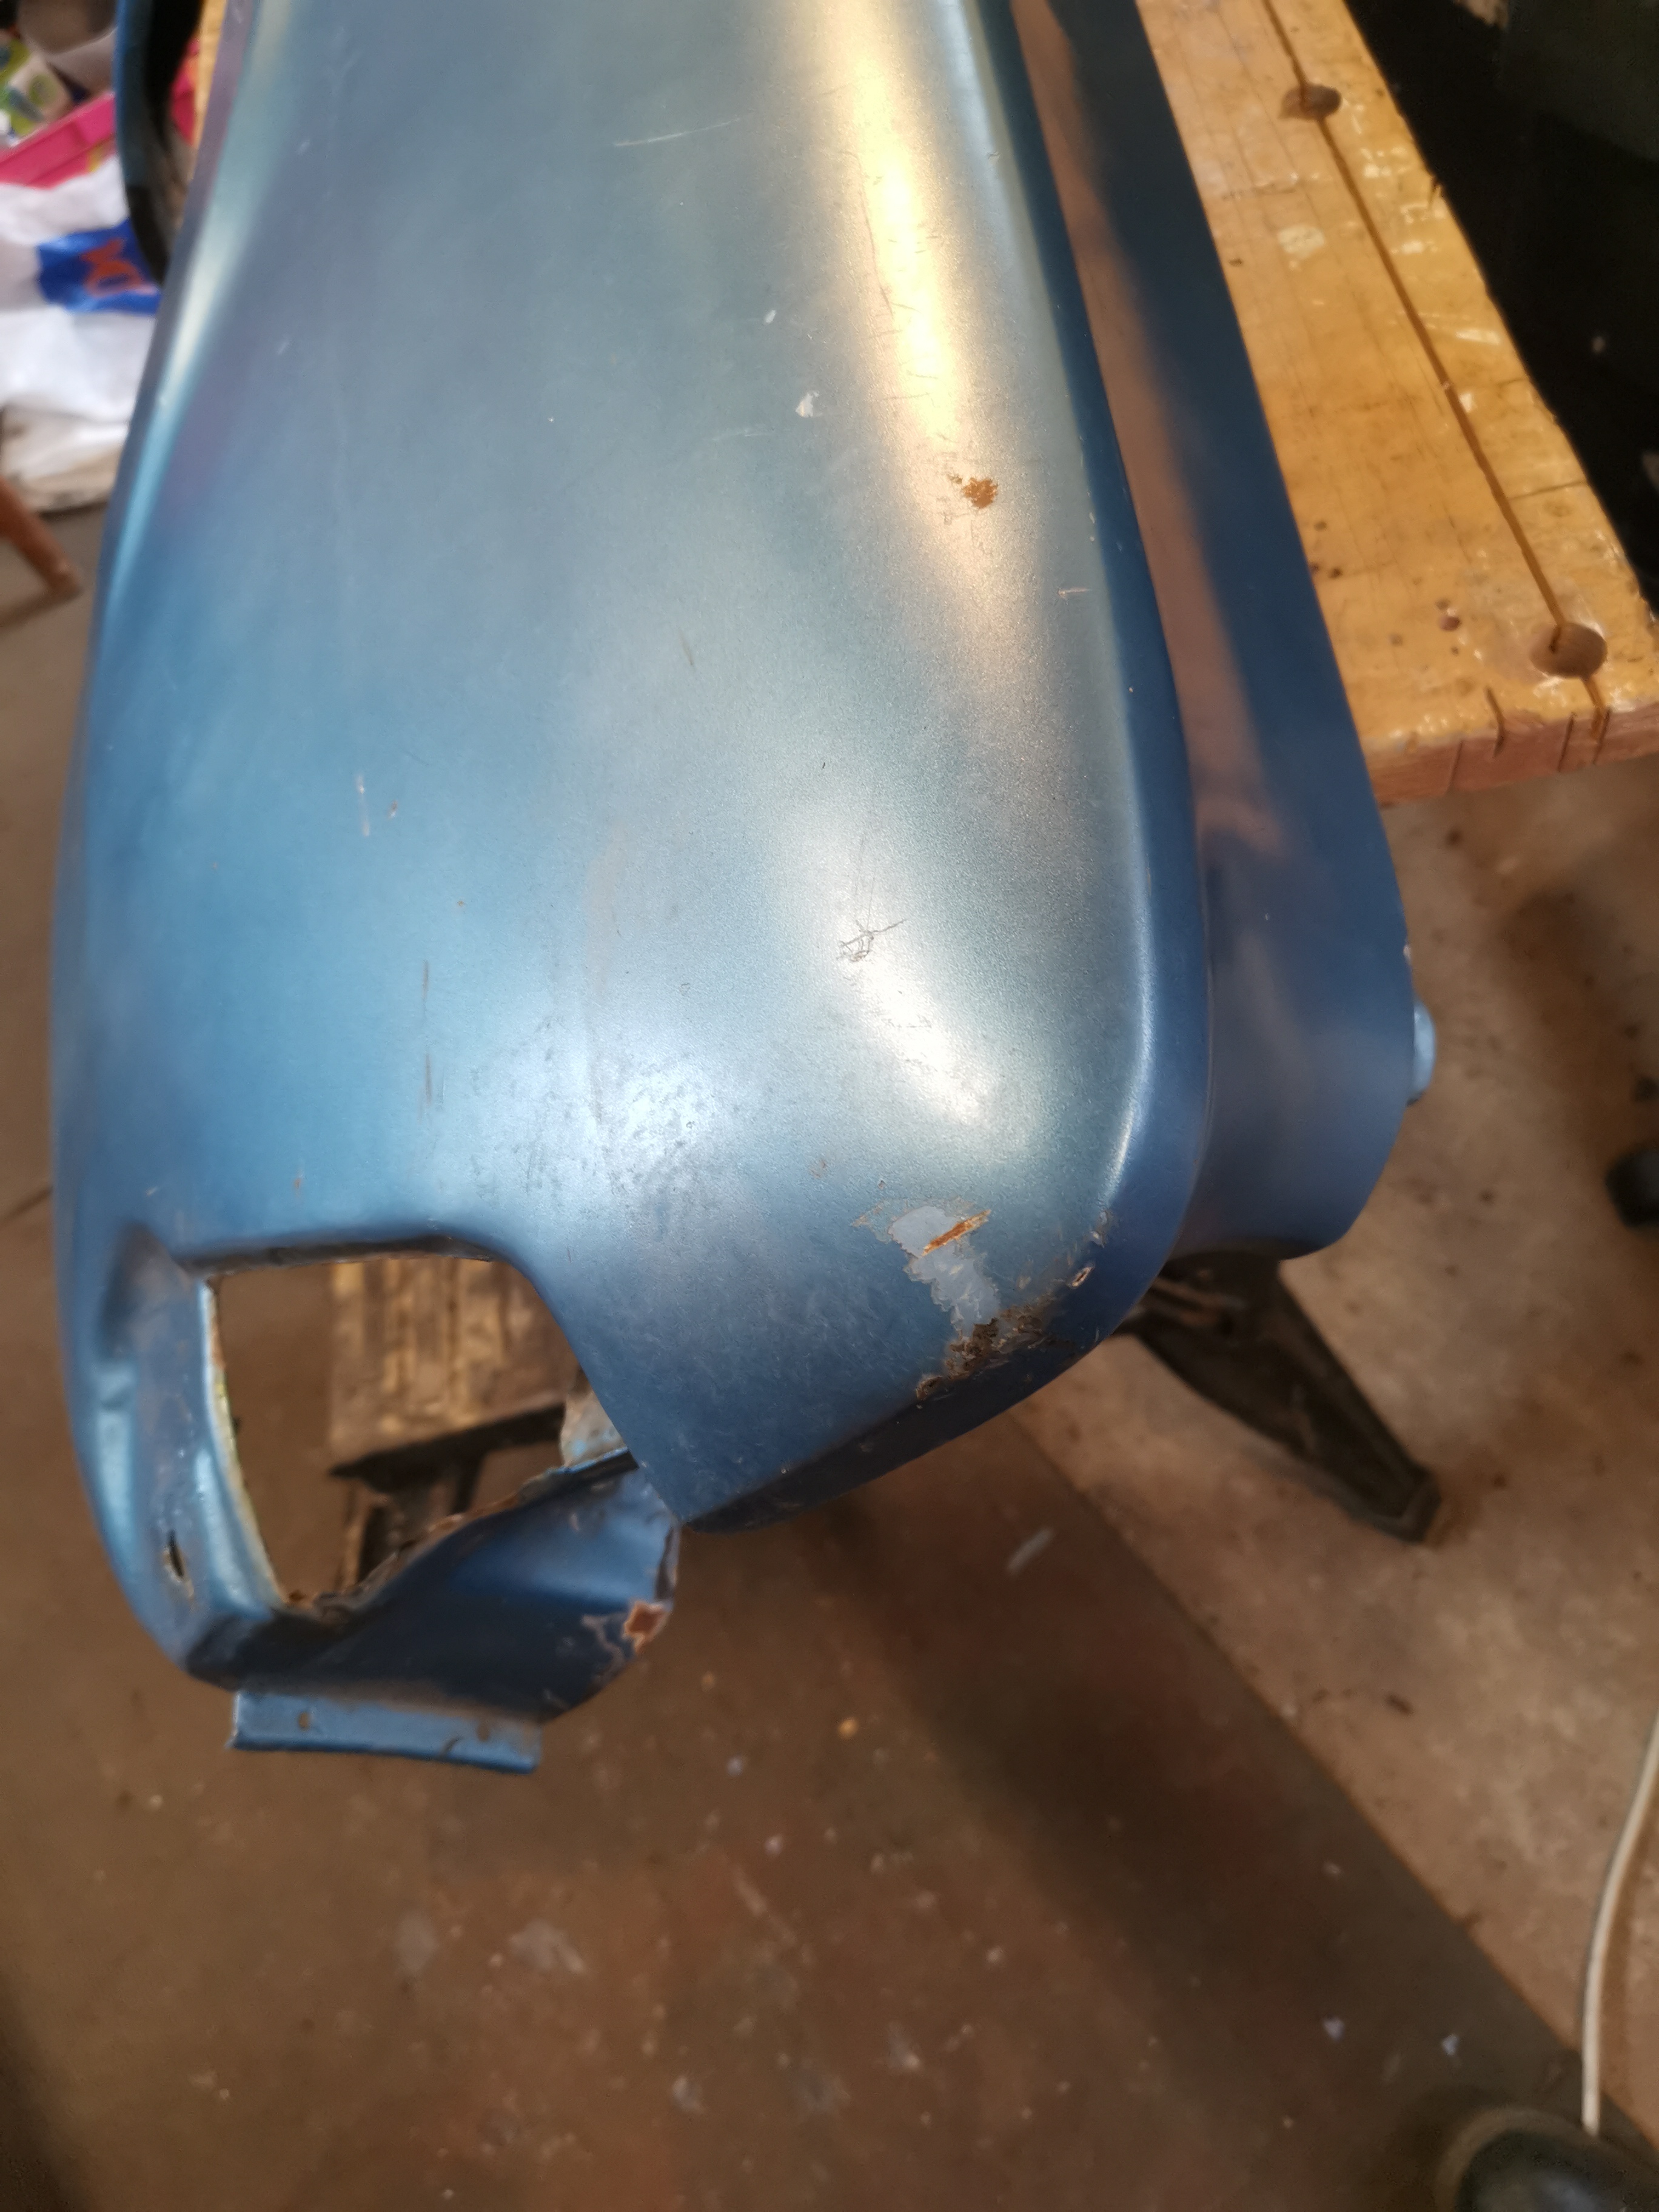
Front wings
No rust around the indicator mounts like the others!
Front wings
There's a couple of small bubbles on the top and rear edges though.
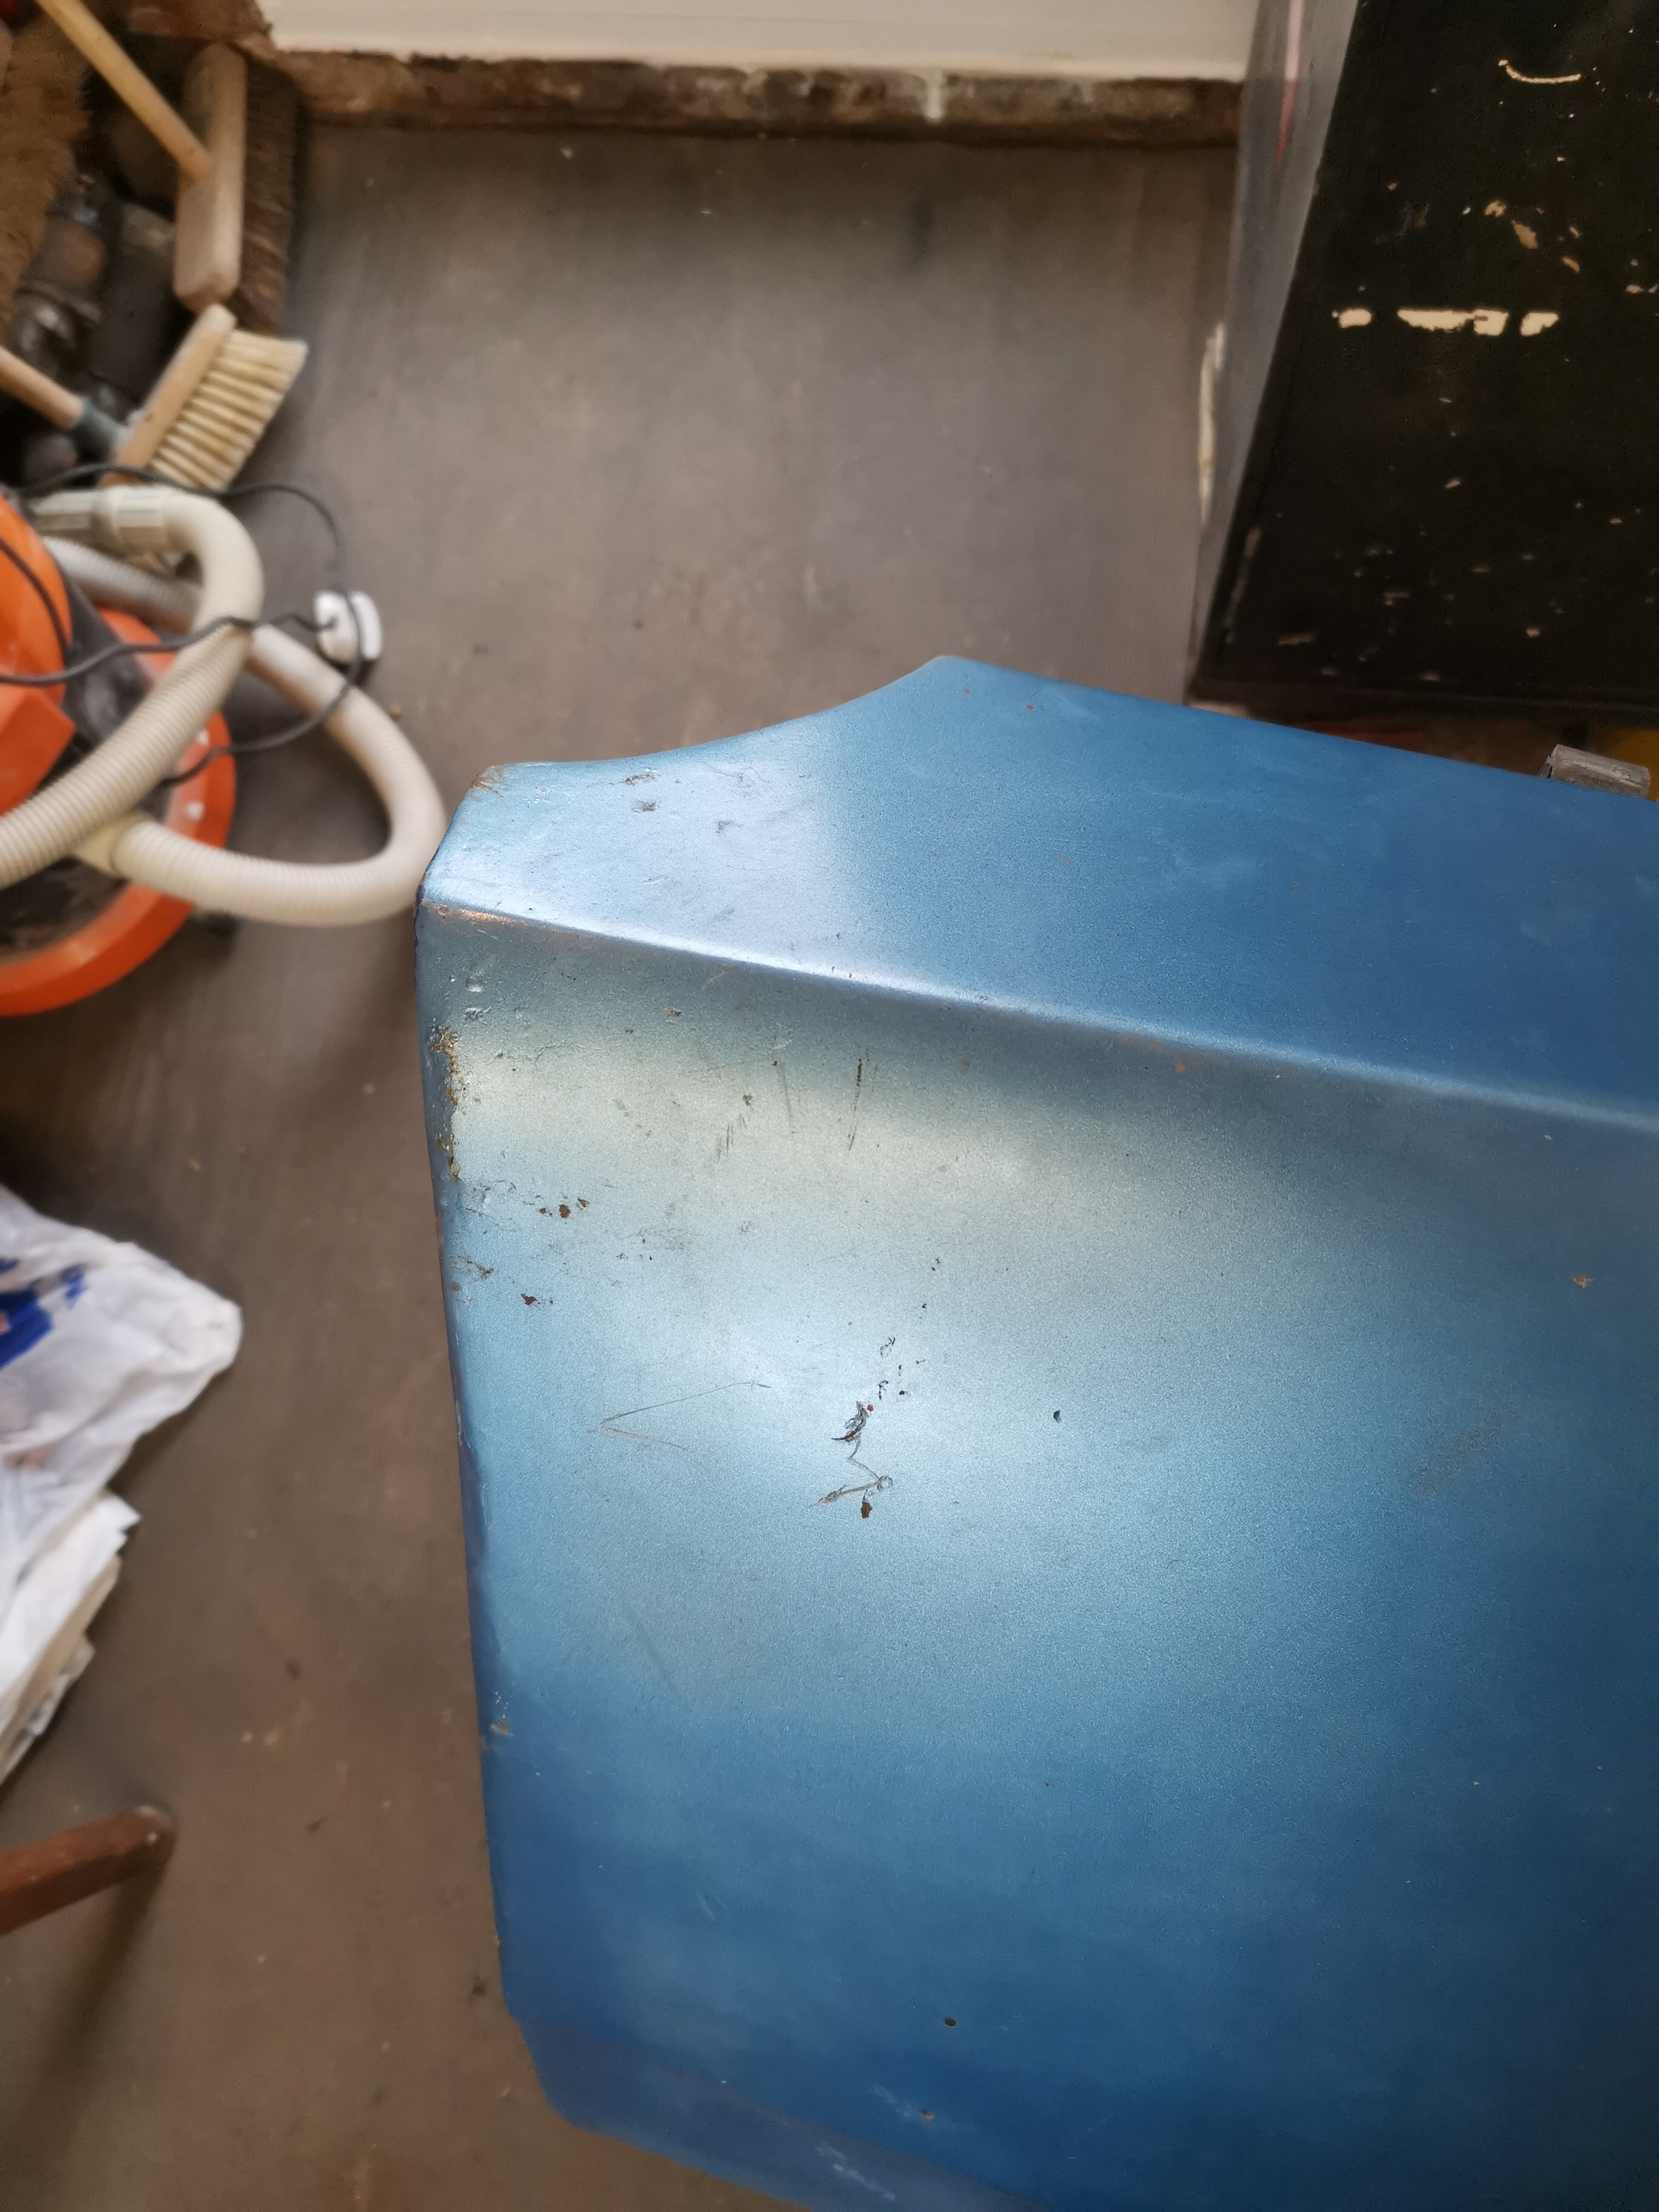
Front wings
This rear edge looks a bit suspect too.
Front wings
Especially at the bottom.
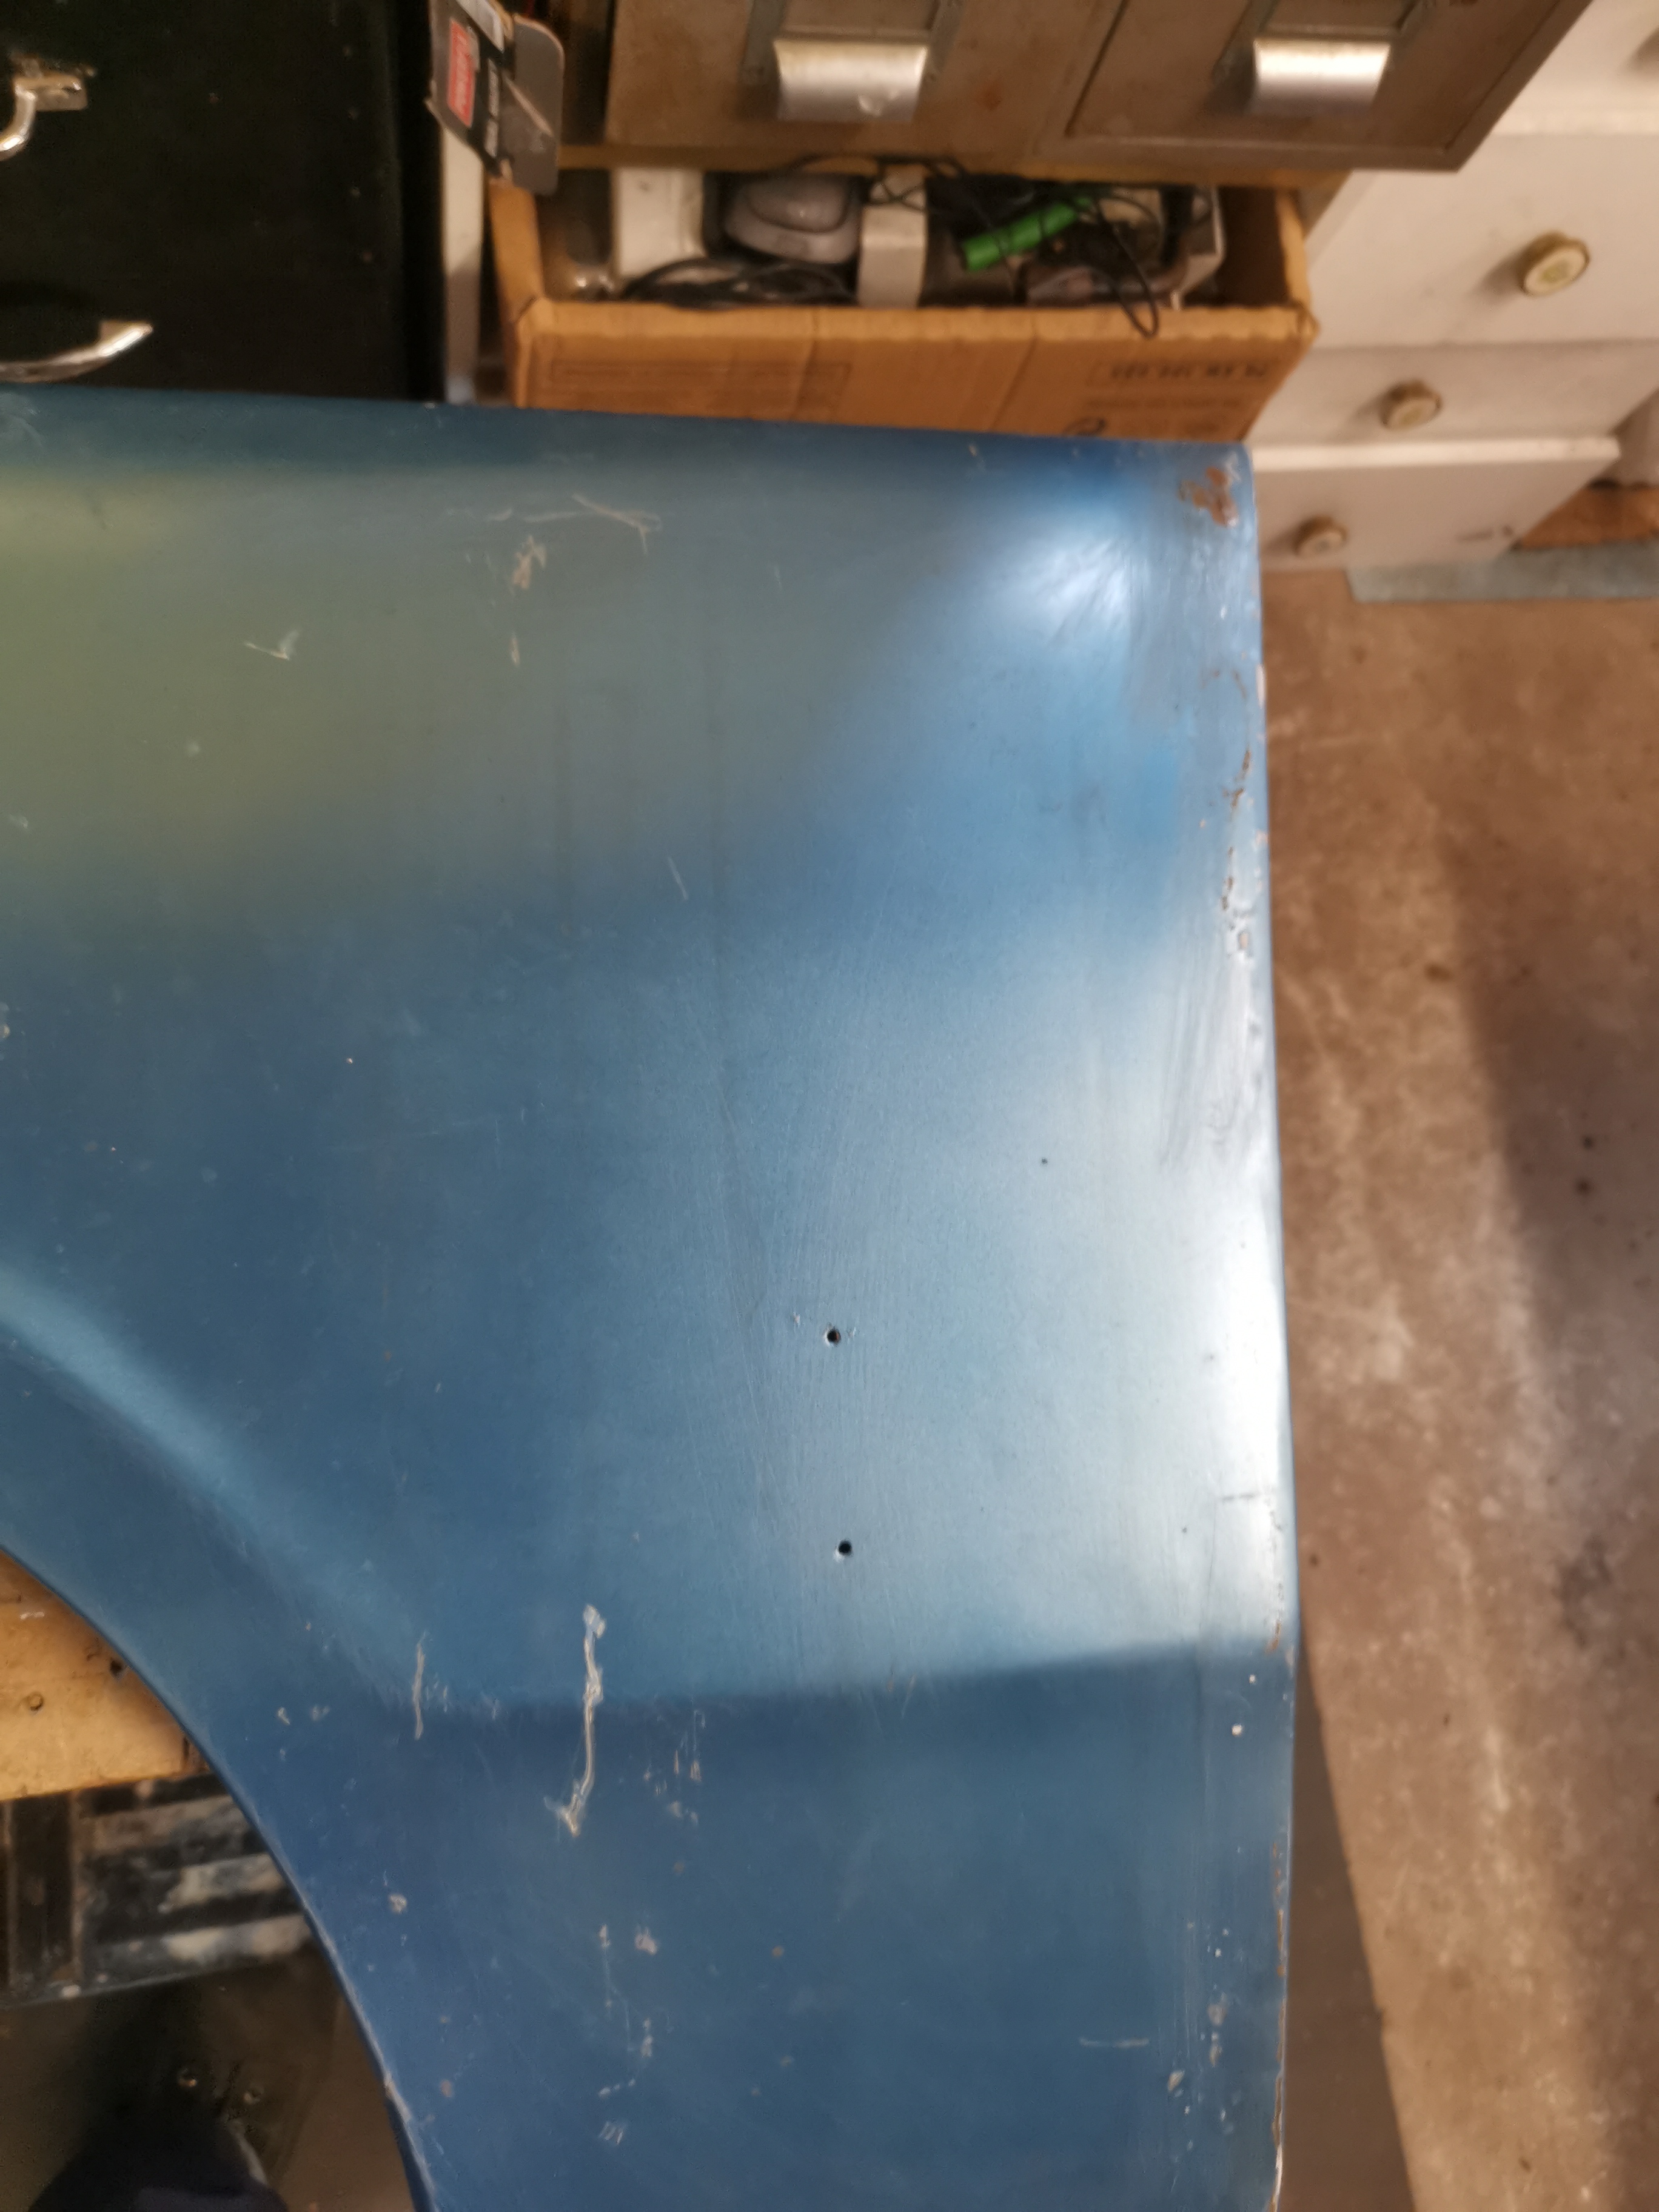
Front wings
When I cleaned the paint off I found quite a bit of rust!
Front wings
So I cut it out.
Front wings
And cut some more....
Front wings
And more....
Front wings
and even more!! I might as well have just done the originals up and saved myself £200!
Front wings
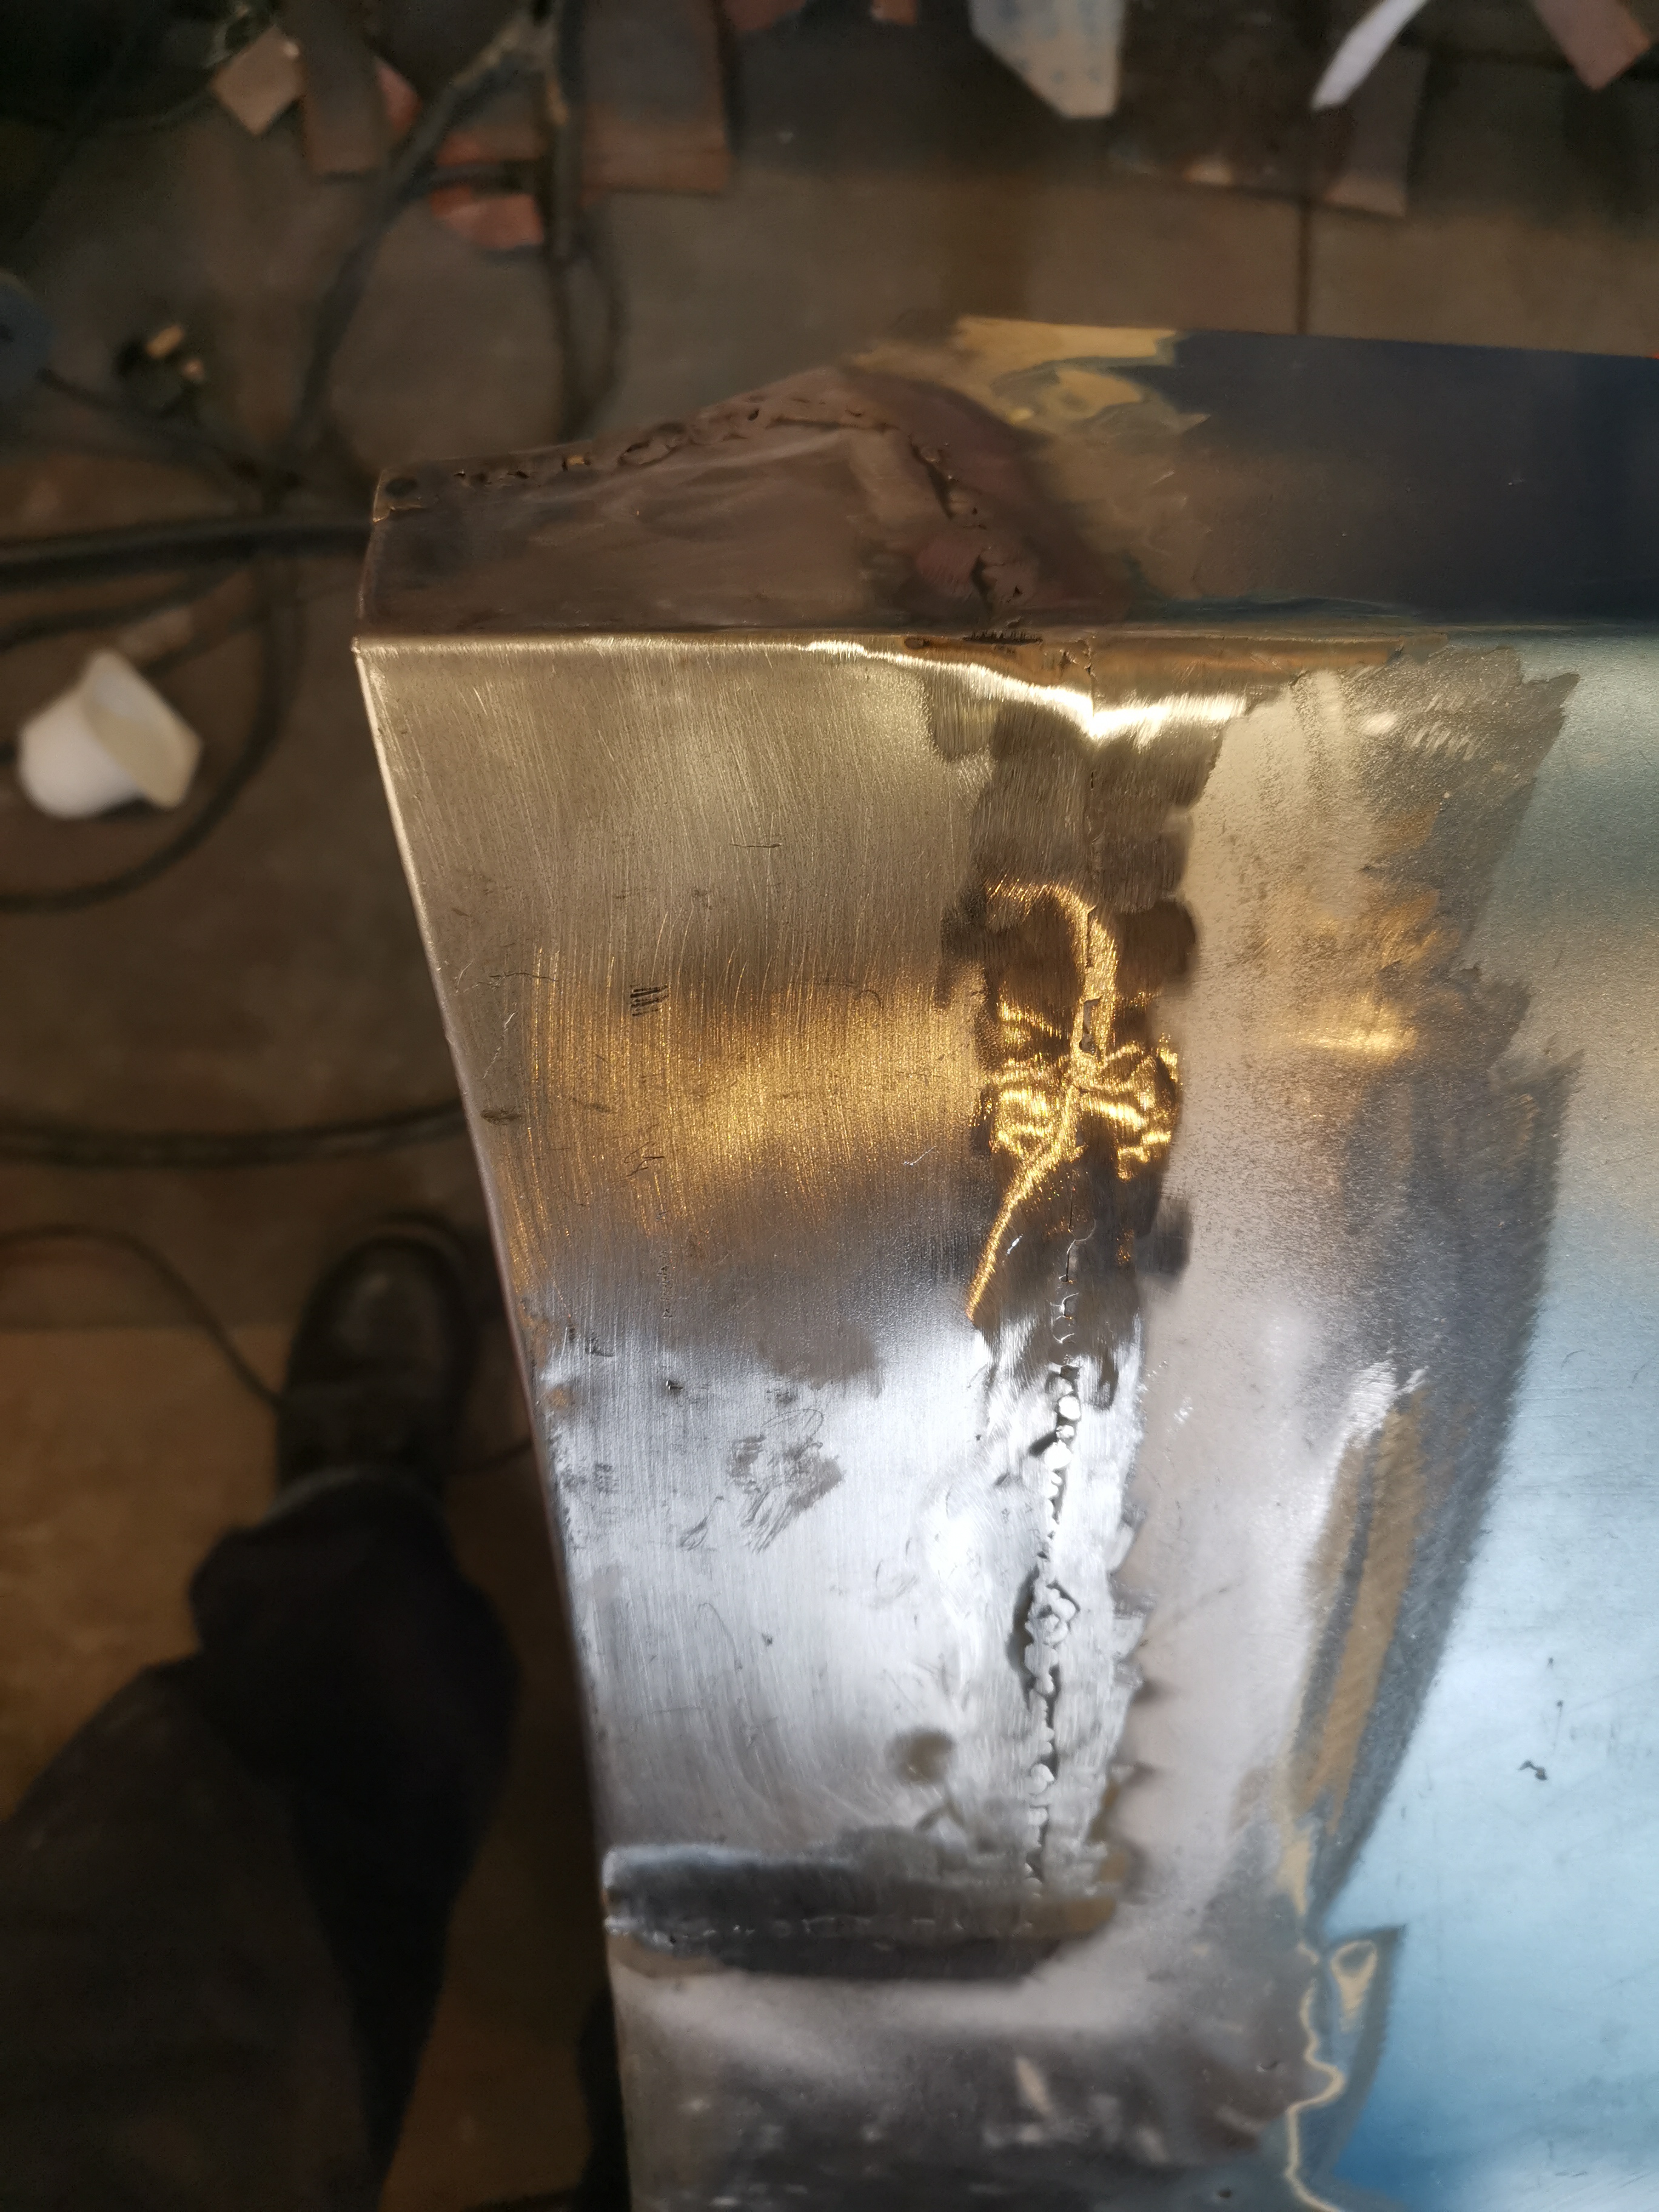
But after a while I felt I was getting somewhere and tried my first bit of welding...
Front wings
Anyway, Onto my first bit of panel beating and metal folding... Getting the profile and lines right was a bit of a challenge when I've never tried doing anything like this before.
Front wings
Not too shabby for a first attempt, even if I do say so myself!!
Front wings
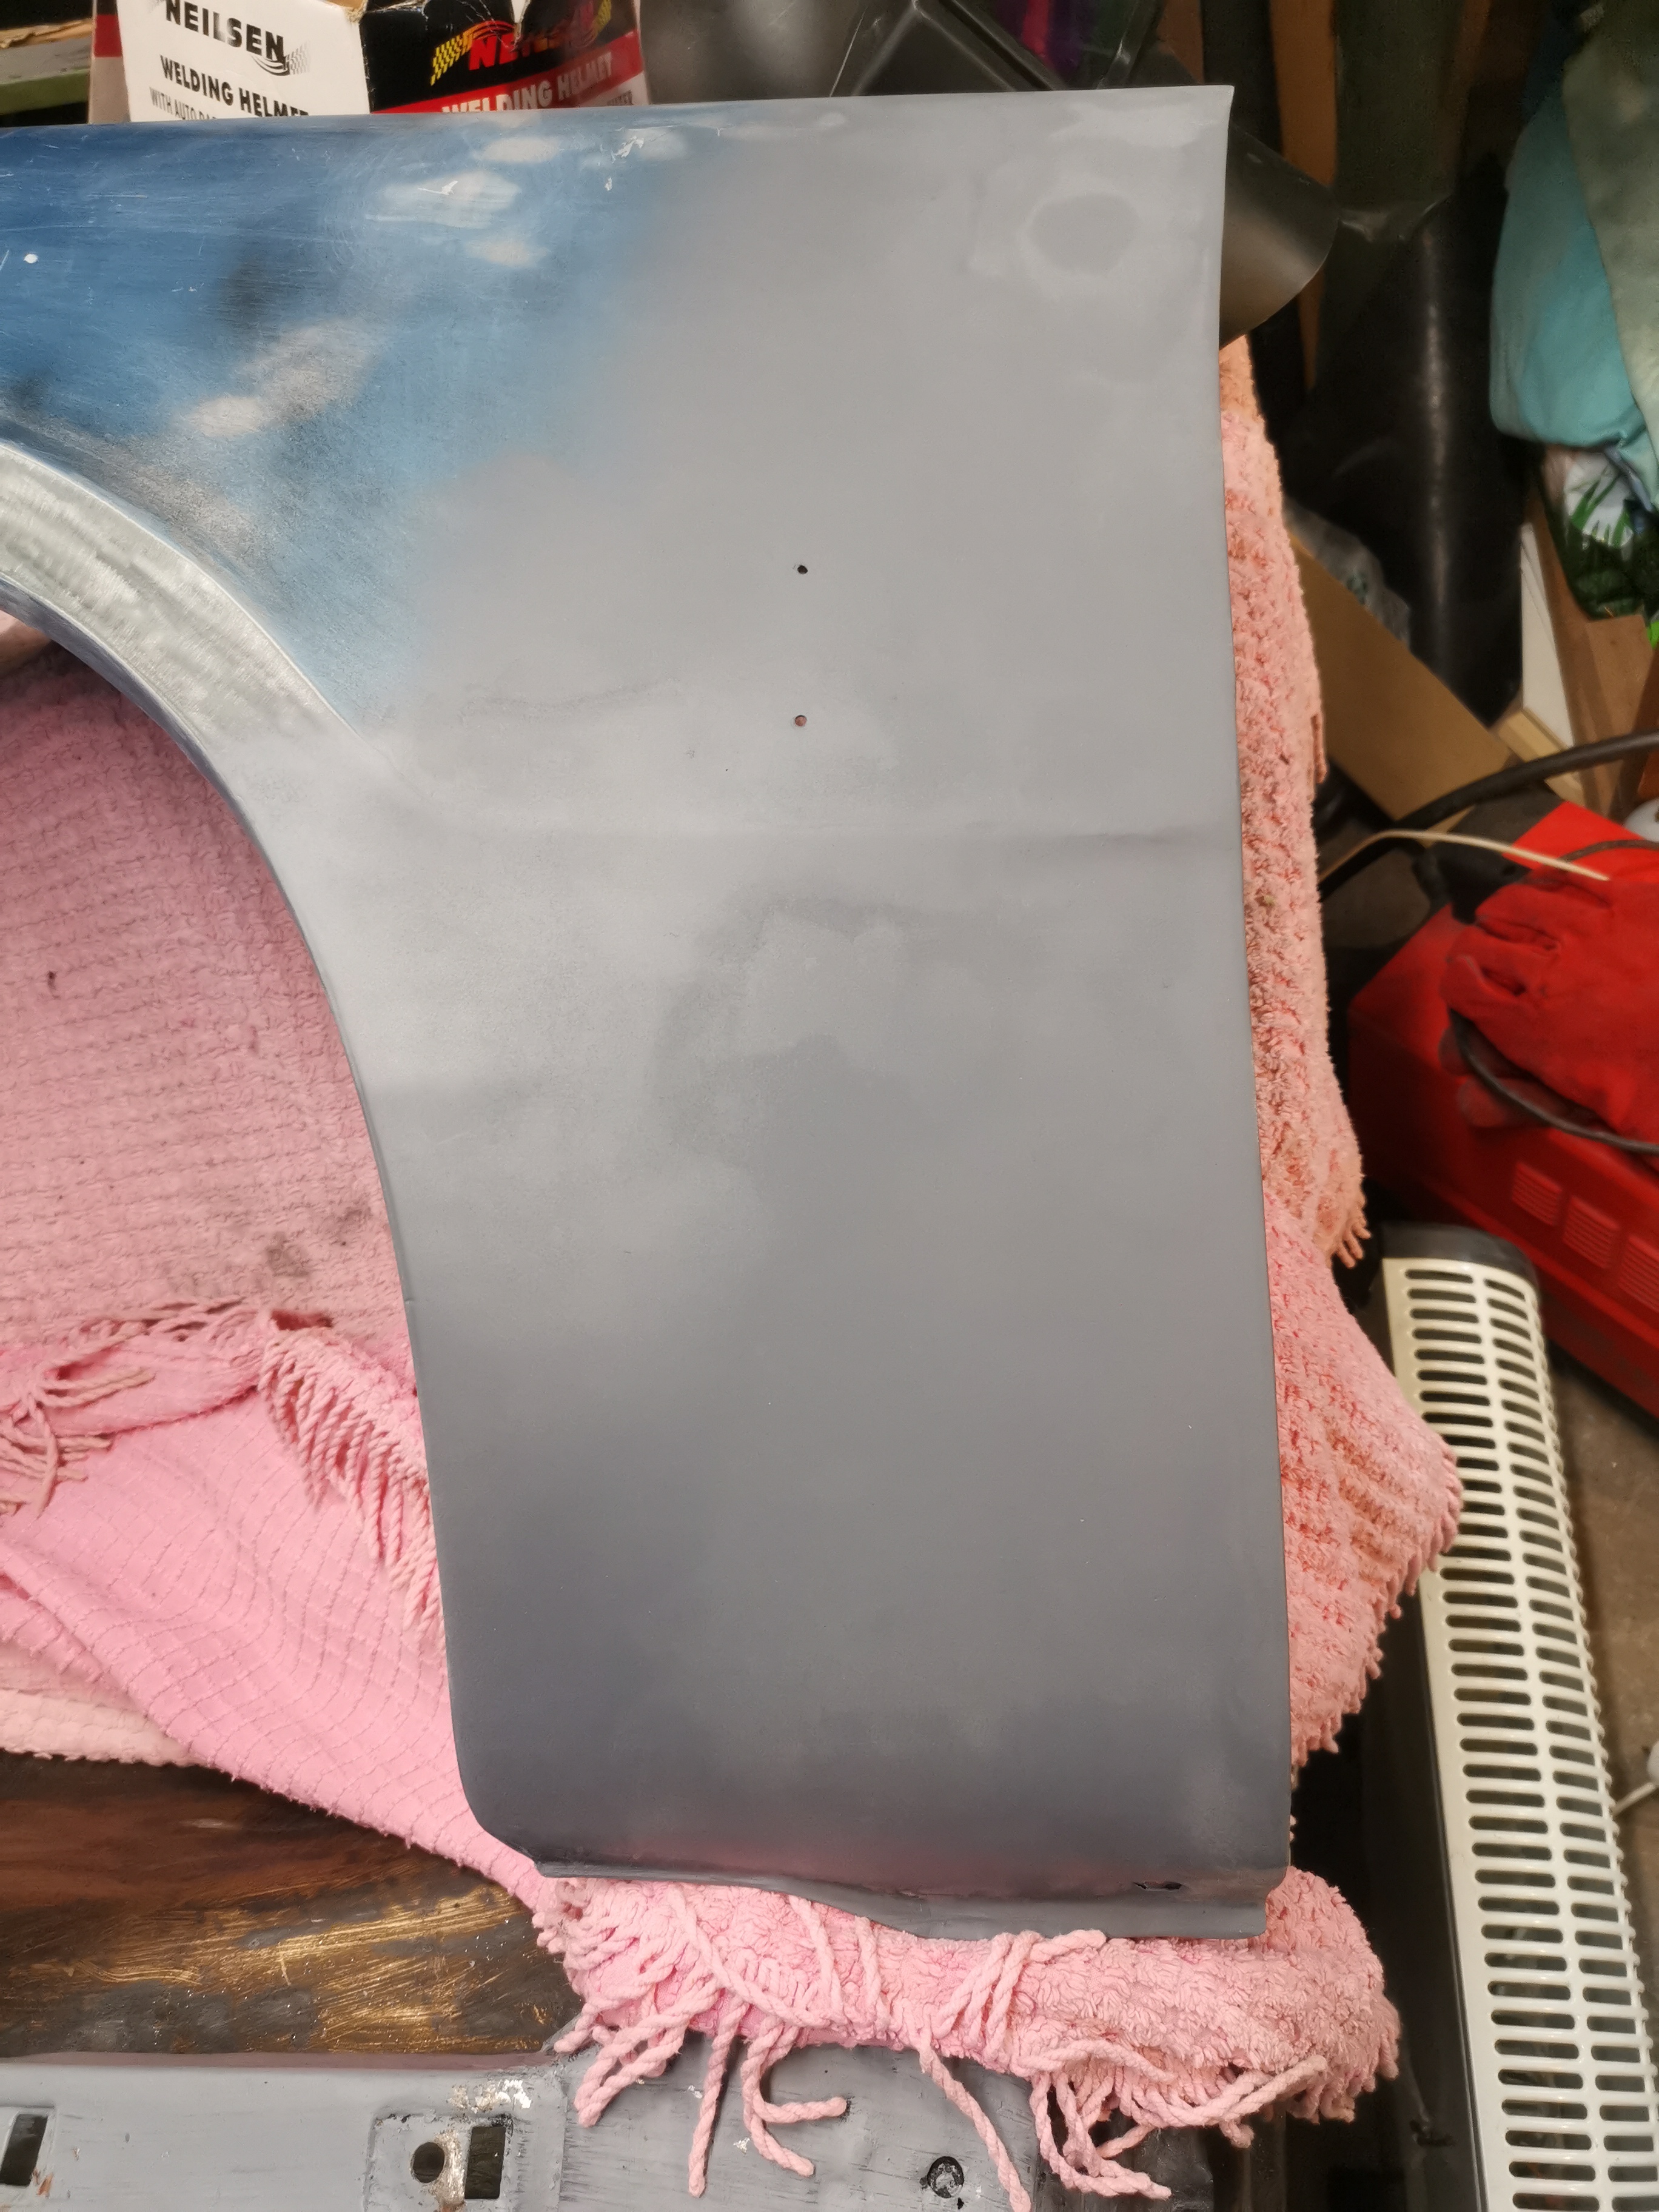
No filler, just a layer of etch primer and it's reasonably straight I think.
Front wings
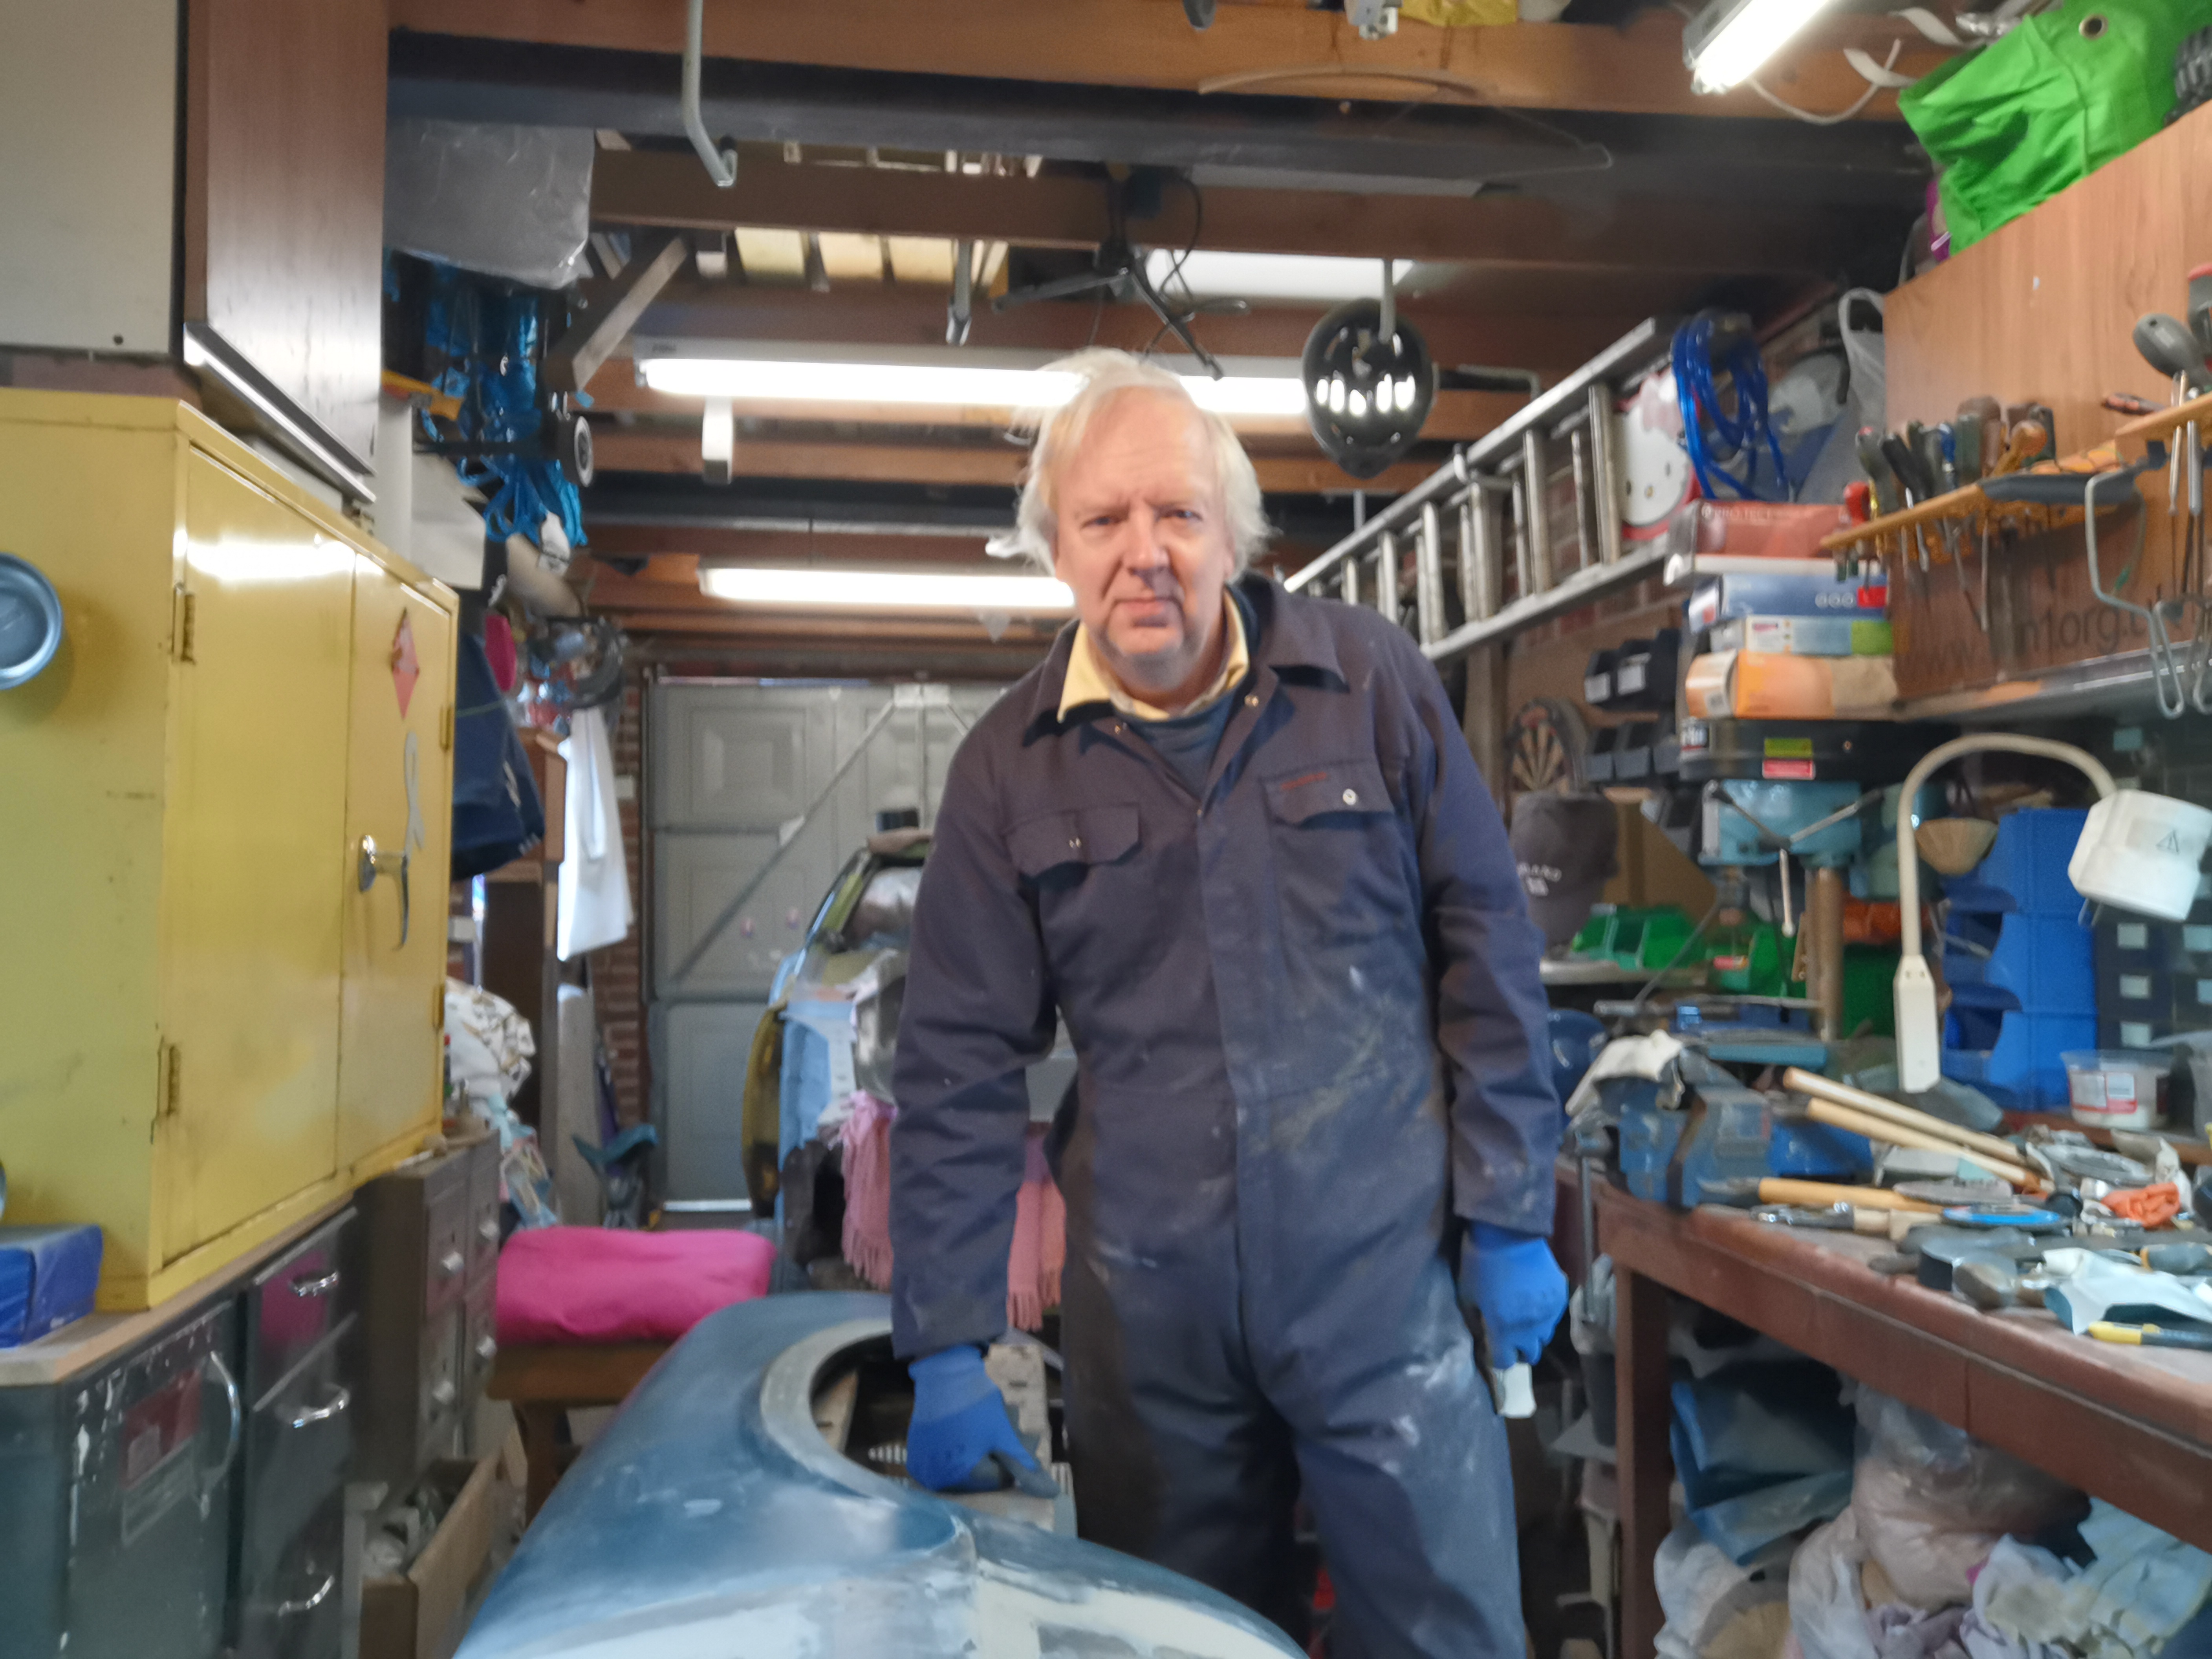
Just to prove it's me just doing all the work I took a selfie lol
Front wings
All the rest of the paint removed by hand to make sure I hadn't missed any more corrosion.

Front wings
A couple of layers of Rustbuster EM121 Epoxy mastic chassis paint on the insides for protection.
Front wings
A thin skim of filler, primer and a layer of Halfords filler primer and they look as good as new!!

Inner wing
The inner wing got similar treatment, stripping, cleaning and painting with EM121 Epoxy. (This is before I realised the front was all bent out of shape! - Don't ask me why I didn't notice this earlier 🙄)
Front wings
You can't even see the joints. It took a few months work lol, but I'm mighty pleased with the results.
Summer 2020
With many of the parts removed from the car over the winter I decided to take each individual part and clean it up the best I could and put it into storage. These are a few of those part's before and after photos.
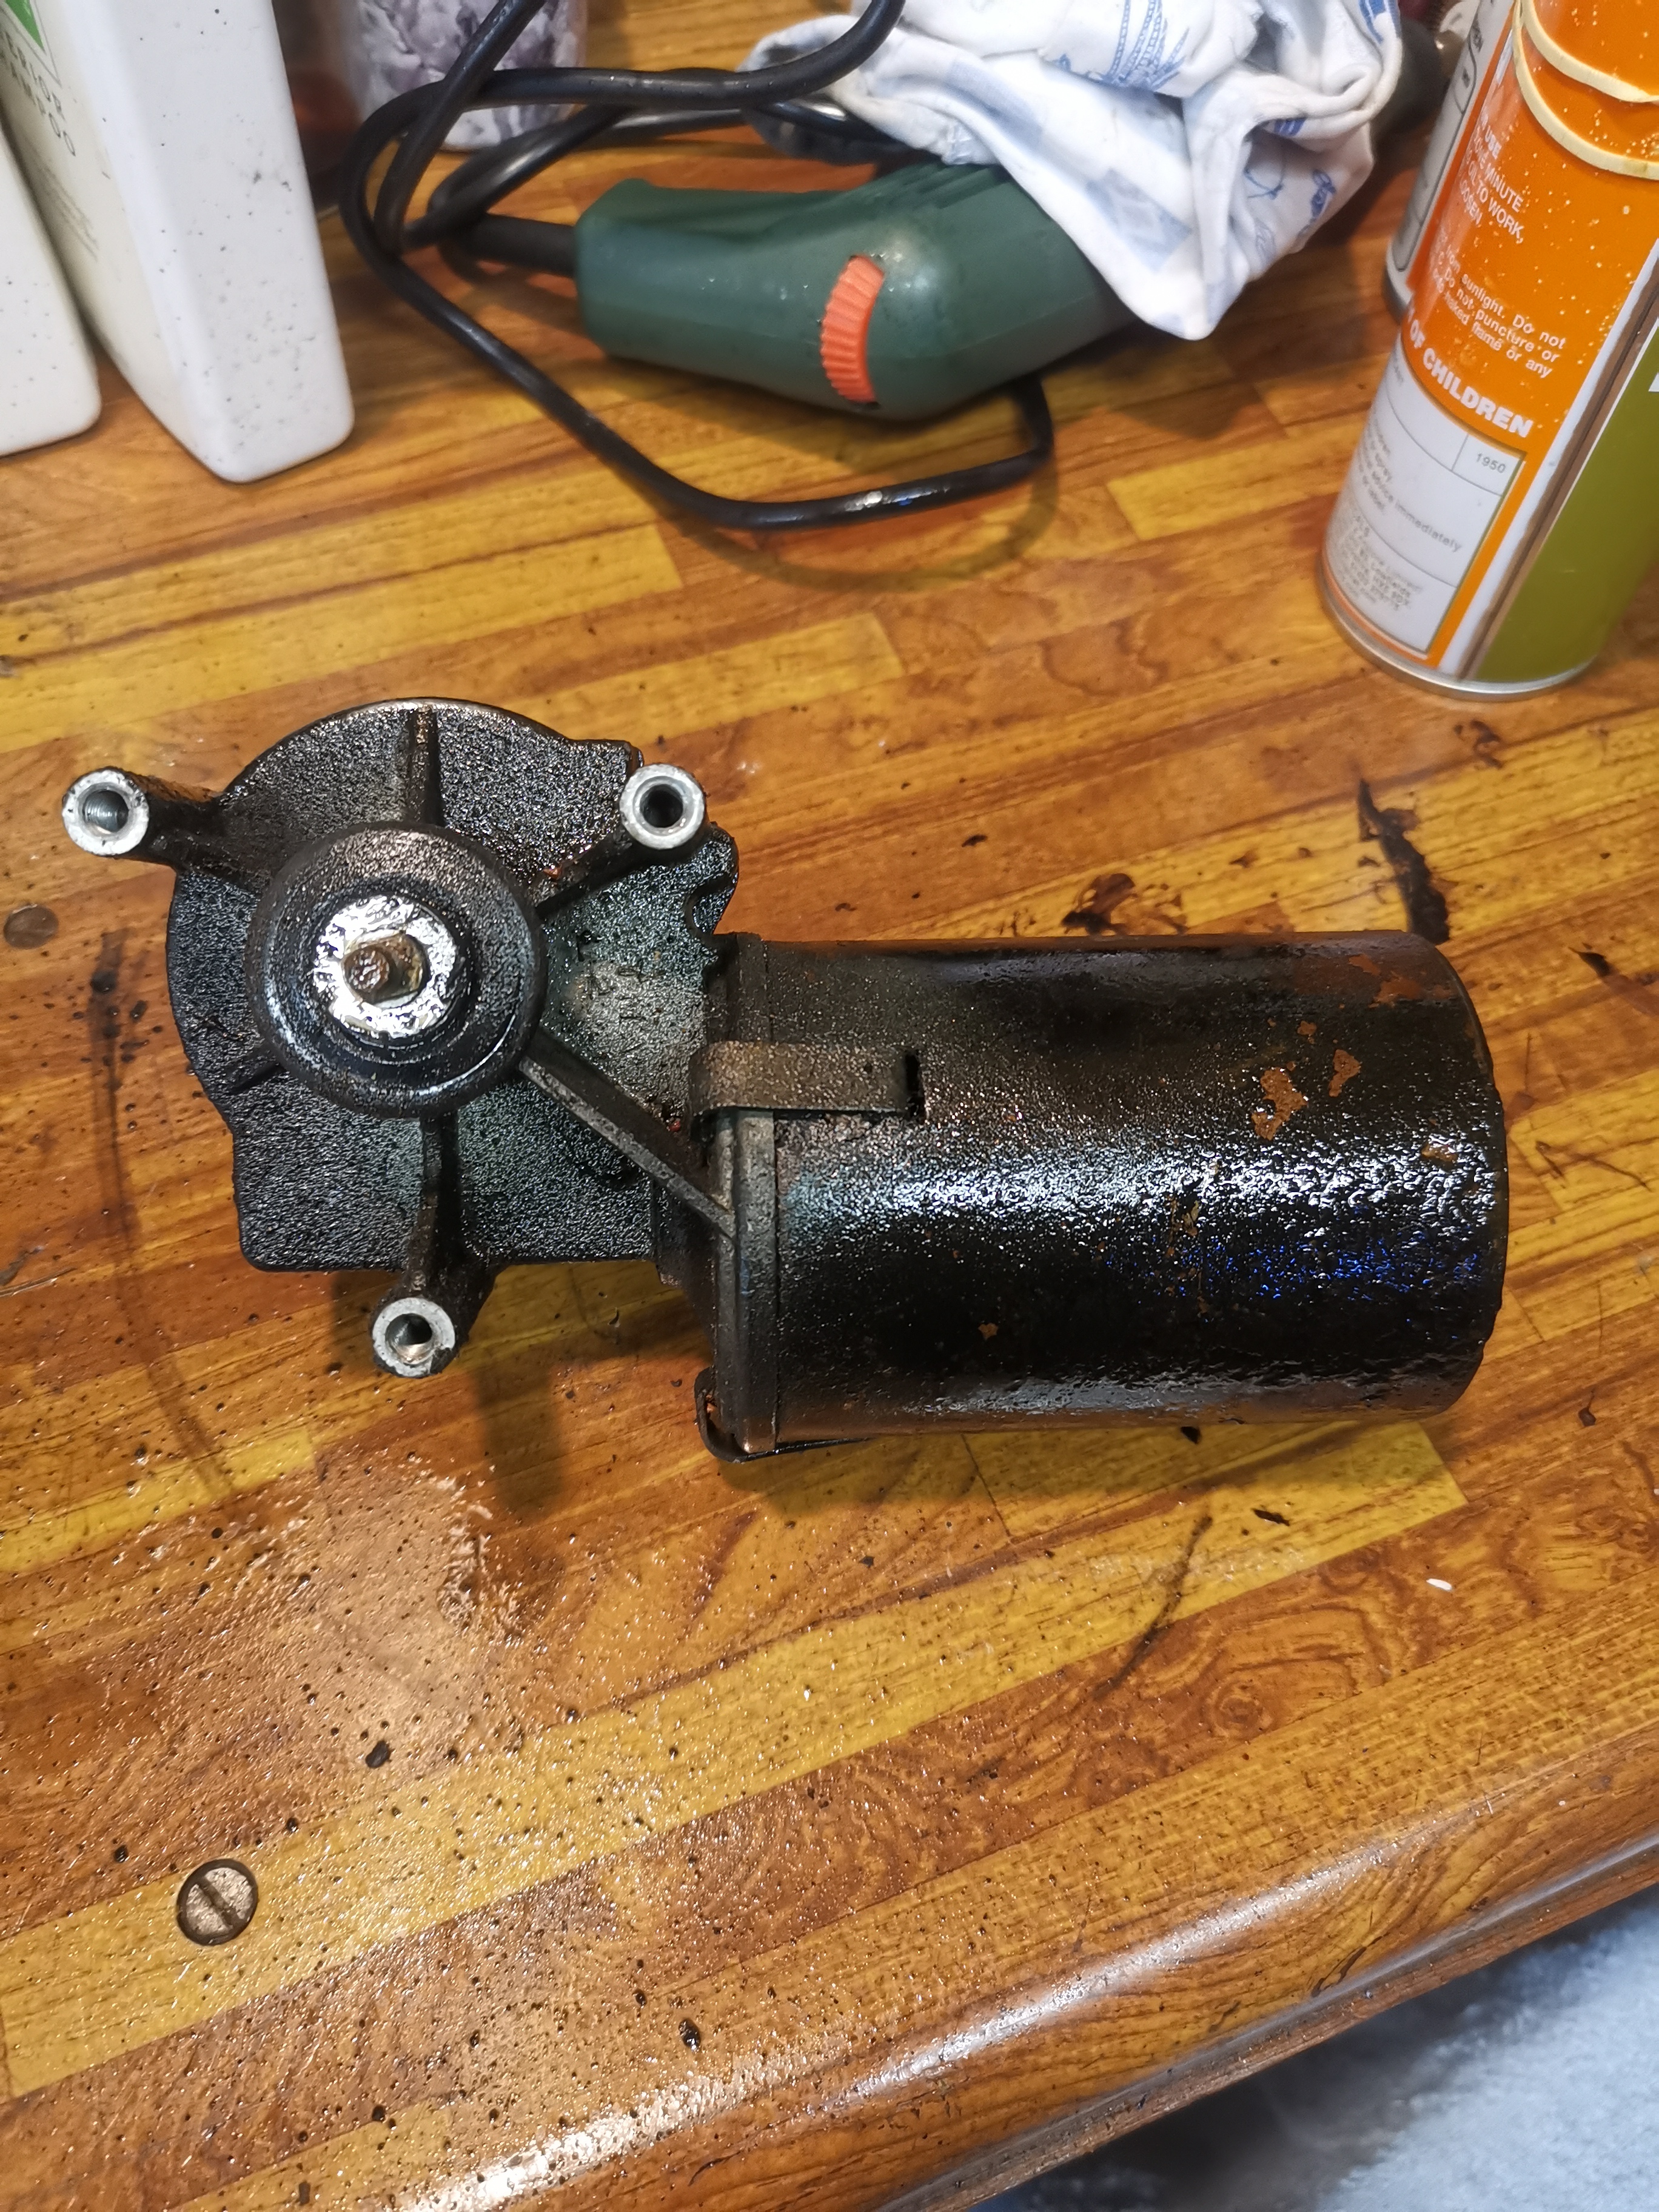
Wiper motor
The wiper motor was dirty and greasy.
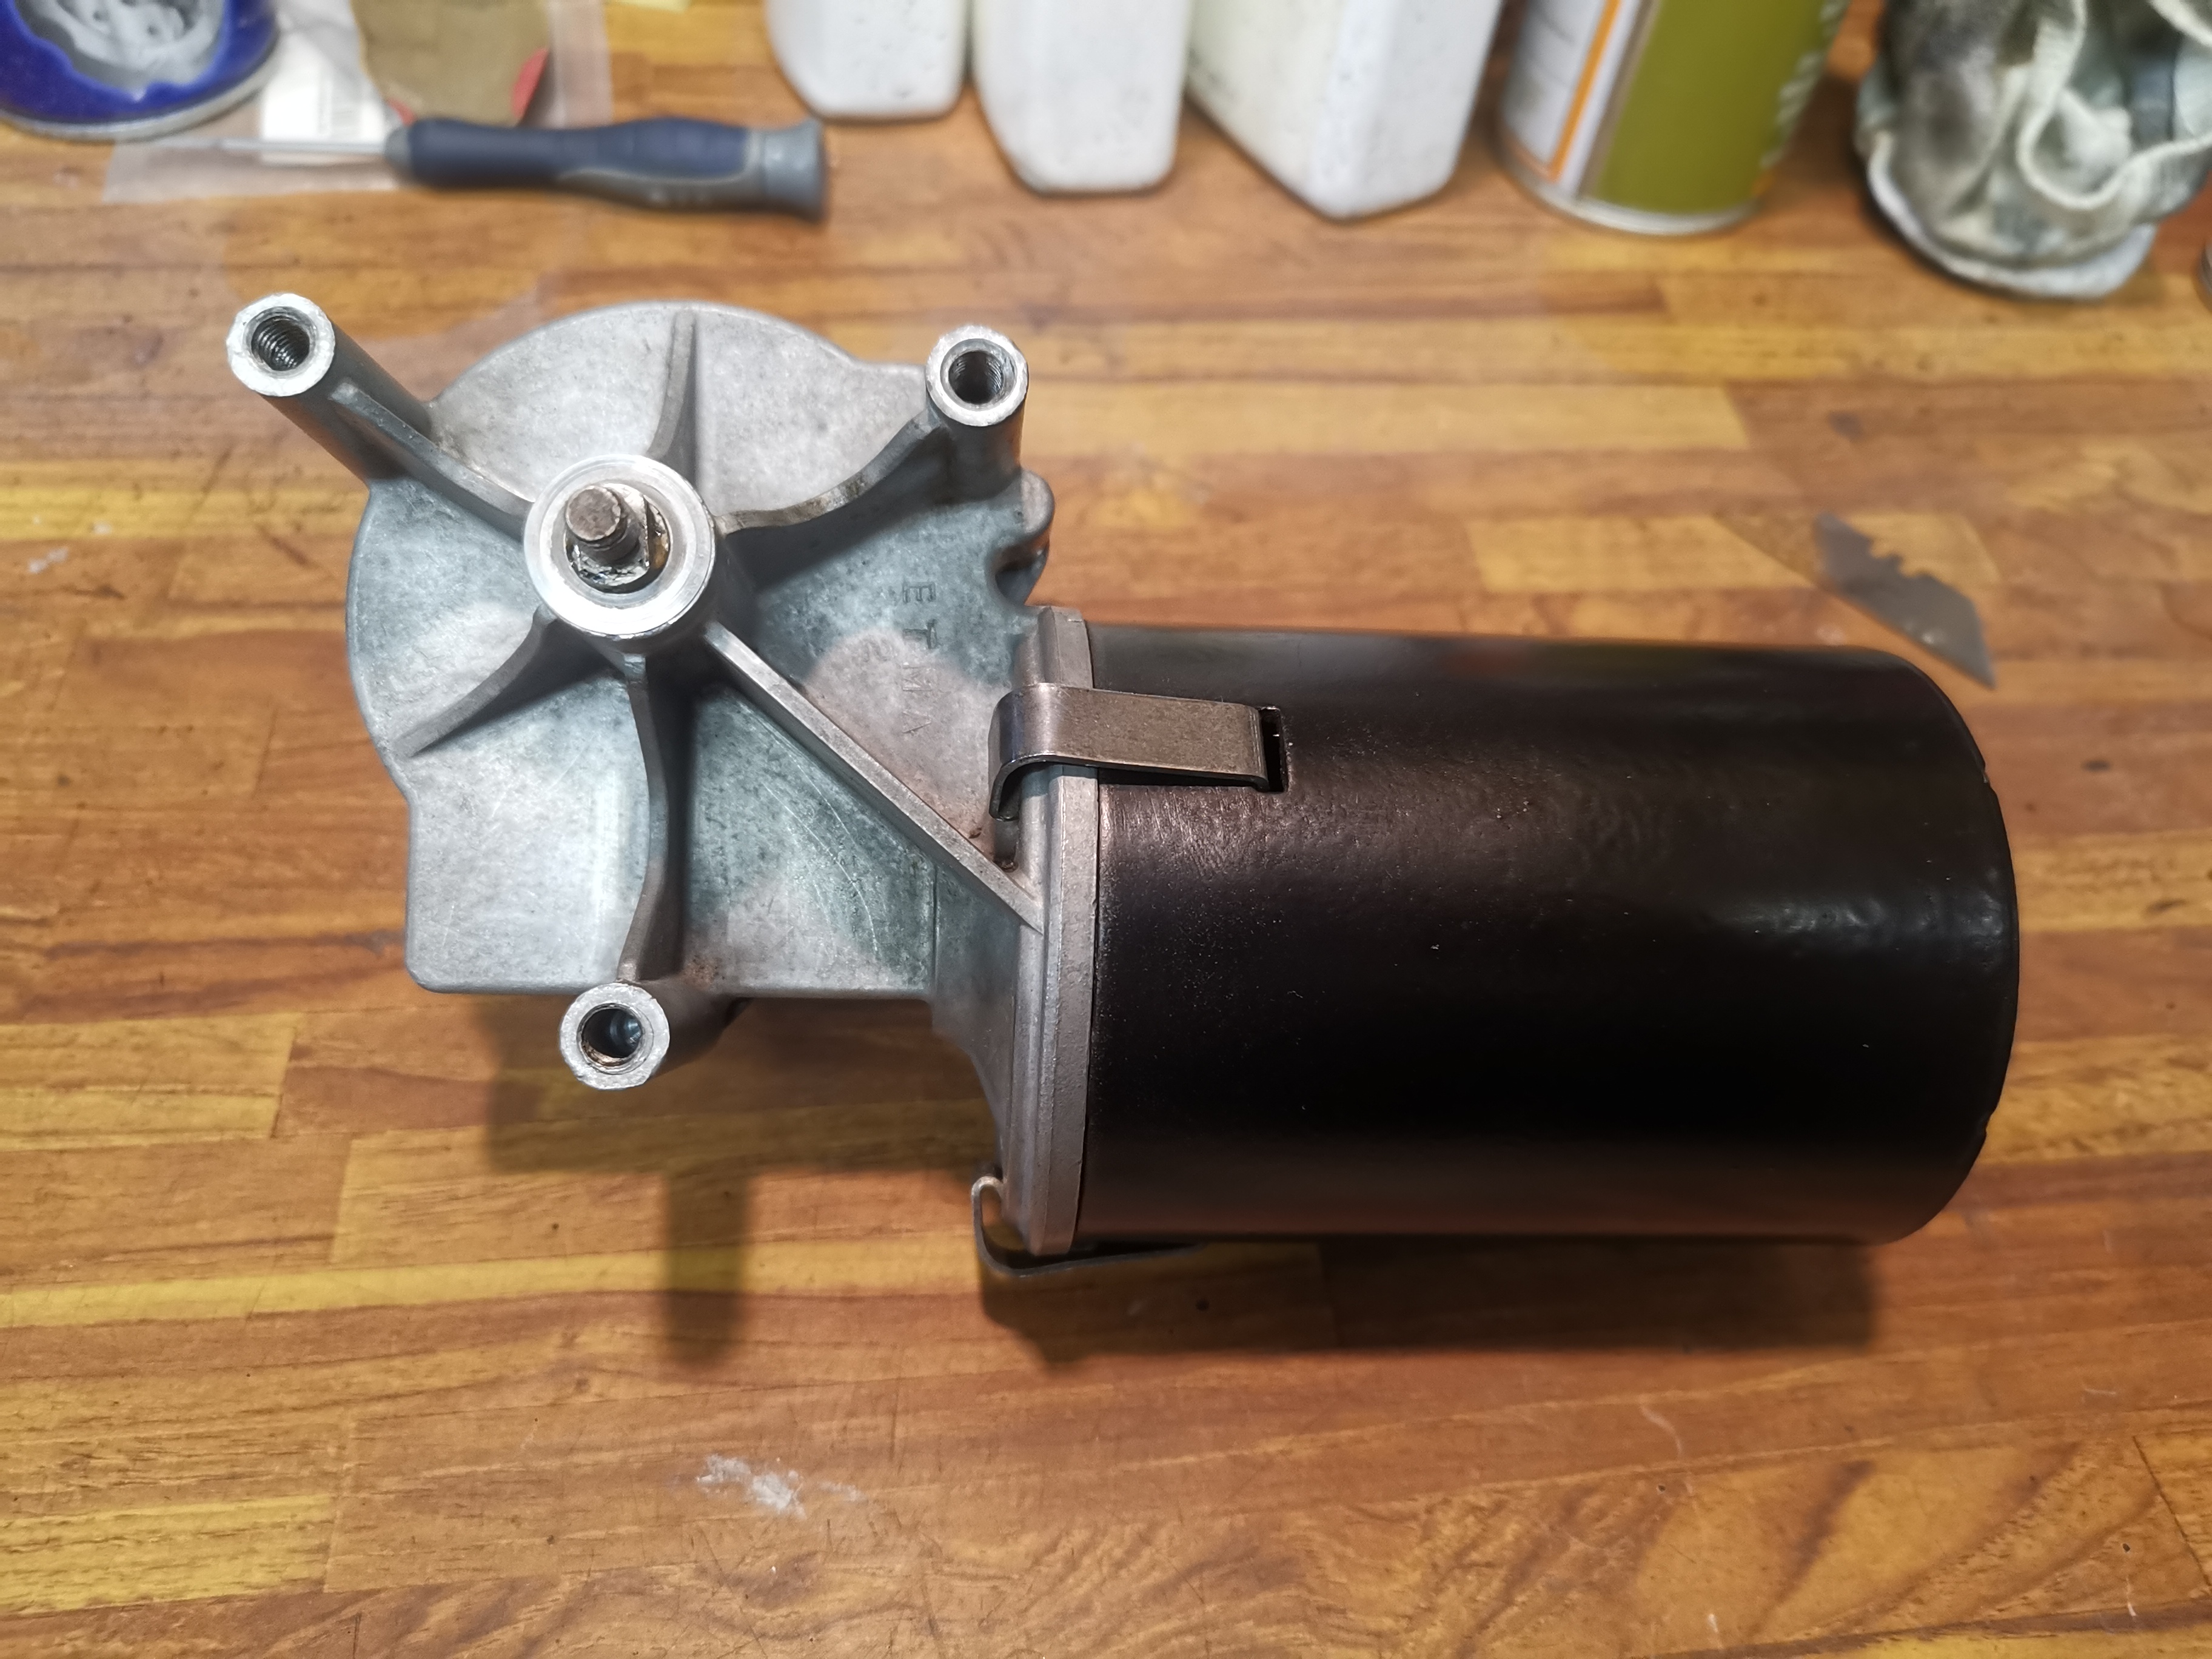
Wiper motor
I dismantled it, cleaned it, painted it and reassembled it.
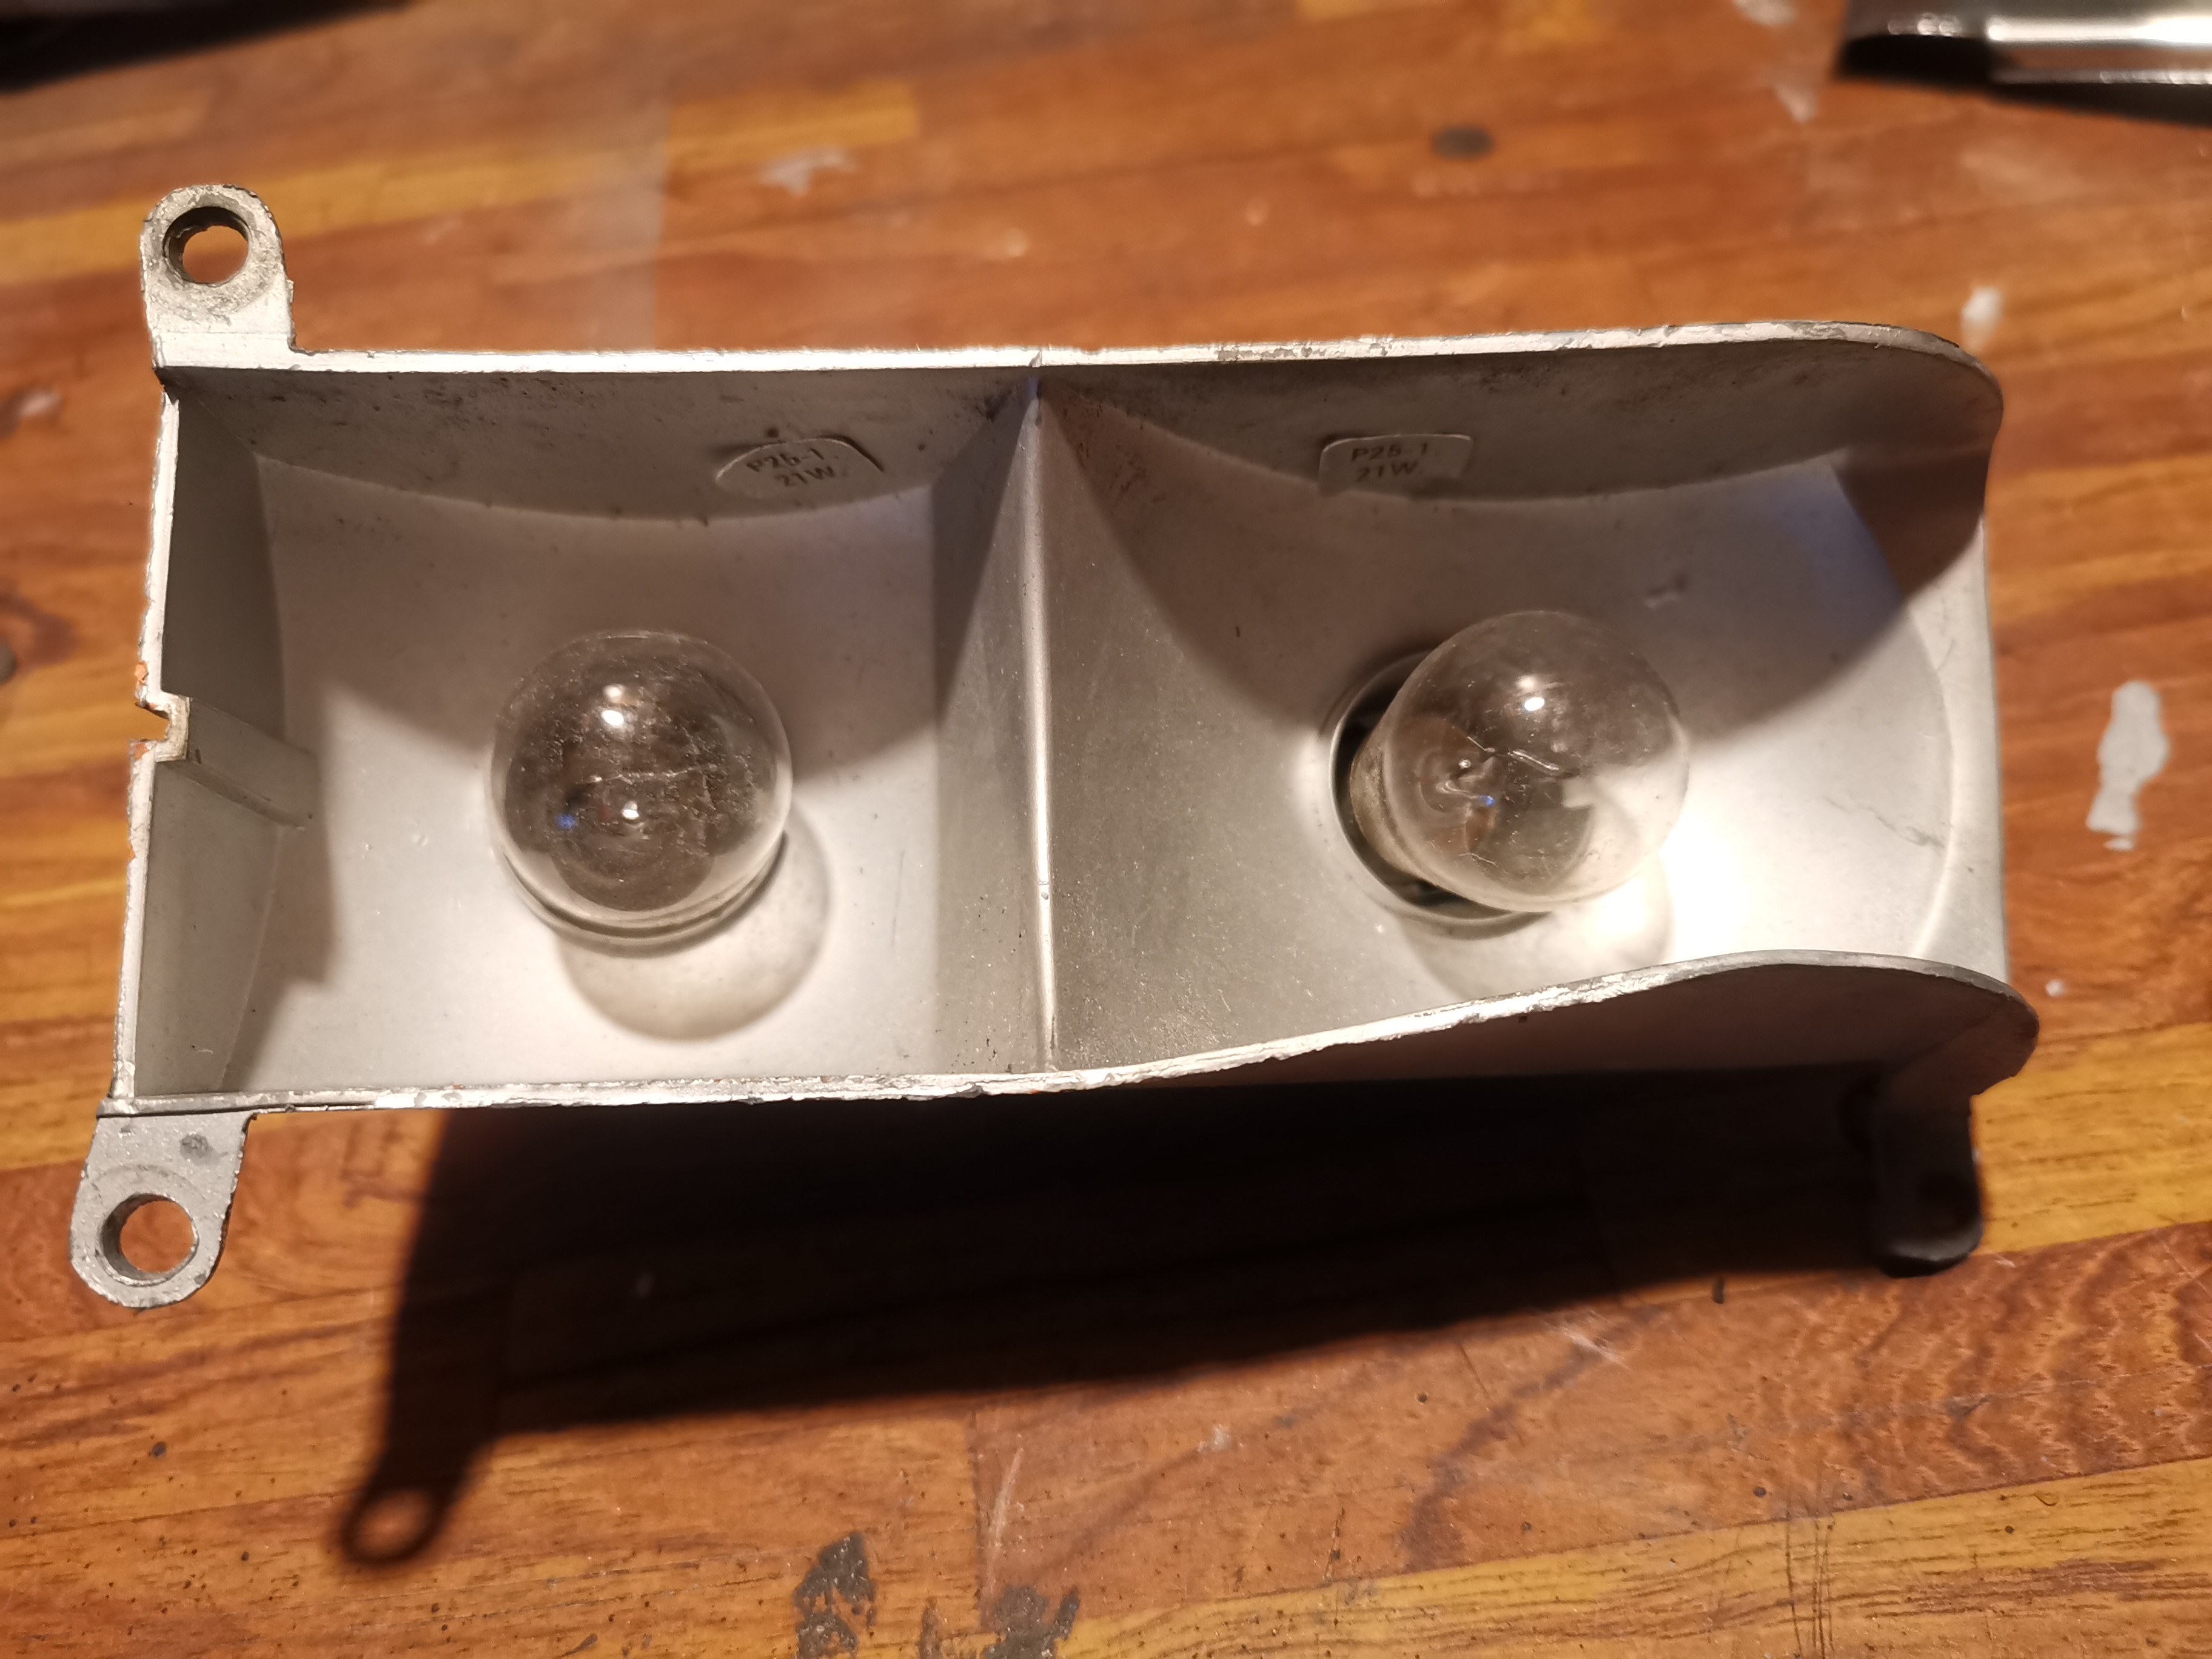
Rear light assembly
The rear light assembly was bent and twisted and also the reflectors were very dull and not at all reflective.
Rear light assembly
I managed to straighten then out and polish them up so they were much more reflective.
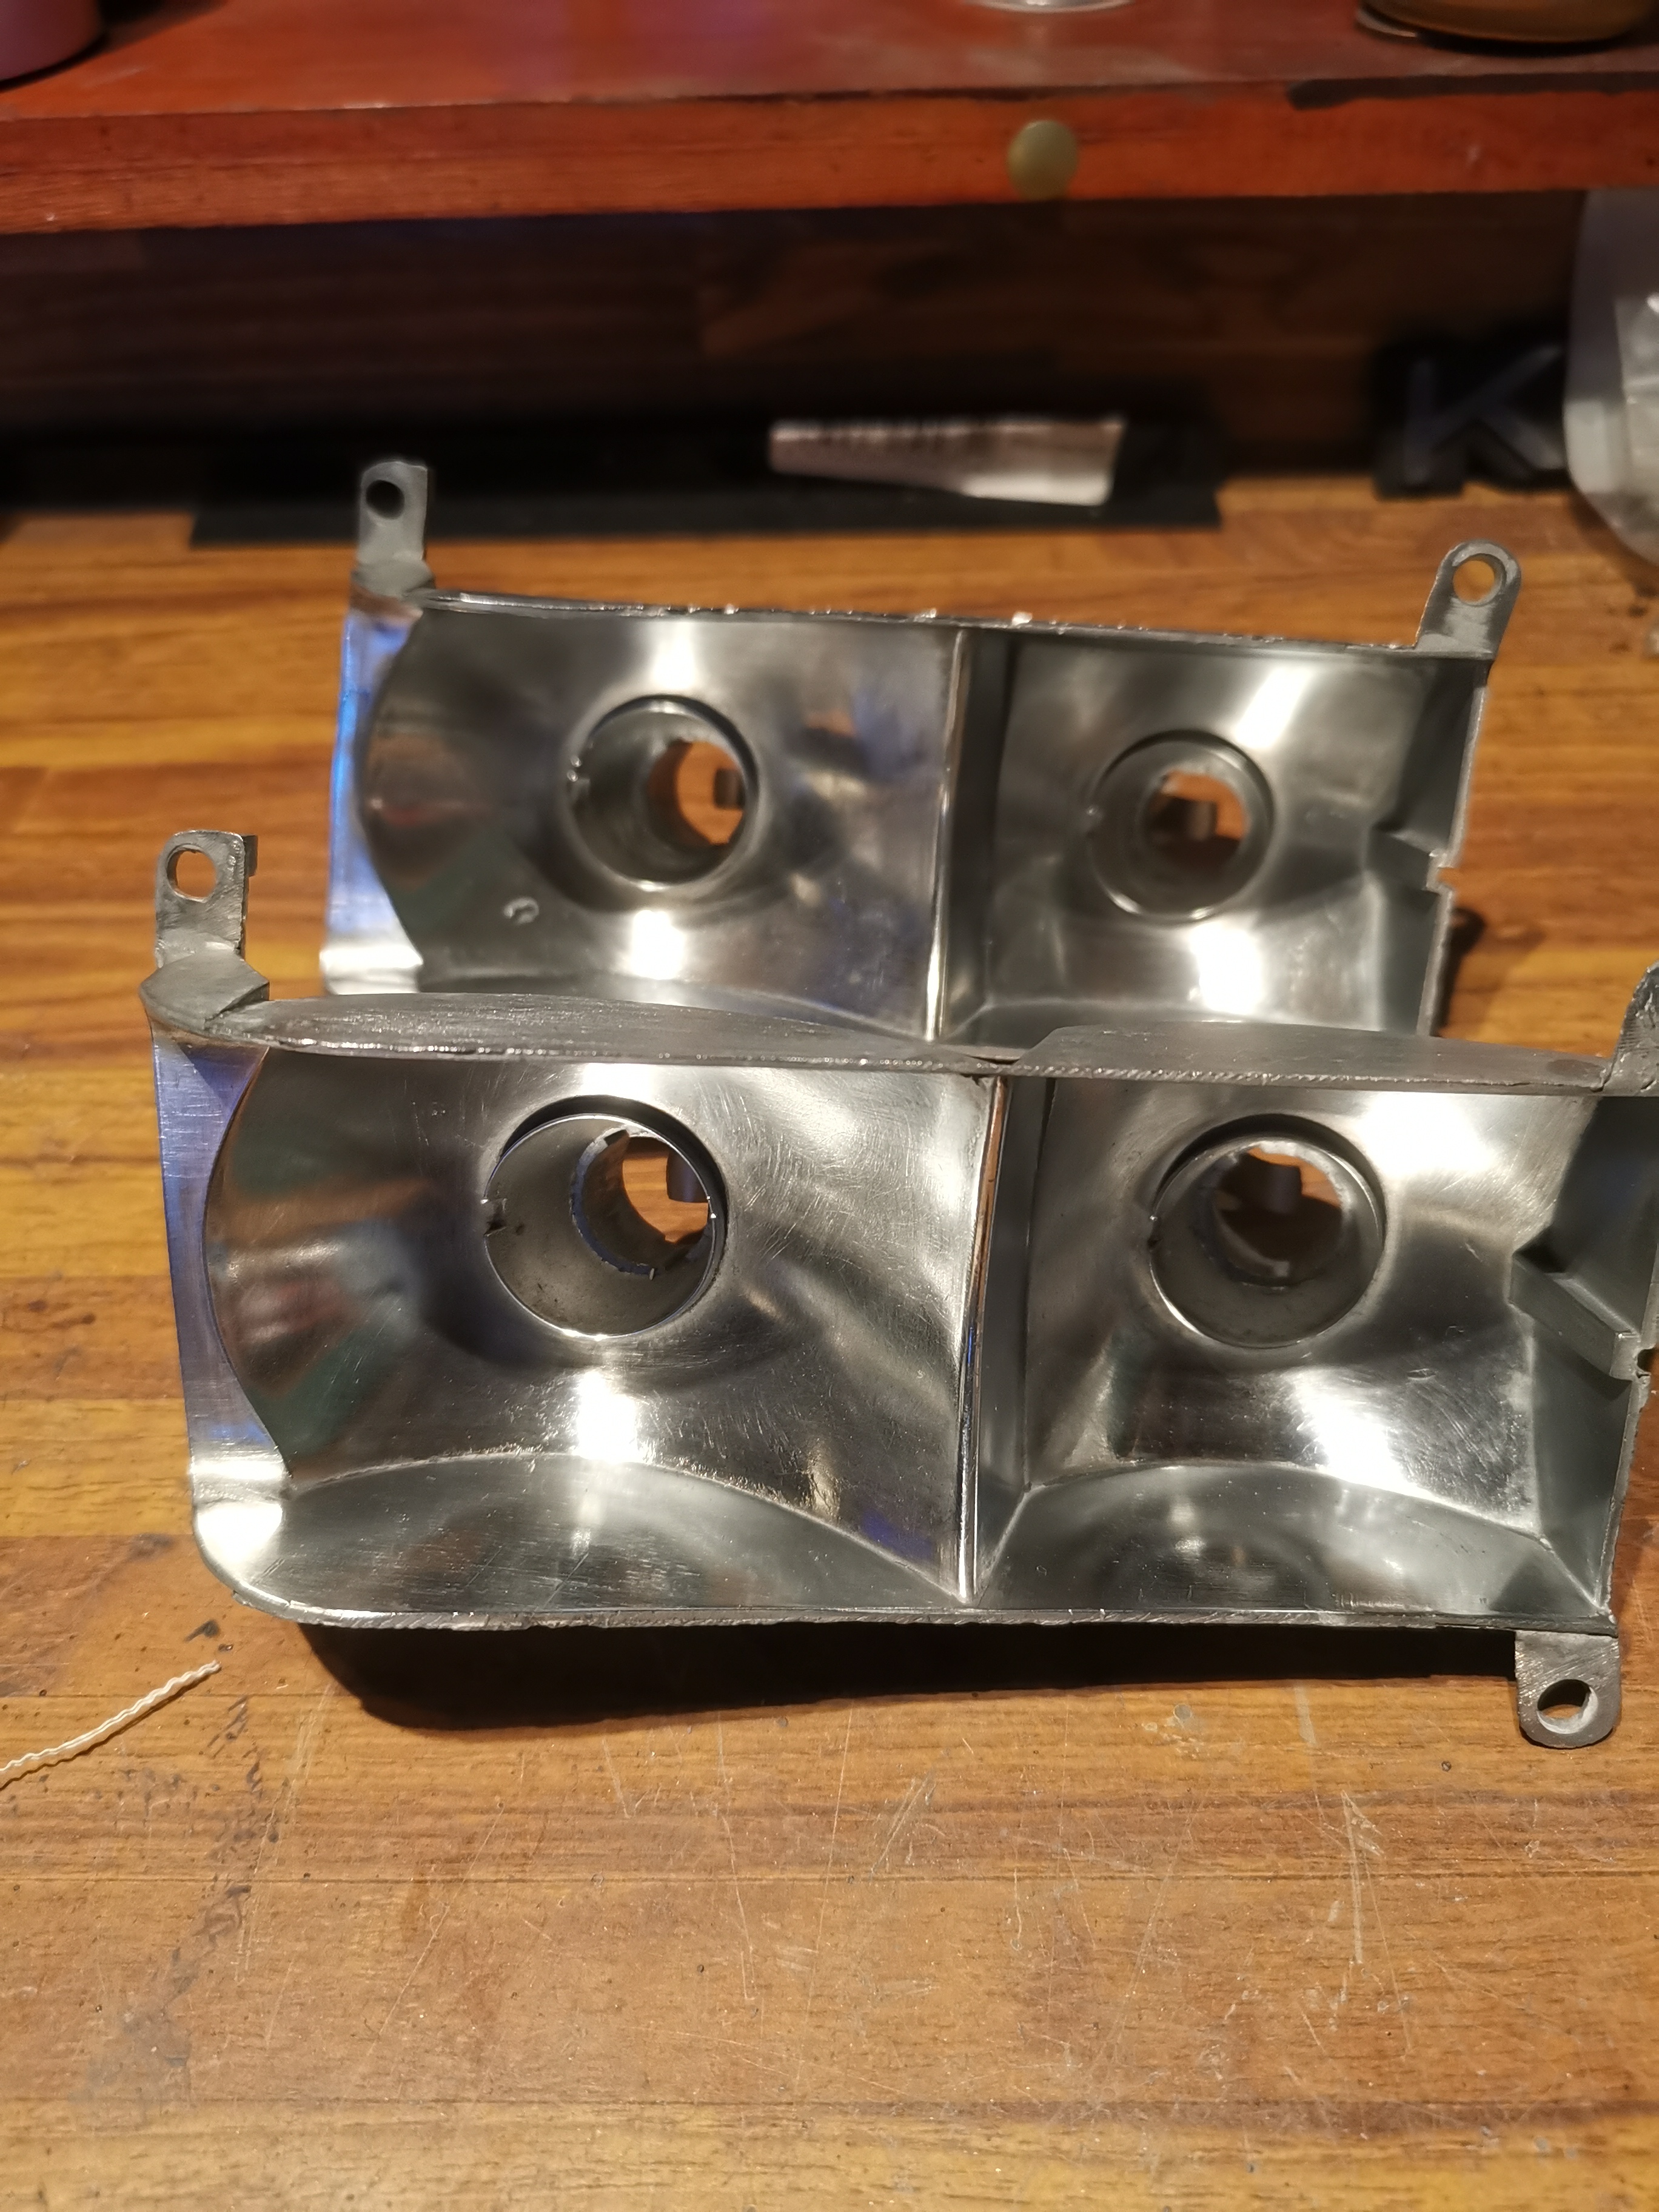
Headlamp rings
I thought these were too far gone to be usable.

Headlamp rings
But actually they cleaned up quite well.
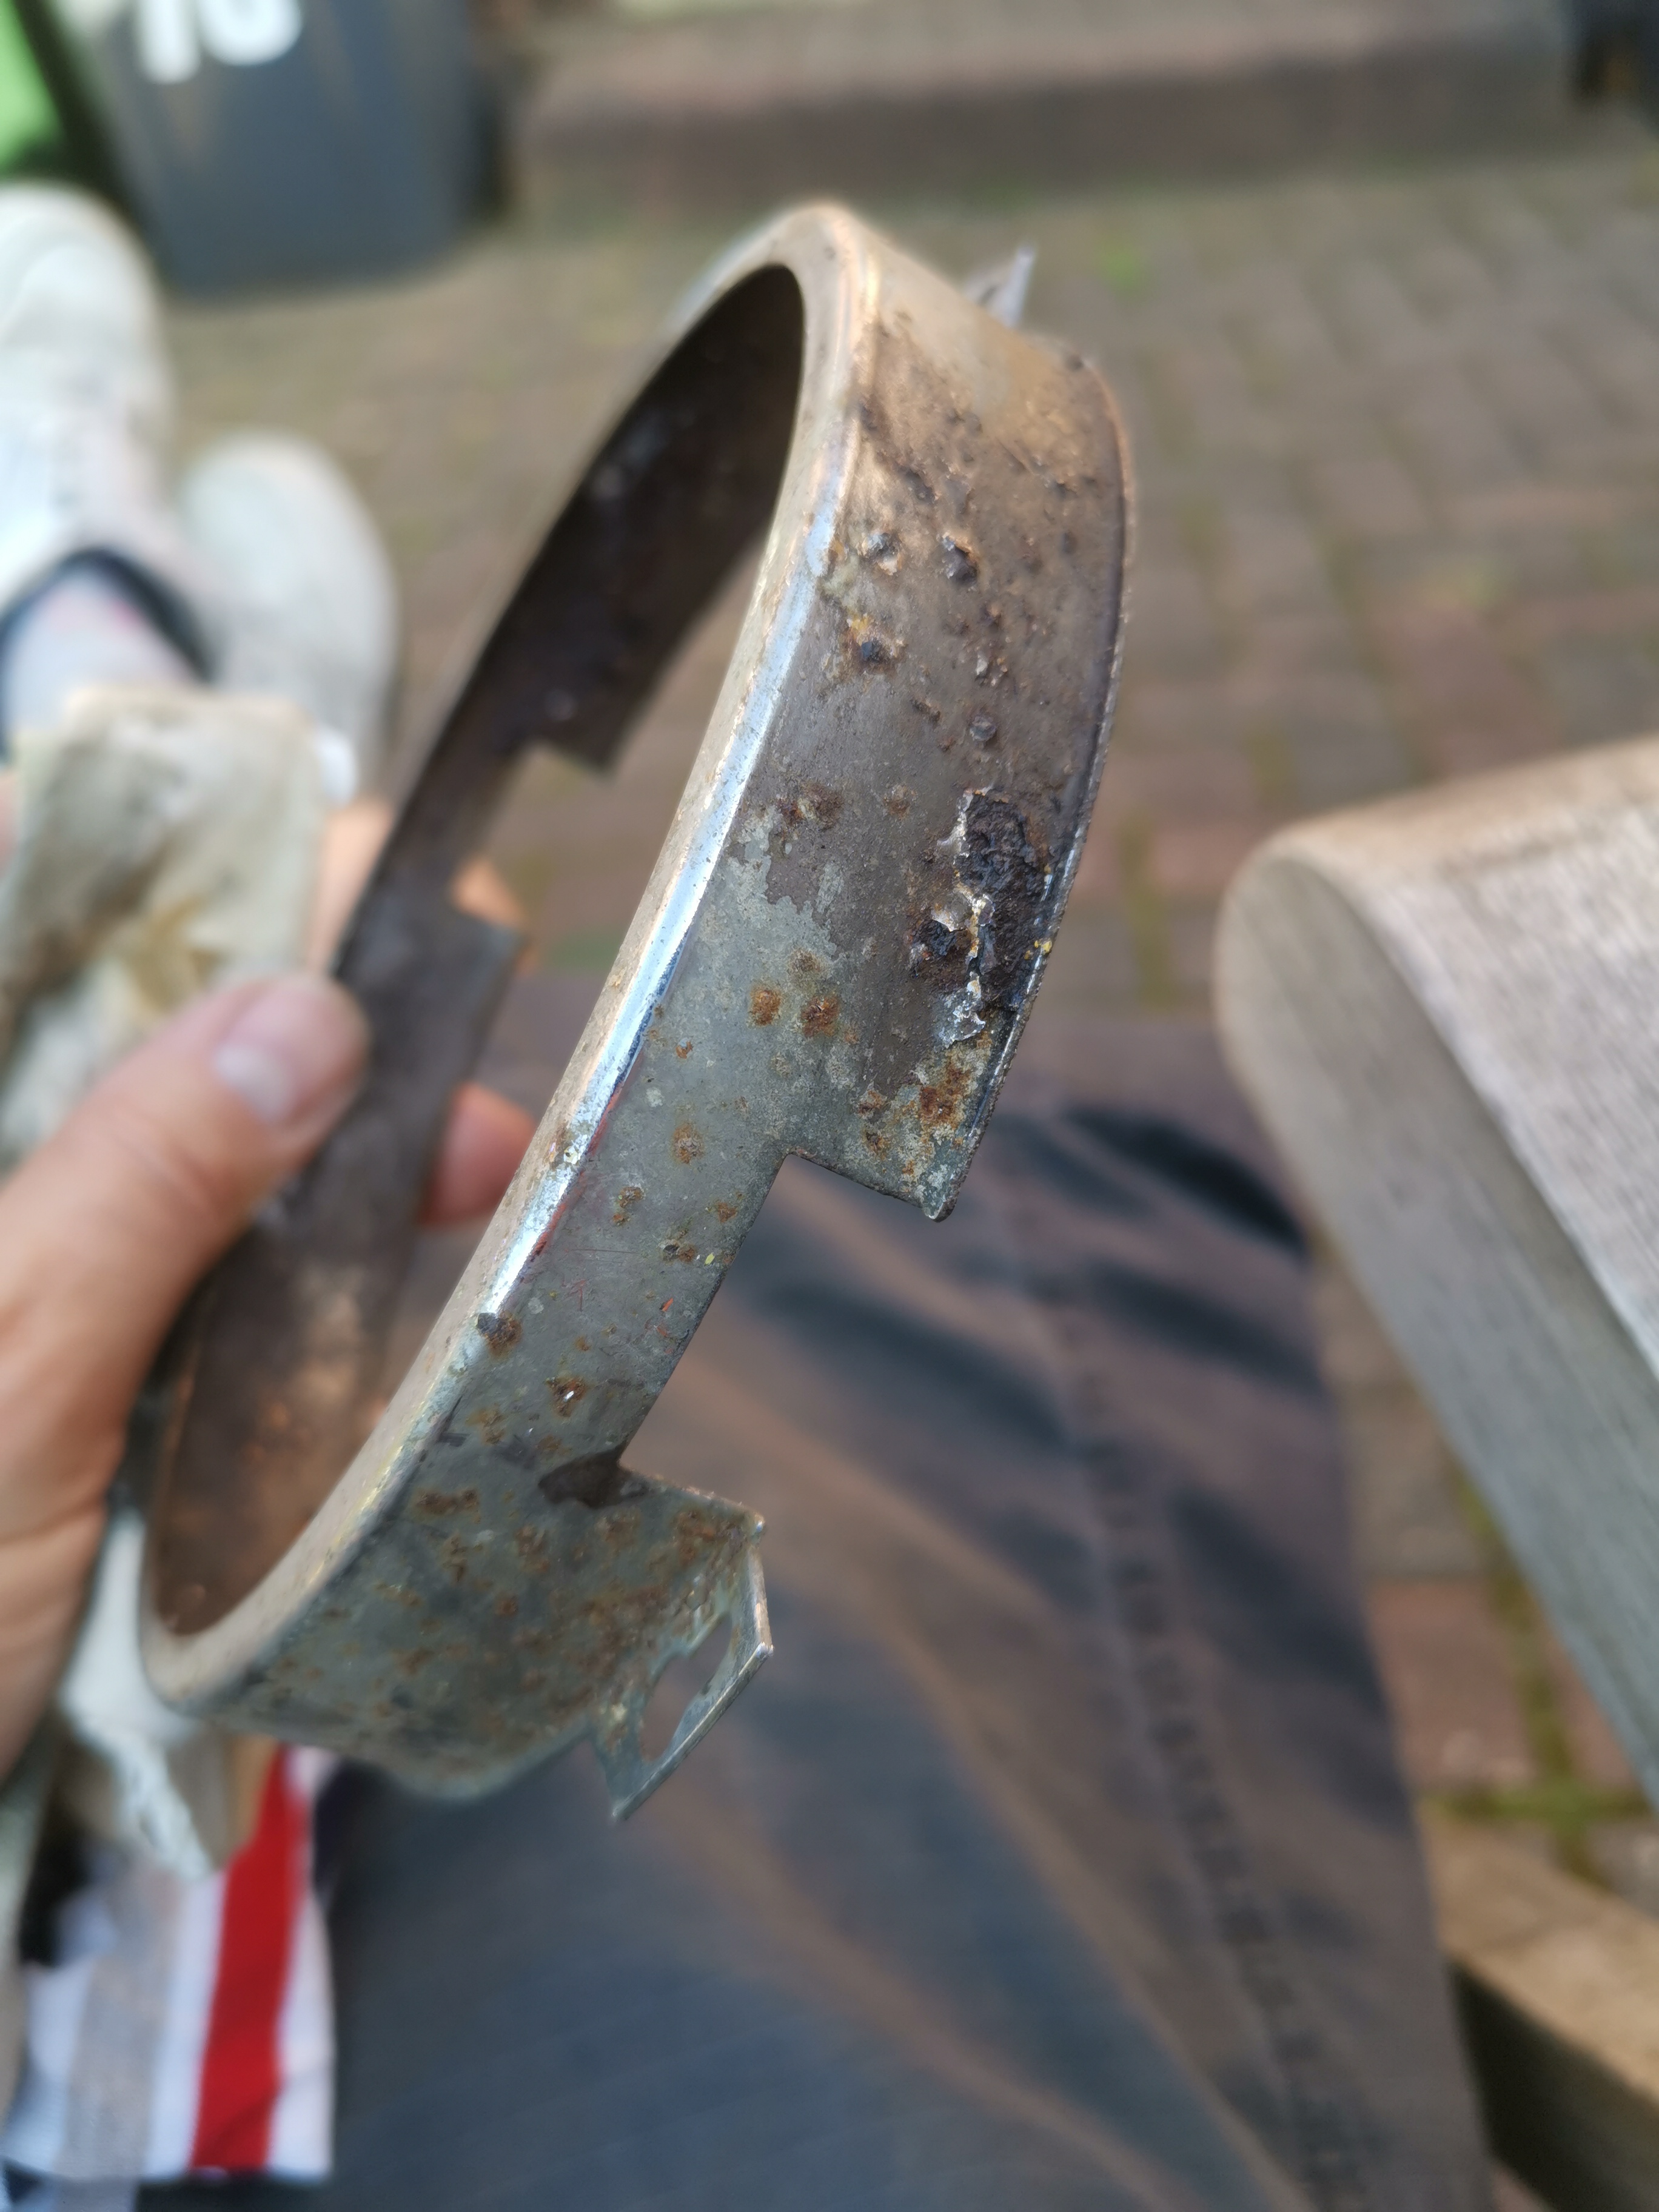
Headlamp back plates
The quad headlights needed the right back plate. I bought a new pair hoping they'd be in reasonably good condition, but no, they were rusty and bent too unfortunately.

Interior door handles
One clean one dirty lol
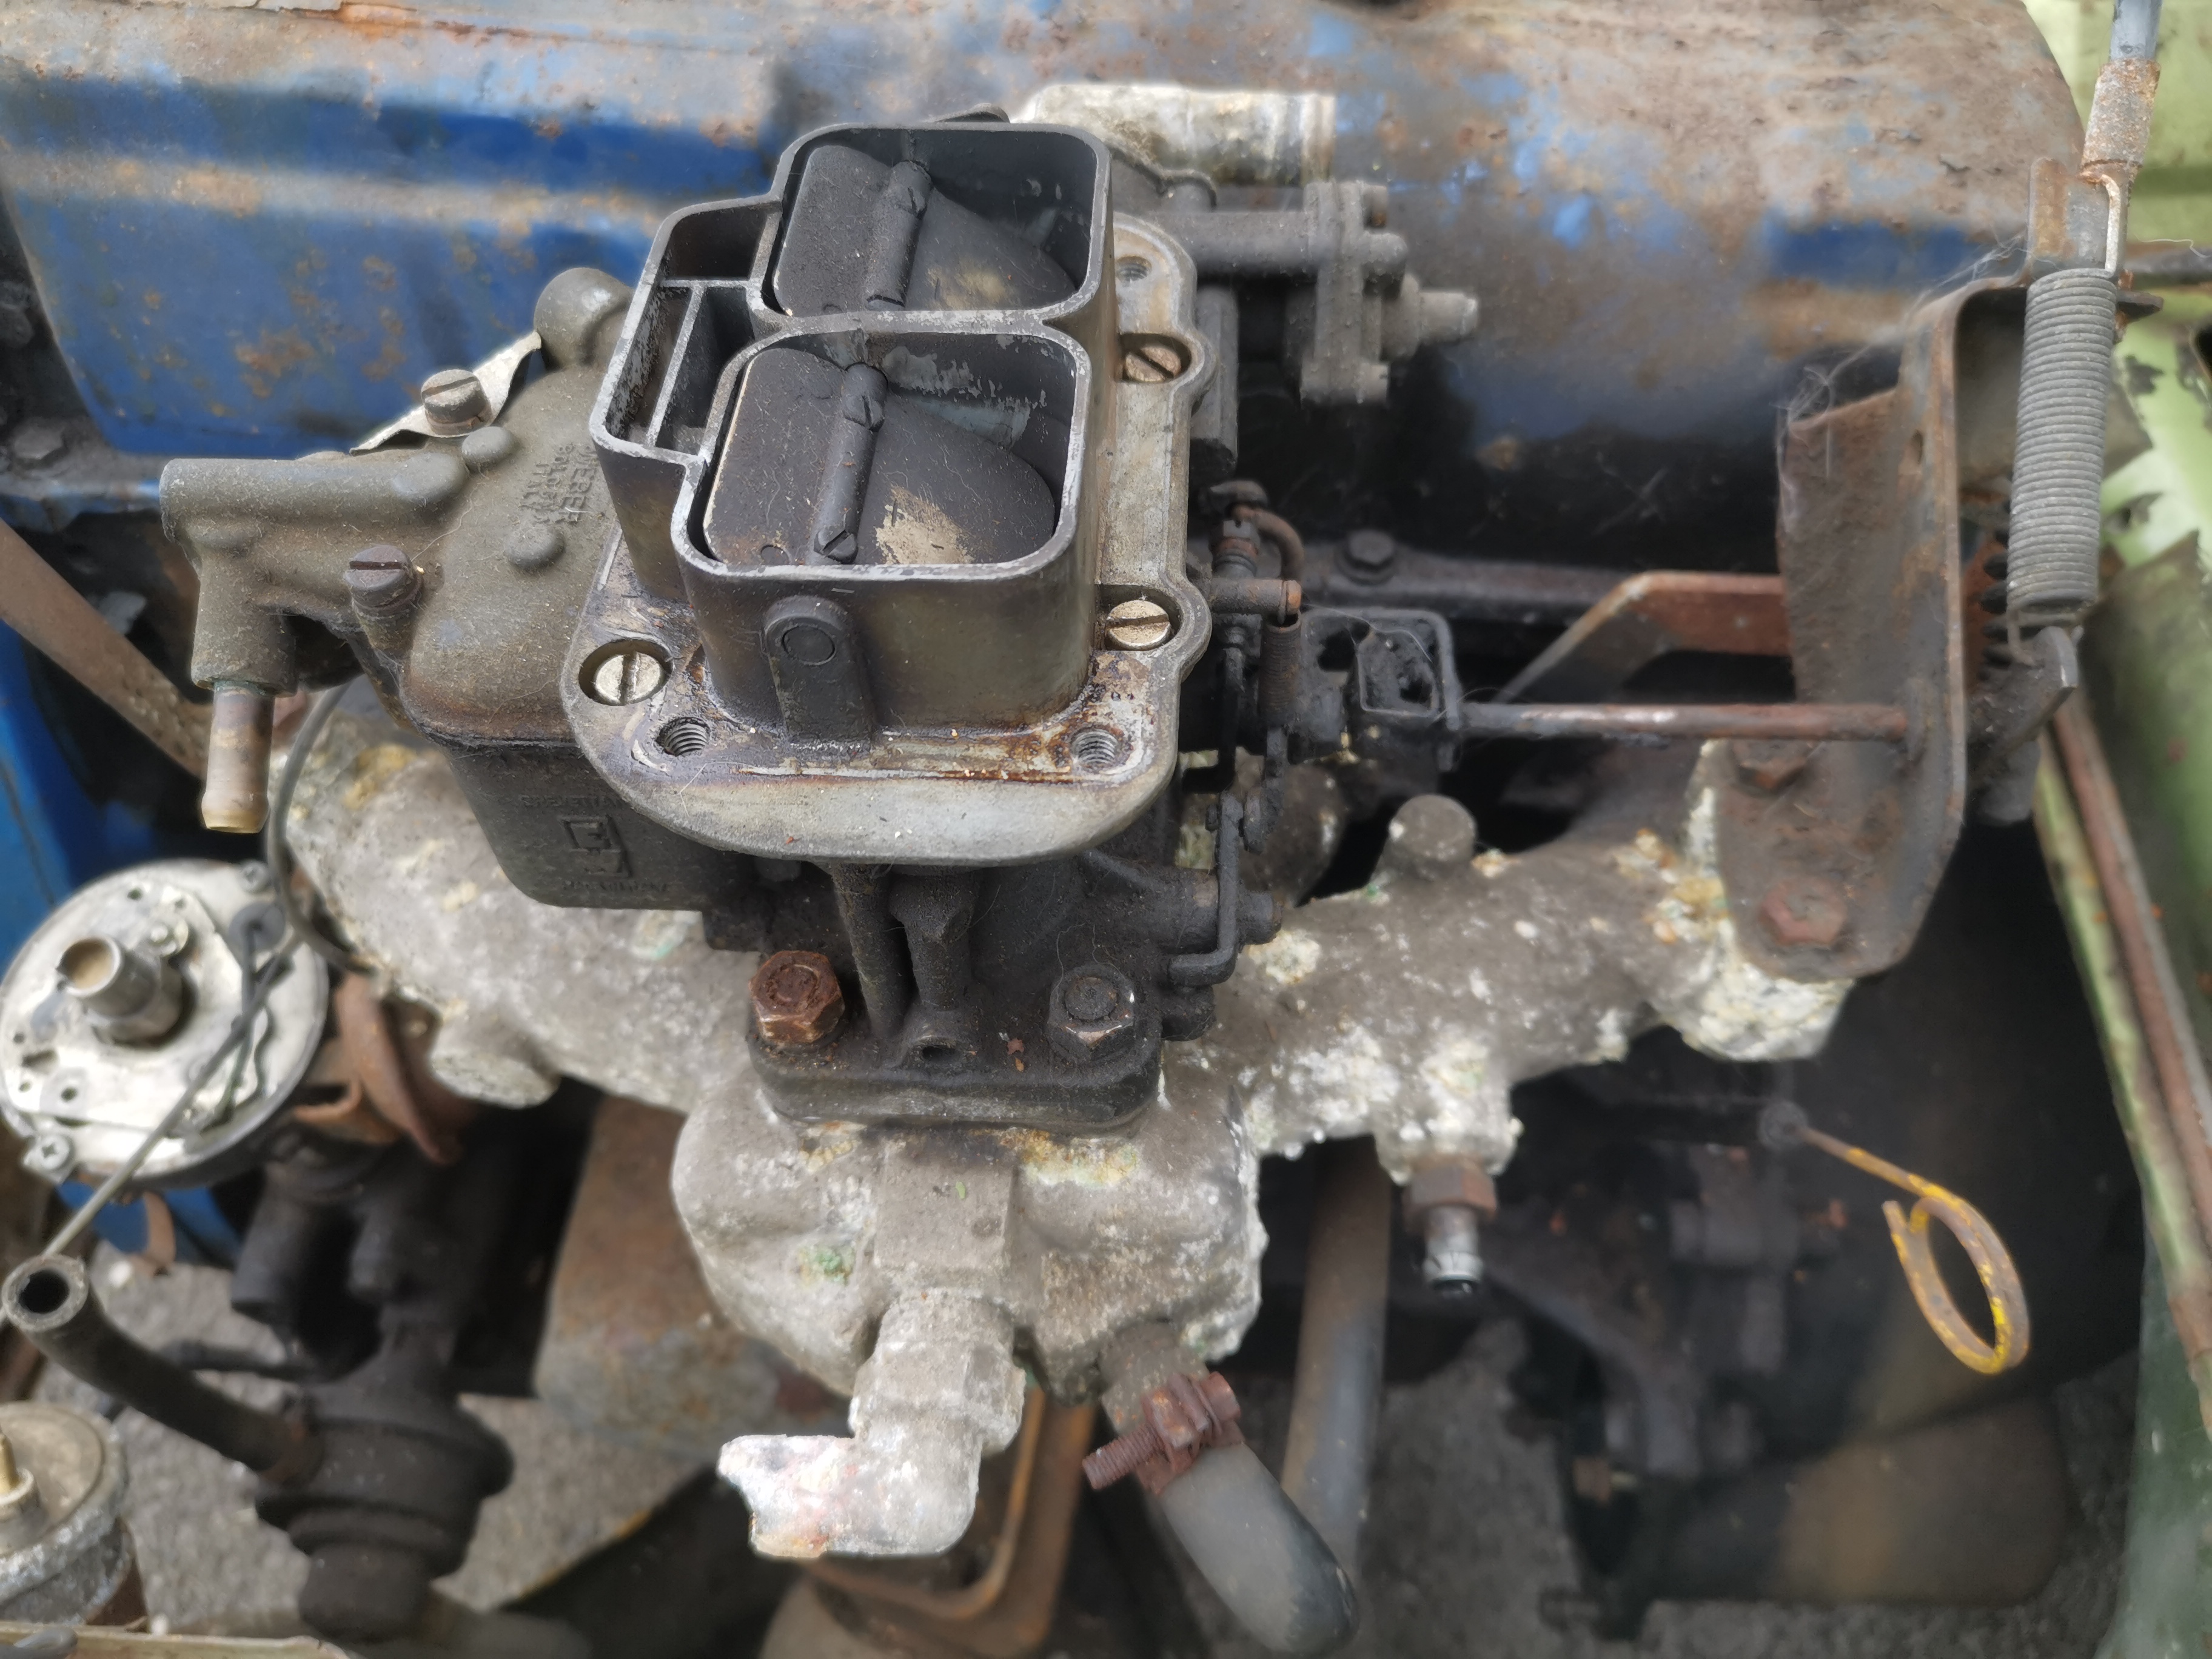
Carburettor
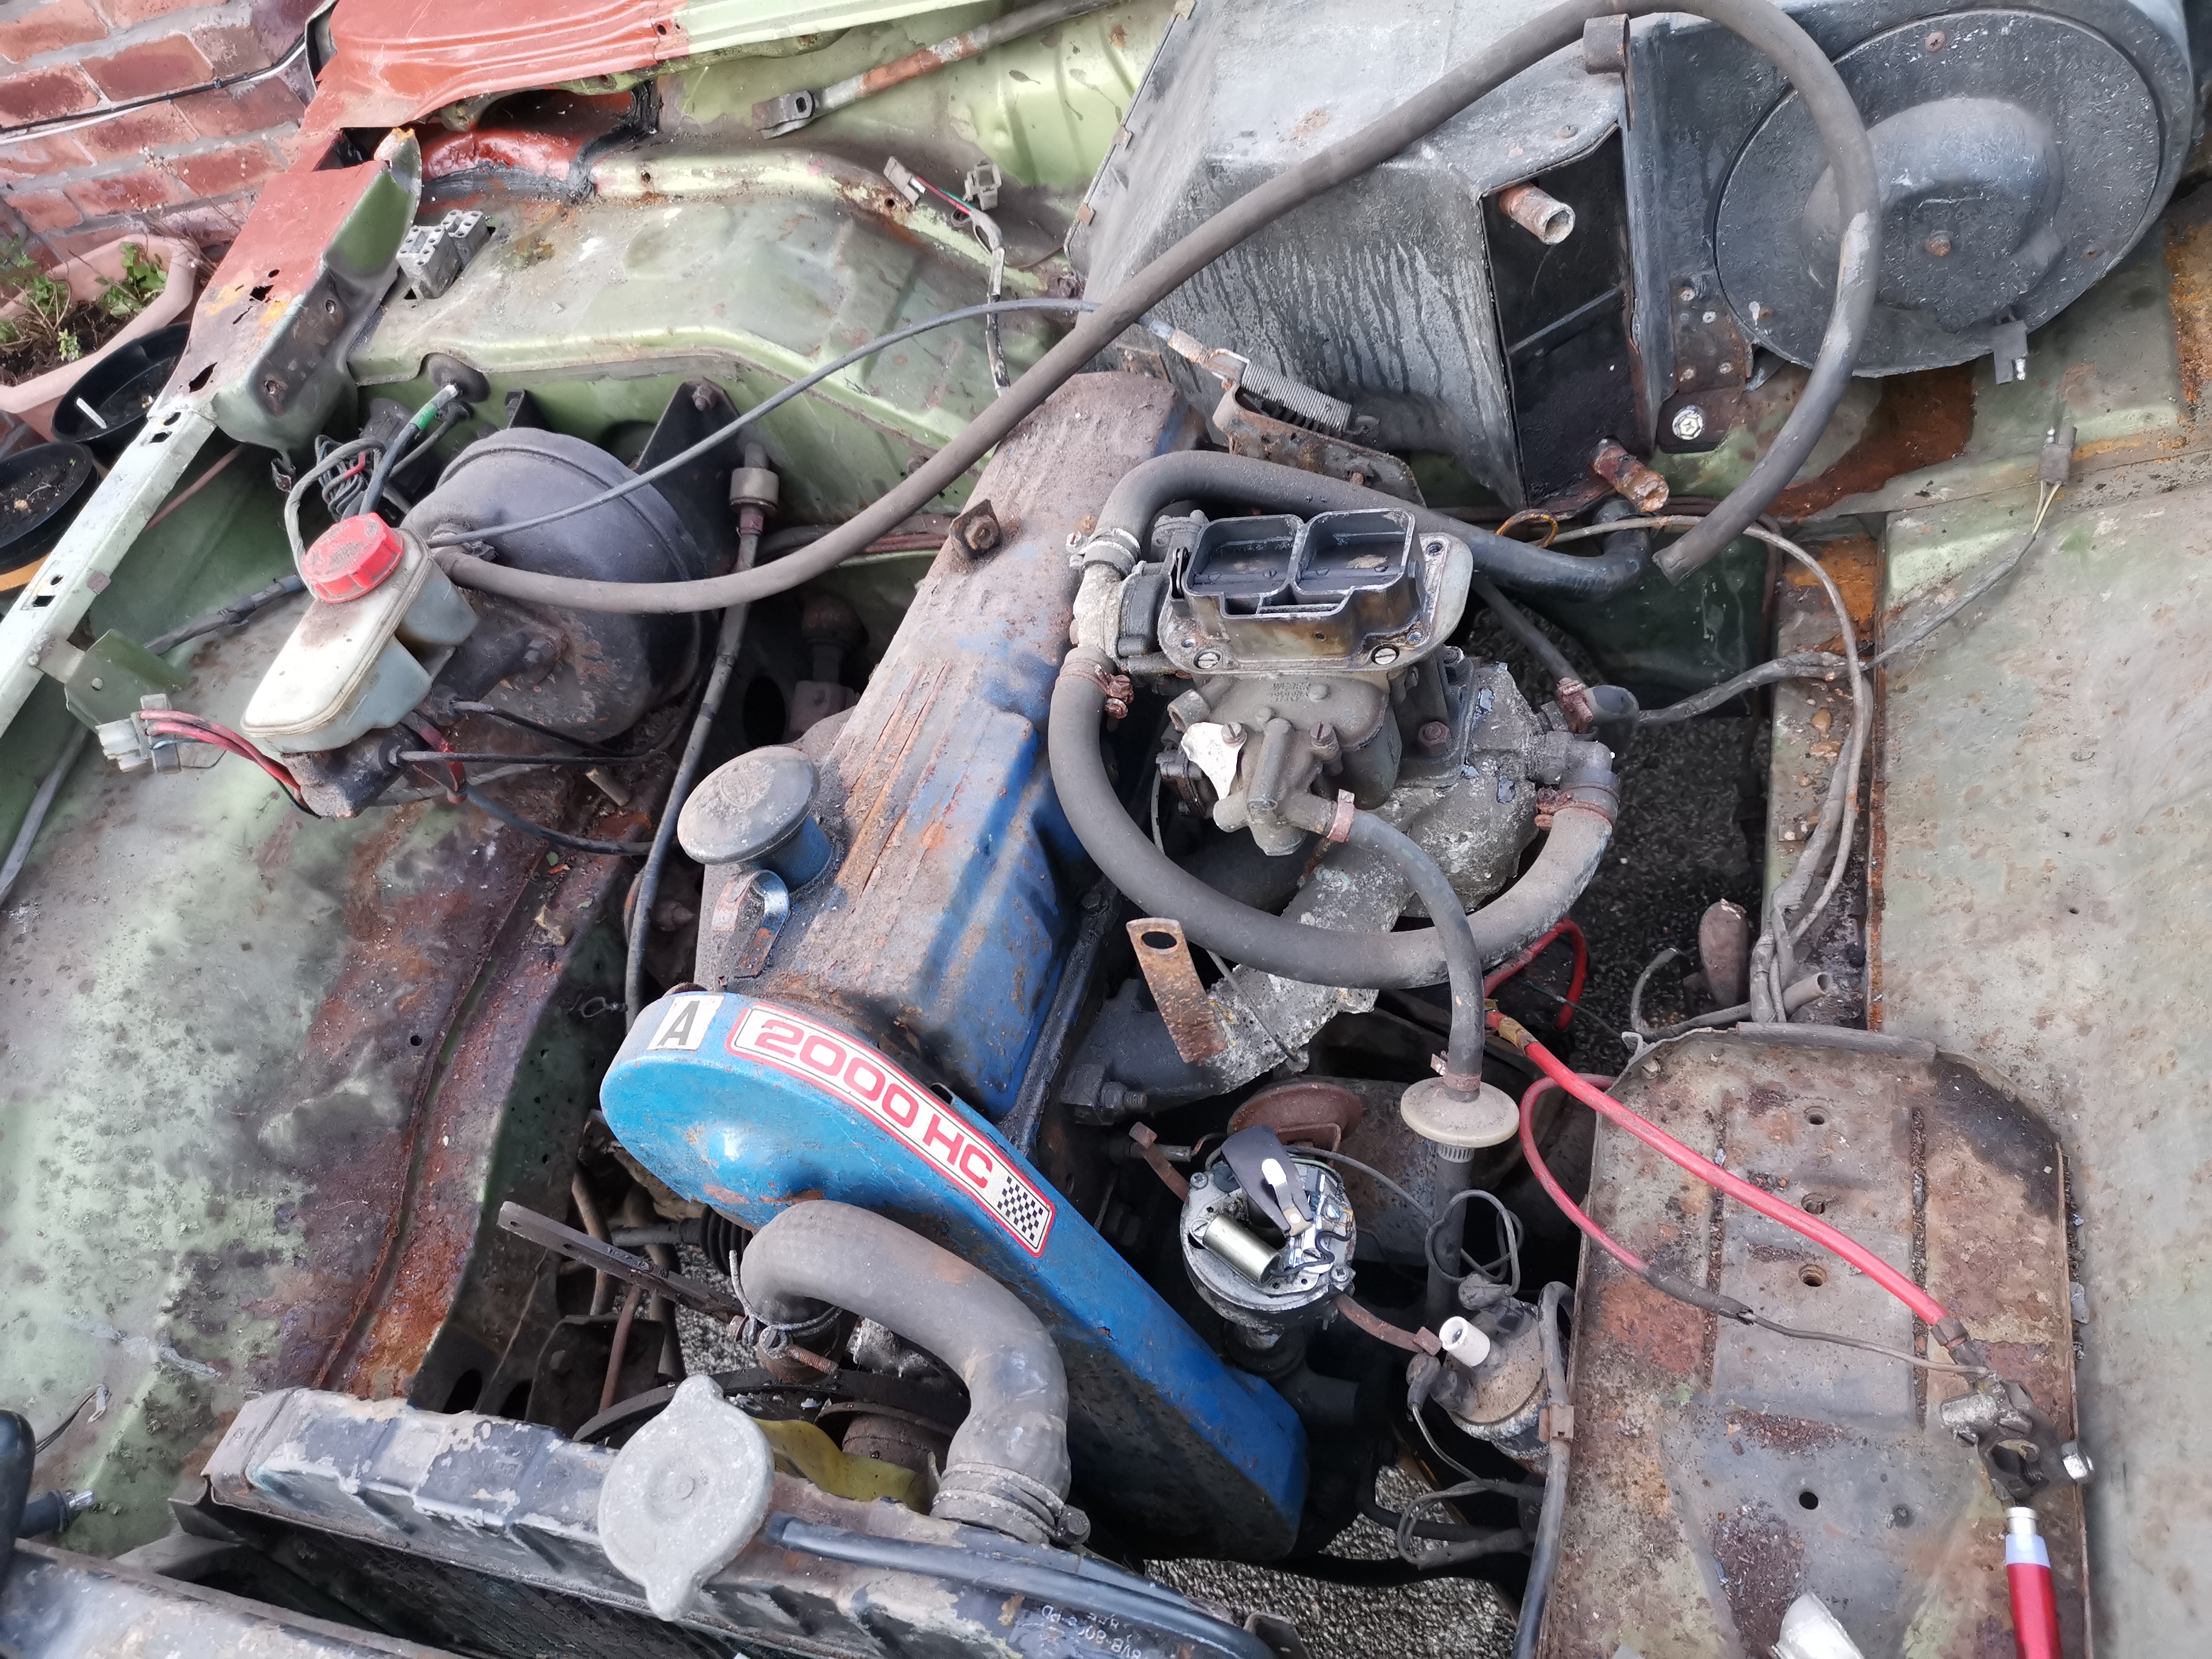
The carburettor was in a bit of a state but I was hoping I didn't need to source a new one or have it professionally reconditioned.
Carburettor
It was covered in dirt, grease and carbon deposits. To be honest it looked as if it had even been on fire in the past!
Carburettor
Look at all the caked on dirt!
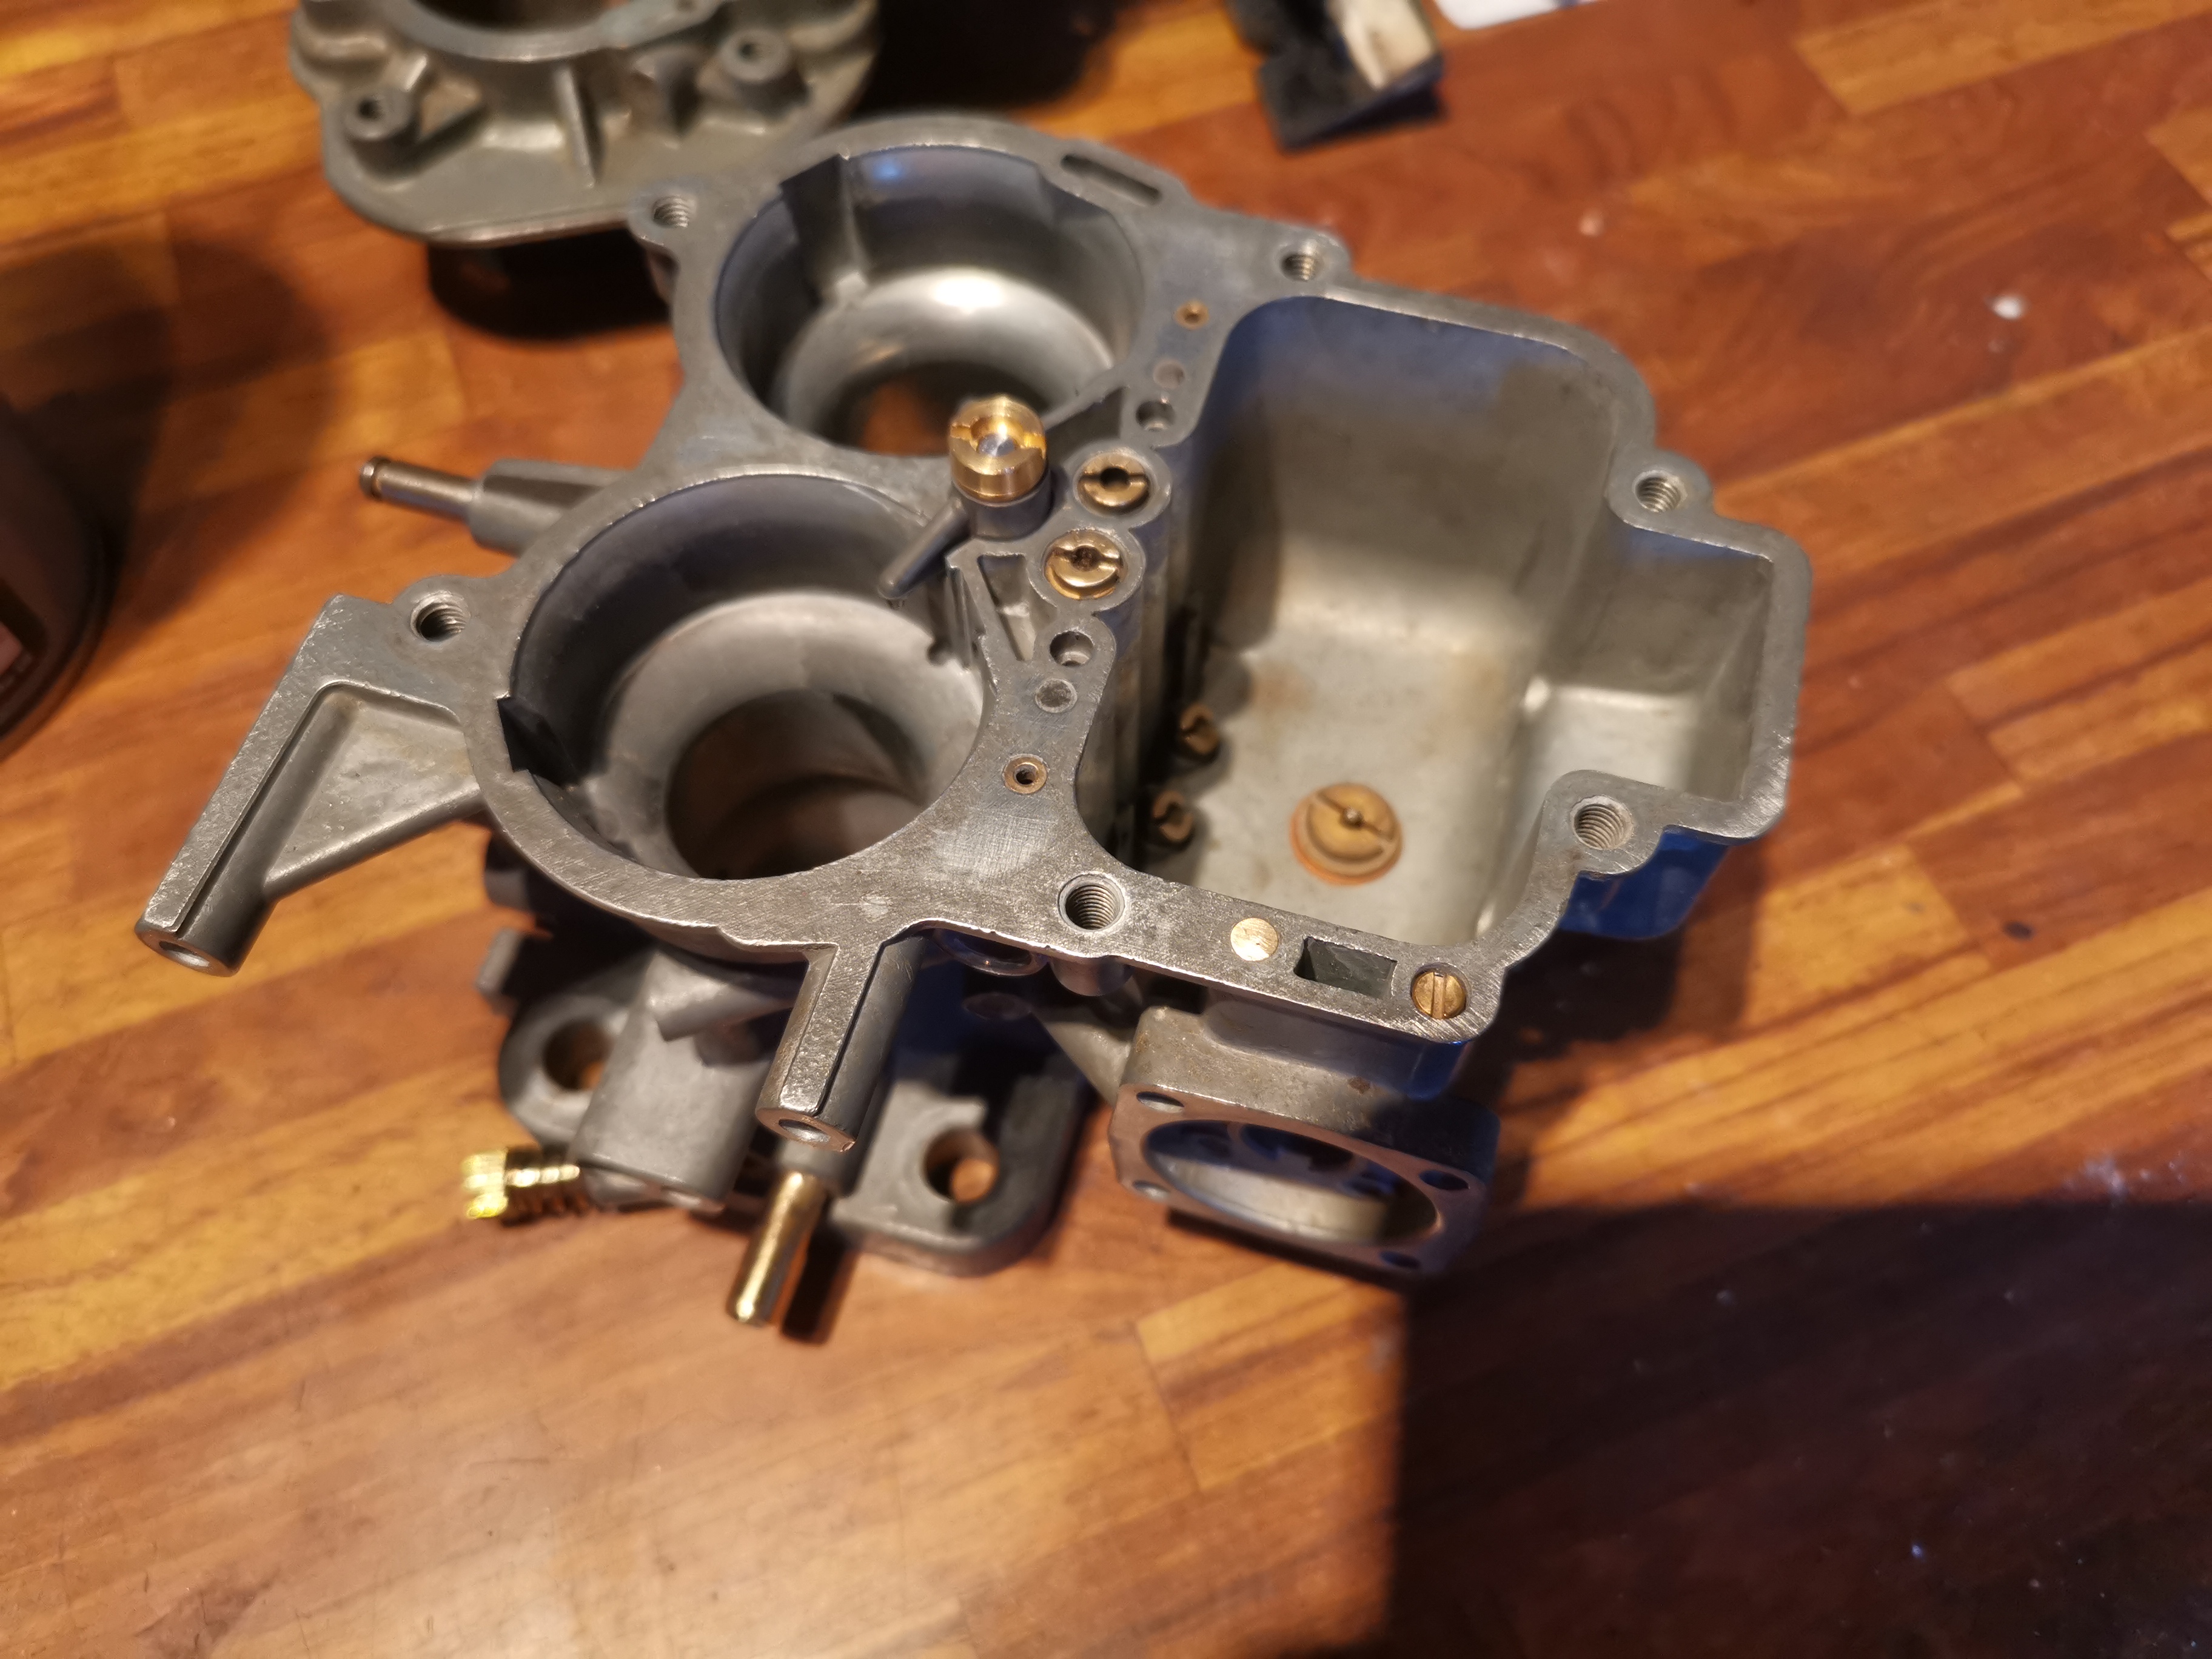
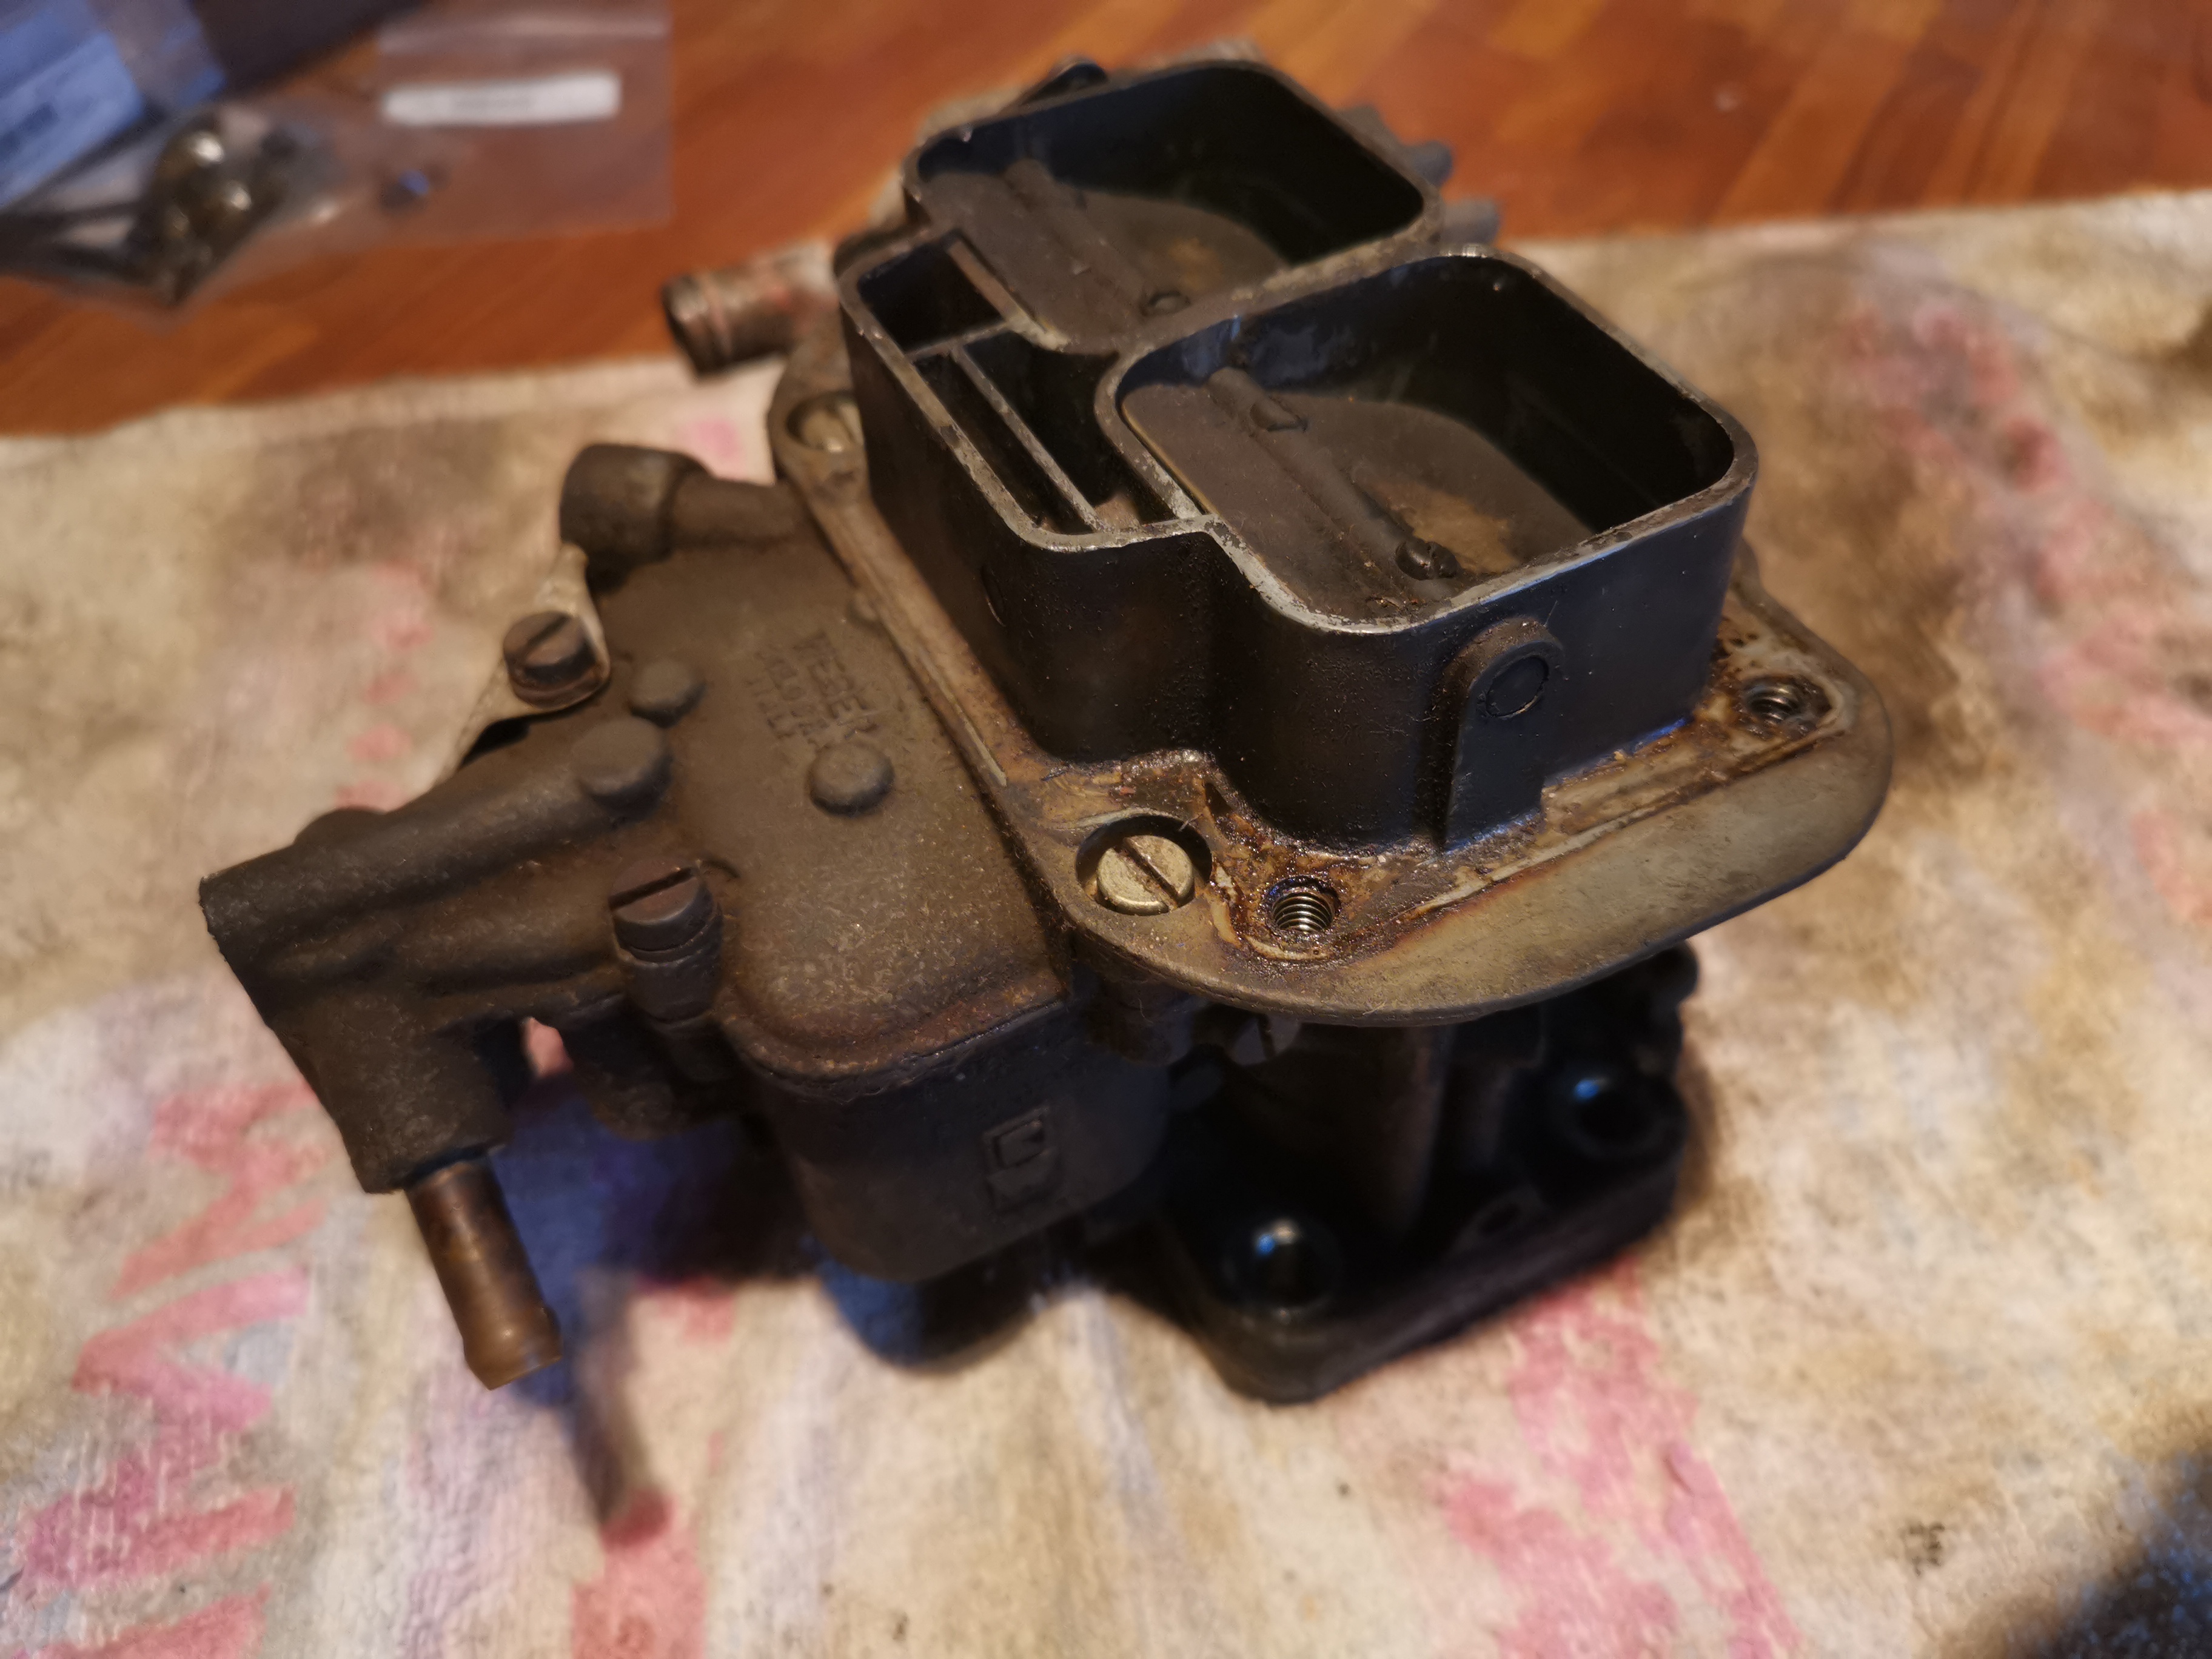
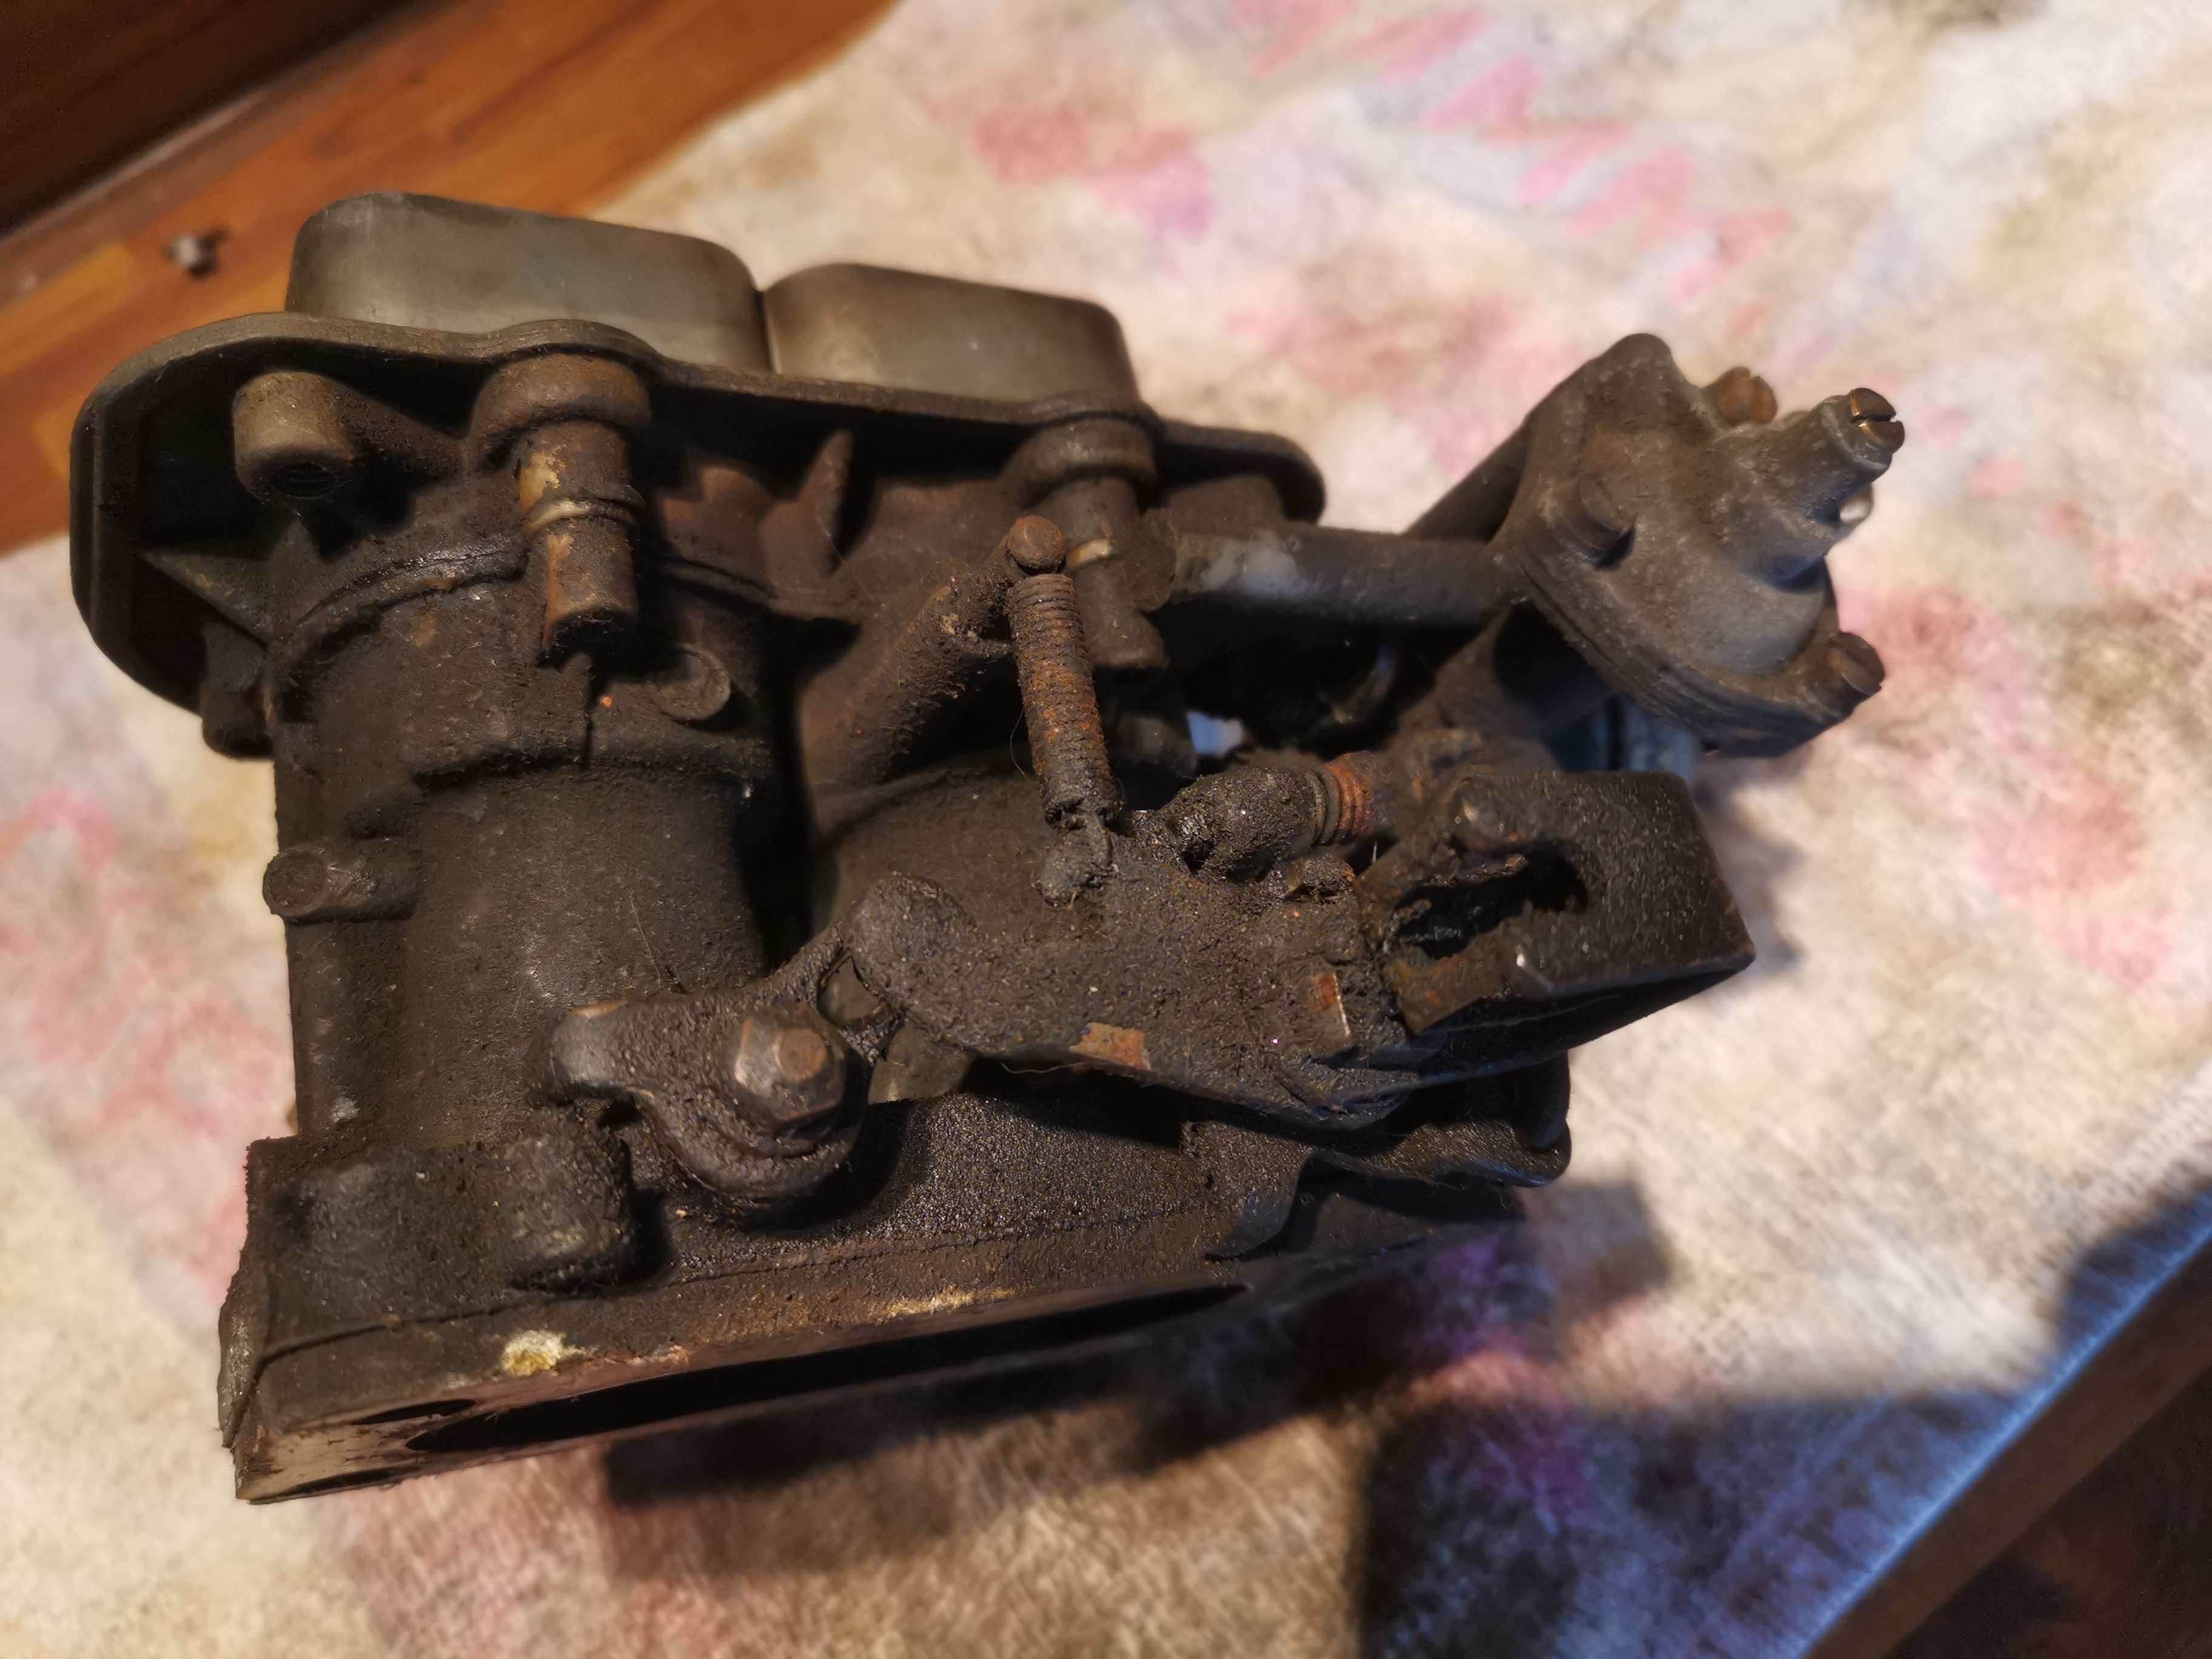
Carburettor
I stripped, cleaned and serviced it, fitting all new seals, o'rings, gaskets and jets etc.
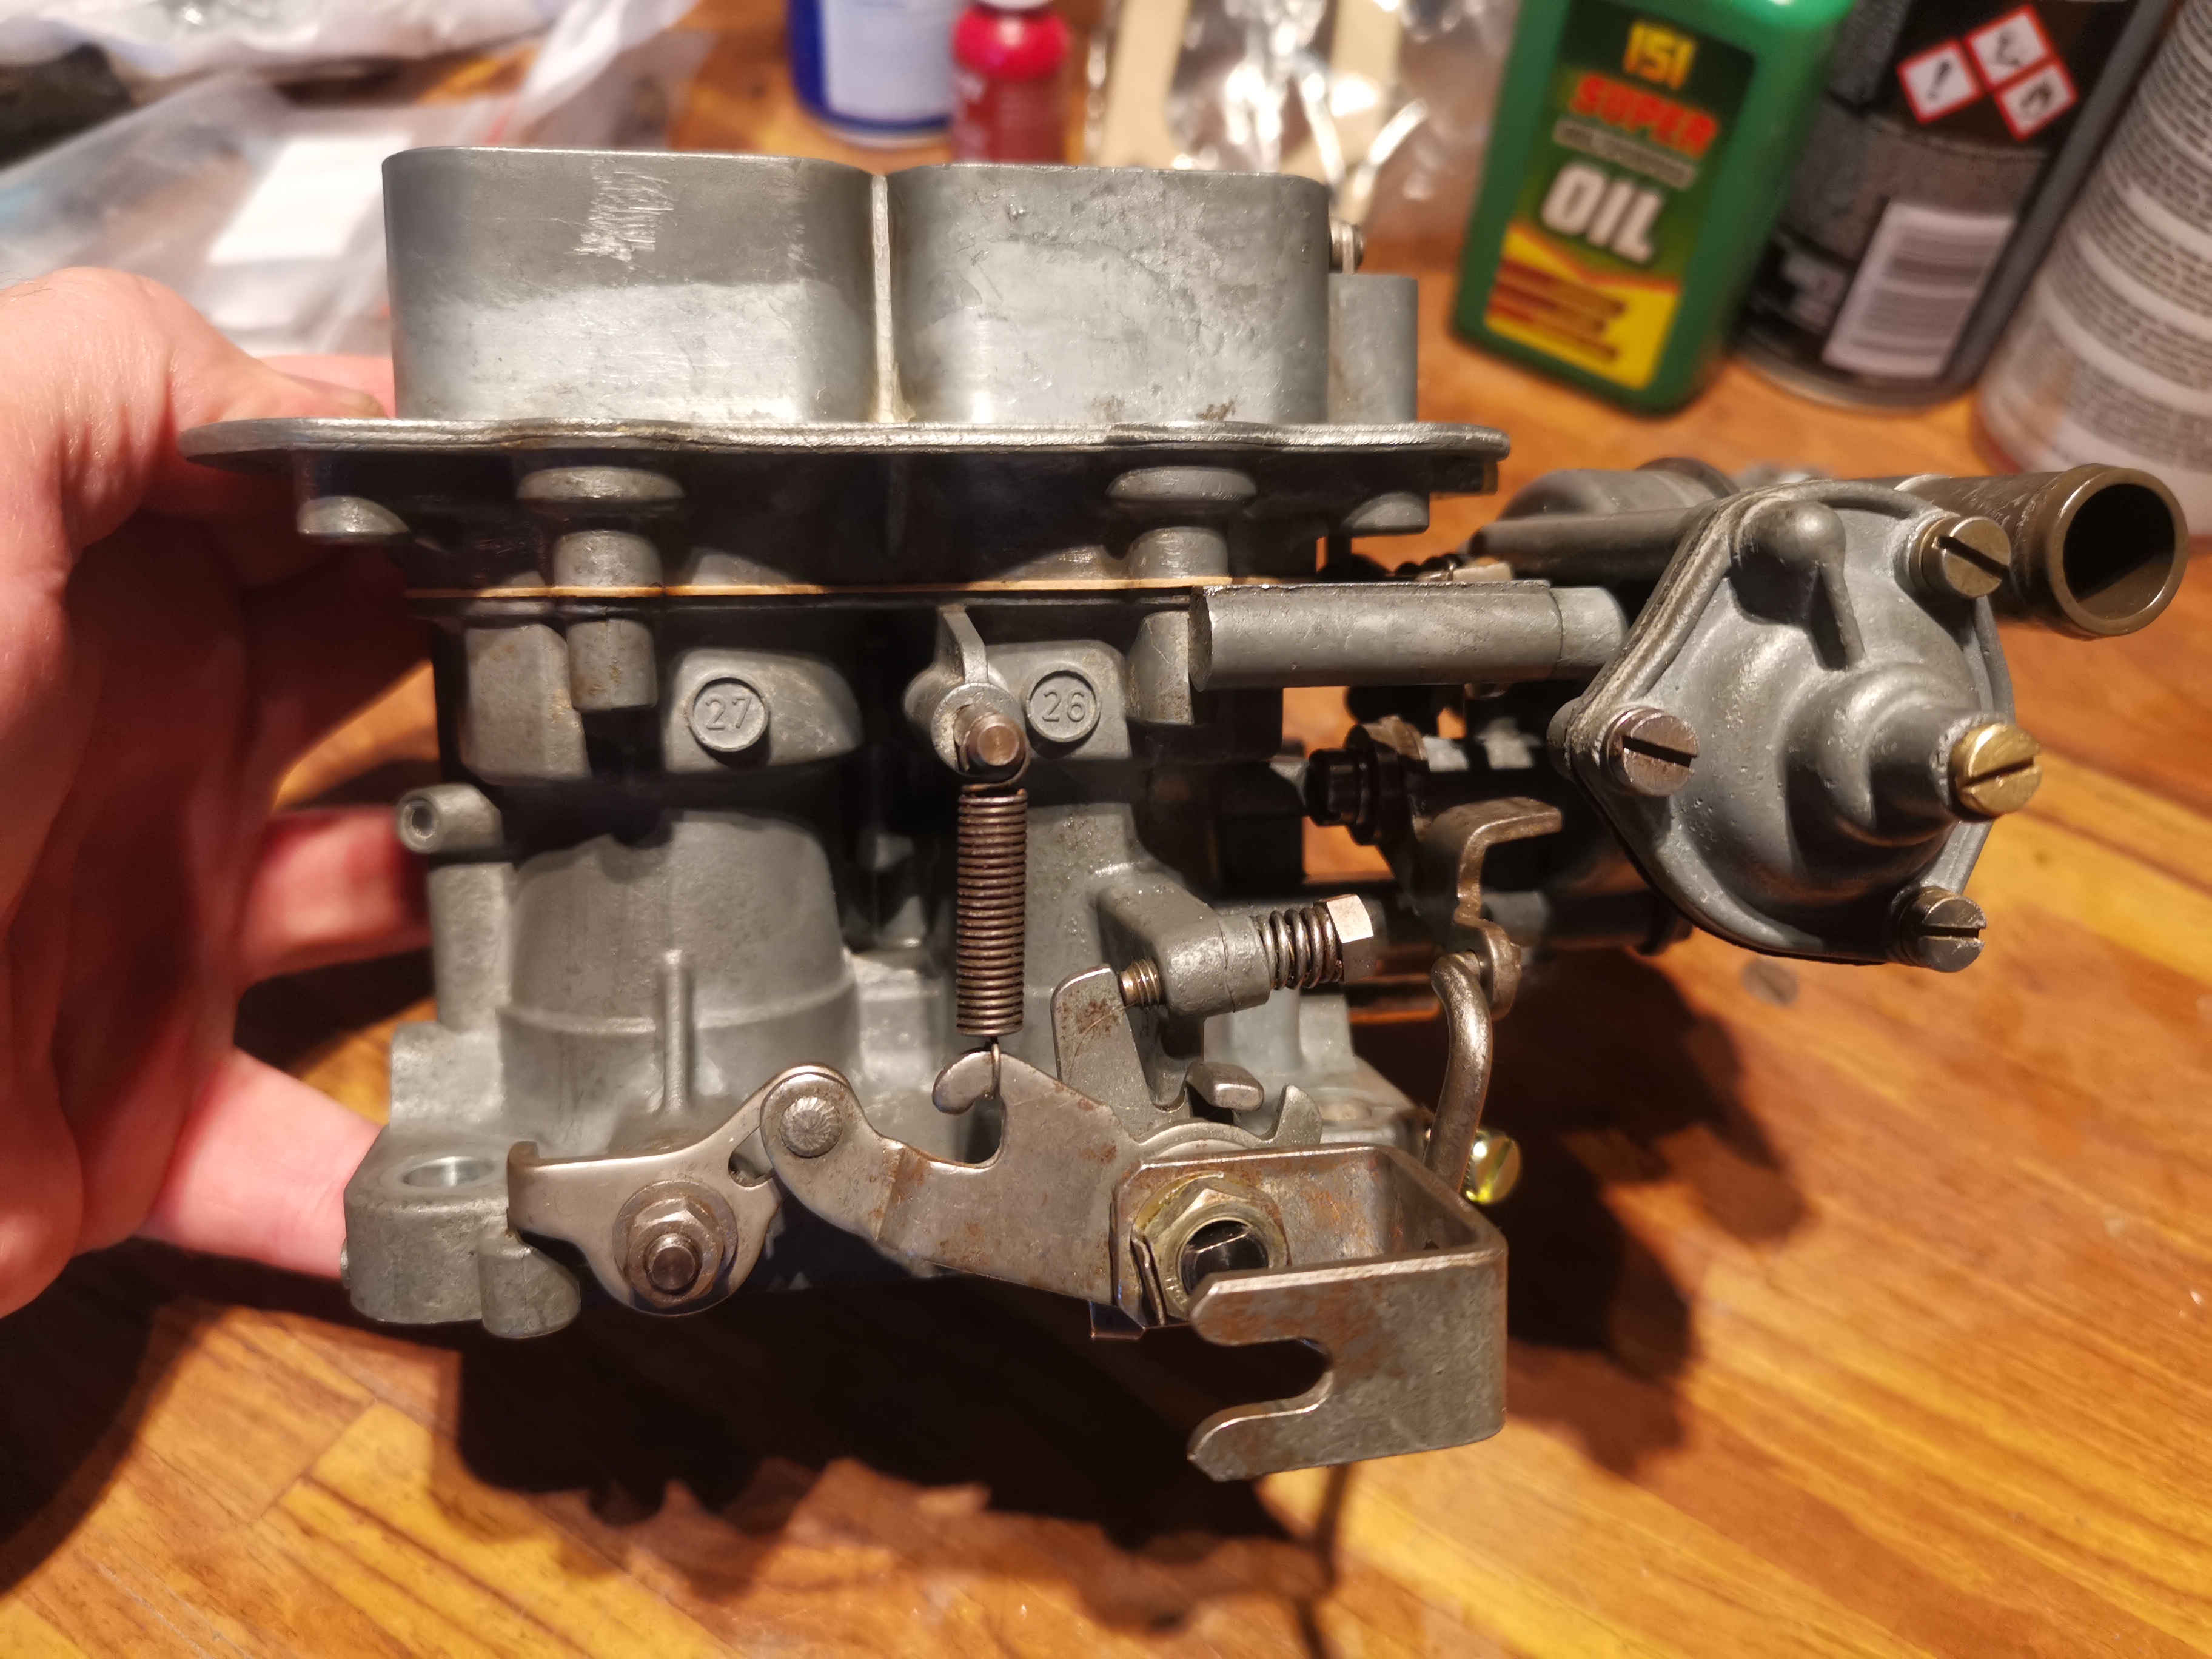
Carburettor
Fortunately all the moving parts don't look worn at all so I think it should be ok.
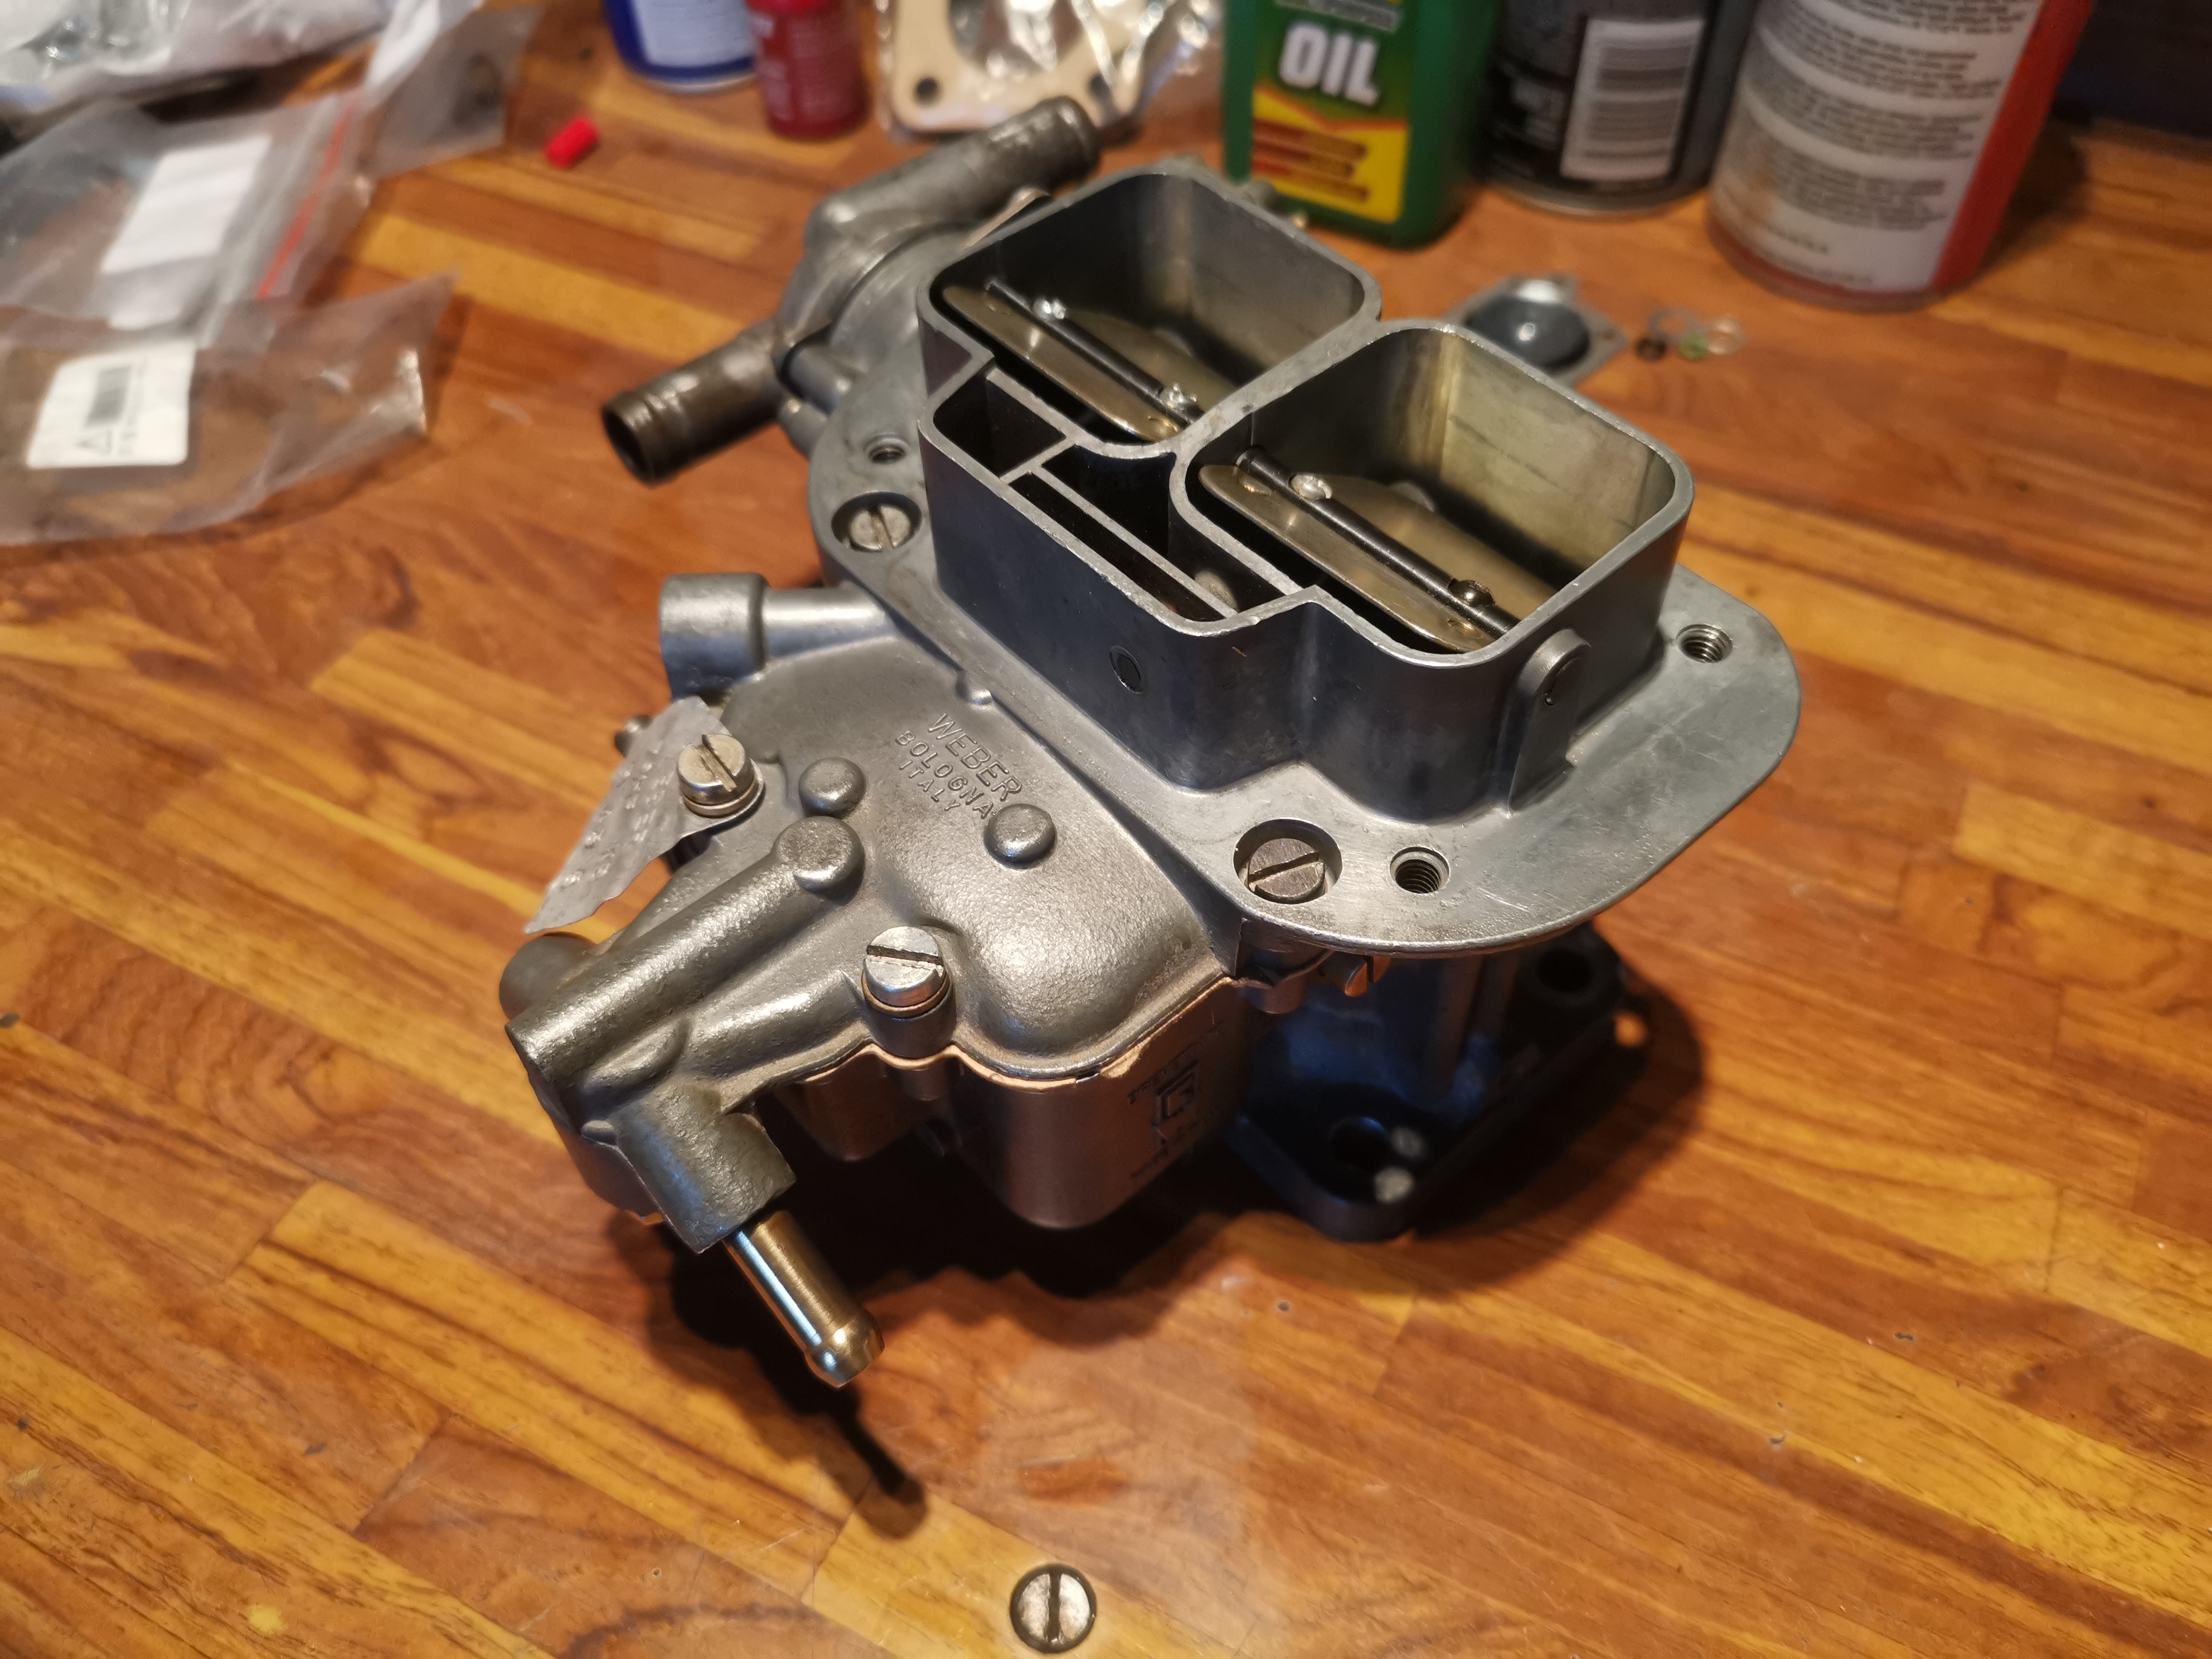
Carburettor
Looks a lot better now. I'll obviously have to set it up once I get the engine done and running.
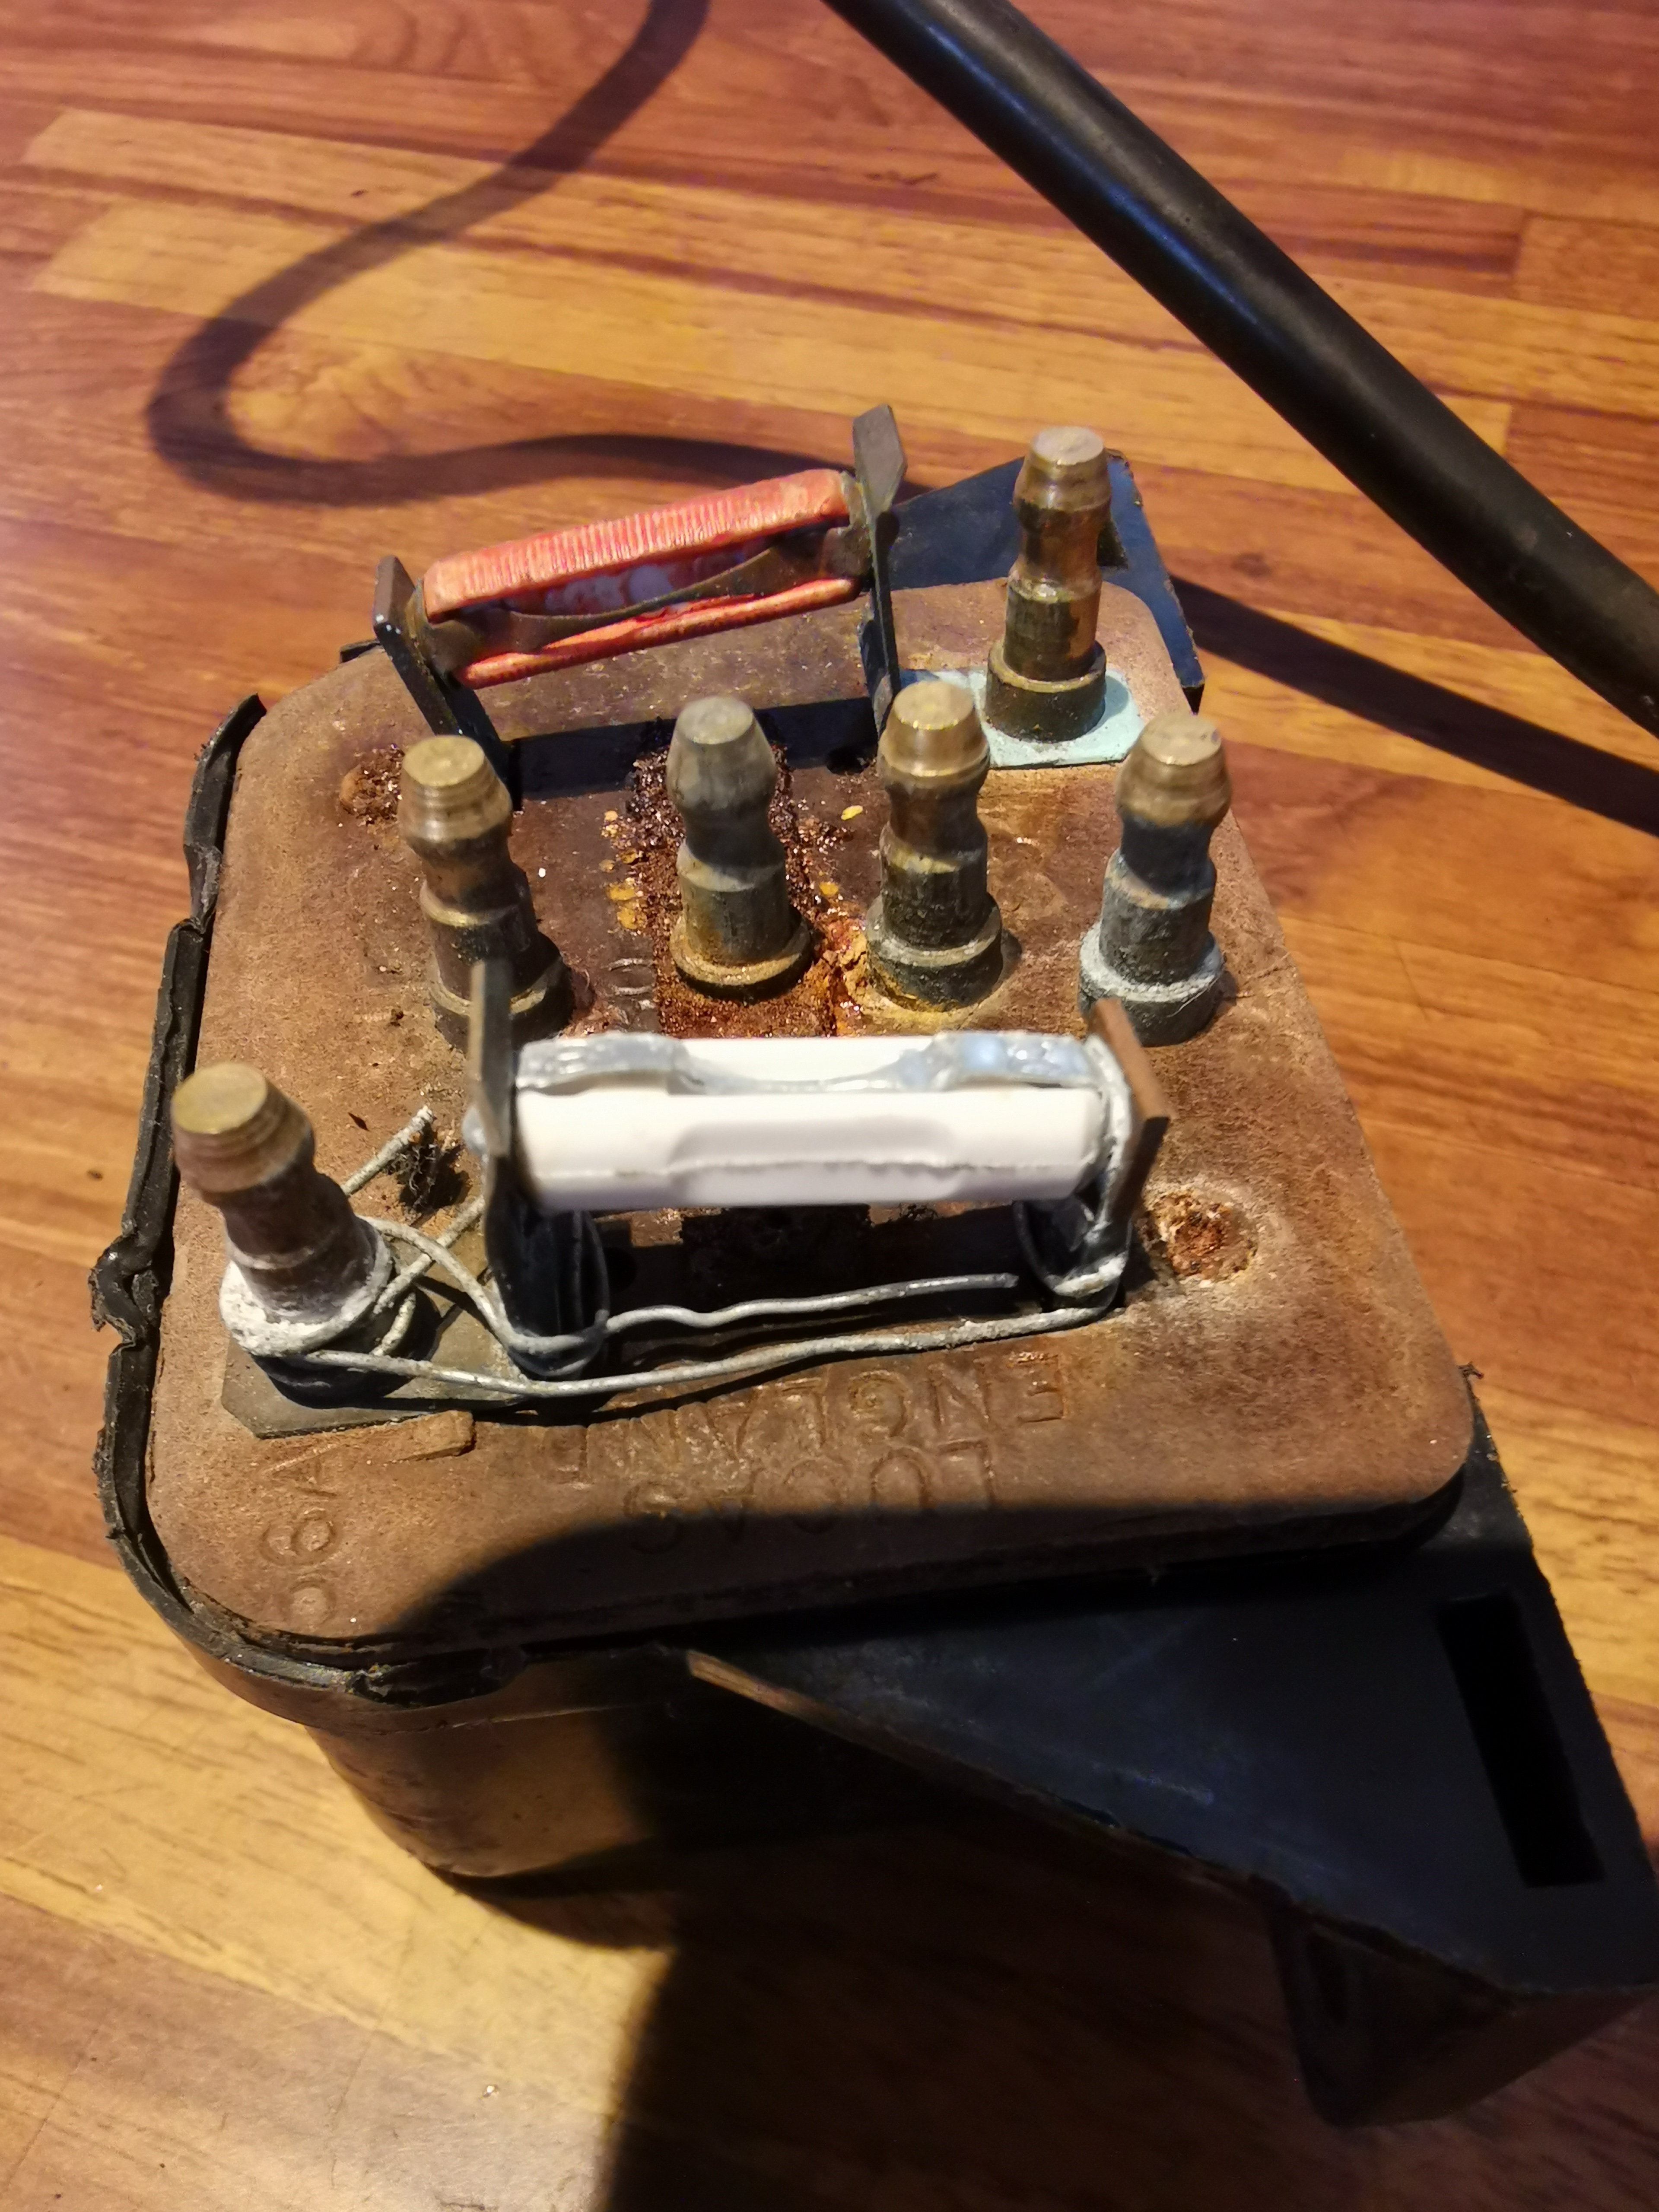
Headlight relay
As you can see, the fuse had blown in the past and had been shorted out with wire! Possibly fuse wire but possibly not! And not wrapped around and around!
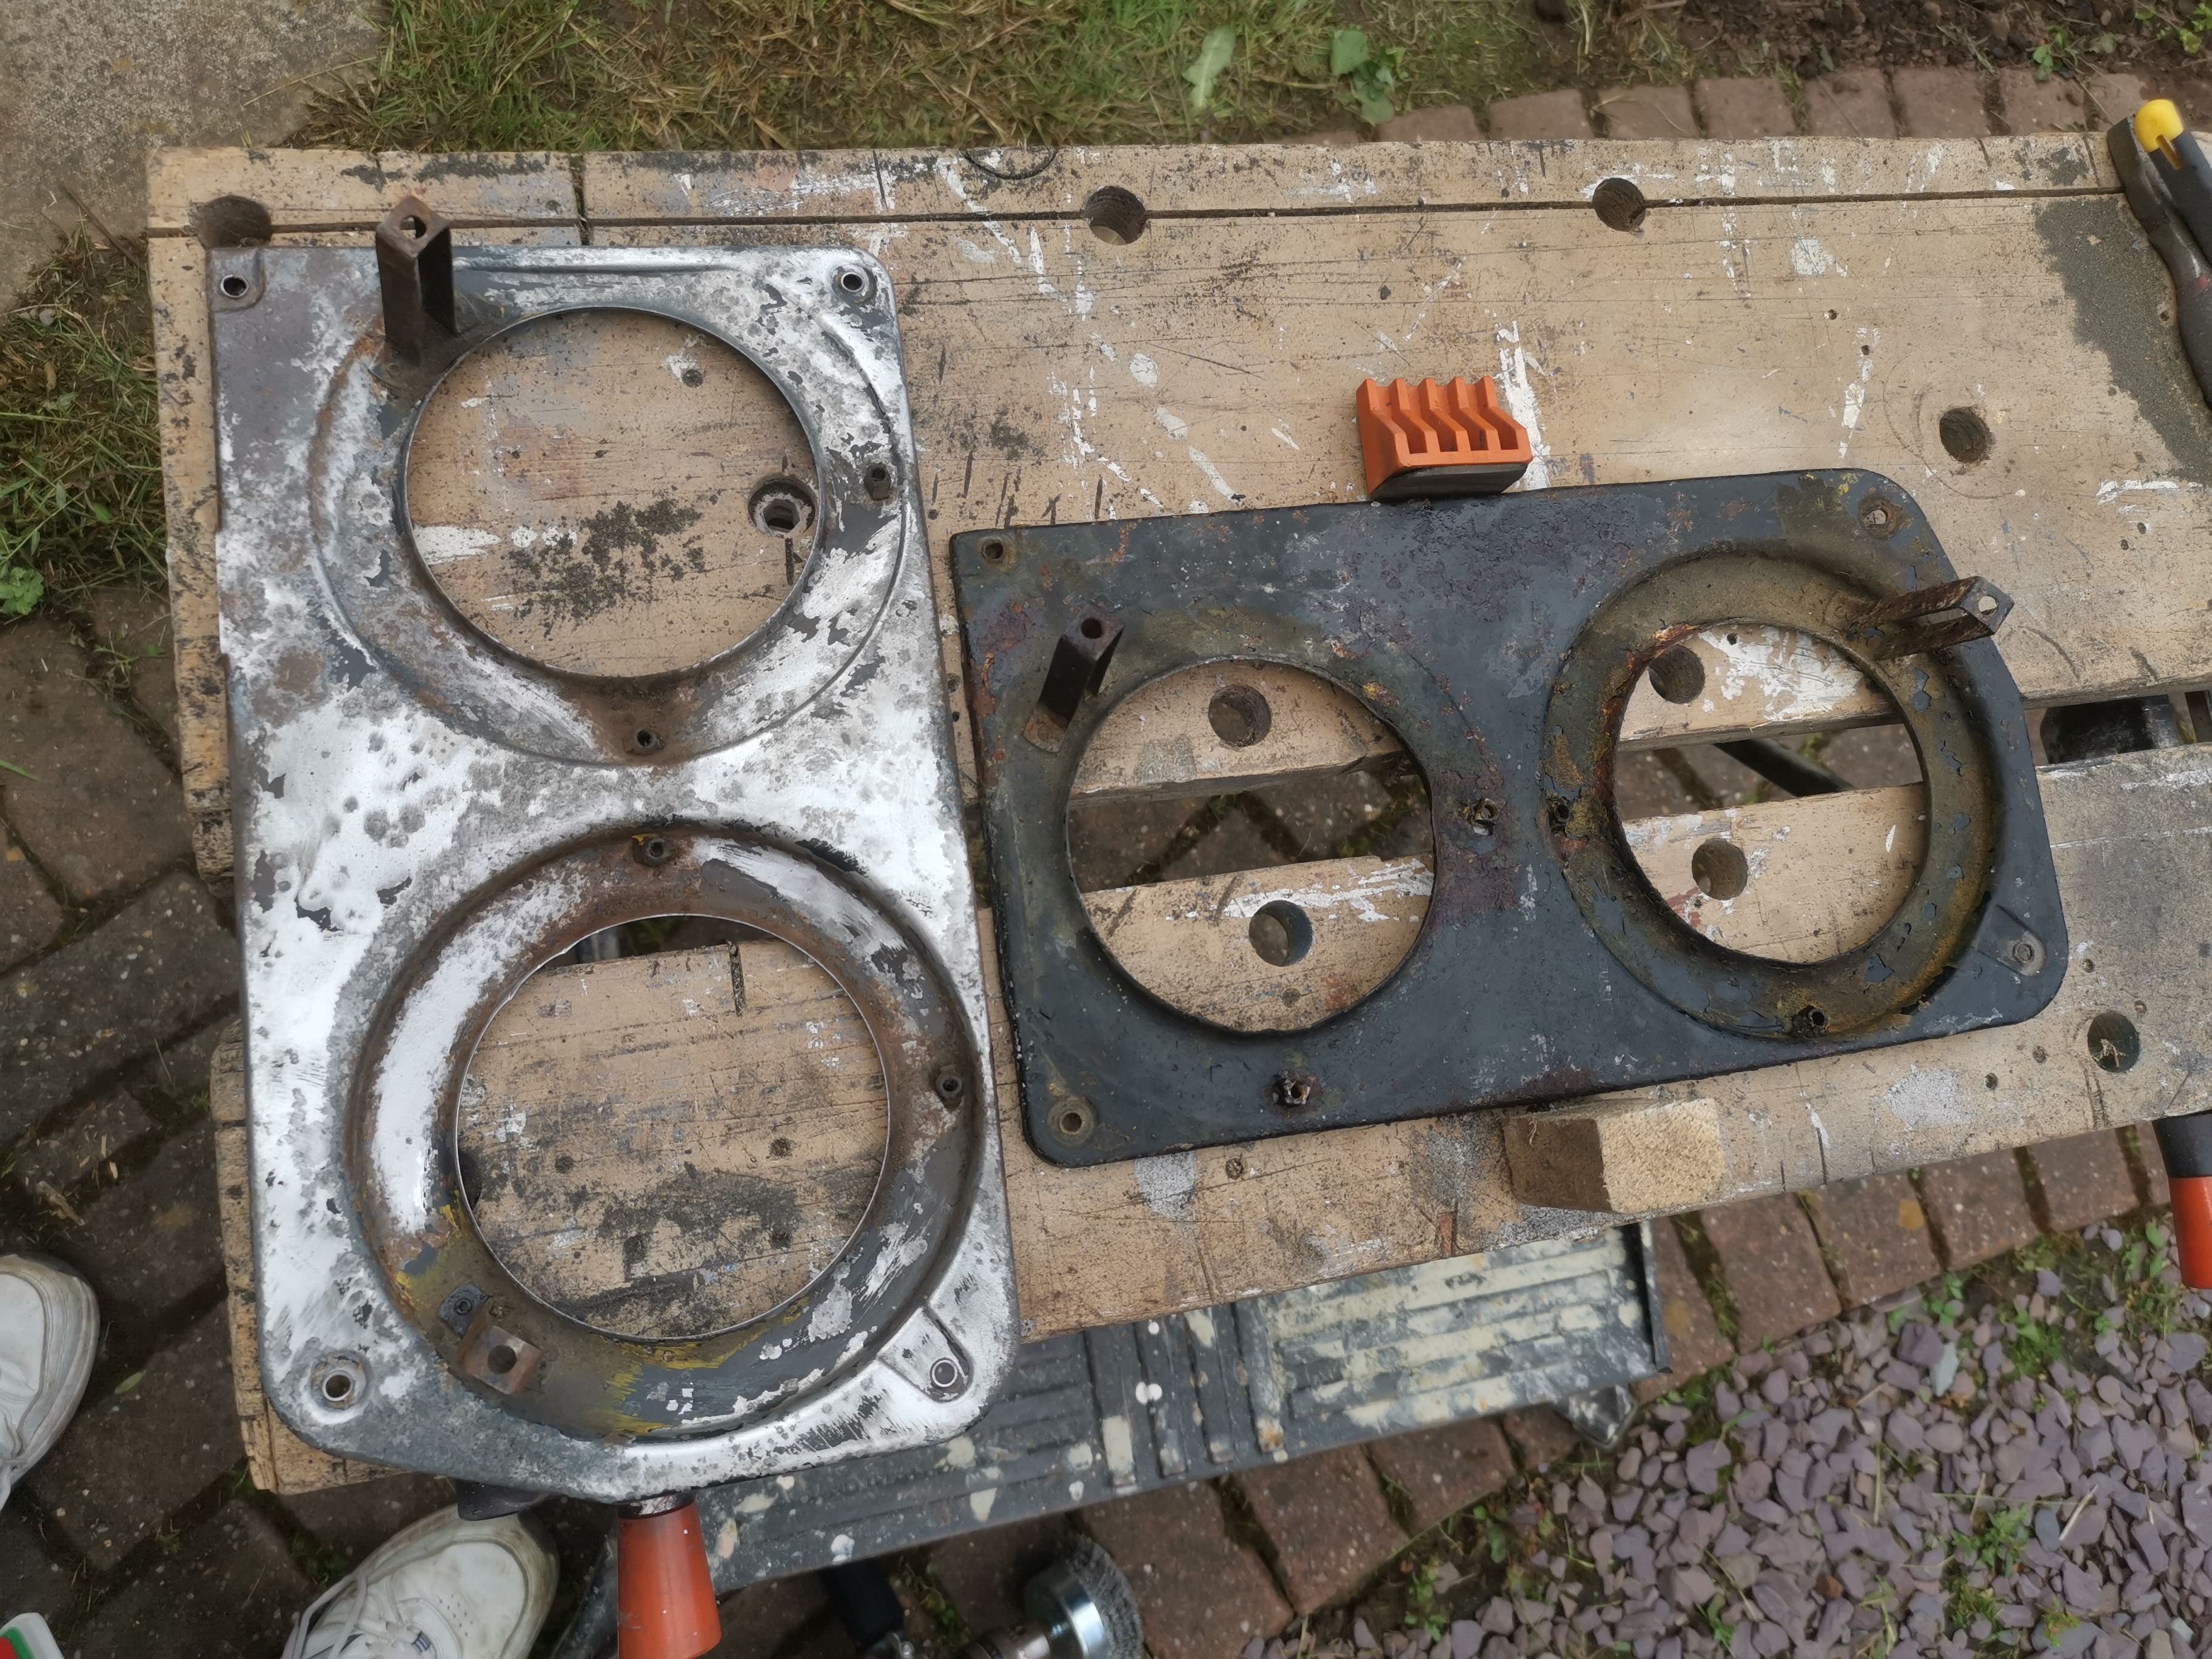
Centre console
I needed a centre console with the 4auxiliary gauges as was fitted to the GXL but this was the only one I could find (that I could afford). Unfortunately it was rather broken and in quite a state as you can see.
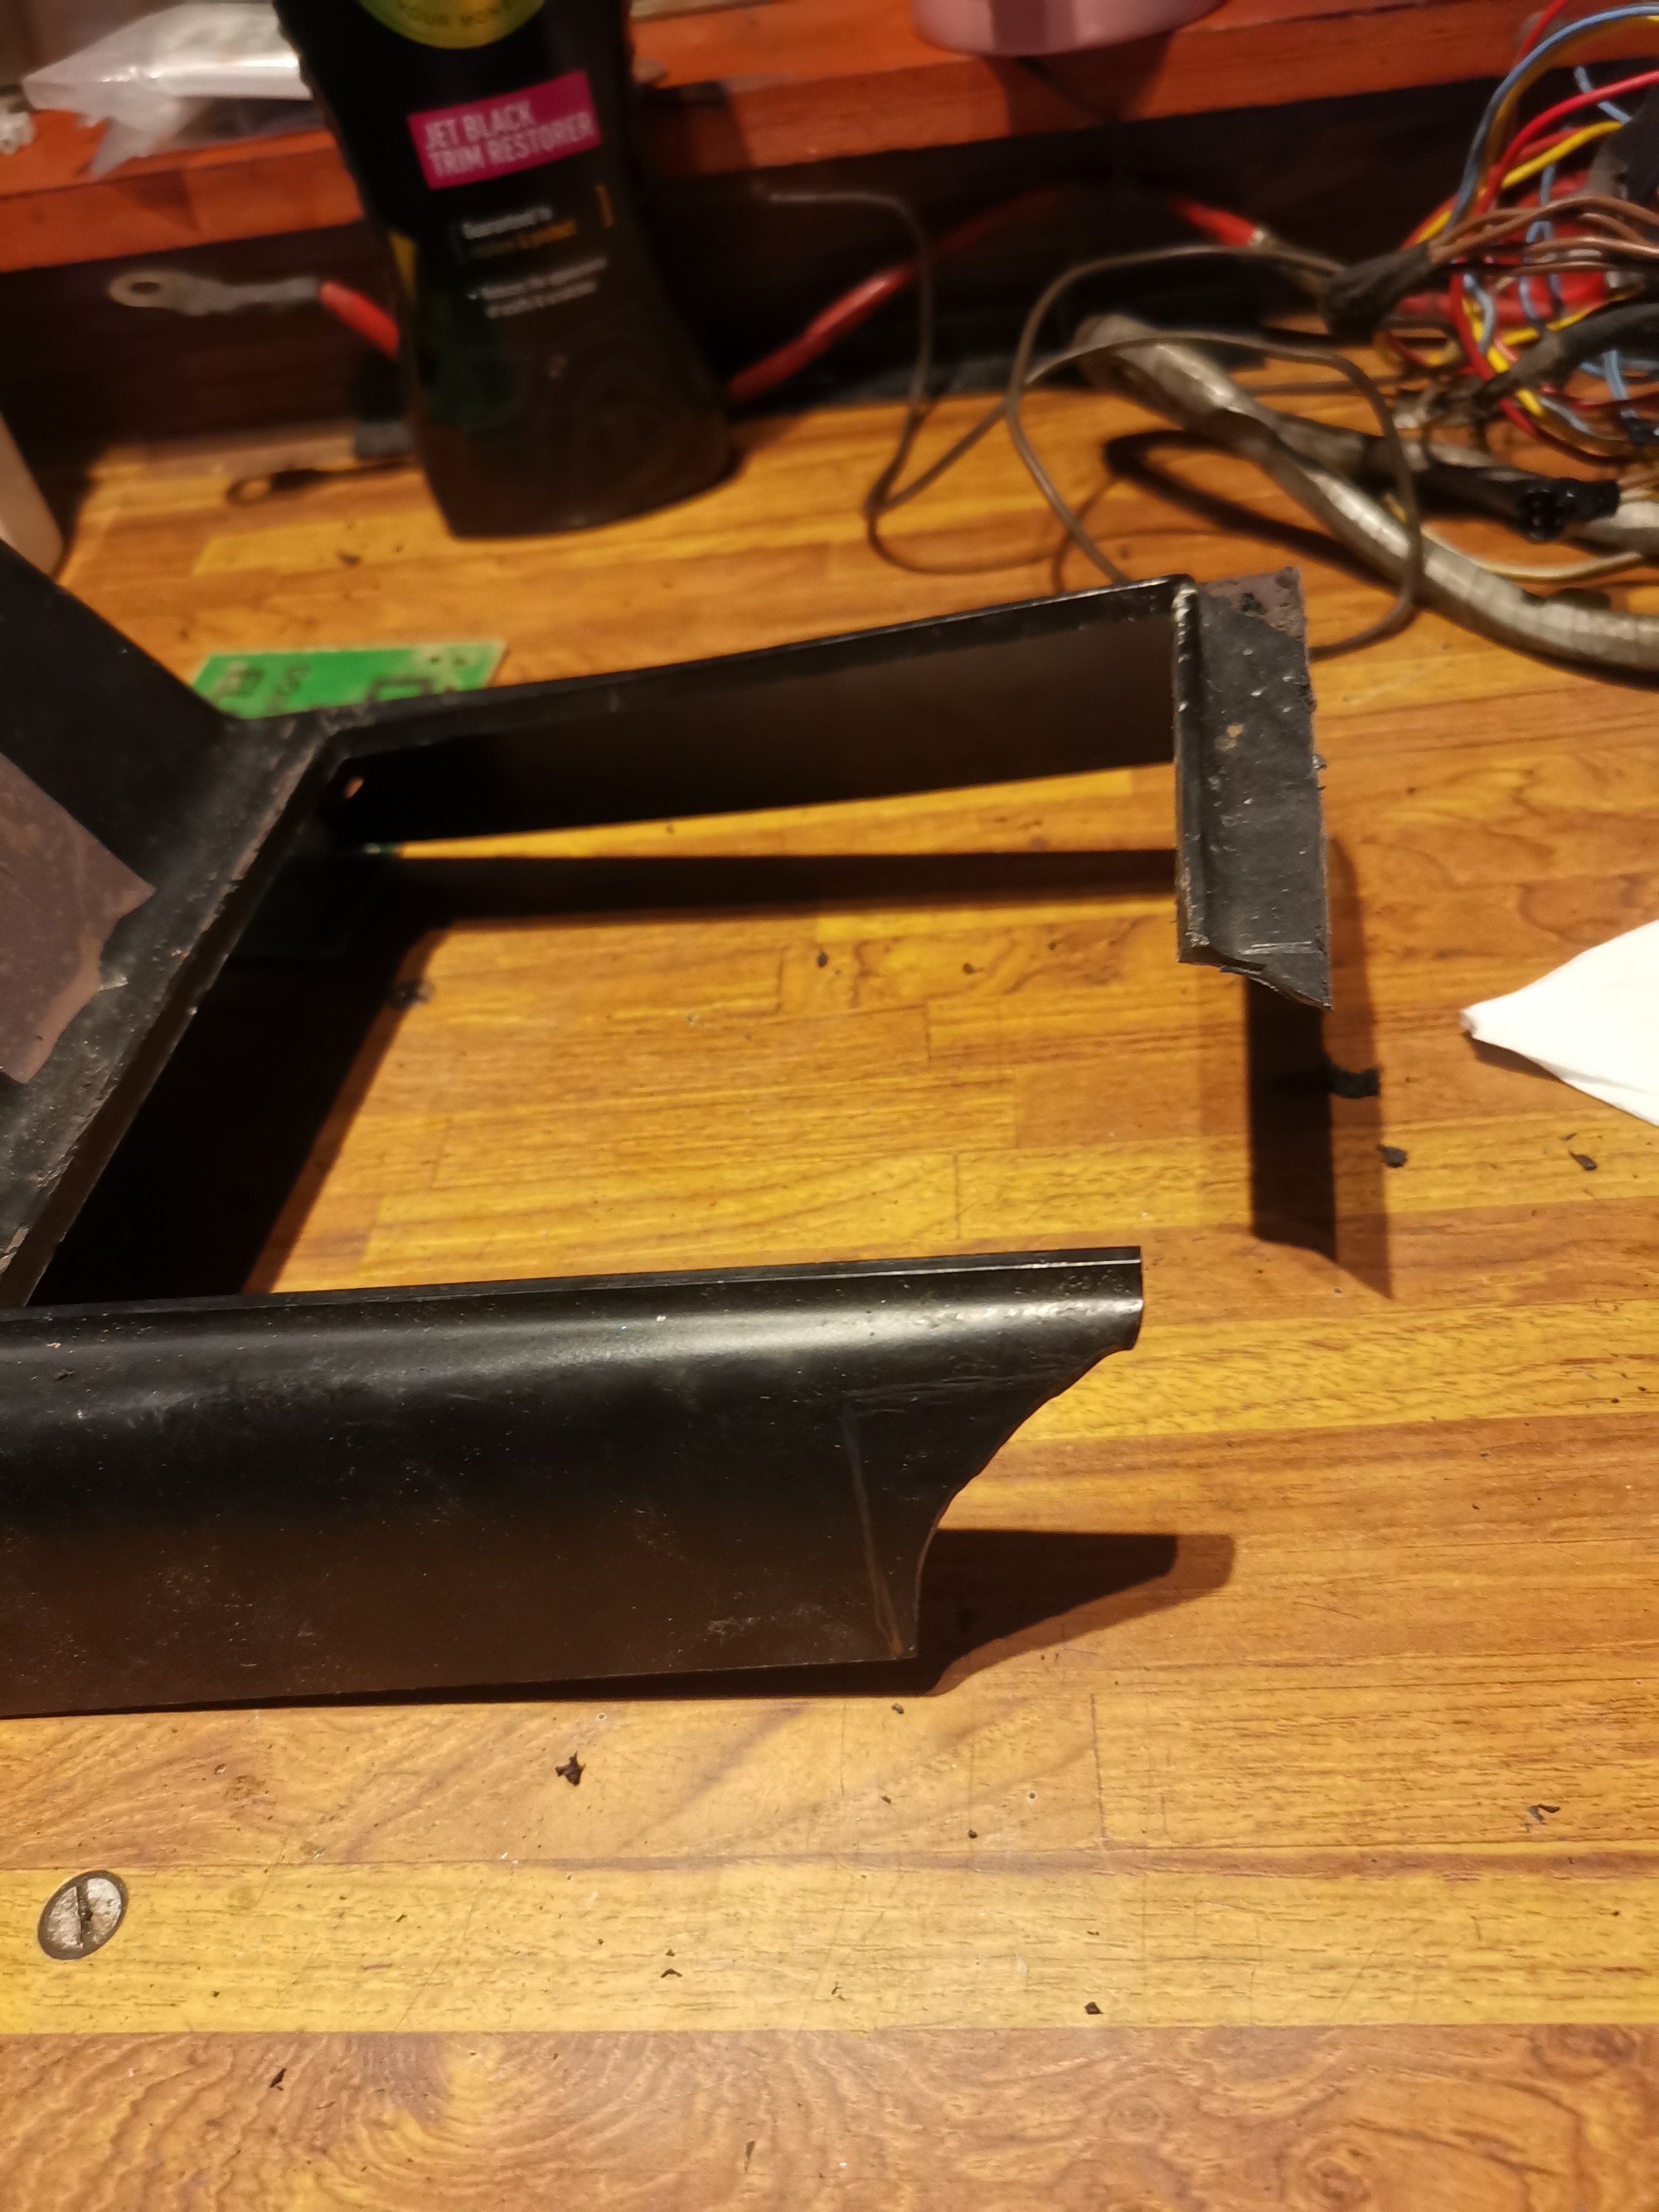
Centre console
I cut the broken section off but was still left with a section missing.
Centre console
I used part of the off cut to re-create the missing corner grafting it in as straight as I could.
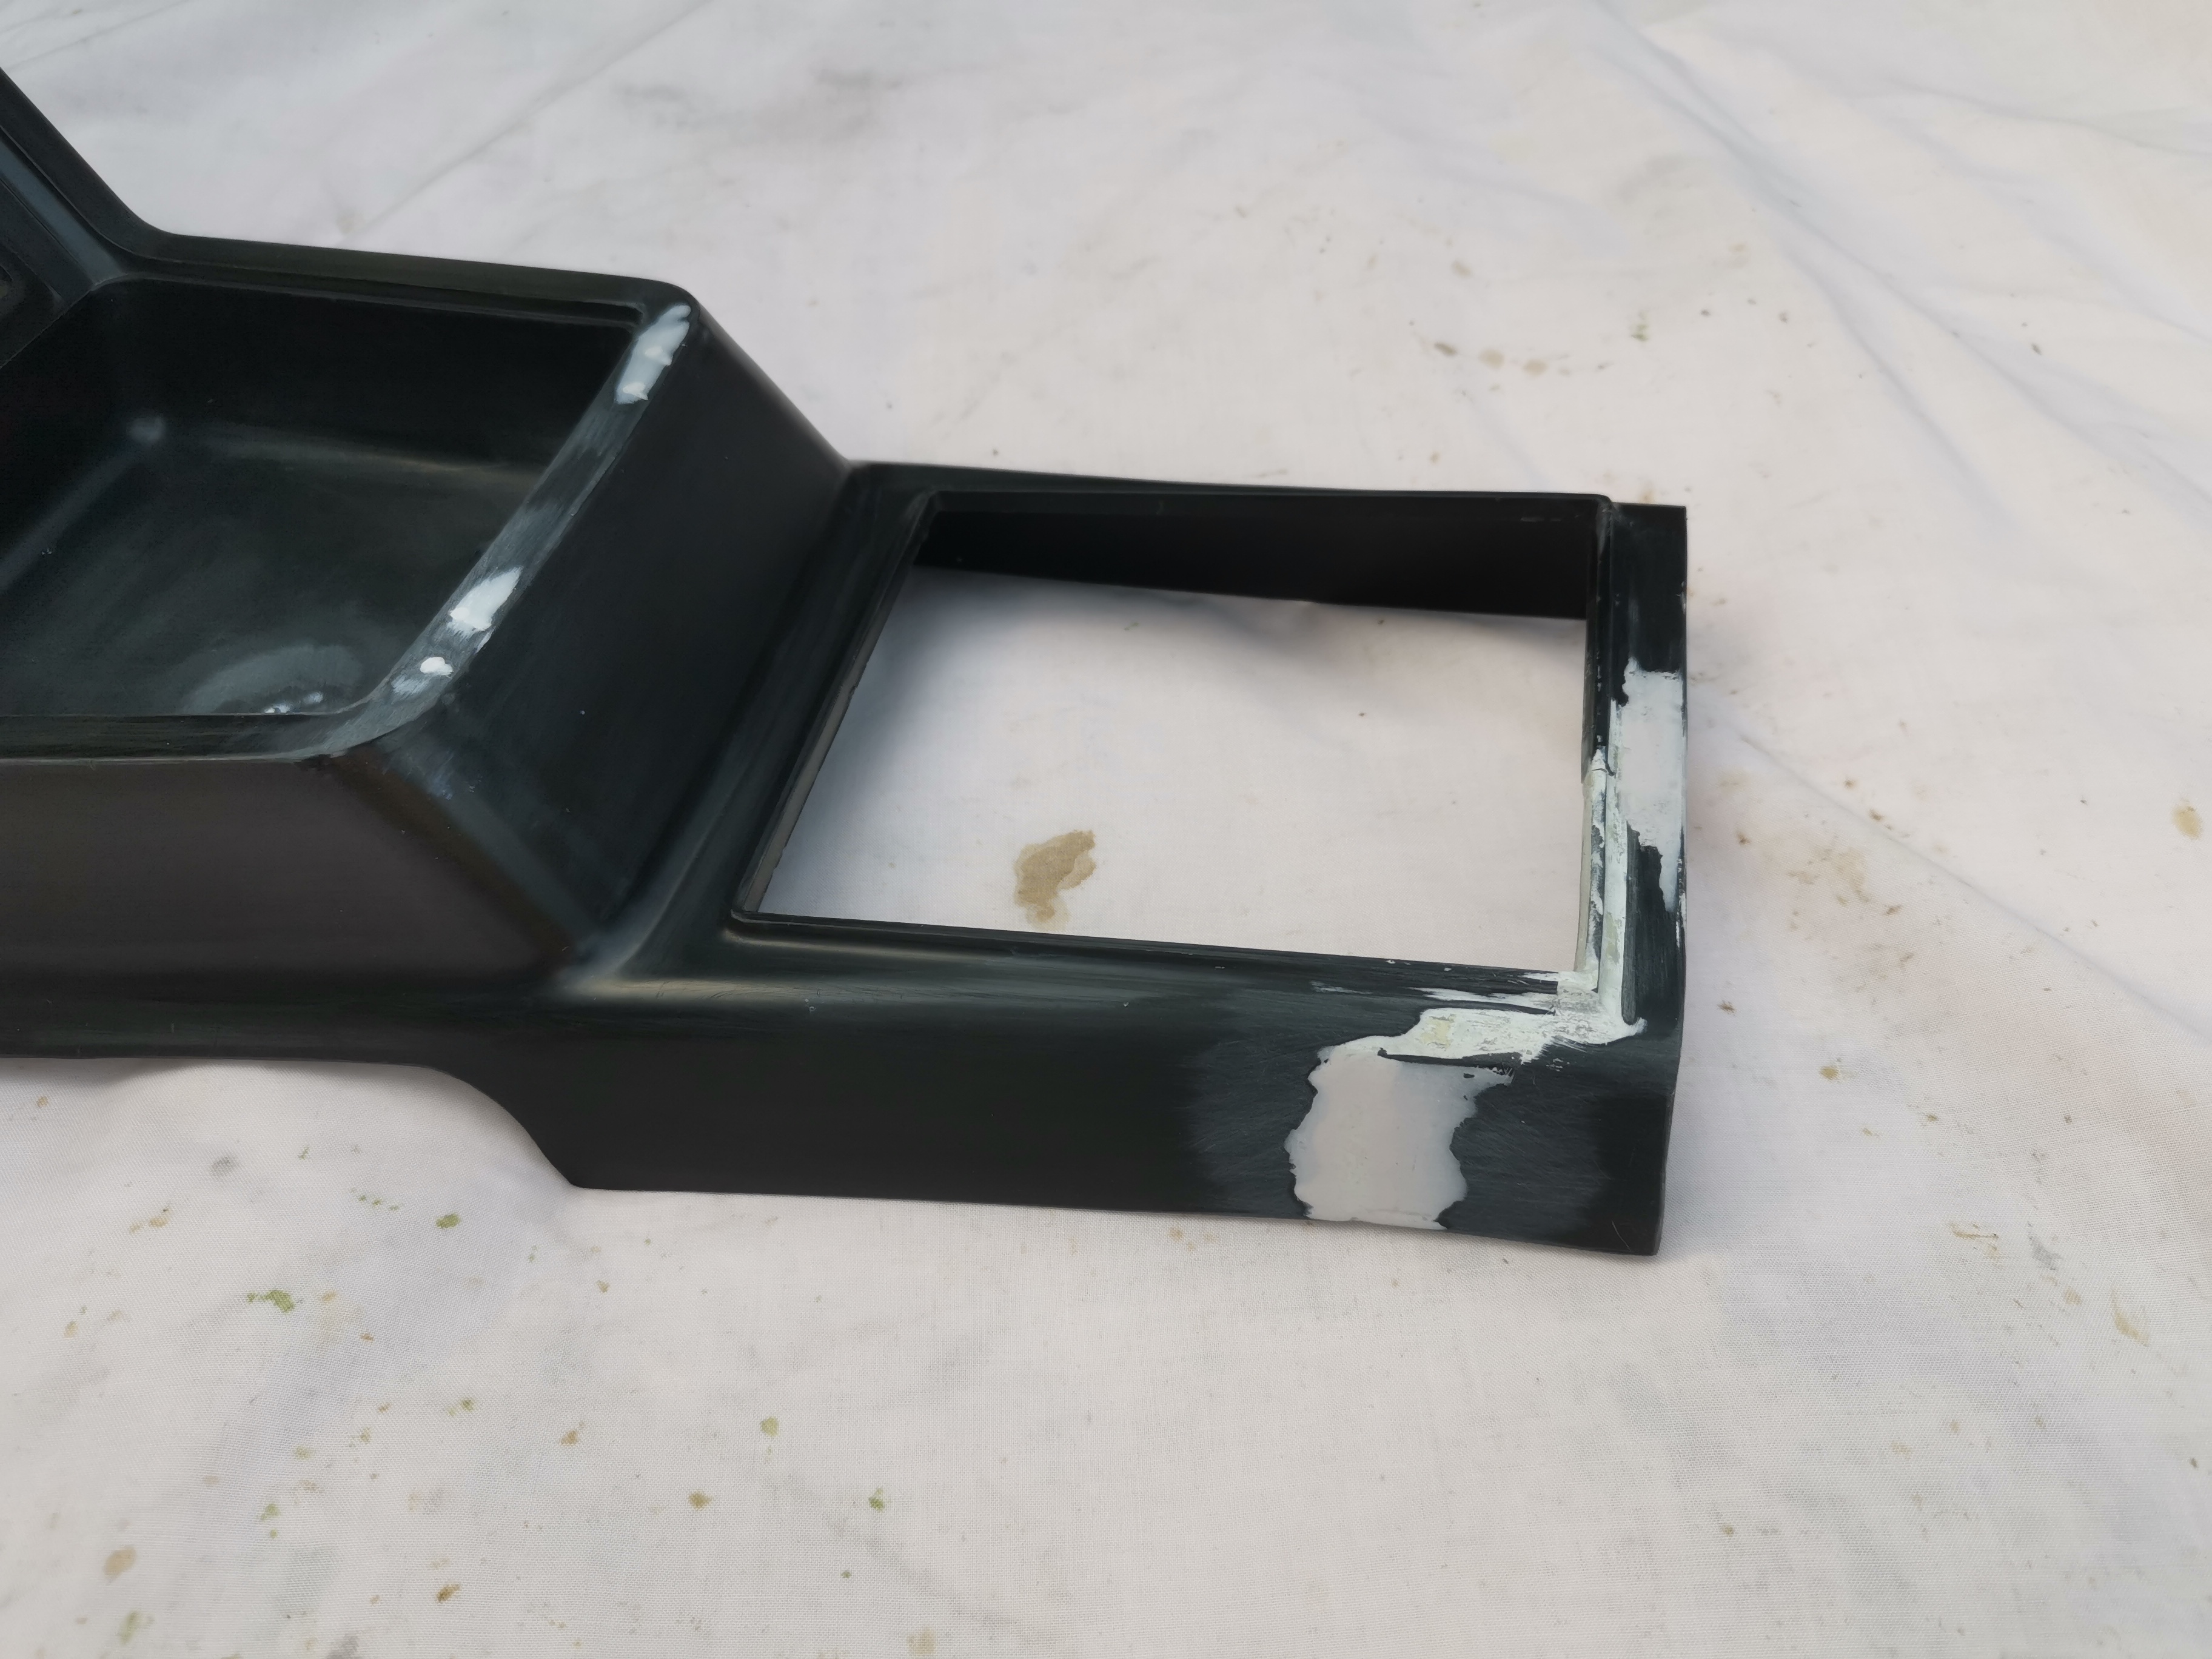
Centre console
Once it was blended in and primed it looked good enough I think. I also filled in a few holes that had been drilled in it in the past.
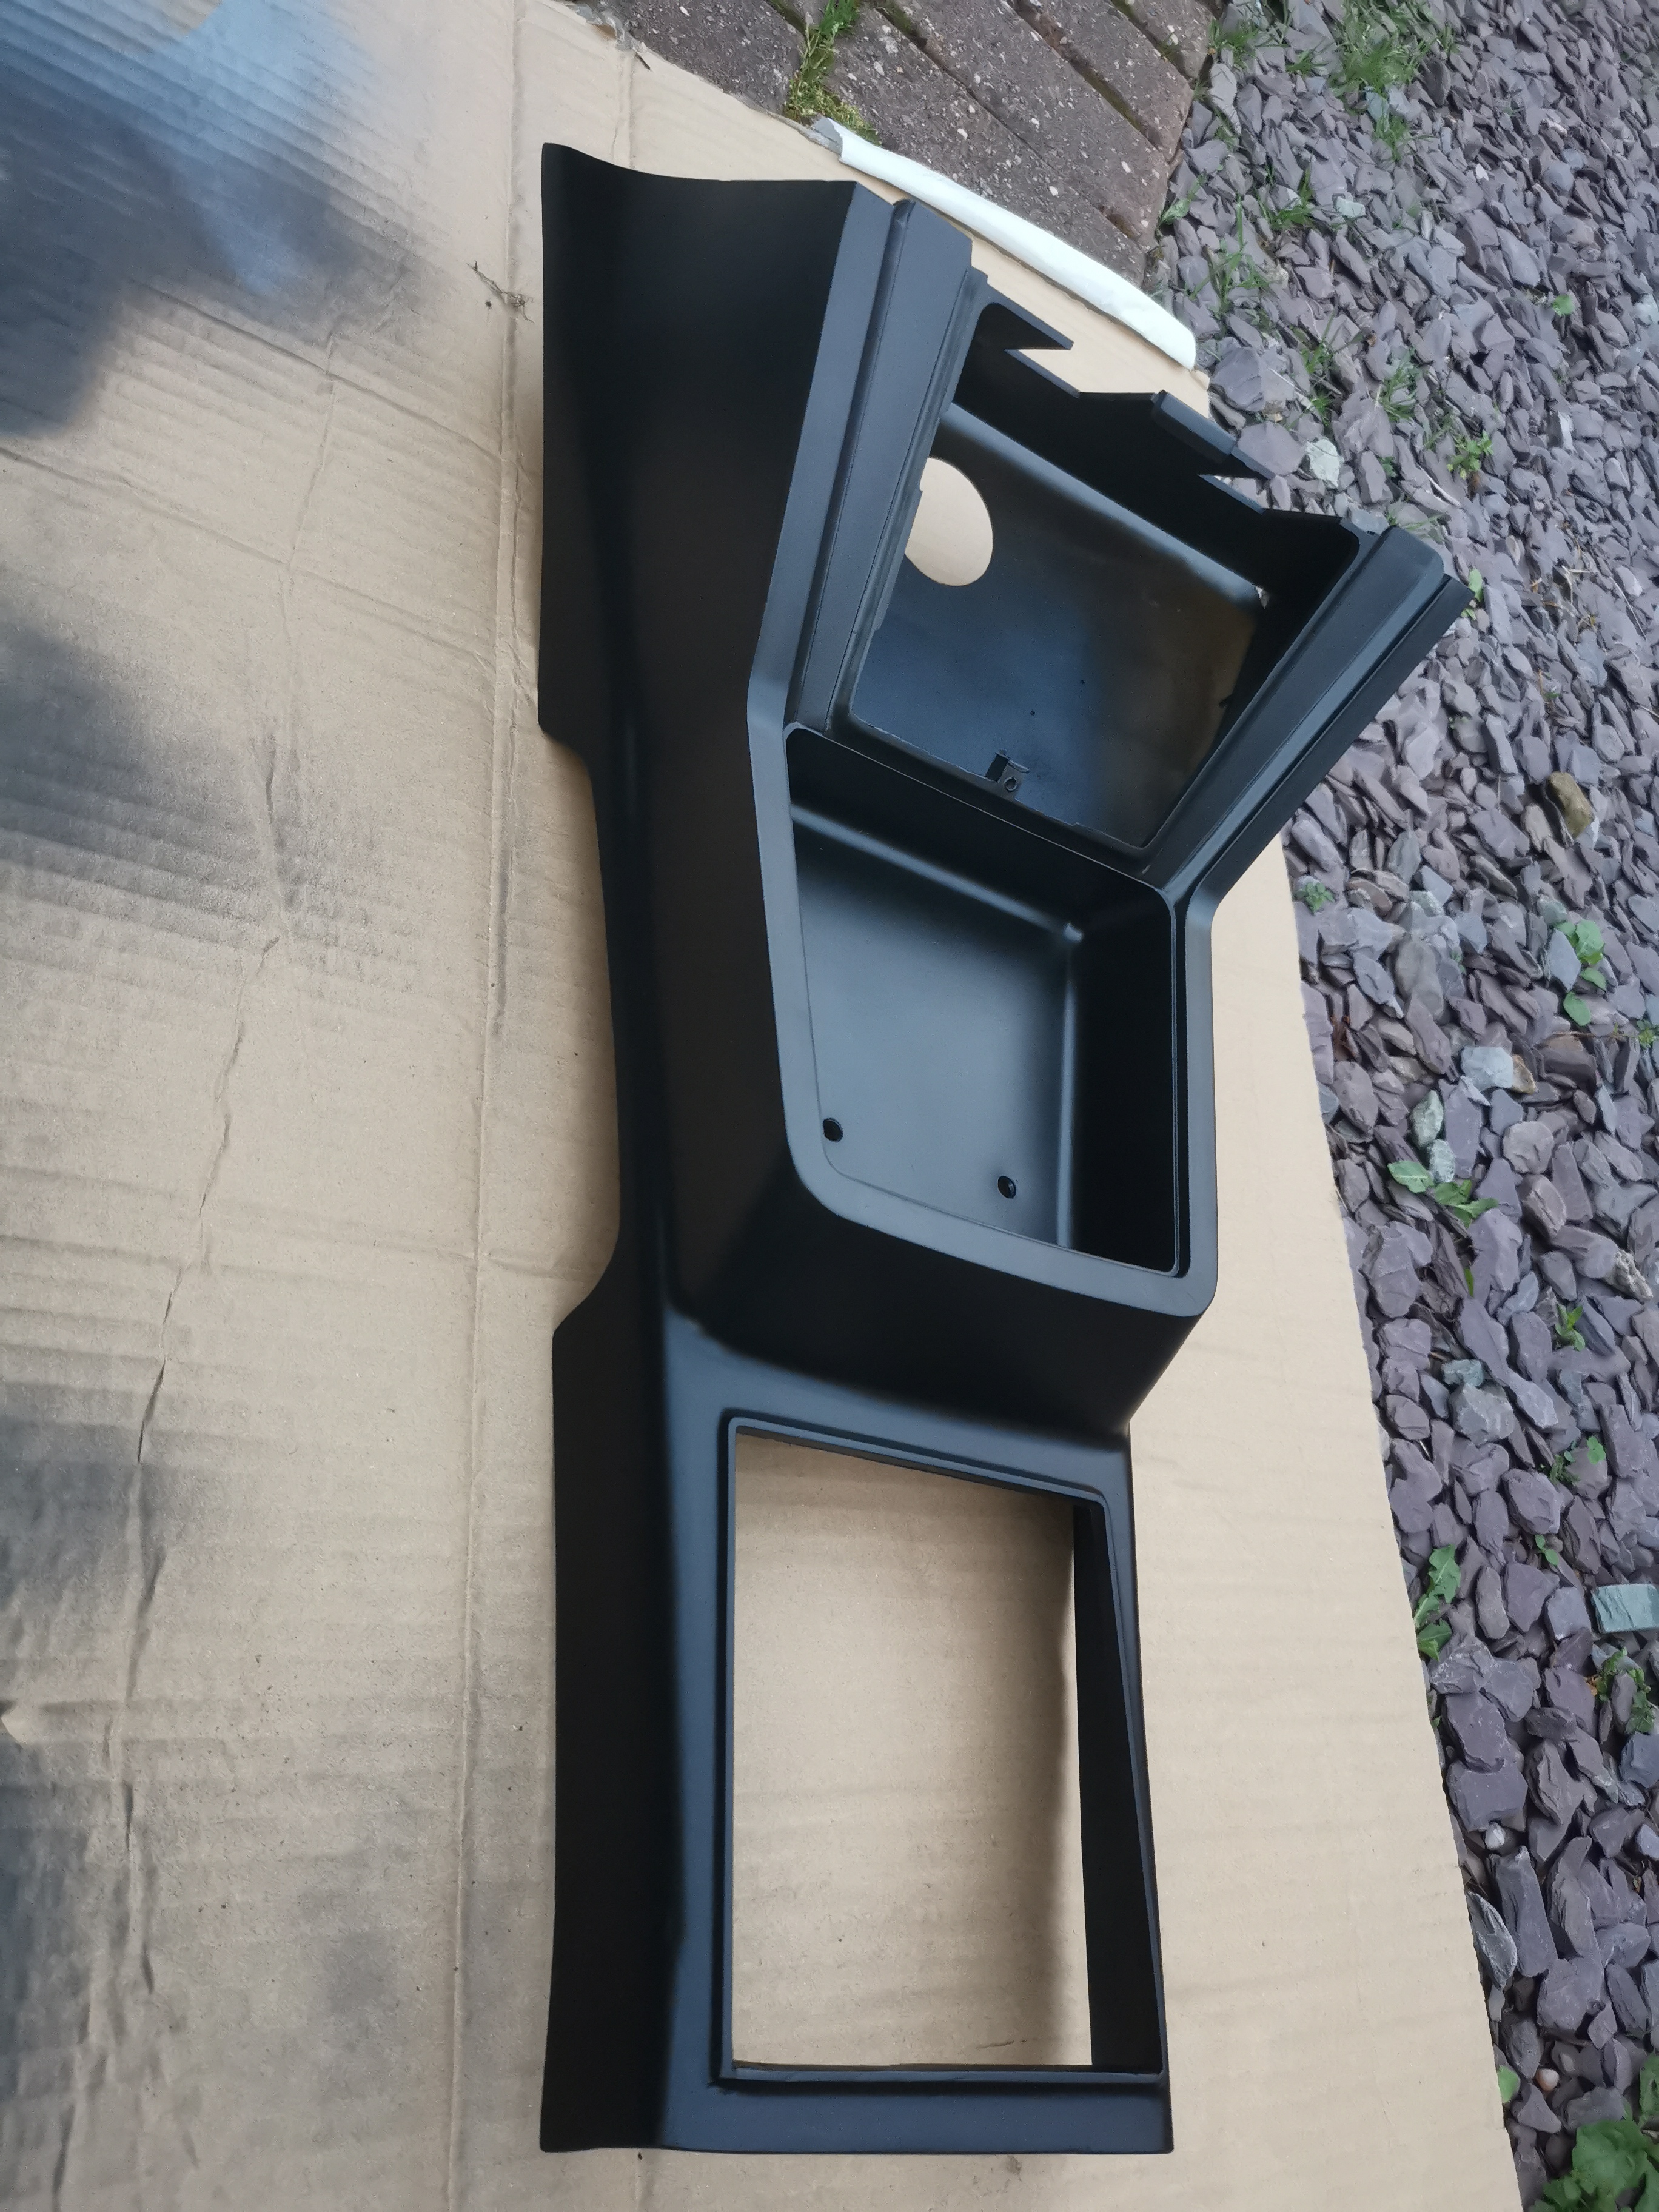
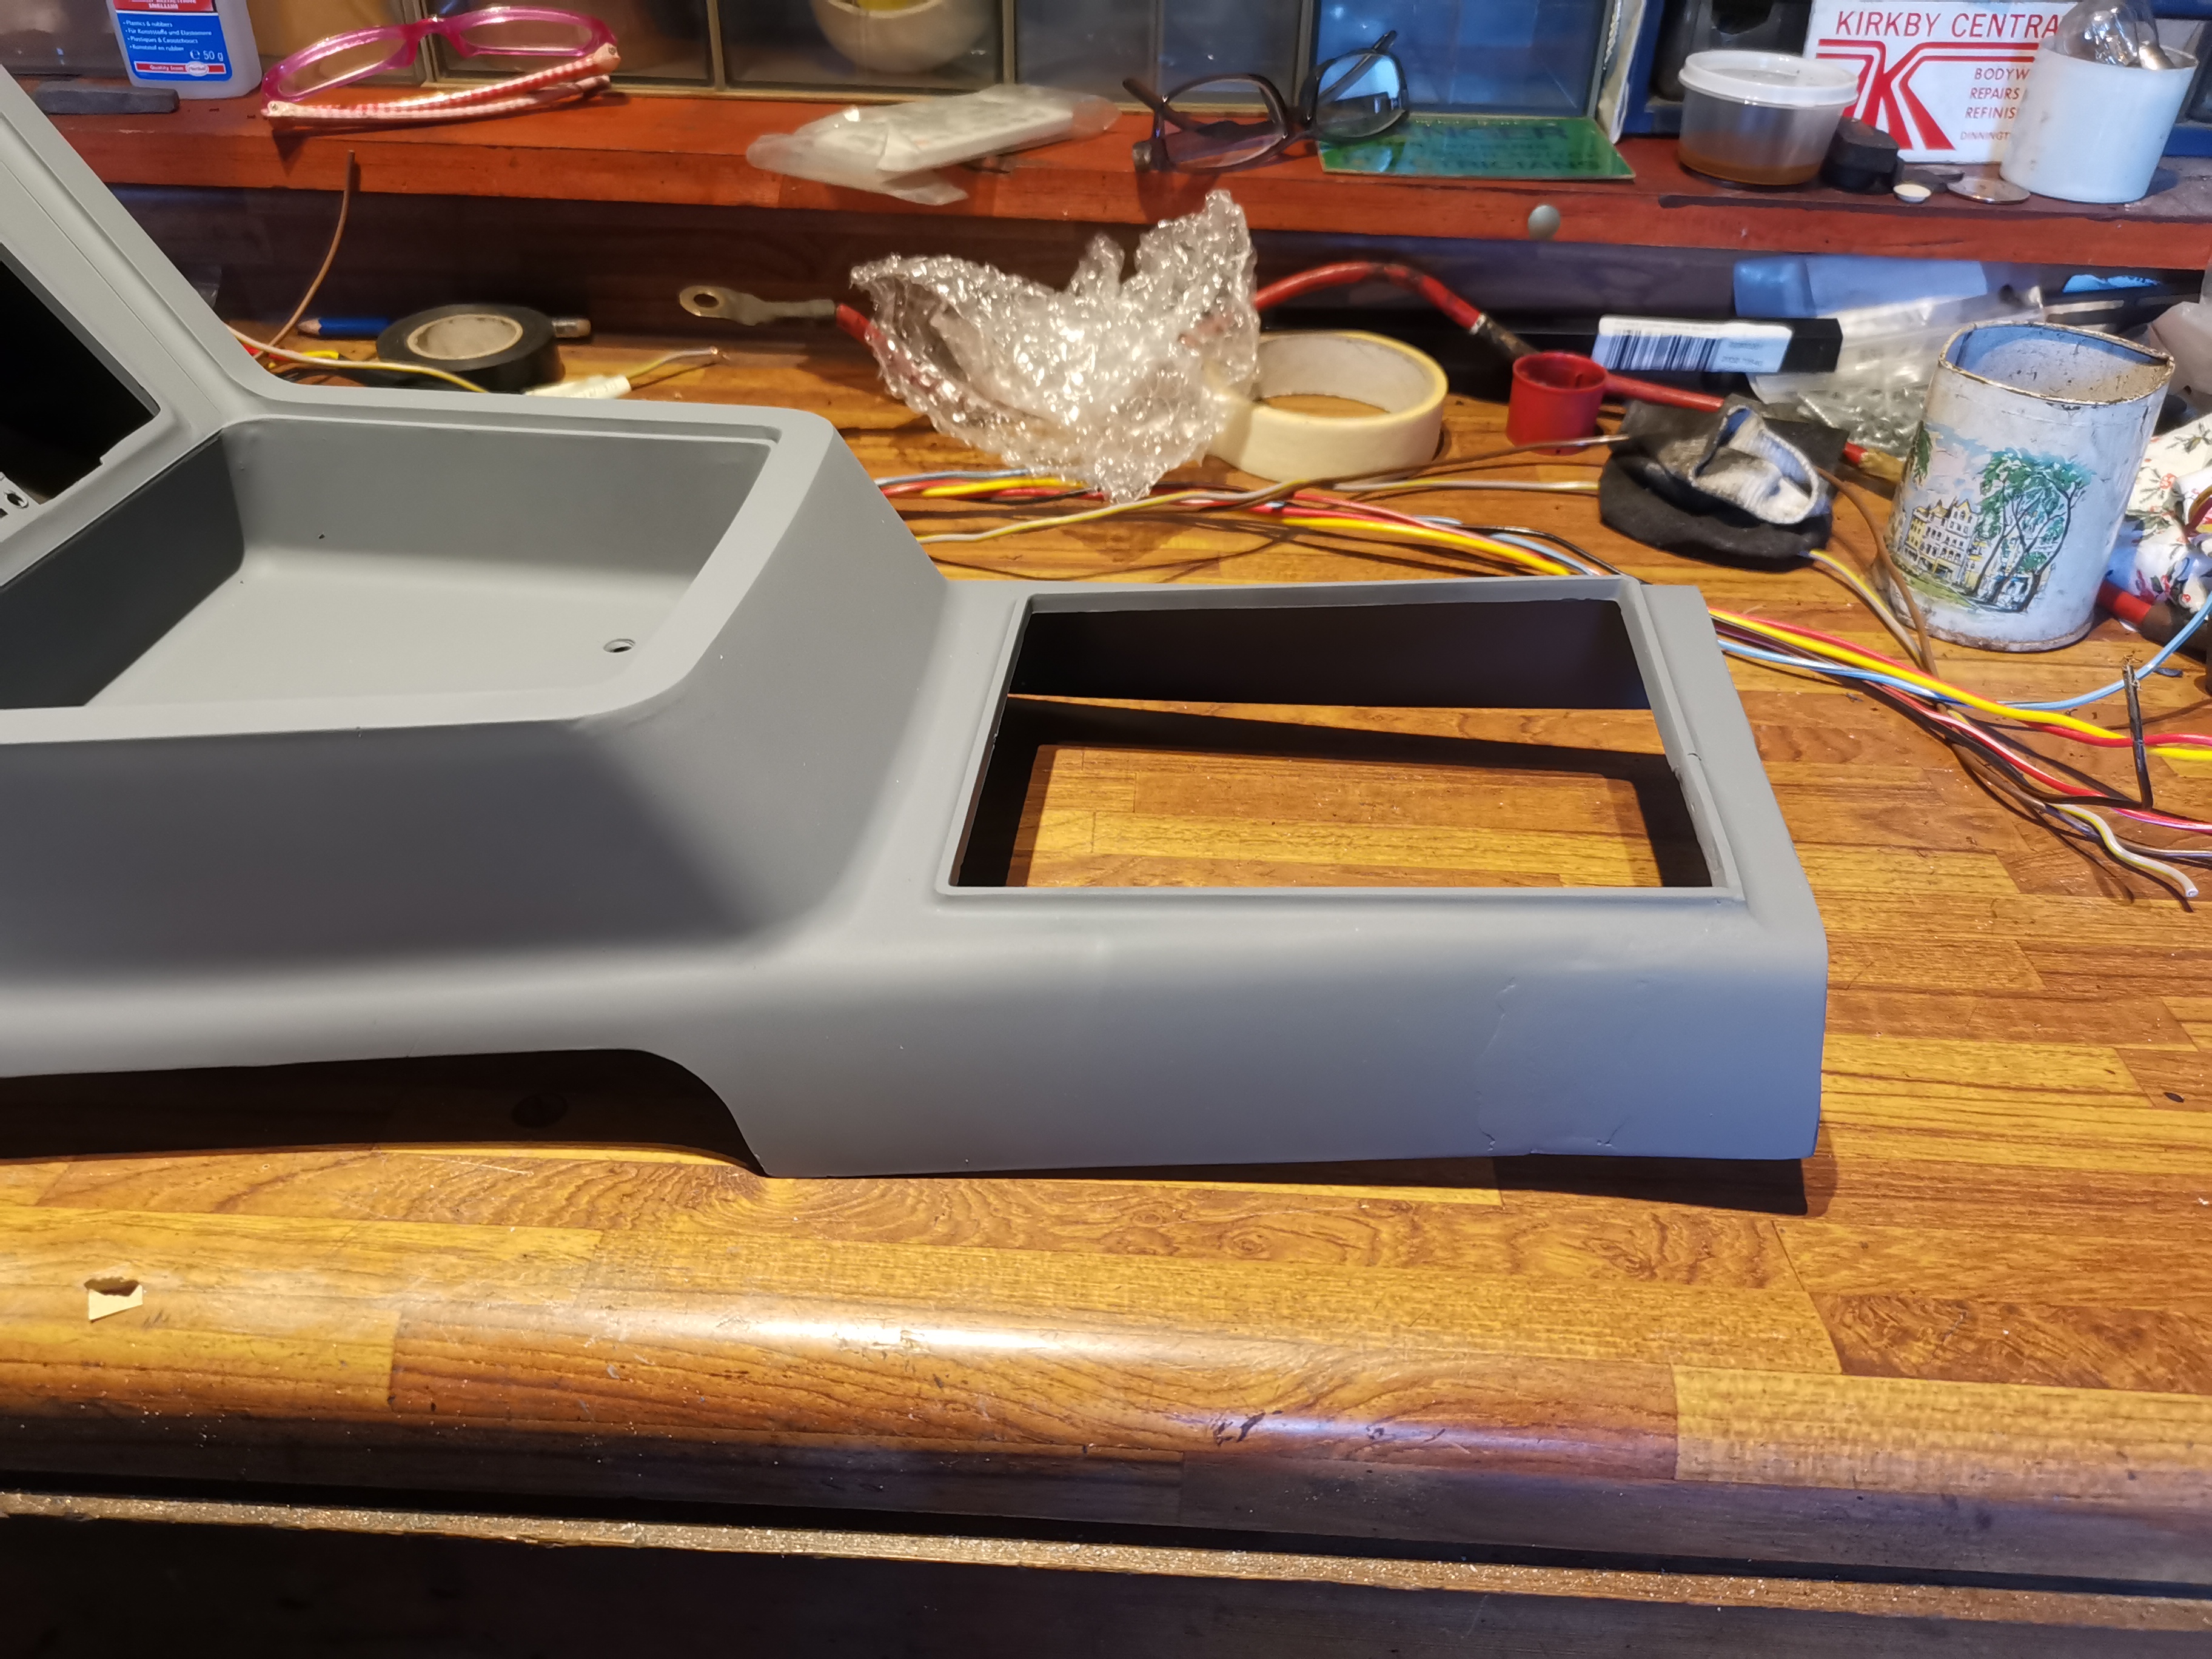
Centre console
Once painted I don't think you'll ever notice. I'll make an end panel and sew up a new gaiter at a later point.
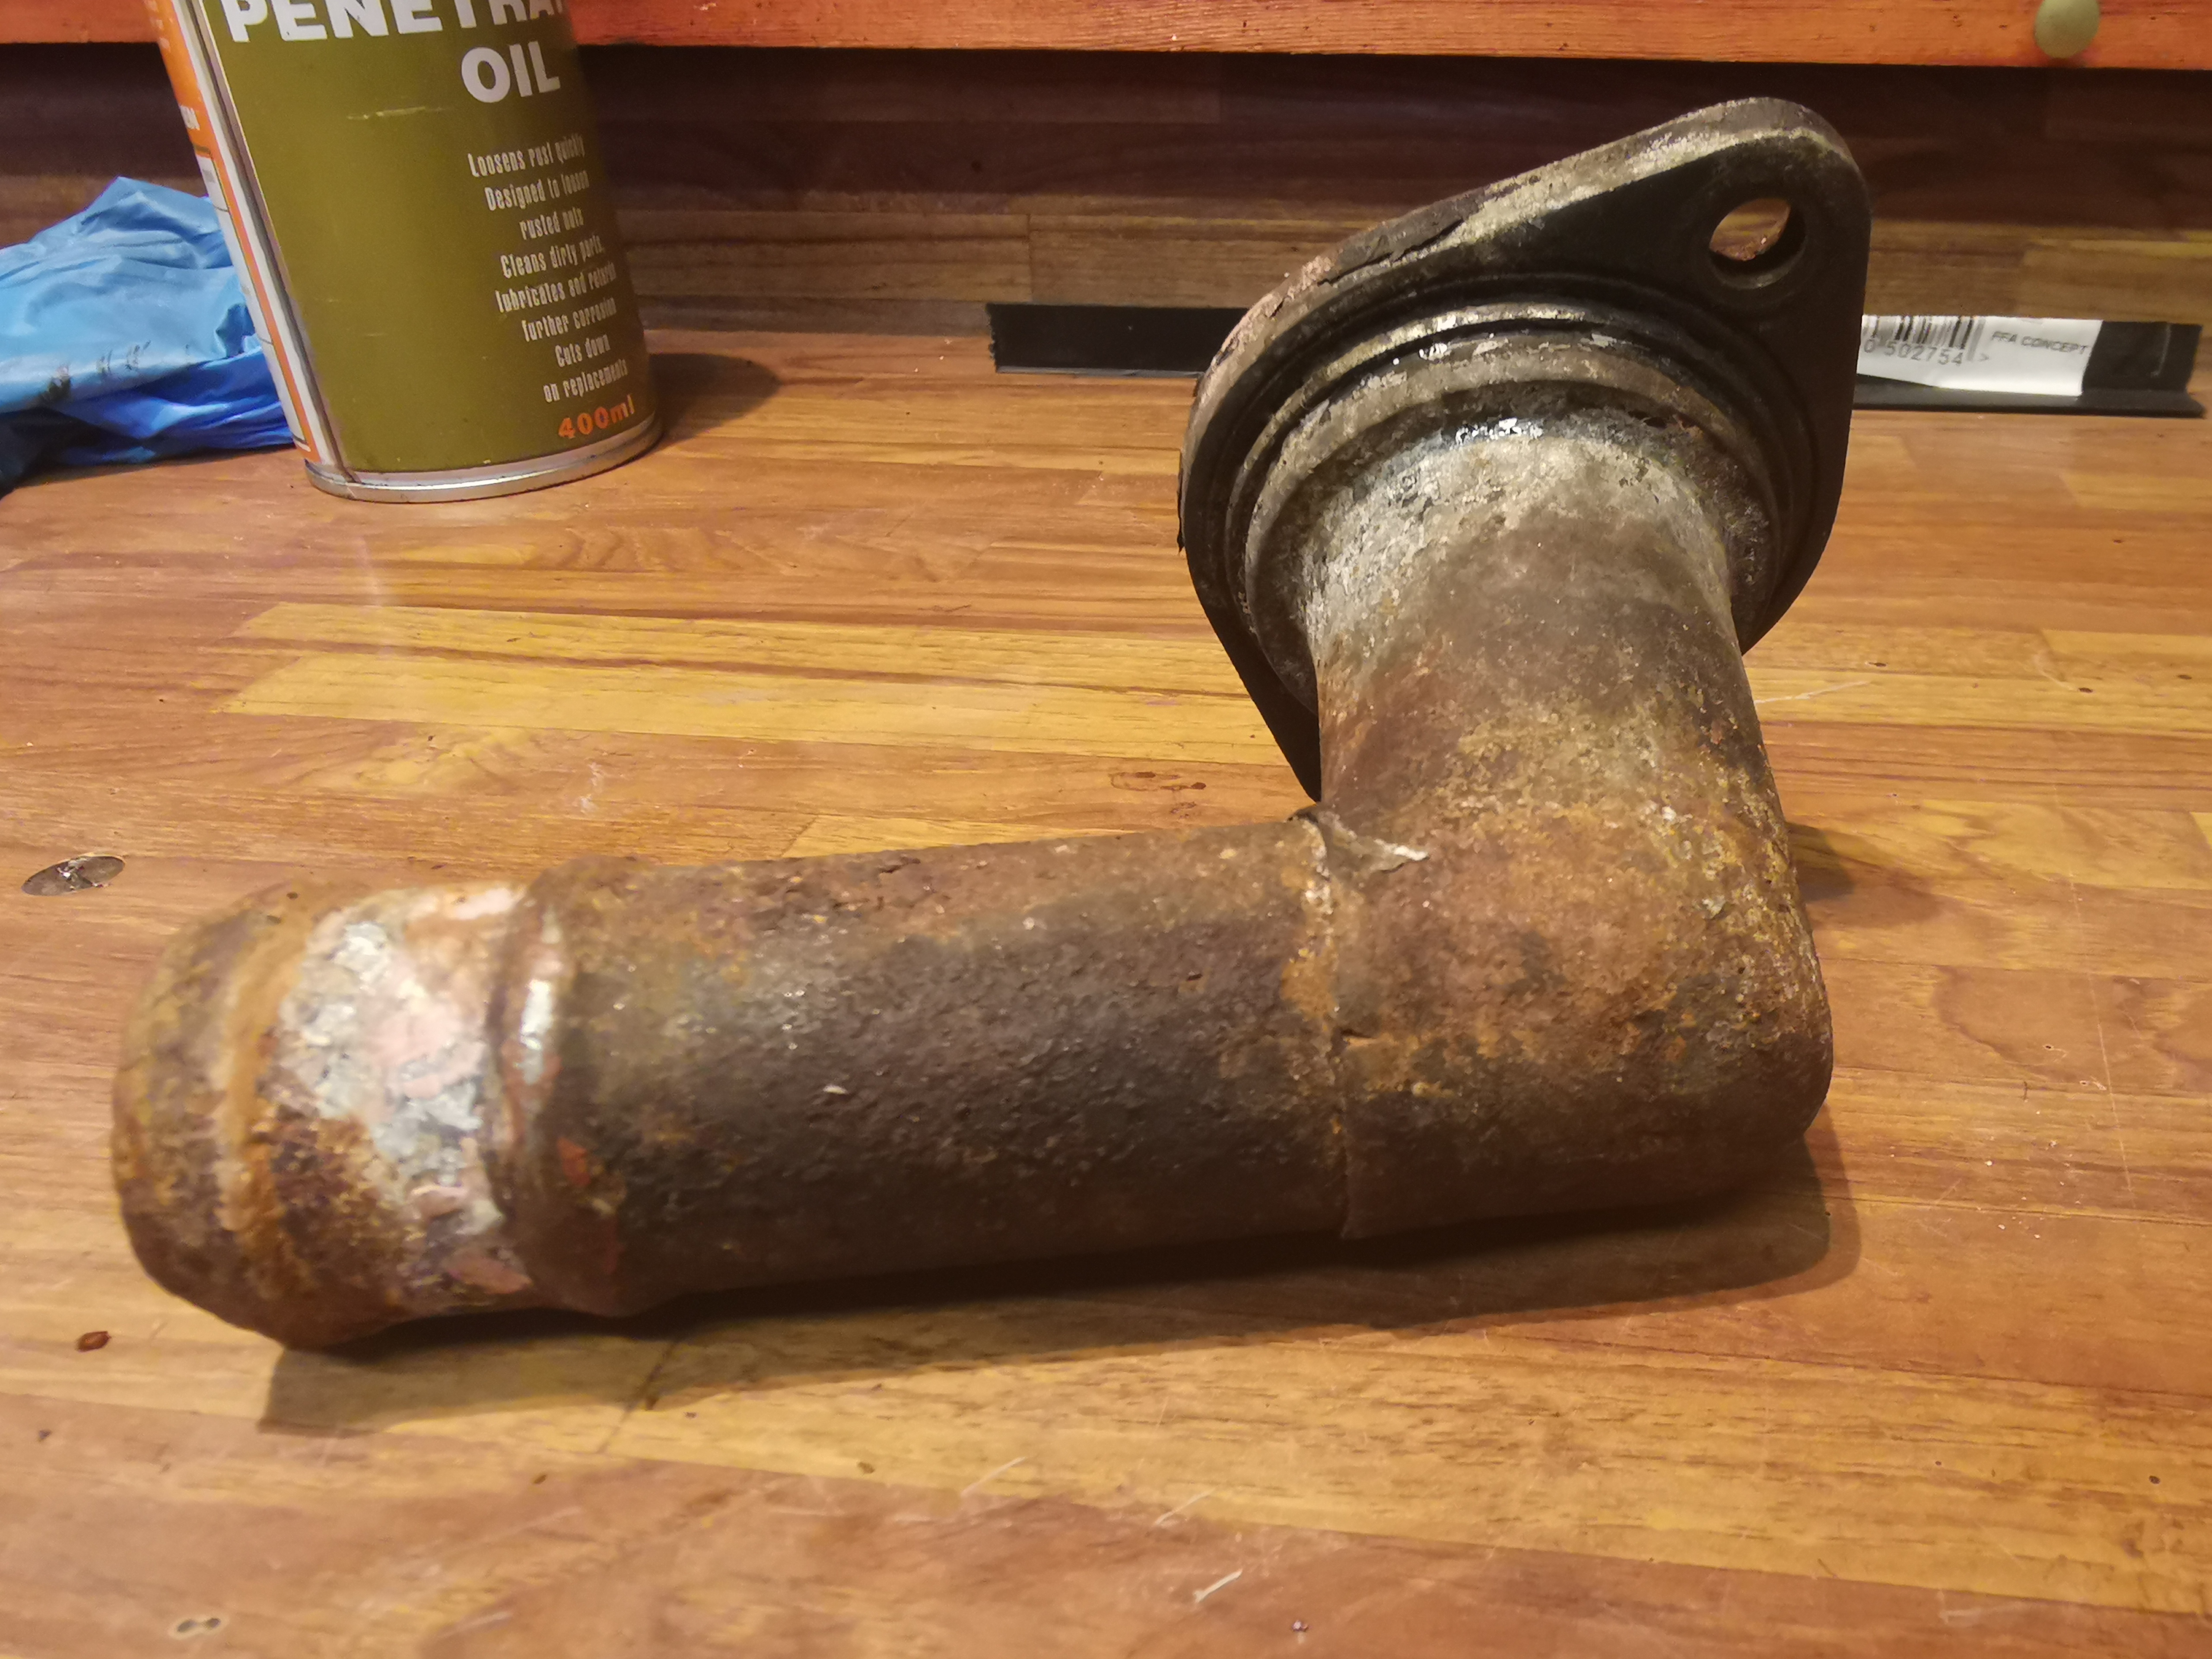
Thermostat housing
All rusty and corroded internally.
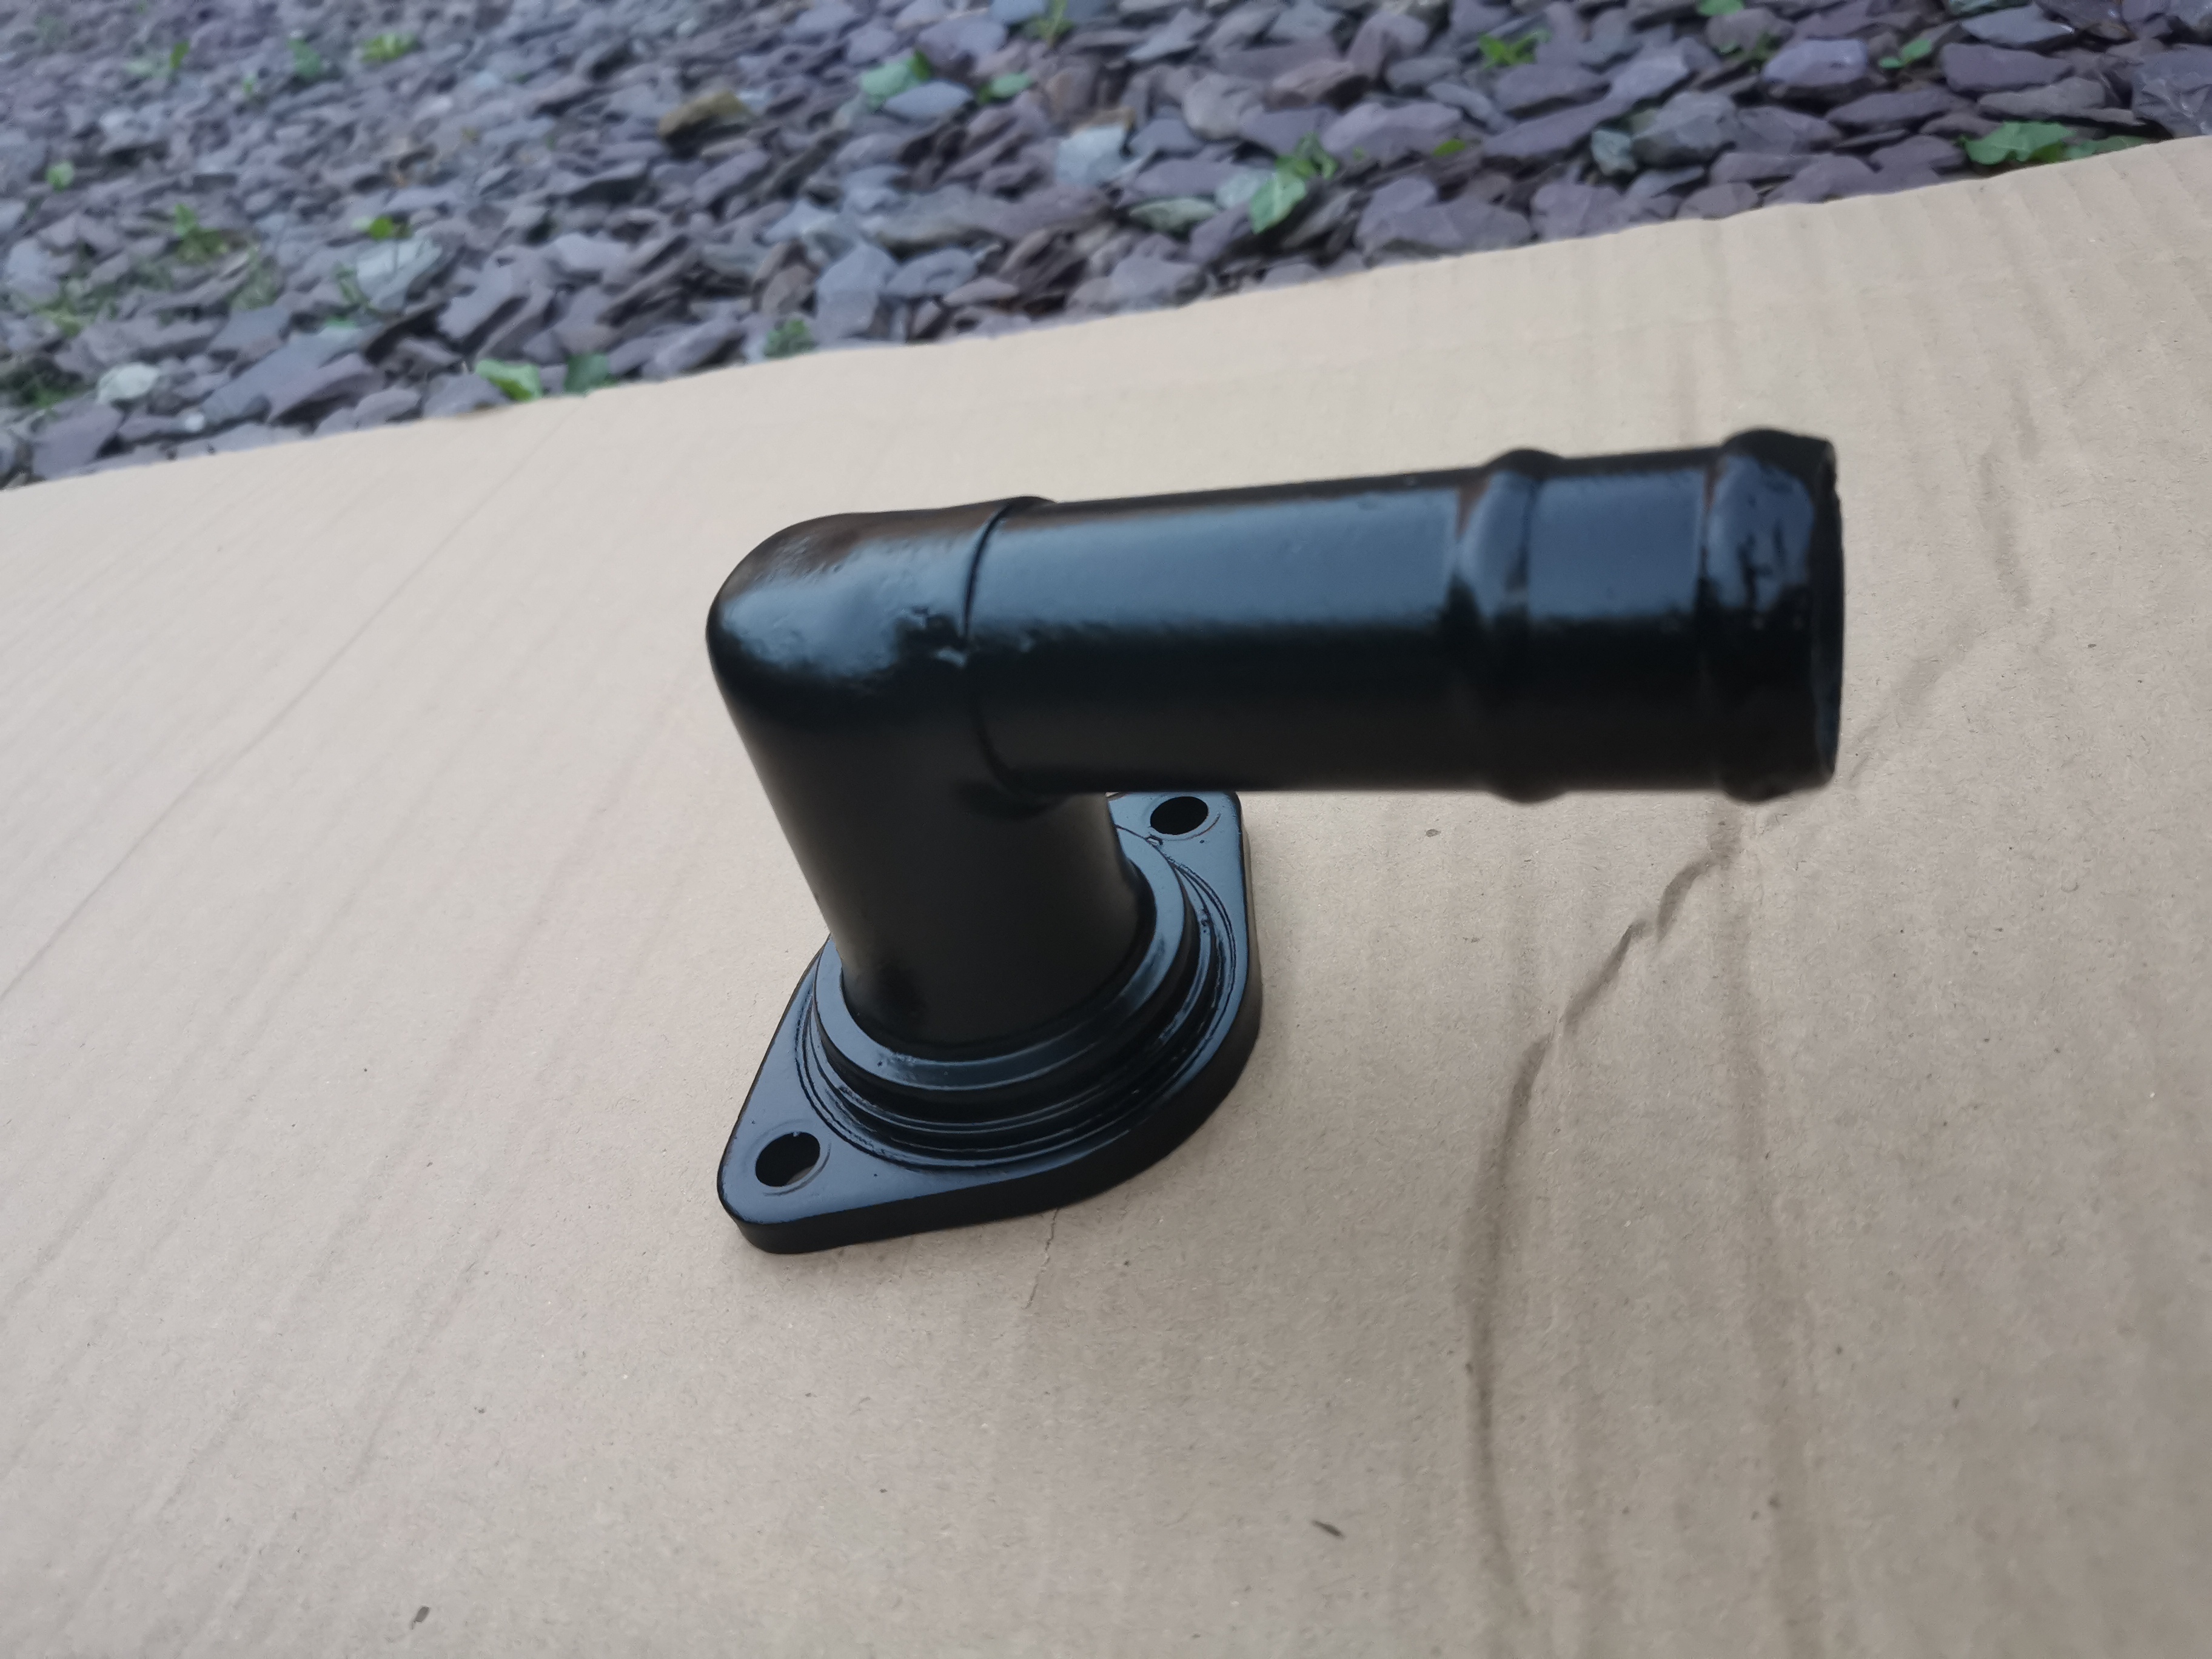
Thermostat housing
Cleaned and painted nicely.
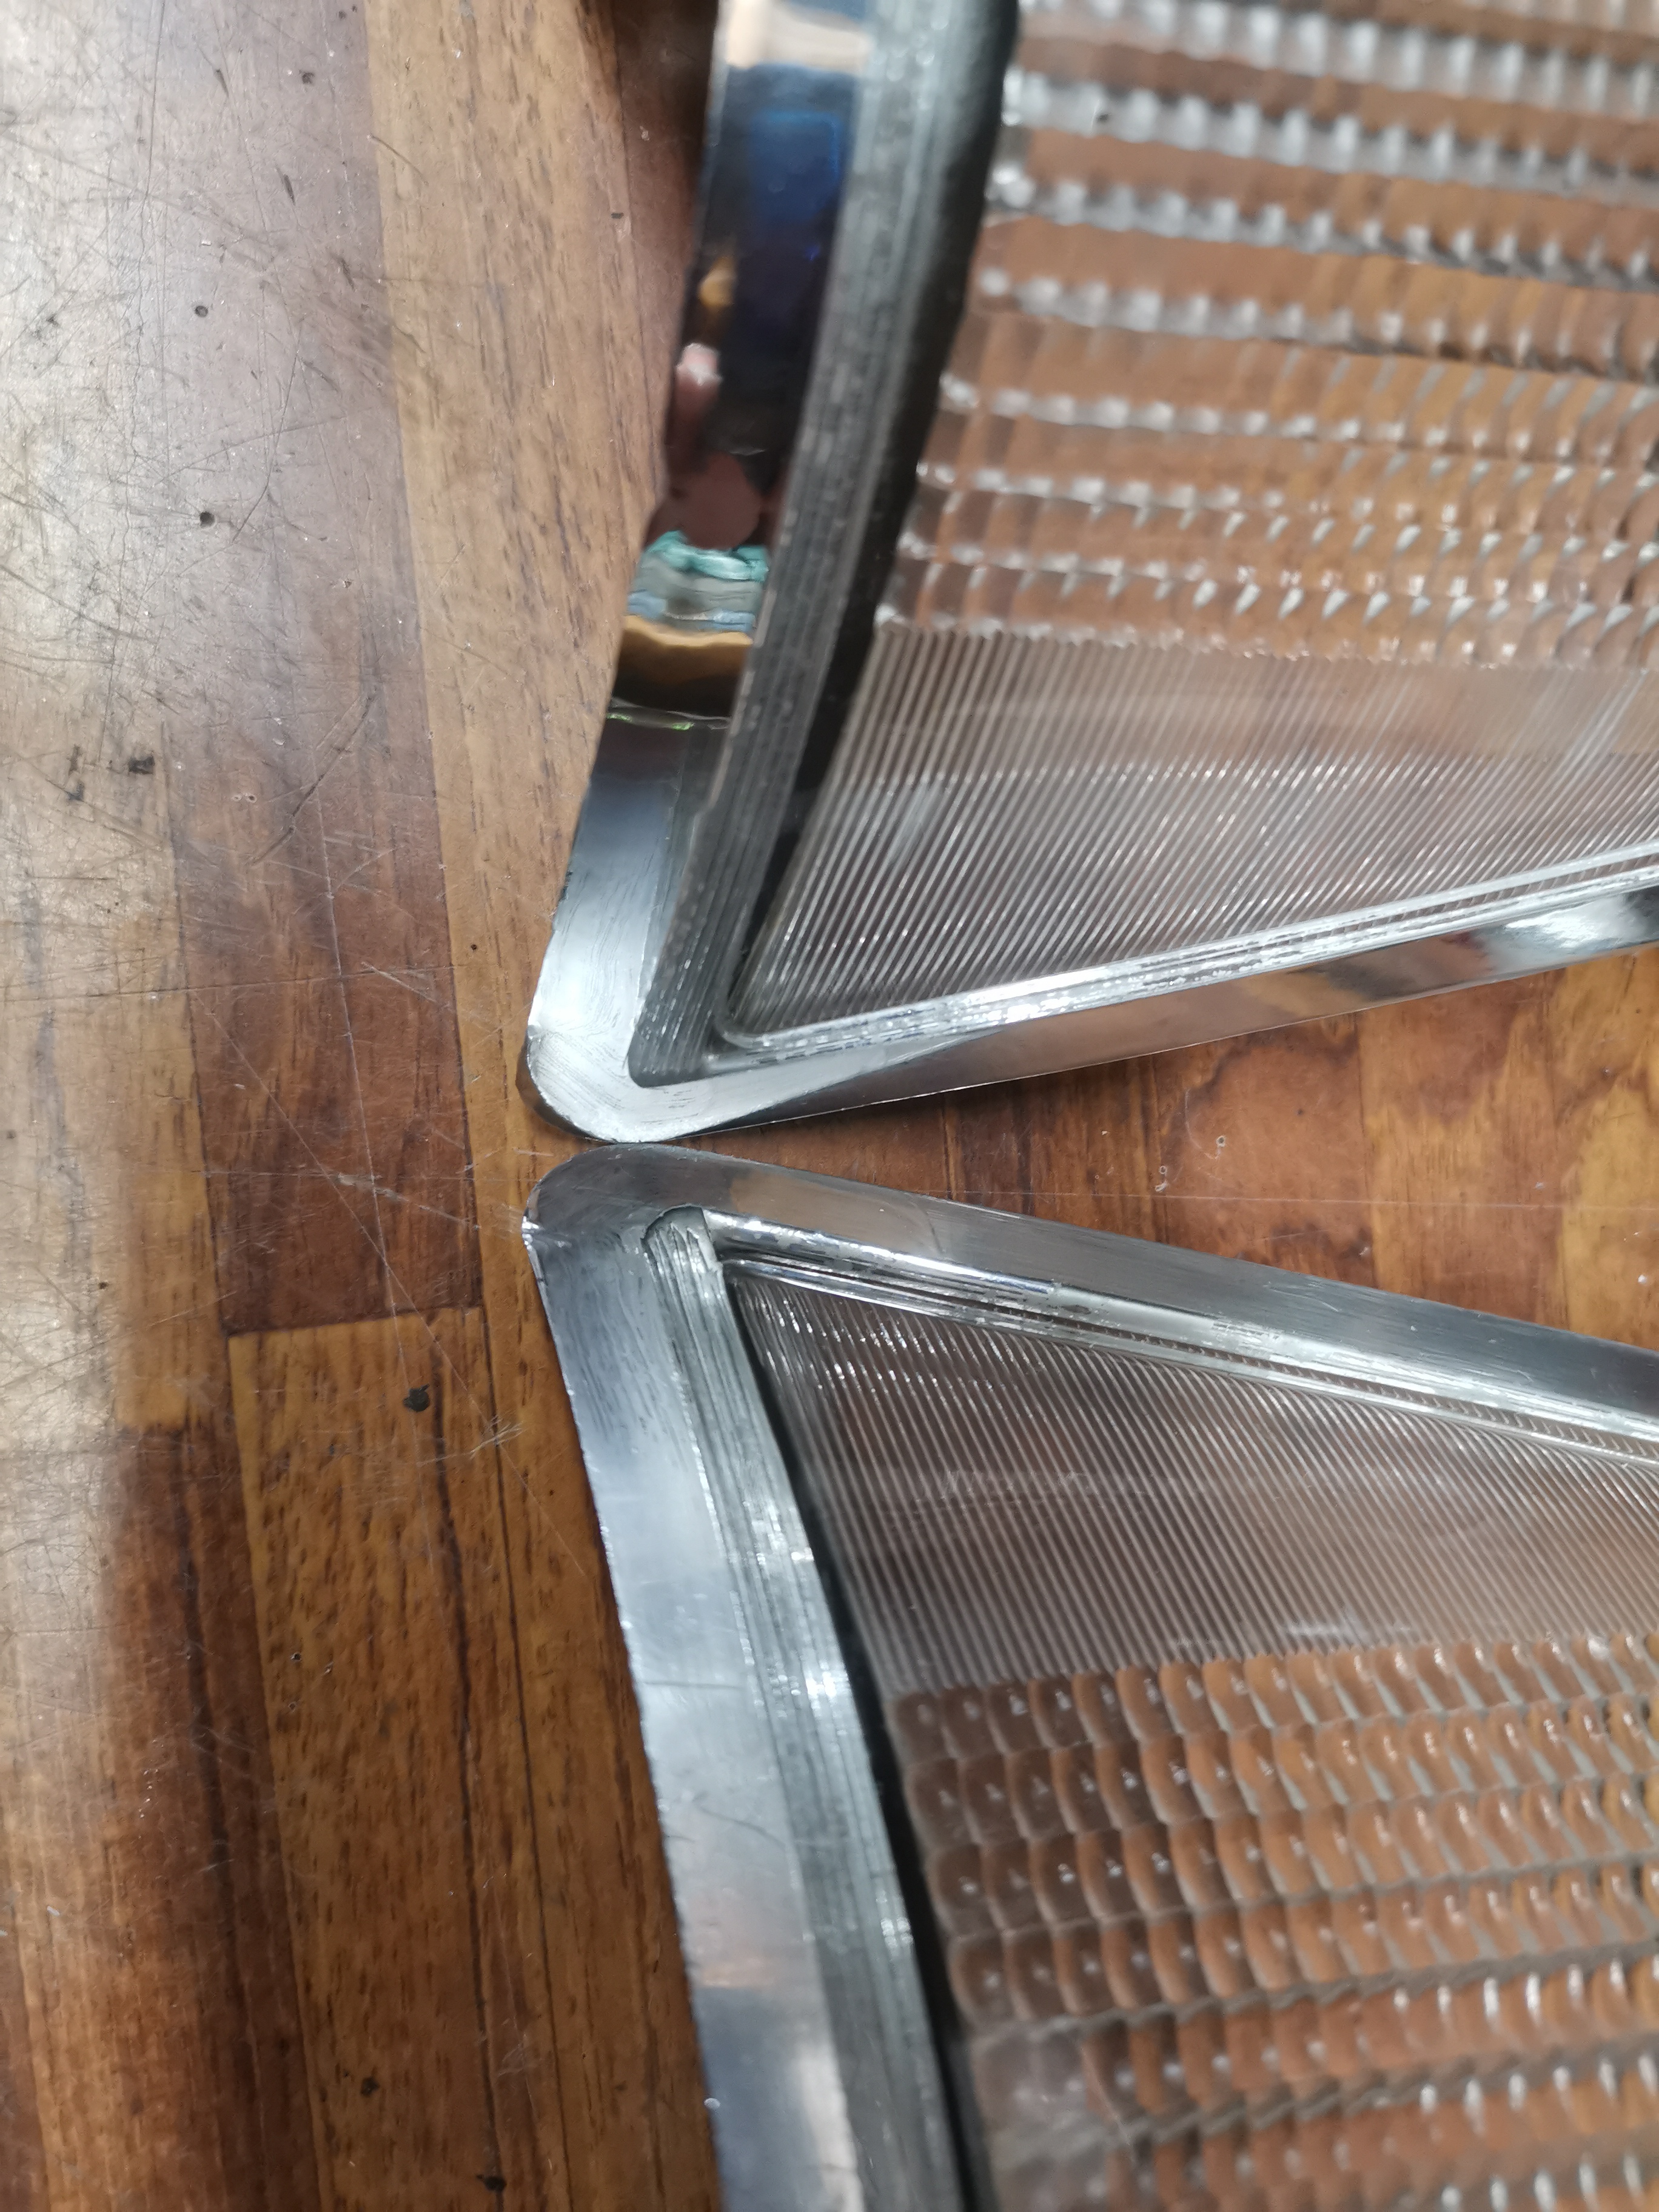
Front indicator lenses
Trying out a variety of treatments in an attempt to end up with a decent chrome look finish. In the end I went with mirror vinyl on the outside rather than a paint finish on the inside as per the originals.
Front seat
The seats I bought were in pretty good condition but there were some quite bad marks on the back of one and a few nicks and cuts in the fabric that I'll need to sew up.
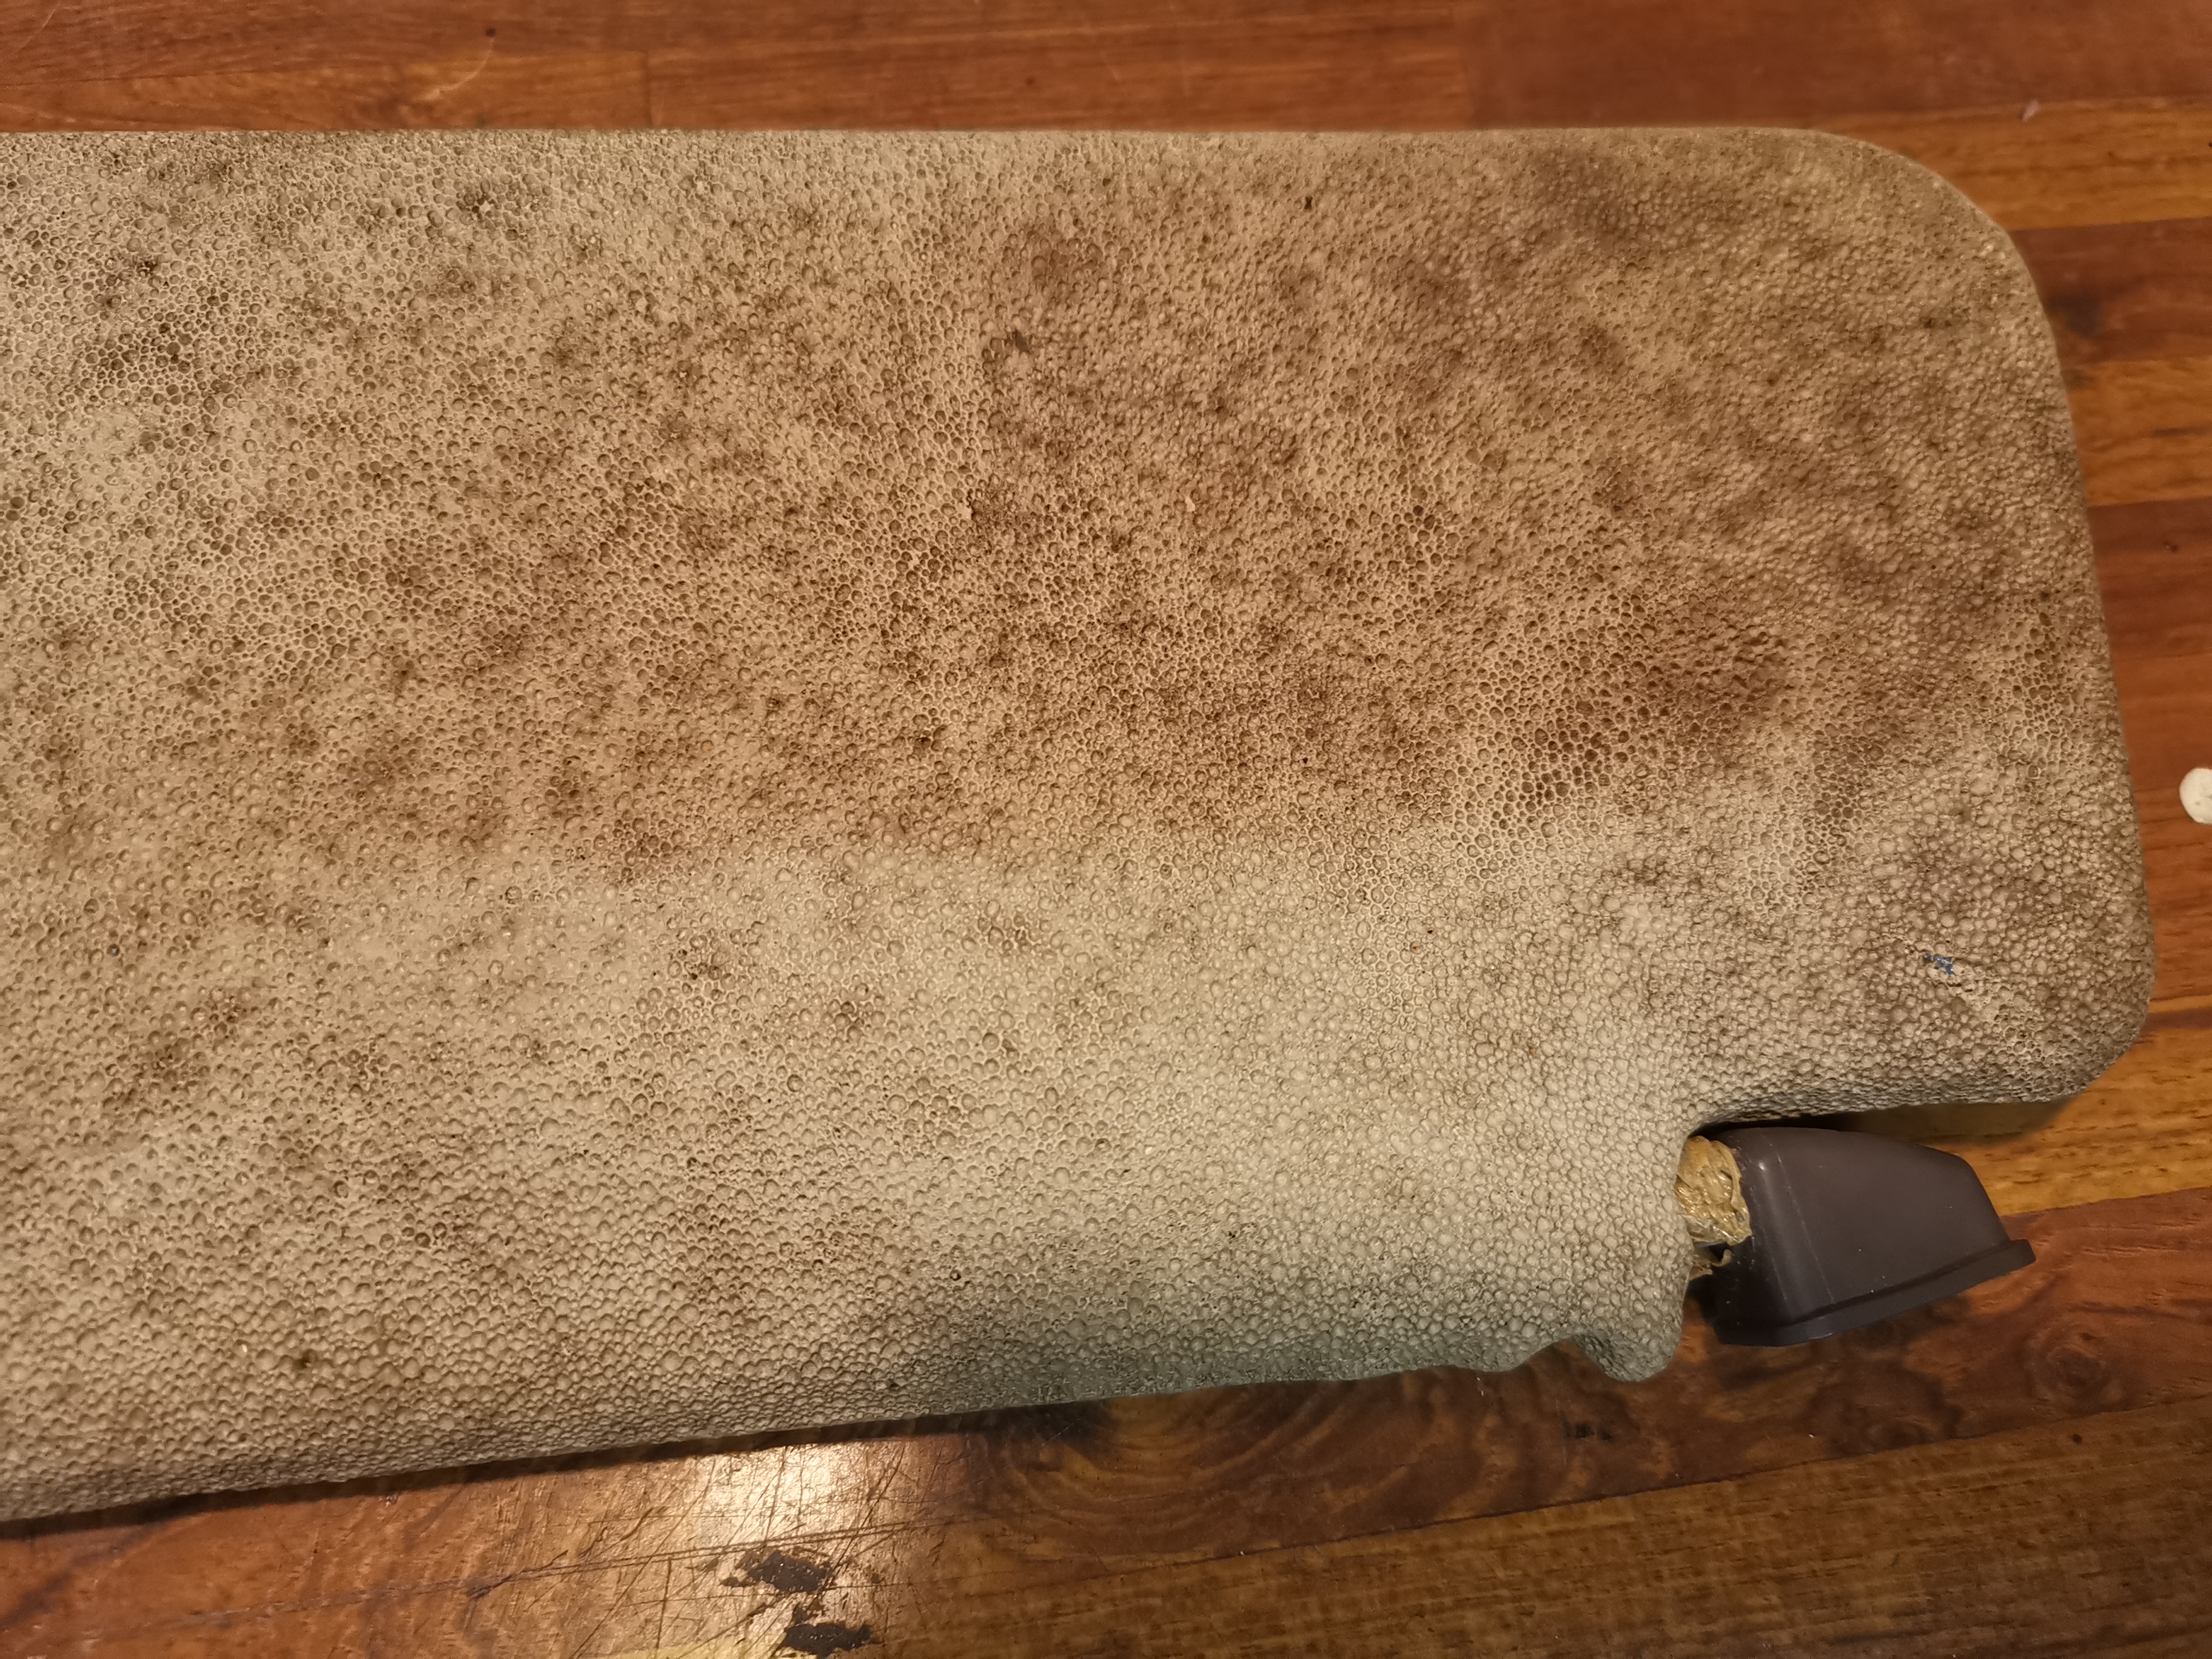
Sun visors
The sun visors were stained and mouldy
Sun visors
But cleaned up surprisingly well.
As you can see there was a heck of a lot of work involved in cleaning and renovating all the individual parts. There are many many more examples of the same but I won't bore you with photos of them all. I spent many hours renovating all the parts to the best of my ability.
Bodyshell
Once I had stripped most of the parts off the car I moved onto tackling the actual bodyshell. Most areas needed extensive repairs with many sections rusted through, some on multiple layers. Once the top layer was removed it often revealed massive amounts of corrosion underneath that also needed addressing.
Nearside rear door
The bottom corner of the rear door was rusted through
Nearside rear door
So I cut the affected section away, cleaned out all the loose rust and treated what was left with rust converter.
Nearside rear door
Then welded a new piece in
Nearside rear door
And linished down and the process repeated on the other doors wherever there was rust.
Boot lid lip
Part of the boot lip channel had been 'replaced' in the past, however it was a VERY poor repair. The metal panel that had been inserted not only was ill fitting and badly shaped but also bare and untreated and therefore already quite rusty itself.
Boot lid lip
Other areas of the lip were also very rusty.
Boot lid lip
With holes that would just let water straight into the boot. All those areas were rubbed down, treated, repaired and undercoated with epoxy paint to make the boot lip properly effective in keeping the boot dry.
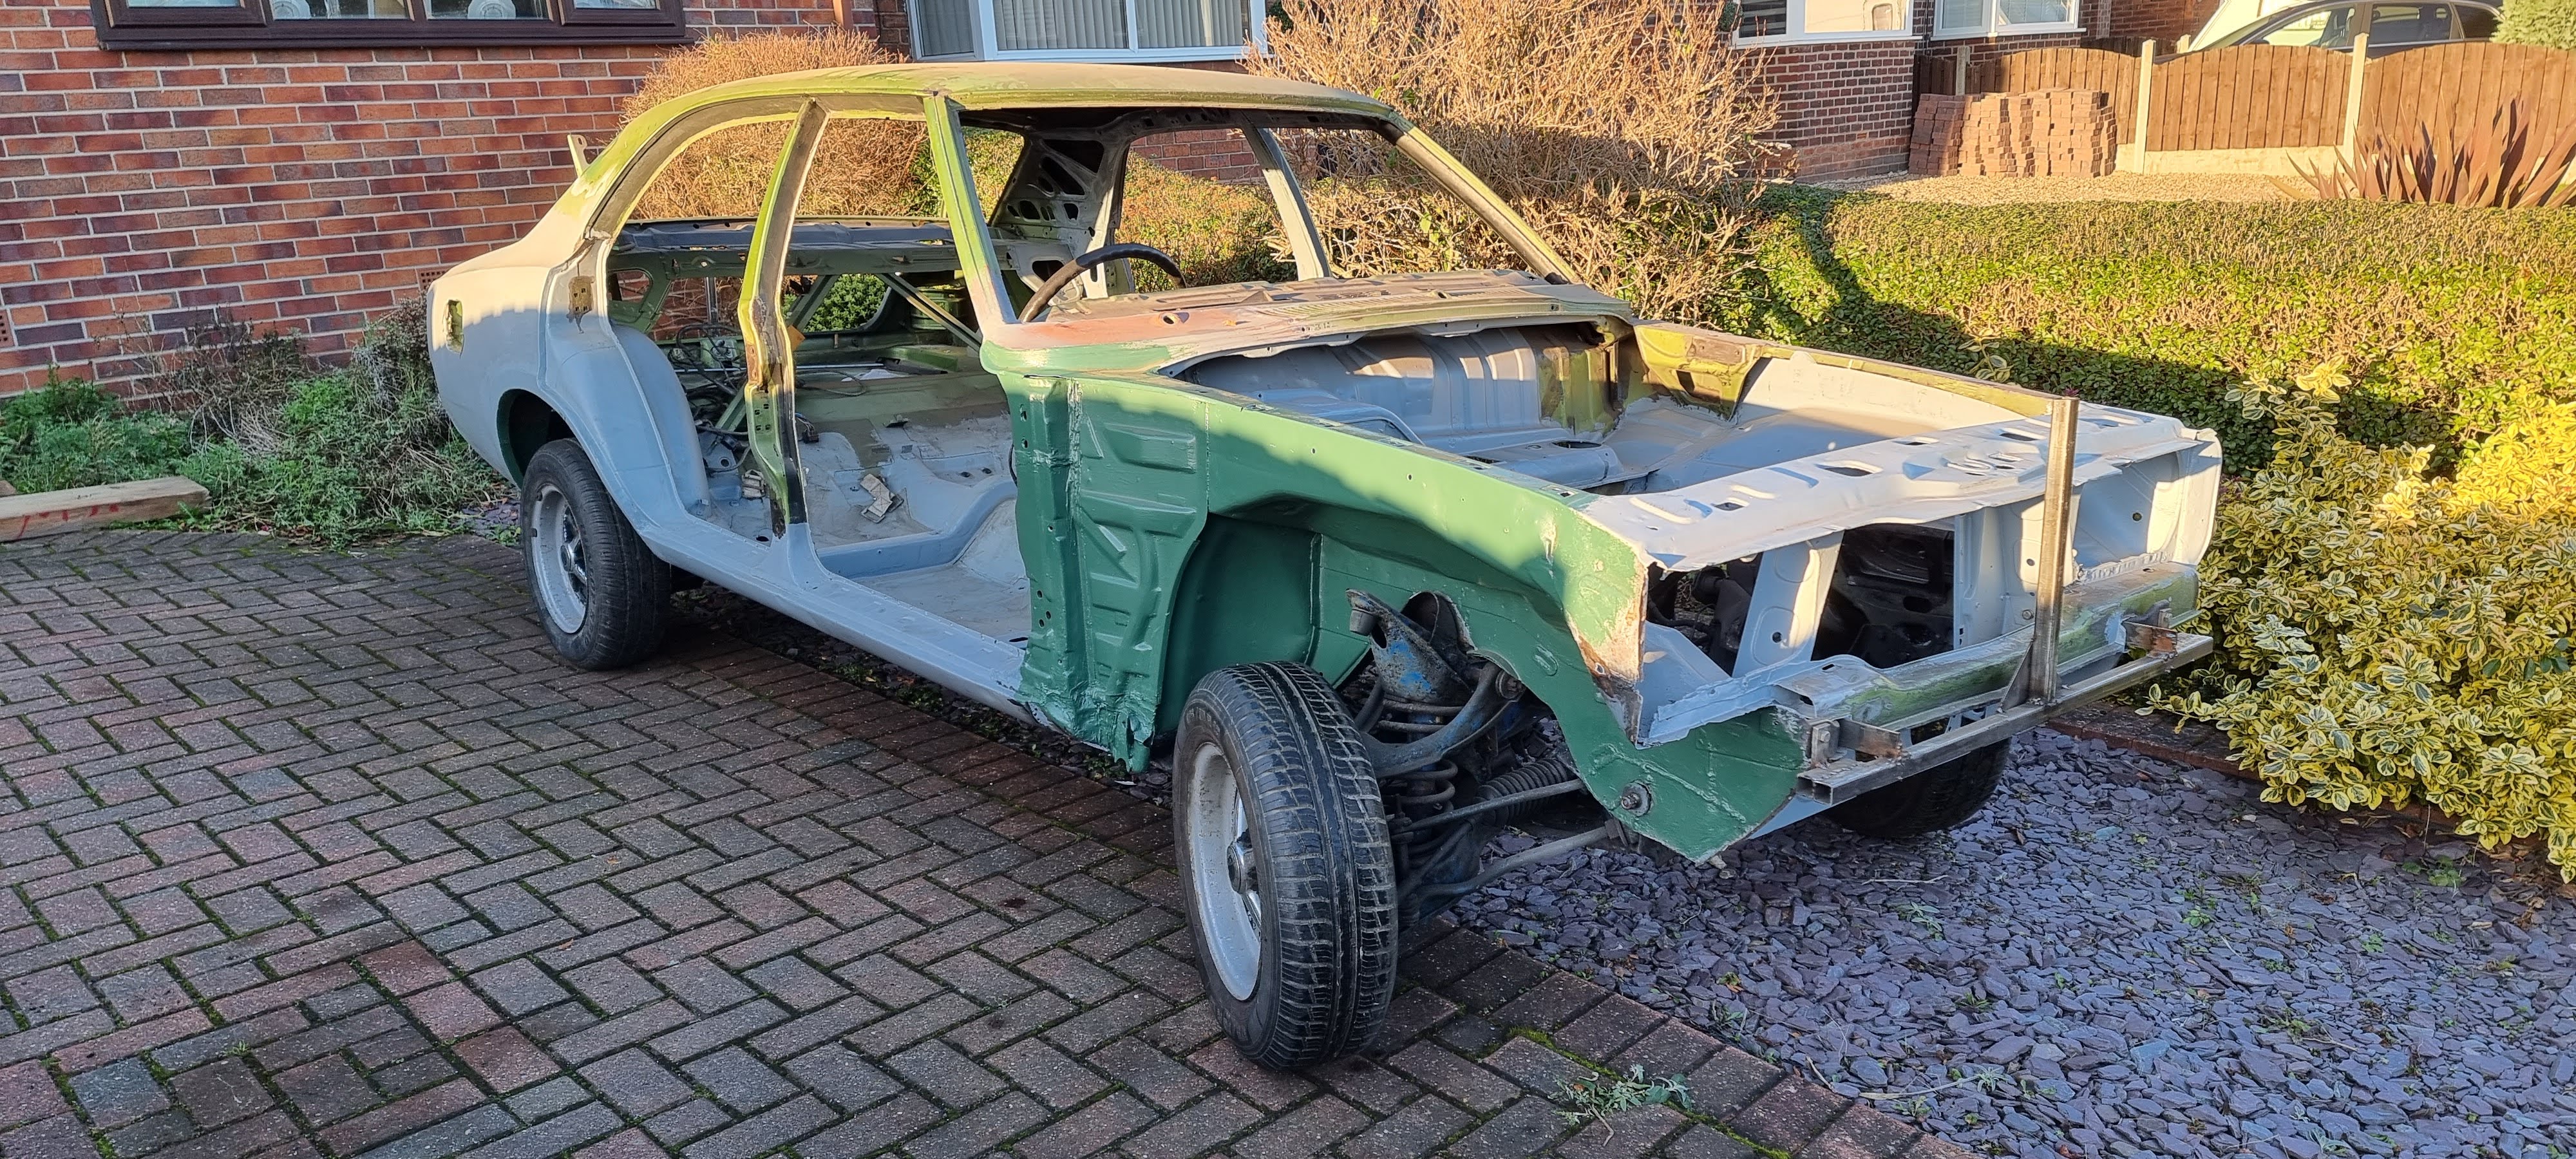
Bare shell
Up to this point everything I've done to the car had been done outside on my daughter's driveway down the road. This is the day I pushed it home and into my own garage.
Bare shell
I've taken everything off that can be taken off, just the suspension, steering and engine block left as I finally push it into the garage.
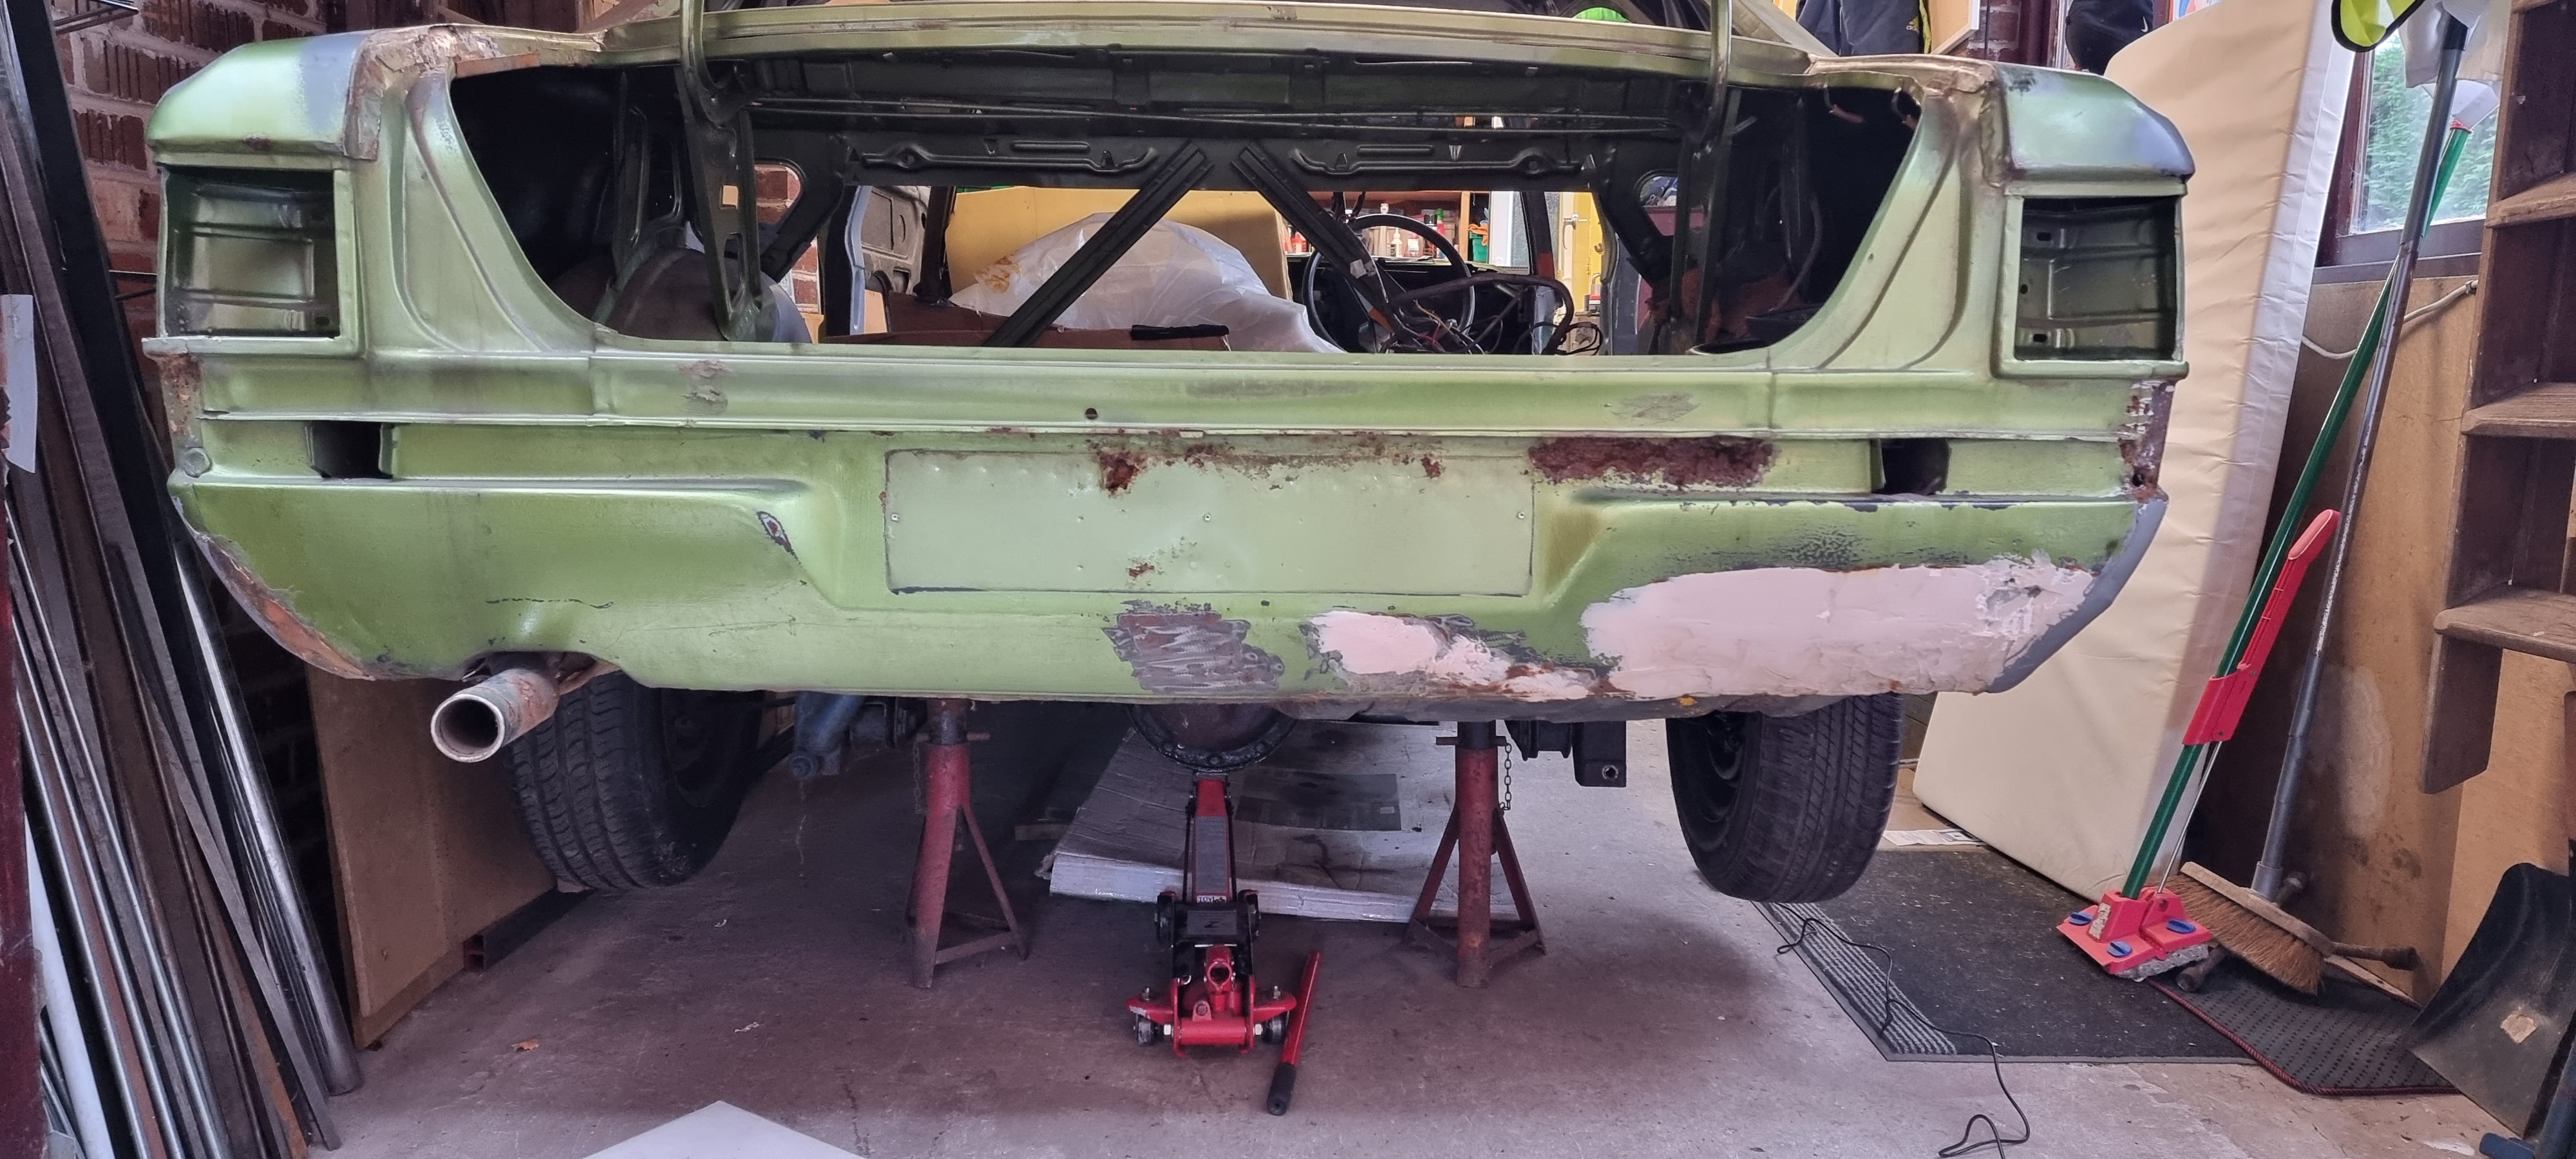
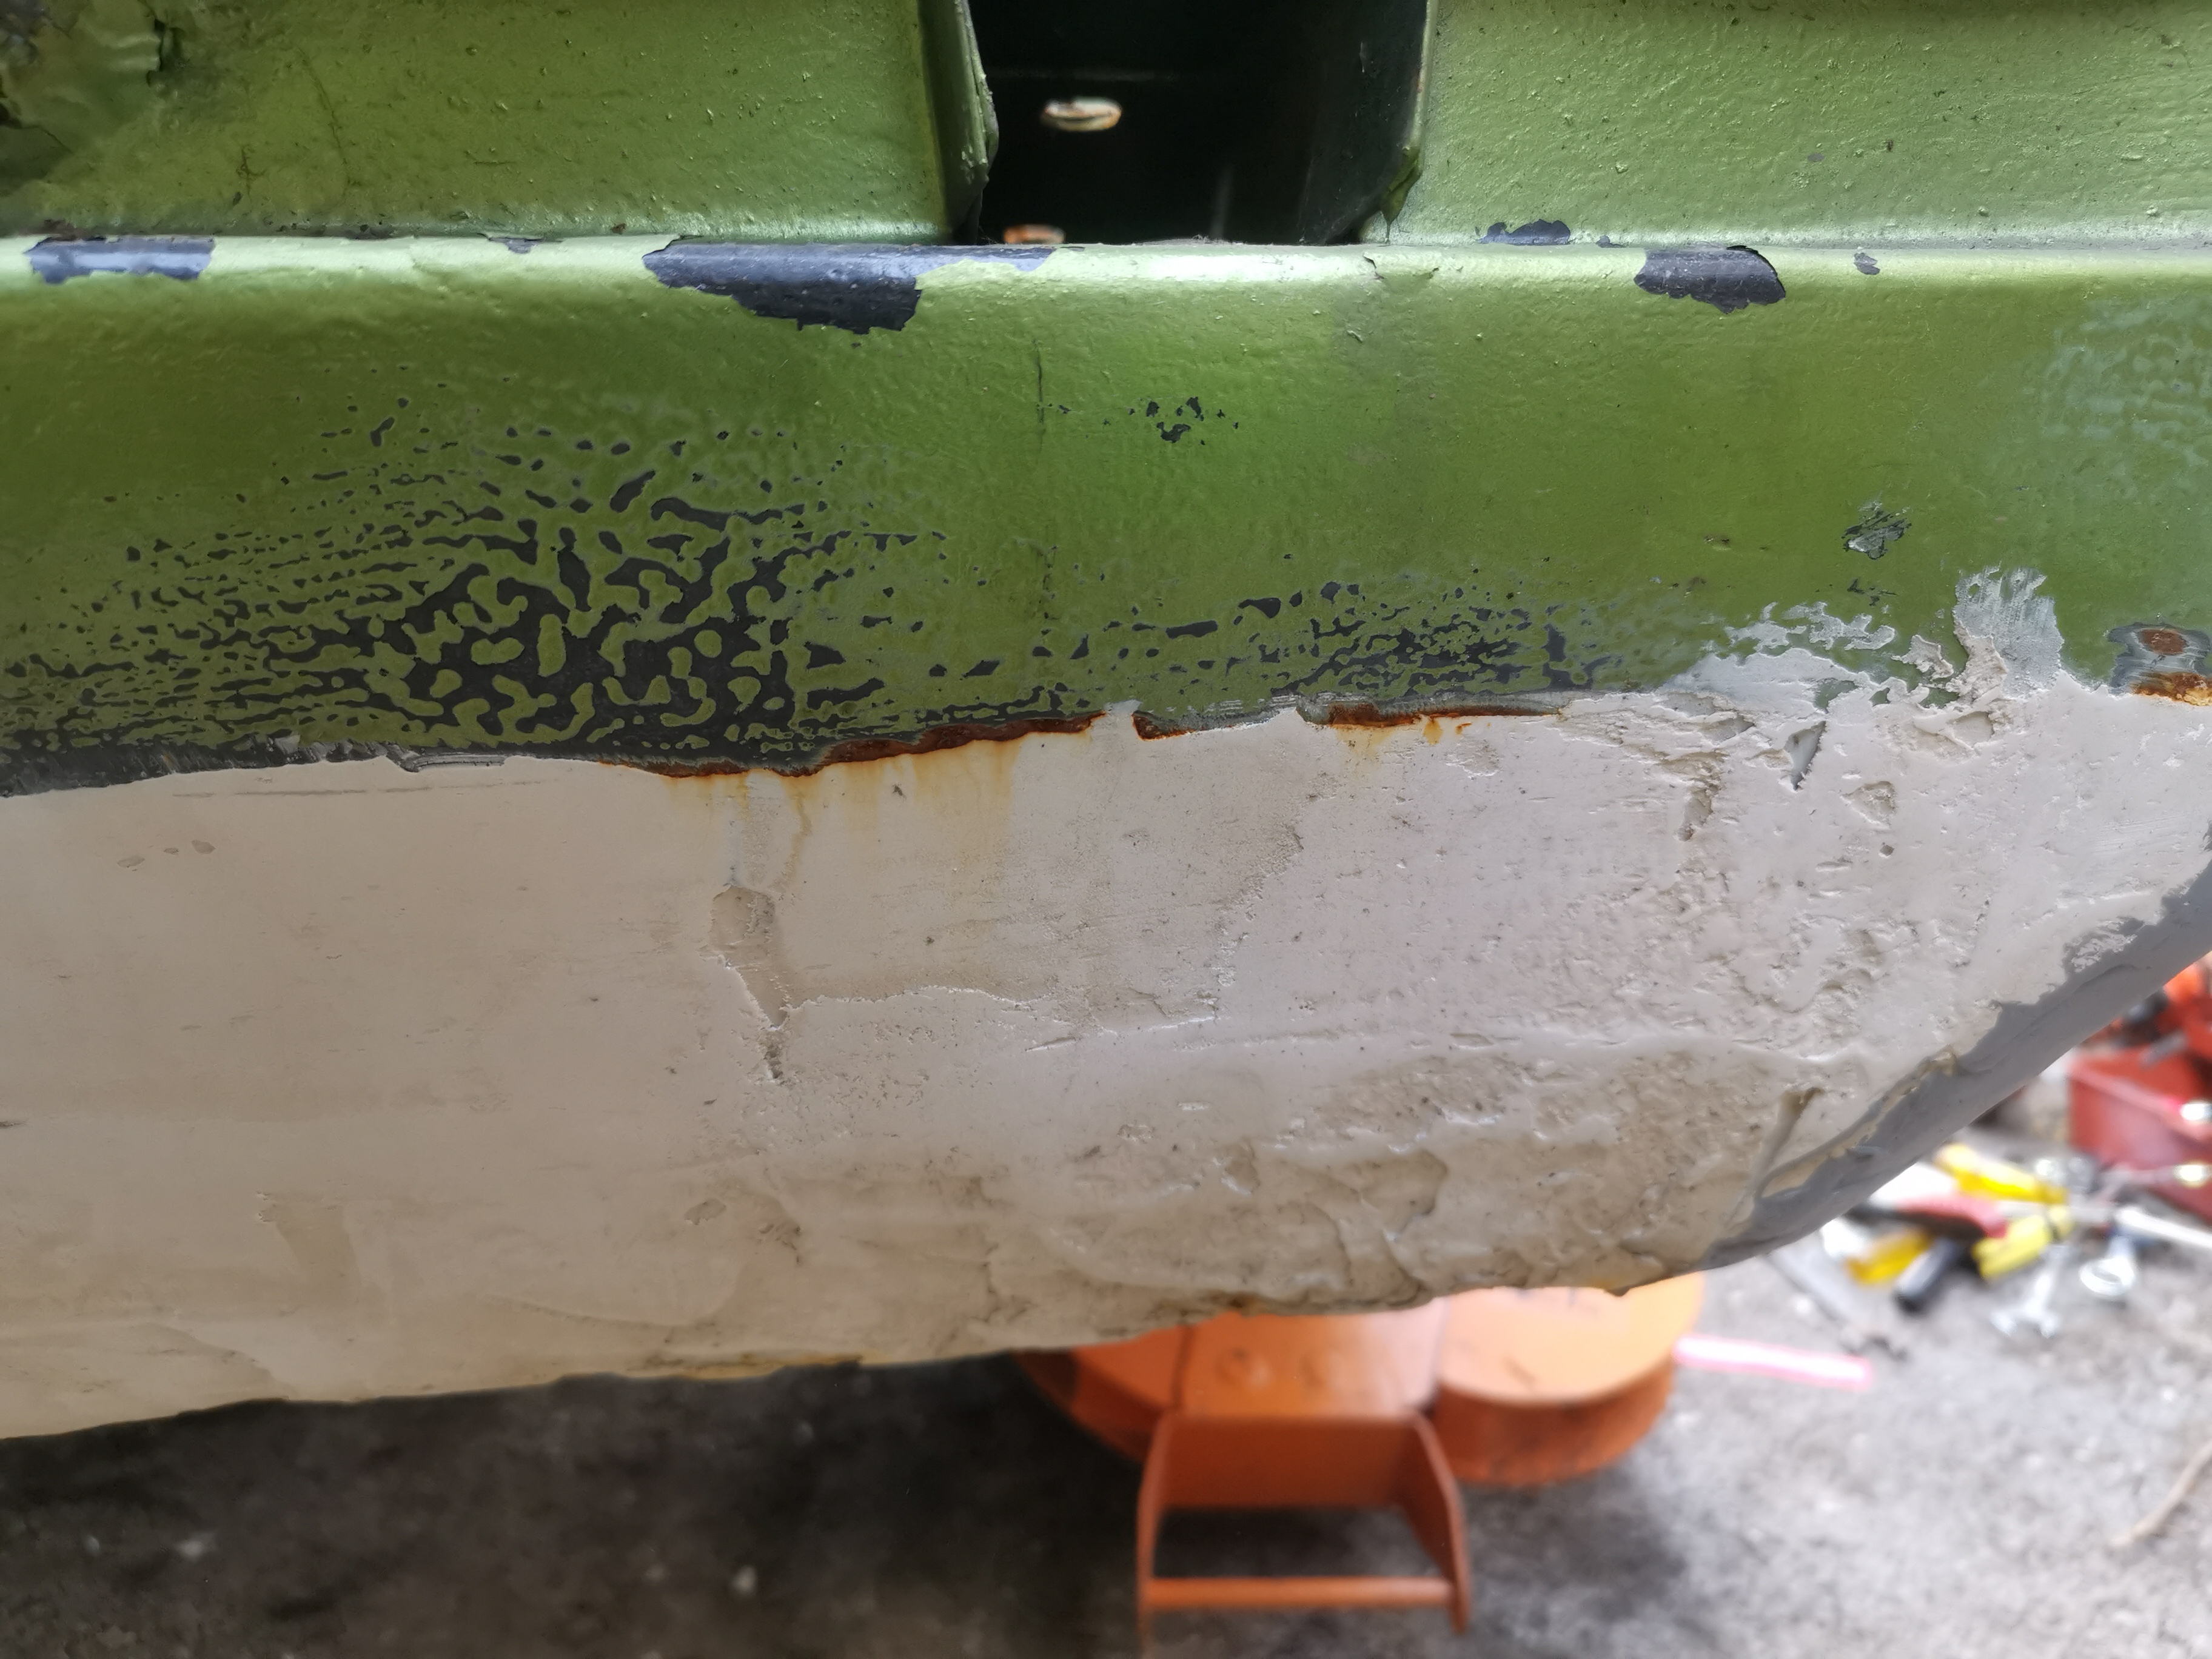
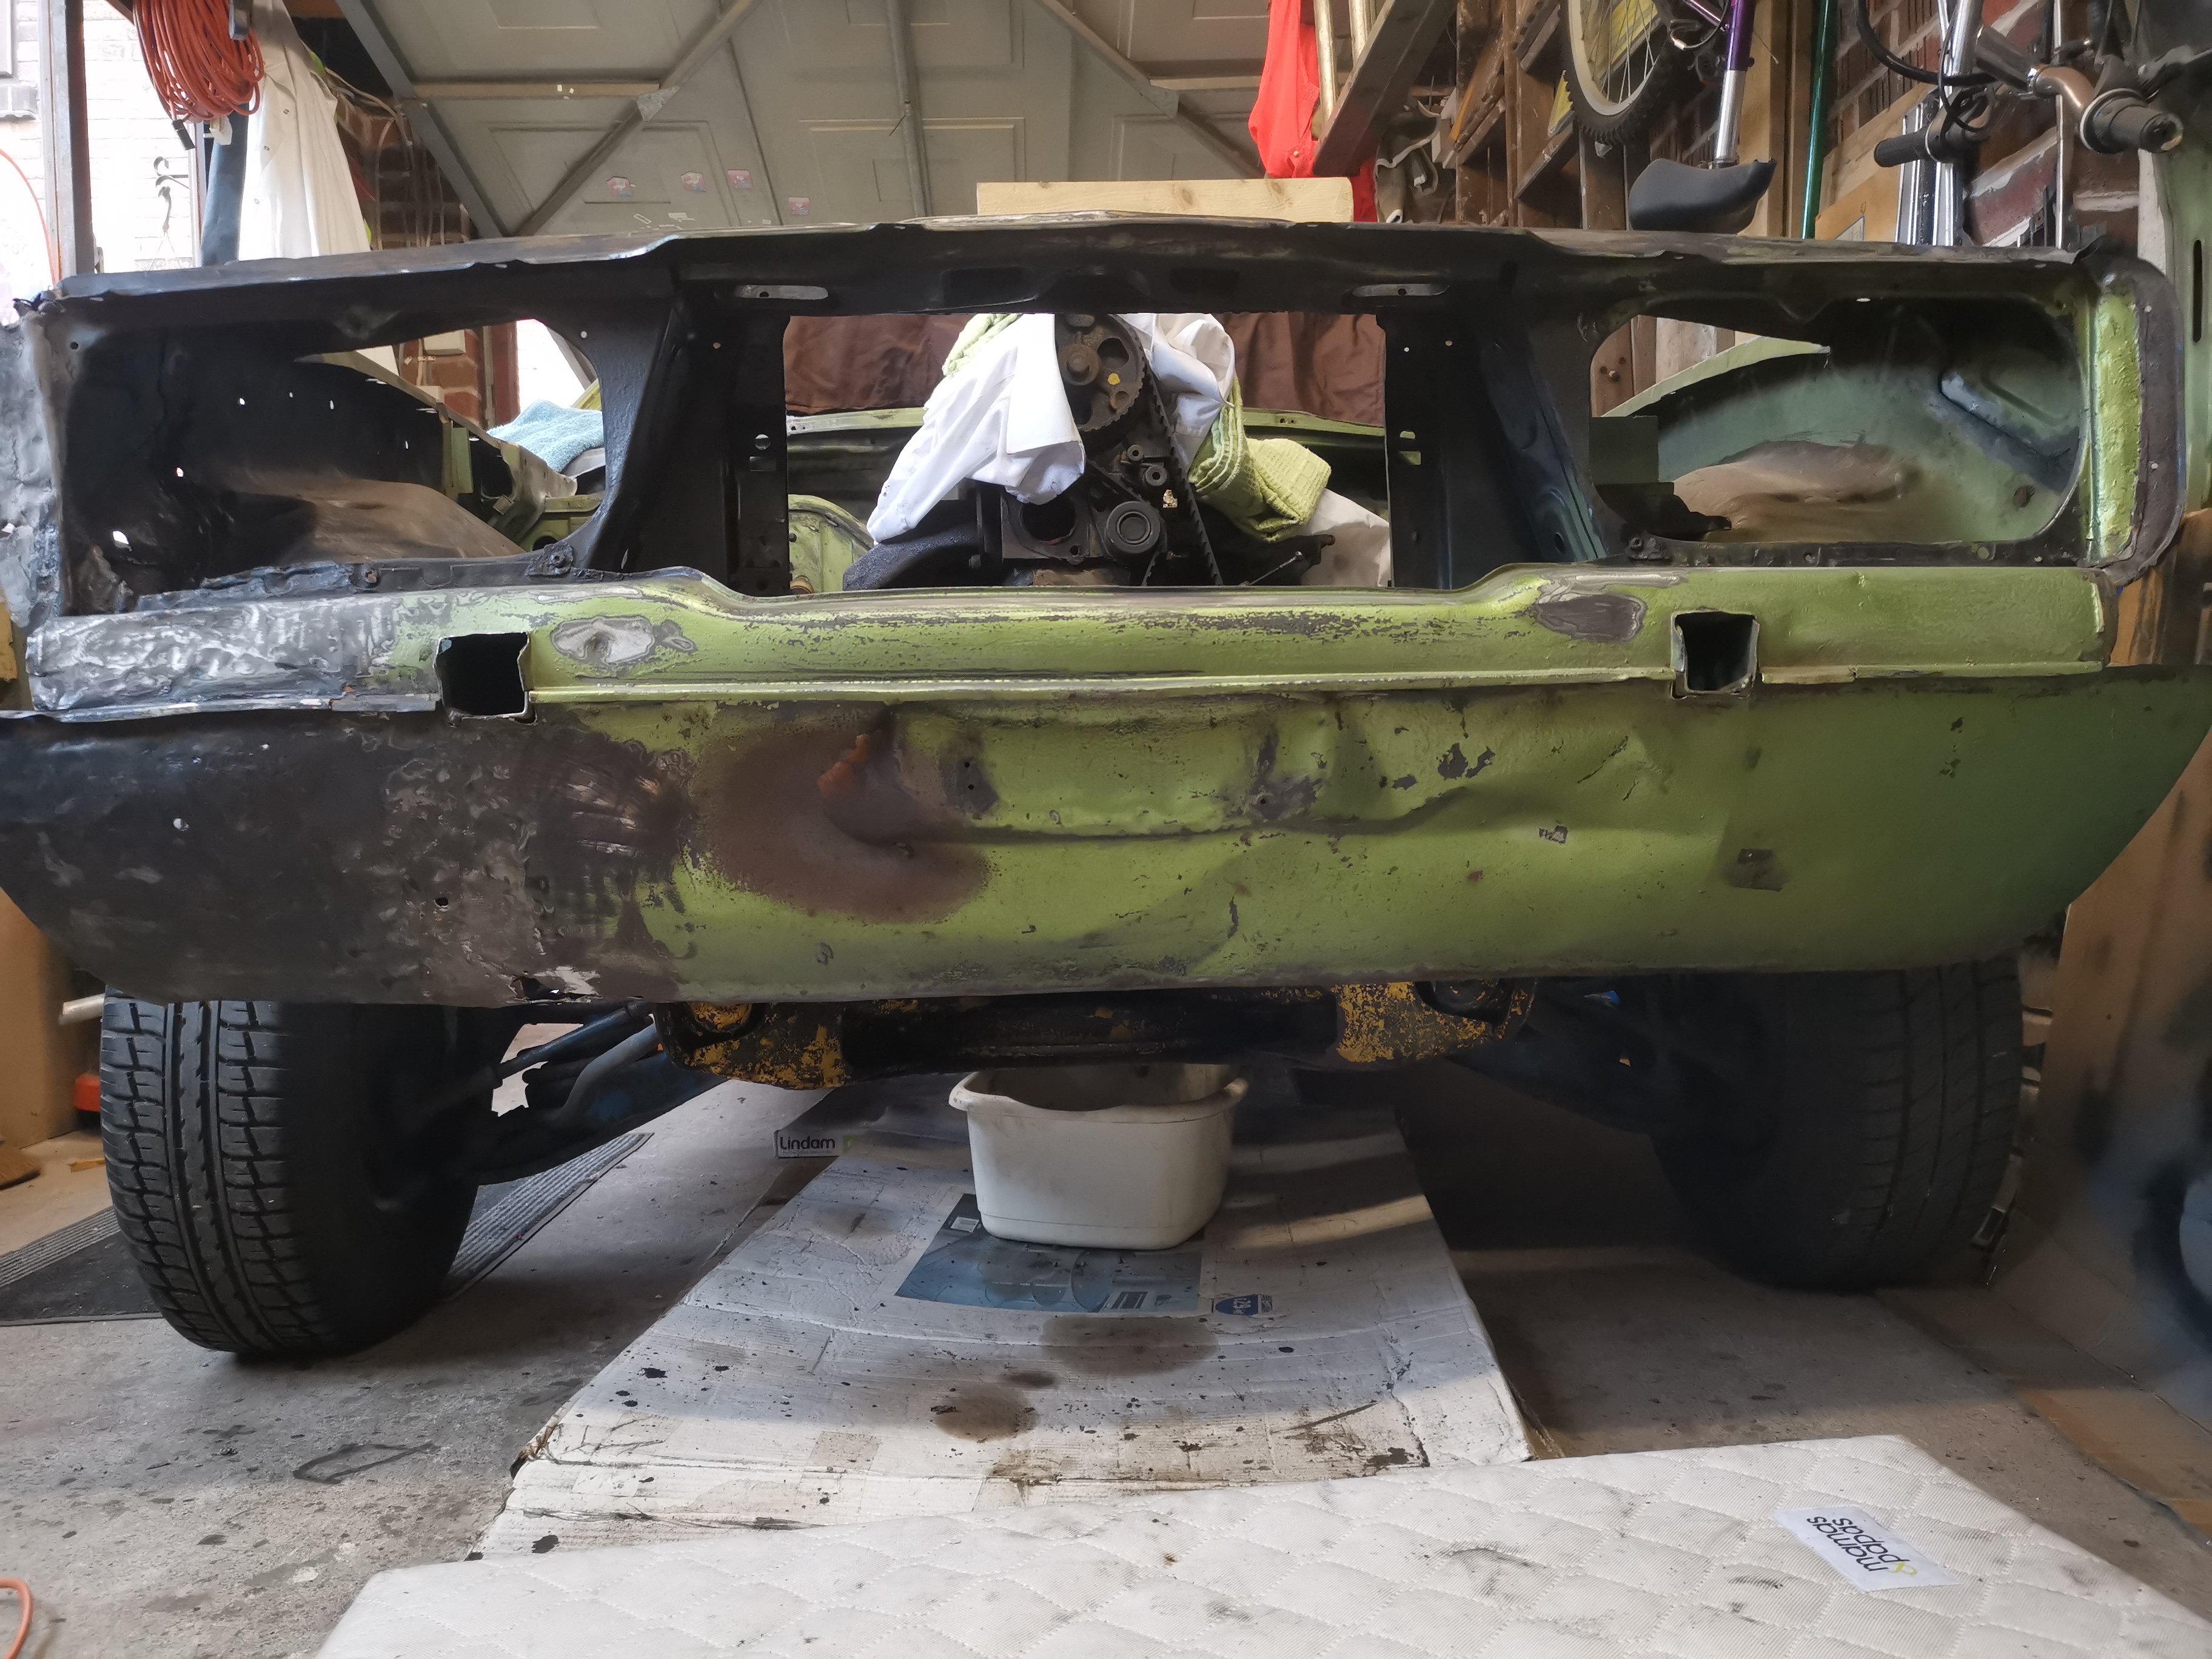
Rear valance
First thing I tackle is the rear valance. It's rusty, dented and full of filler. So I get it up on axle stands and have a close look.
Rear valance
The nearside corner is made of fiberglass by the looks of it.
Rear valance
There's serious rust which was behind the bumper.
Rear valance
I decide it is going to have to be replaced. I start cutting it away and I'm glad I did when I find all this hidden rust behind it.
Rear valance
The rust goes all along the inner valance. It looks like that might need replacing too!

Front Valance
I quickly turned my attention away from the rear valance and moved to the front. It must be in better condition... lol The offside corner looks all beaten up like it has been in an accident and hit back into 'shape' with a big hammer!
Front Valance
Not that it was anything like the correct 'shape'
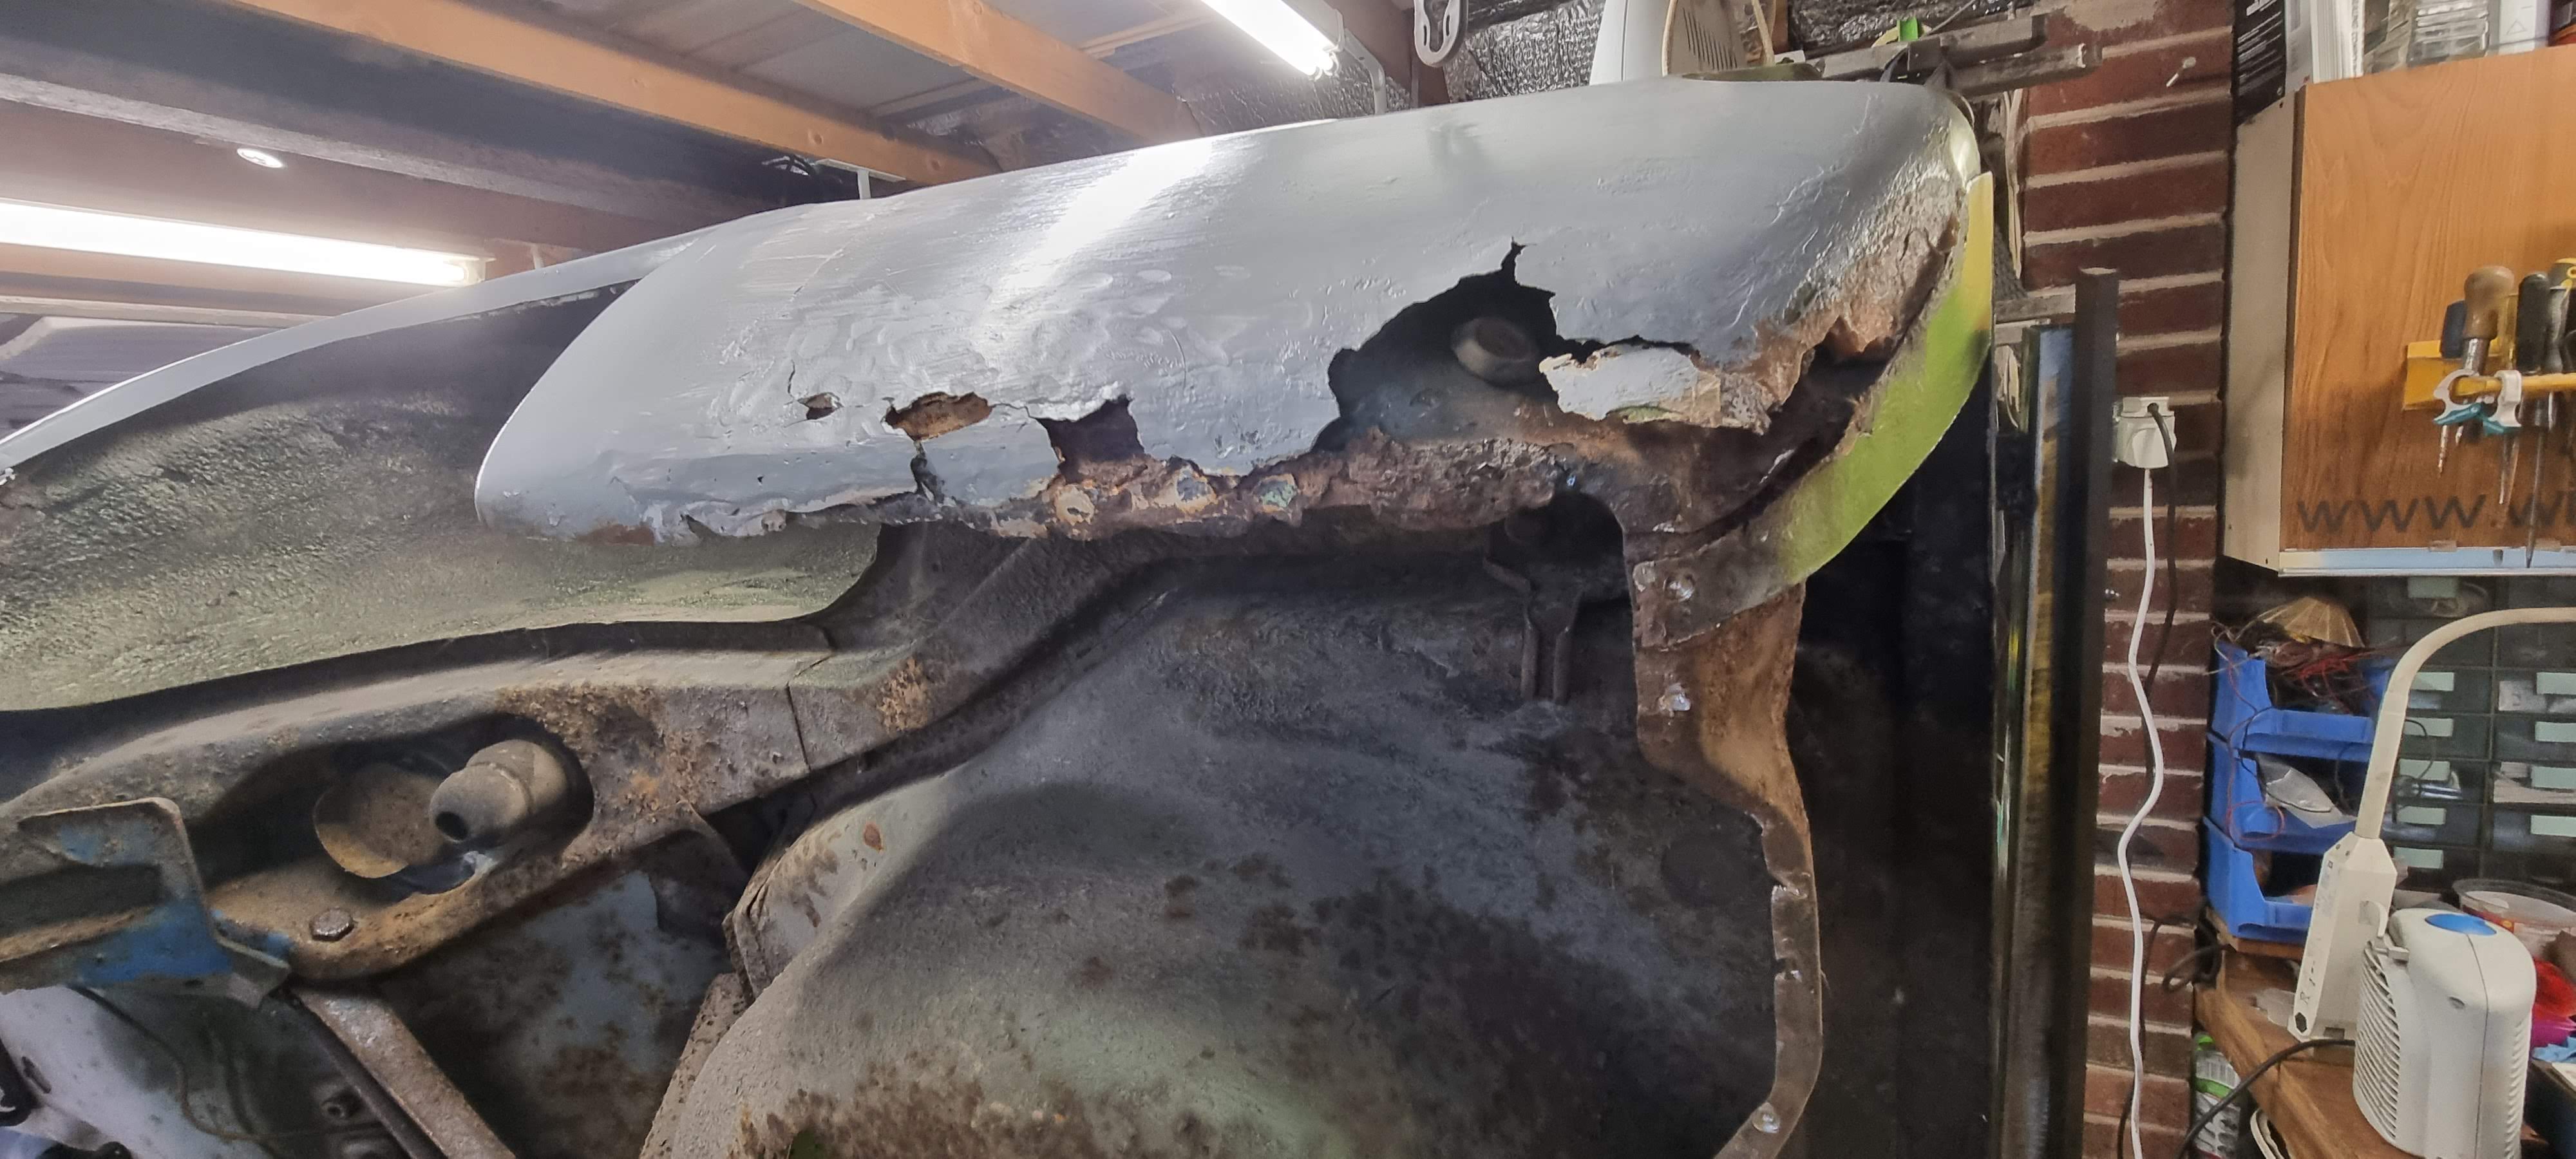
Front headlight surround
The outer edge of the headlight surround was partially missing and what was there was bent and damaged.
Front headlight surround
It also drooped downwards. This was supposed to be level!
Front headlight surround
Again I exposed lots of hidden rust here as well.
Front valance
It's not just the offside corner that's damaged though
Front valance
The rest of the valance is going to have to come off because of the damage.
Front valance
I drilled out all the spot welds and peeled the valance off in the hope that the inner valance was salvageable.
Front valance
When I finally got it off I found it was indeed rusty. However not actually as rusty as it could have been with only a small section missing.
Front valance
Close-up of the missing section.
Front valance
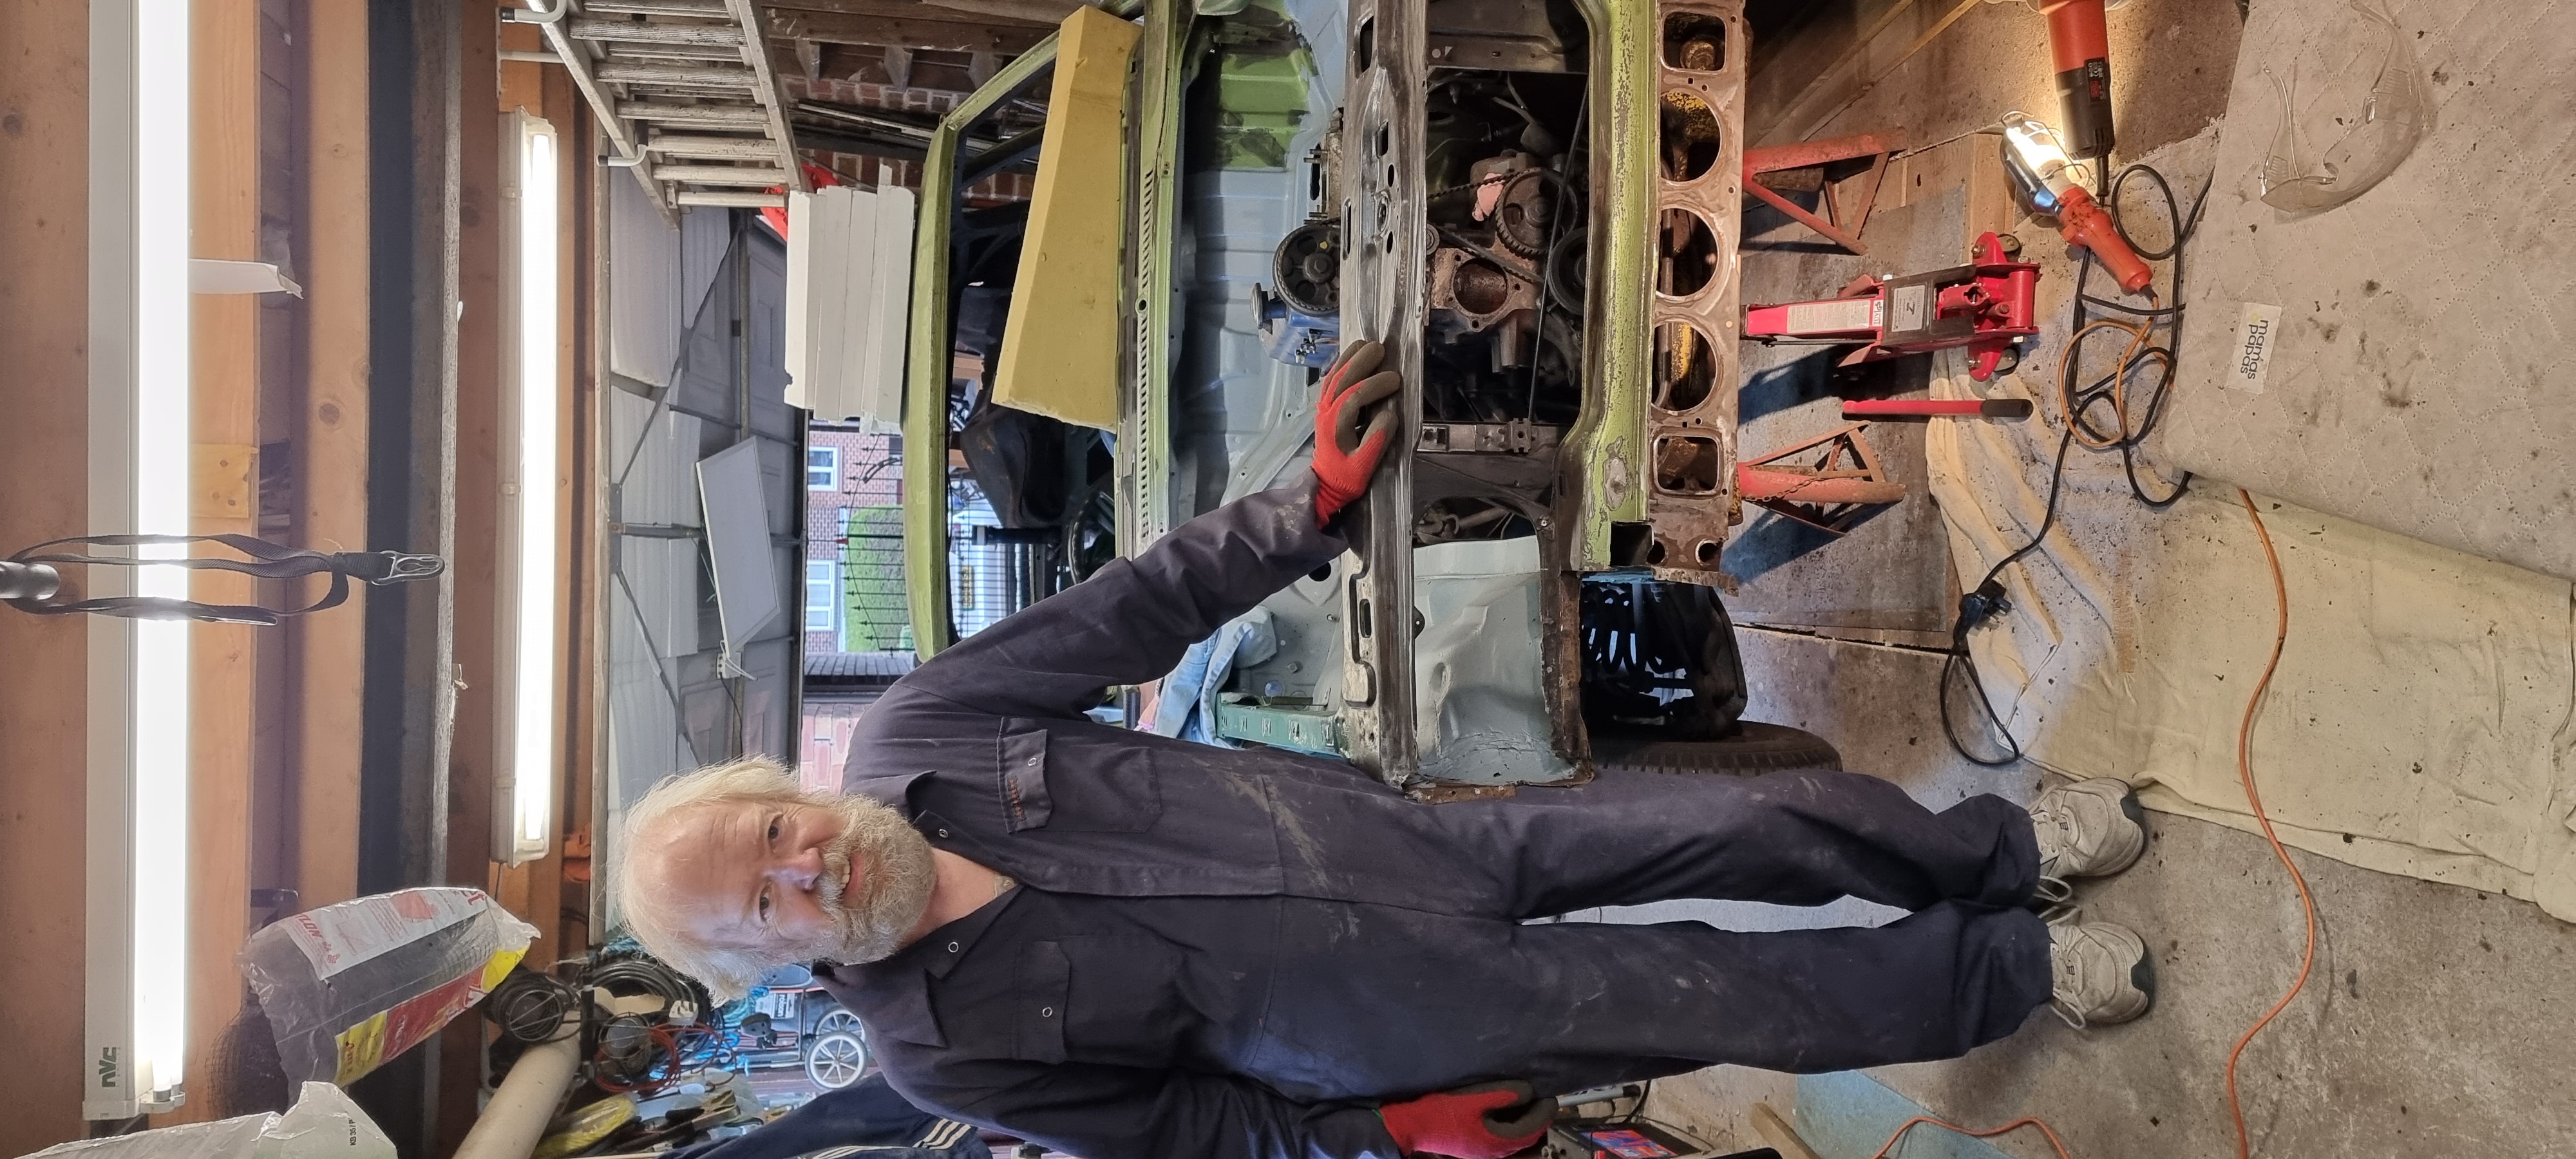
This is me looking rather old!!
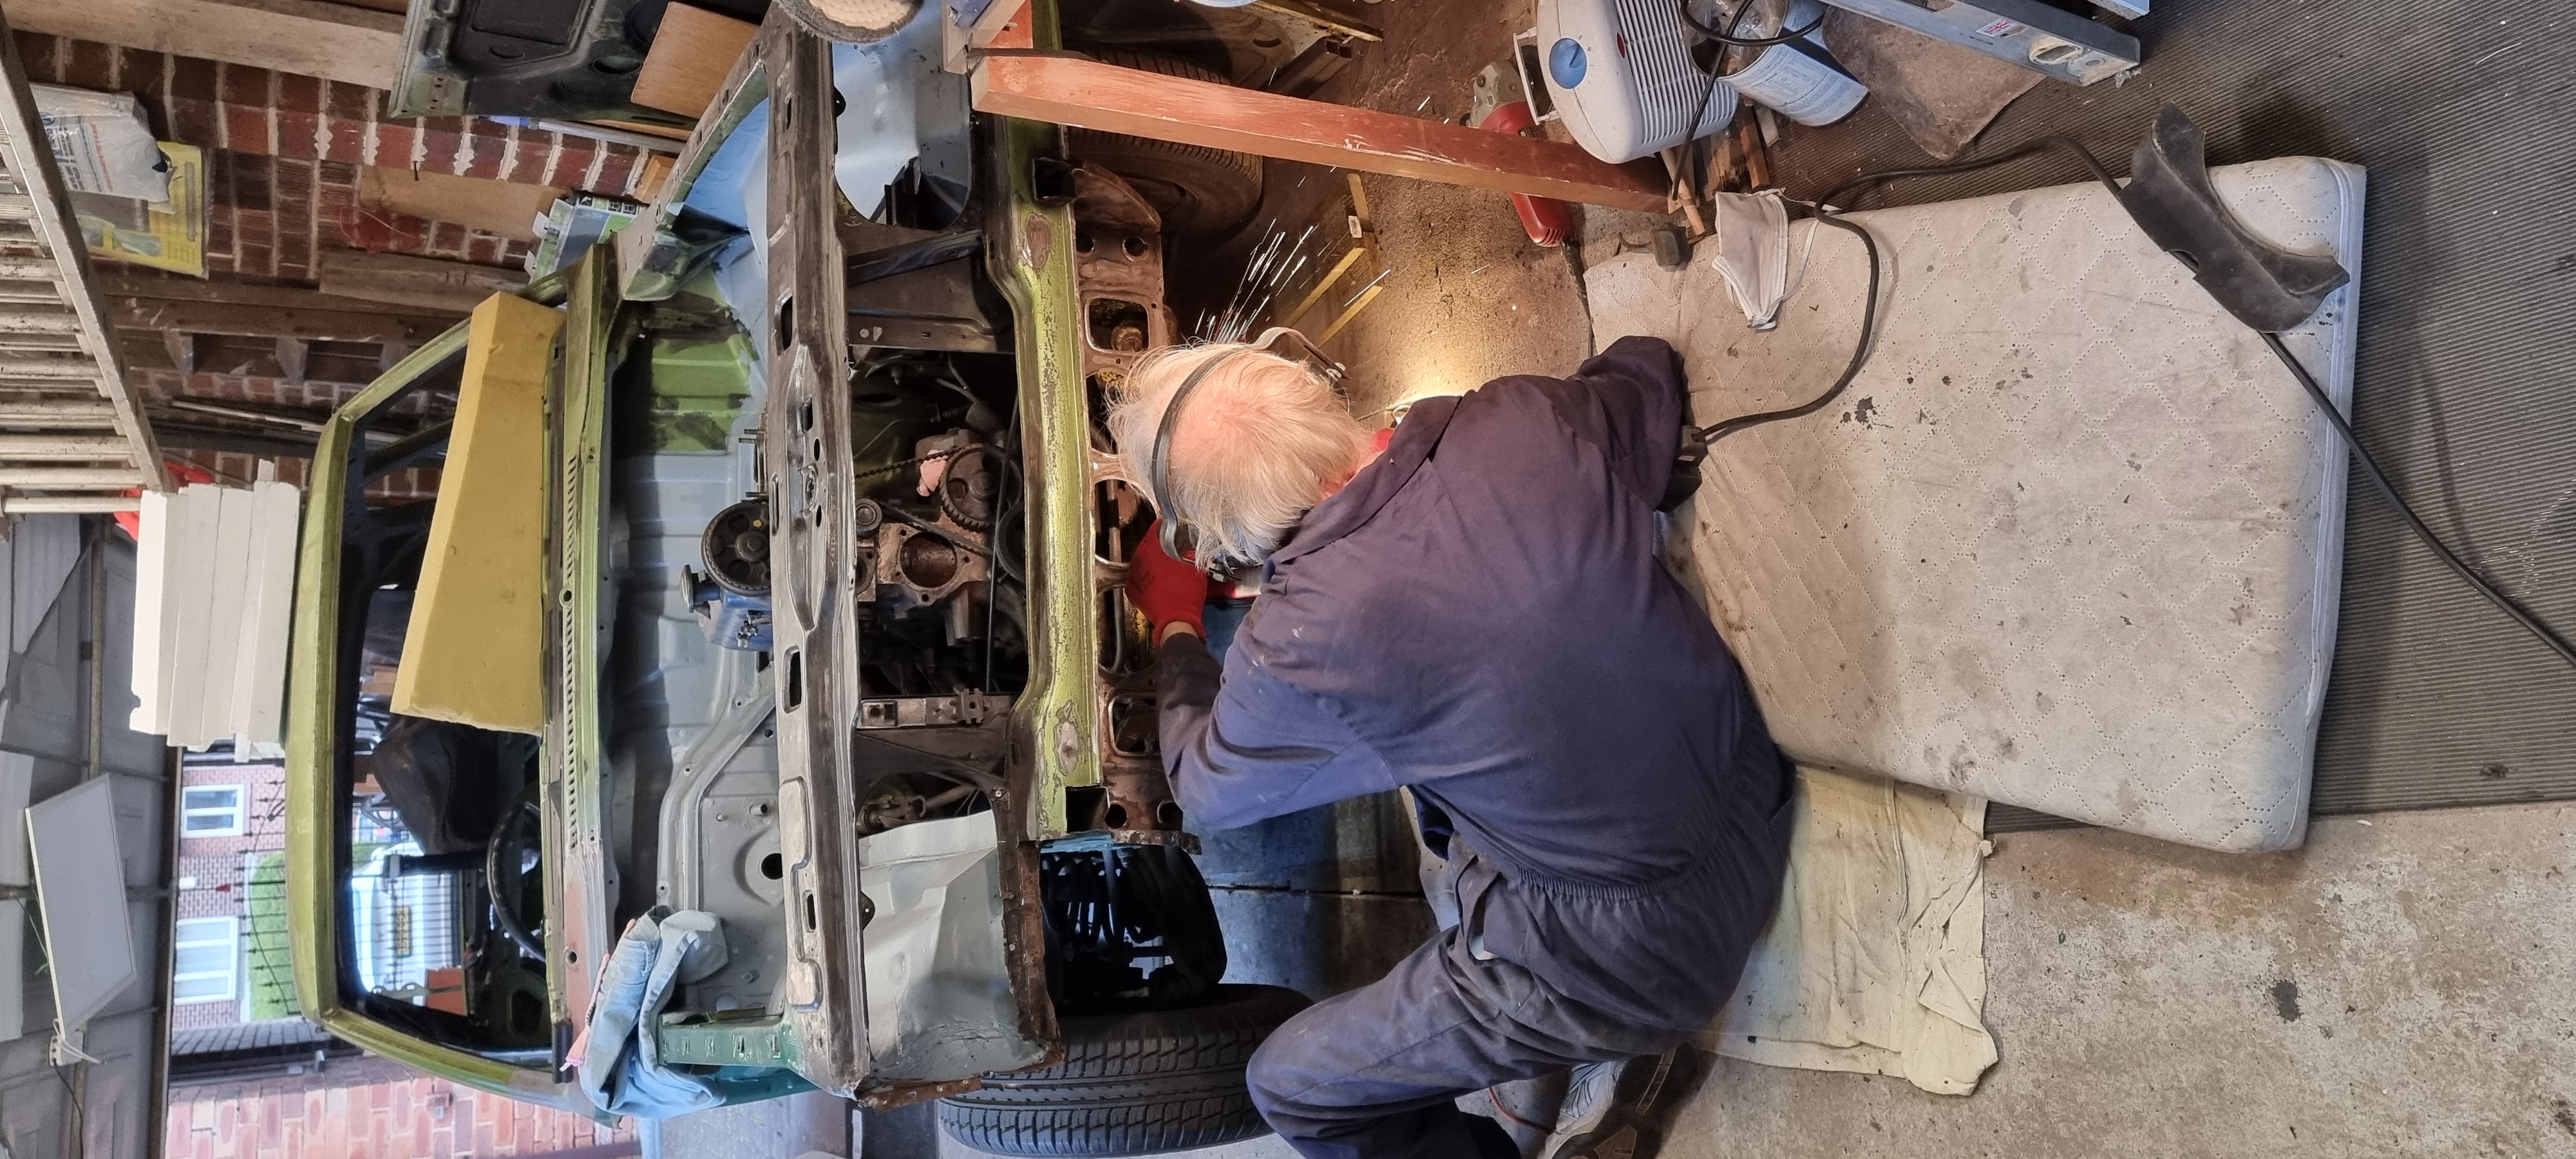
Front valance
Just to prove it's me doing the work, here's an action shot!! Sparks and all. lol
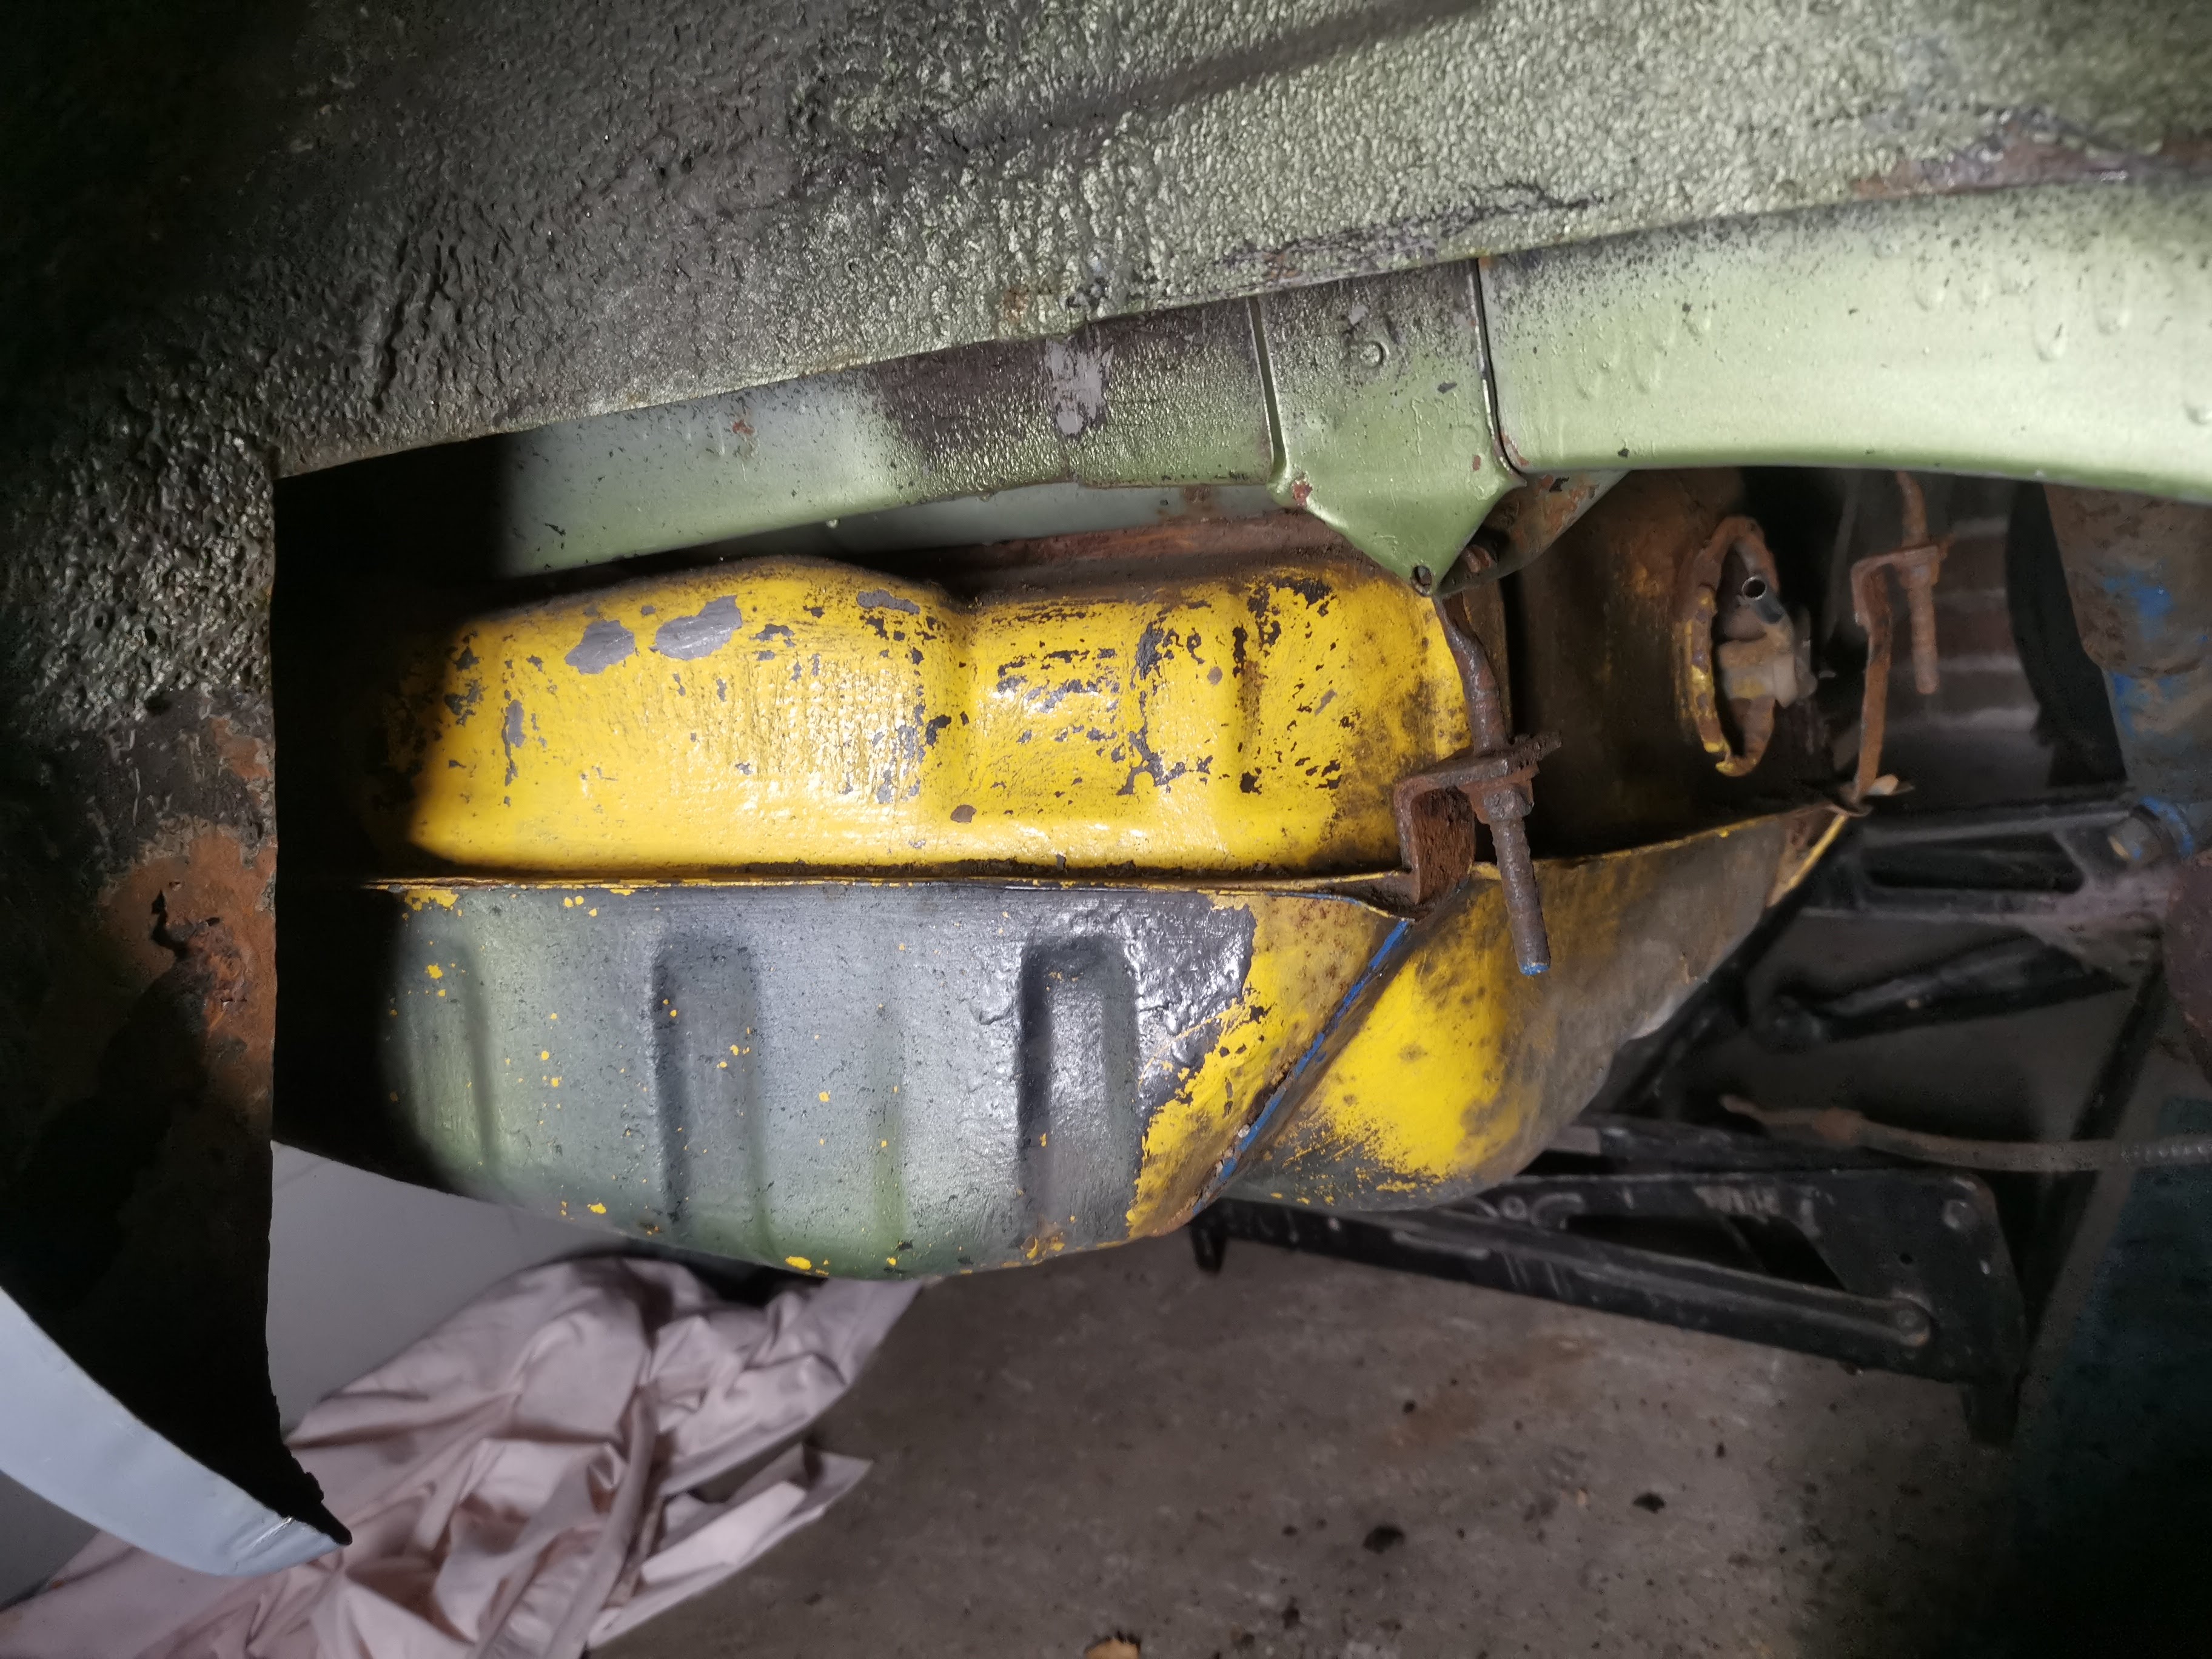
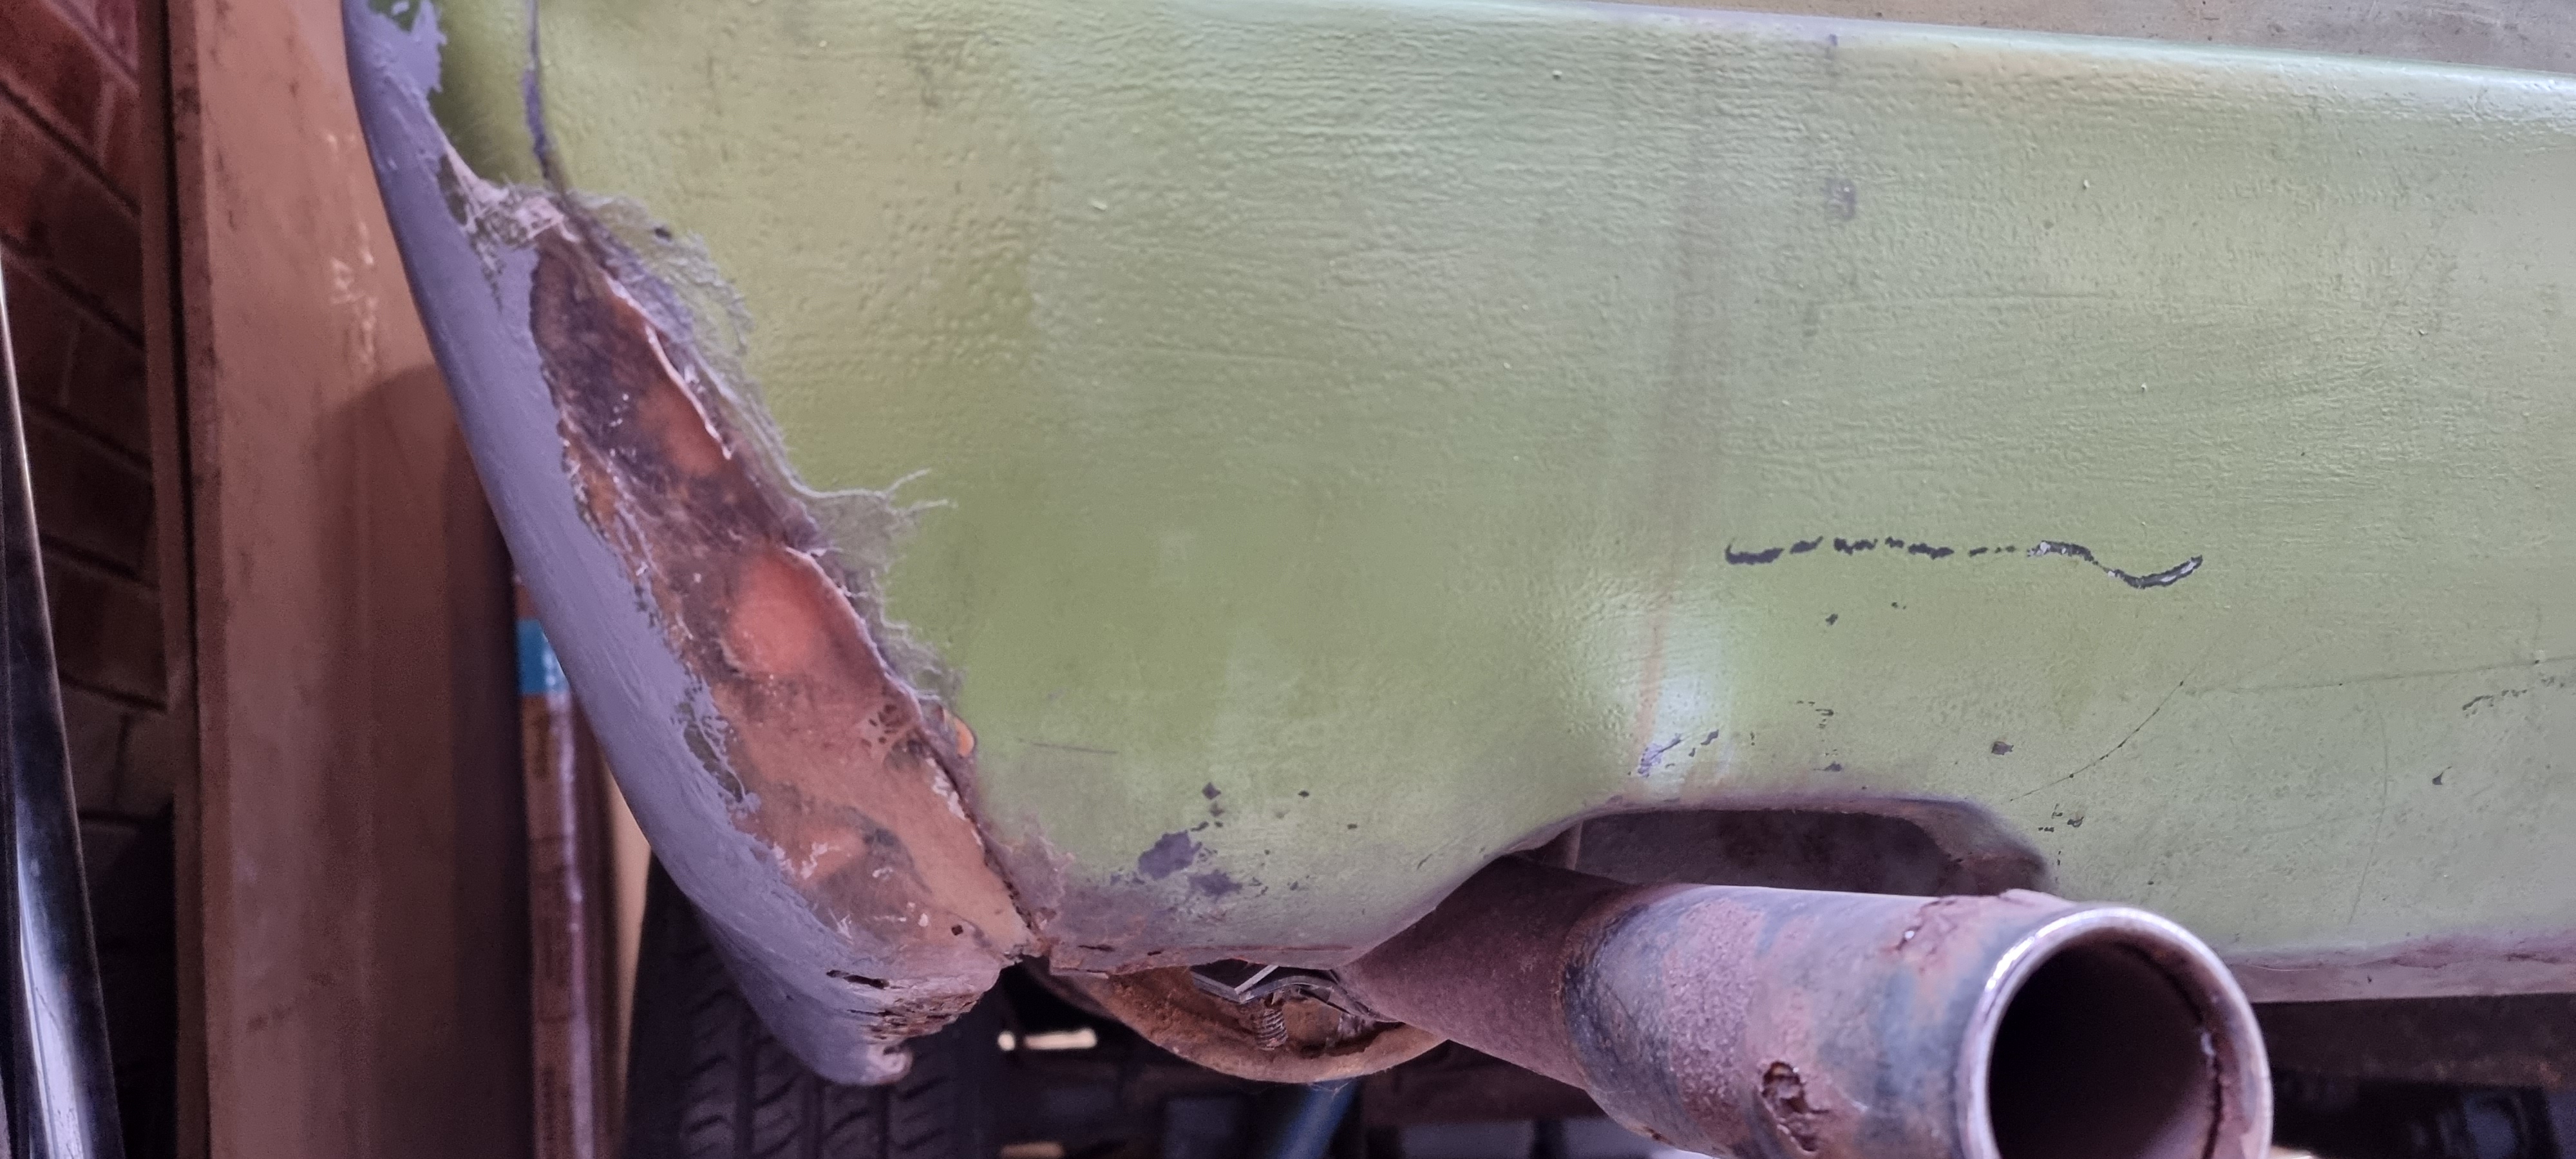
Petrol tank
I wonder why much of the petrol tank is painted yellow. Perhaps it had been replaced in the past, possibly by one from a scrap yard.
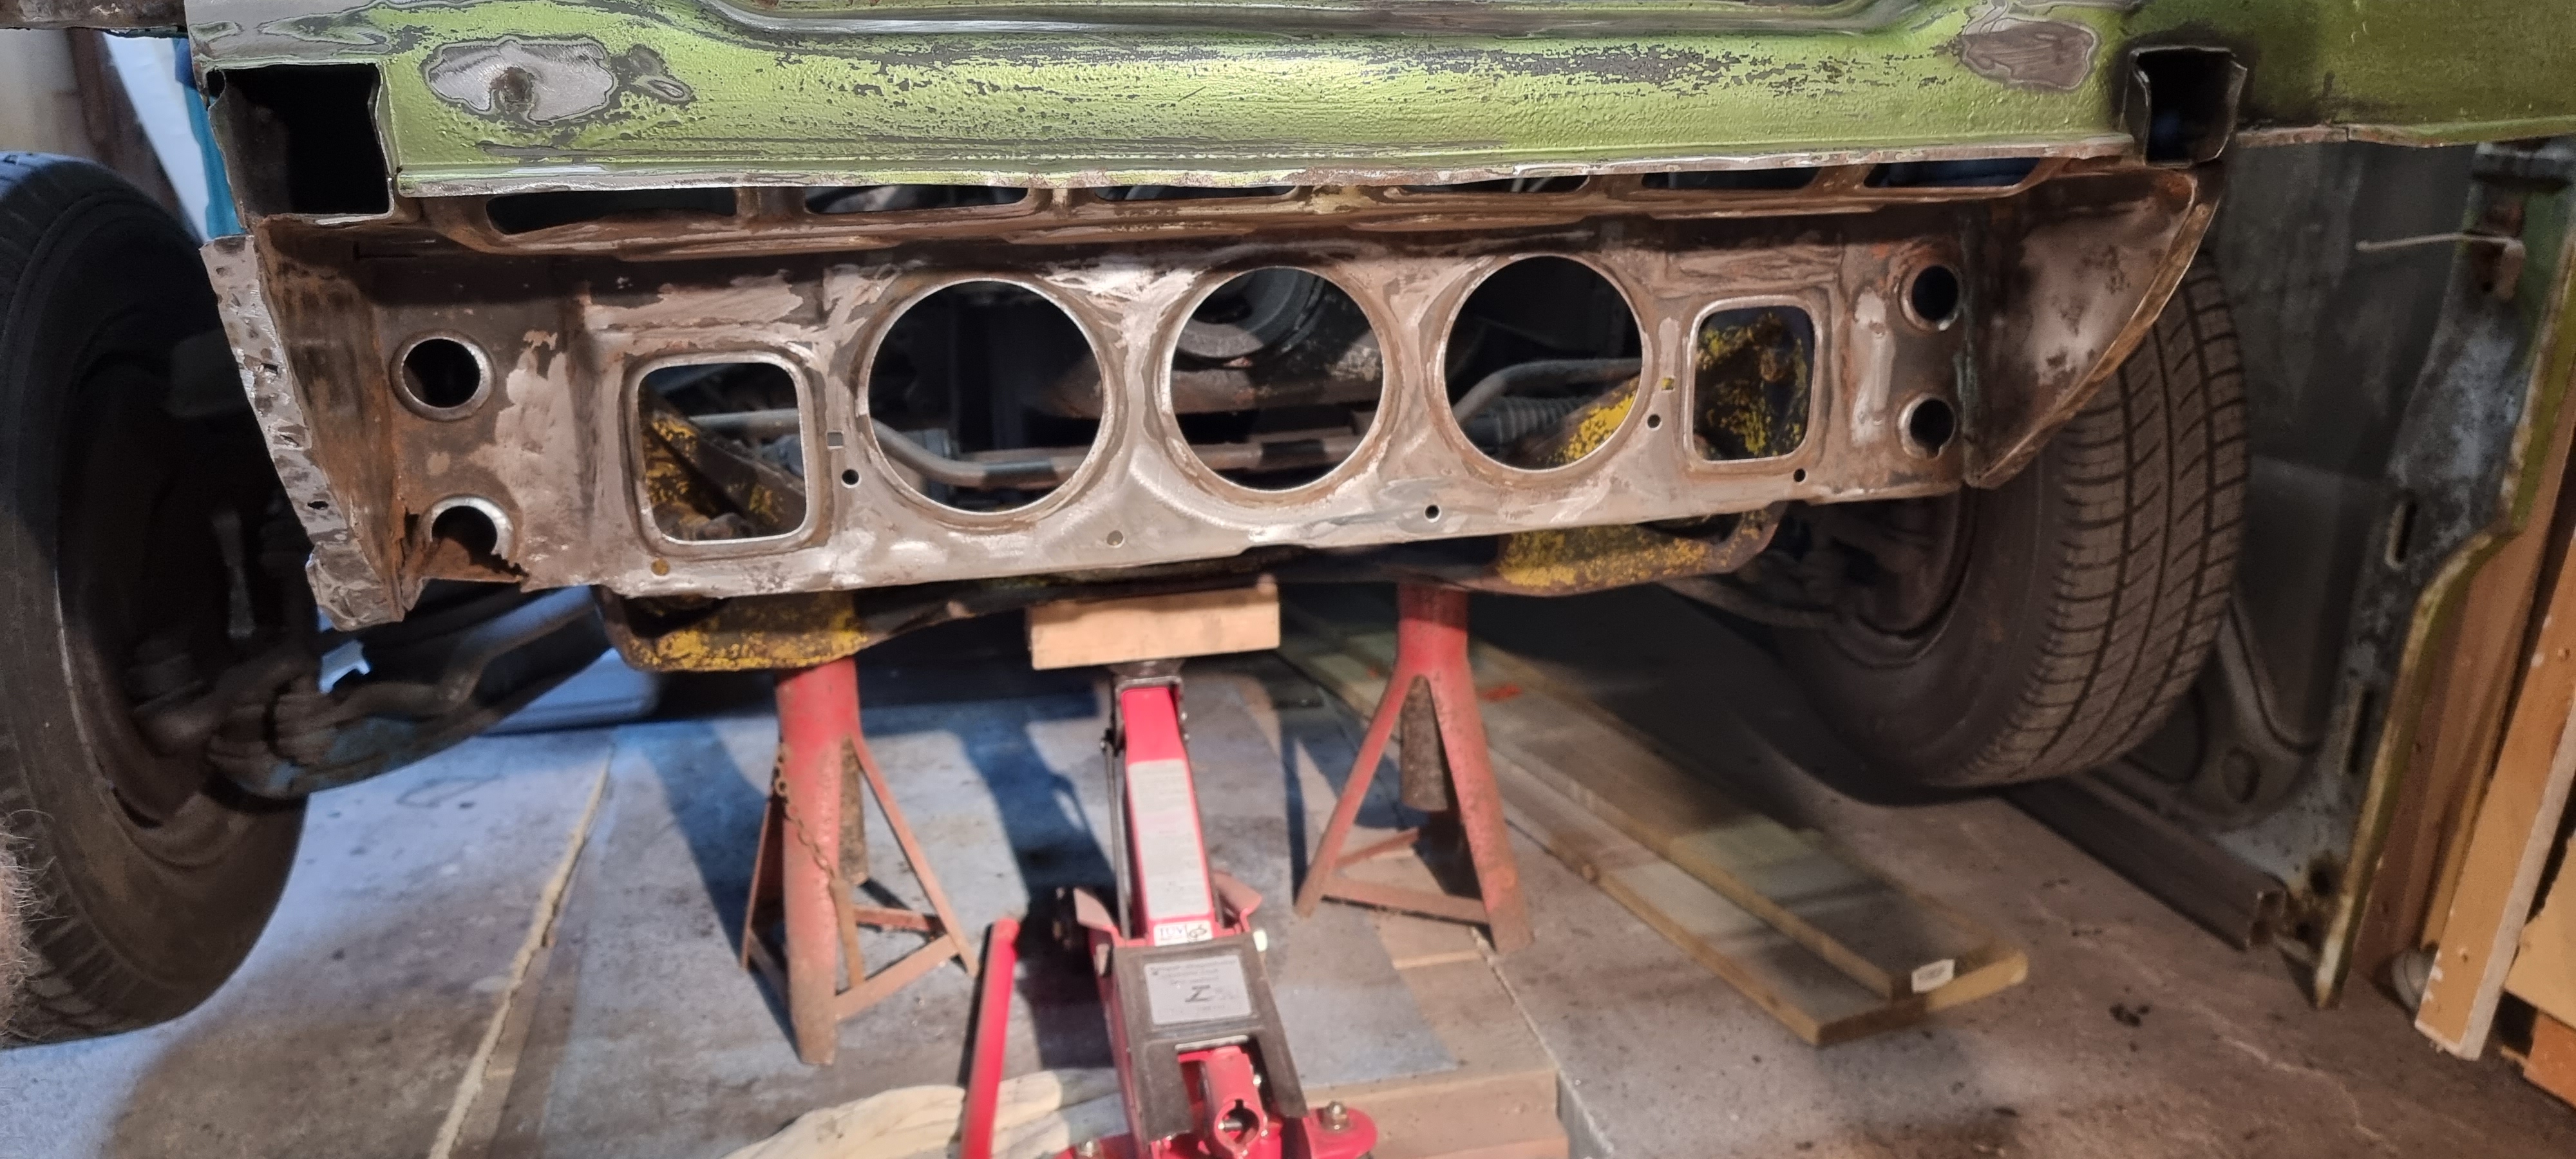
Front valance
After a bit of work with the polycarbide disc the rust is gone and the inner valance doesn't look too bad.

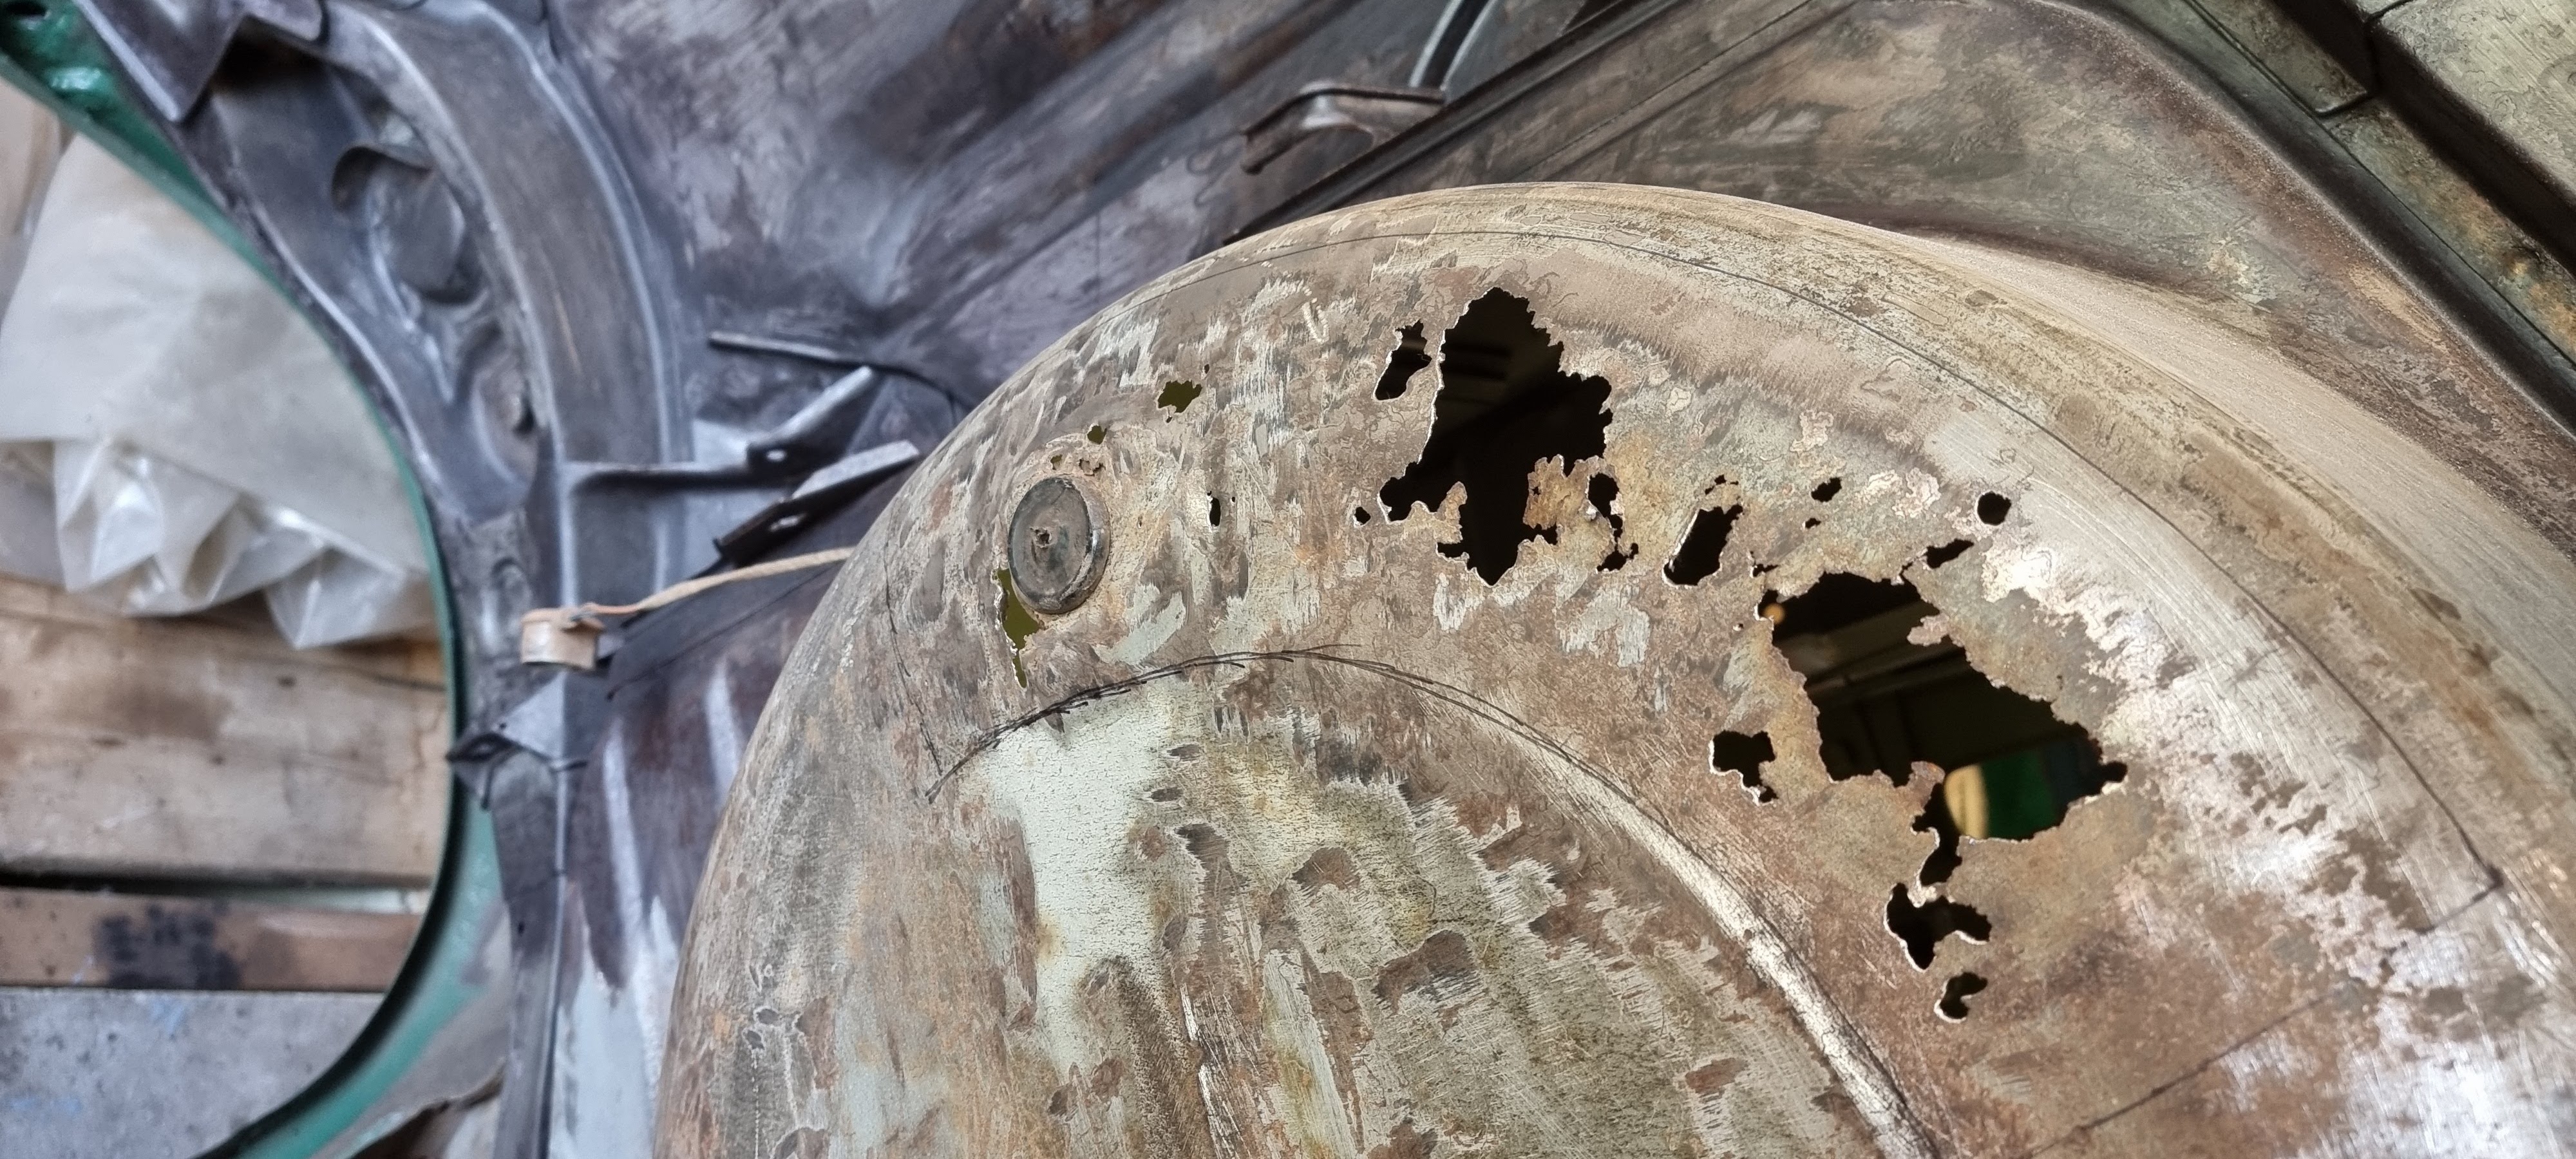
Offside rear wheel arch
There was a small hole in the inner wing in the rear wheel arch. However, when I cleaned the old under seal off, it wasn't a small hole at all, it was a big one!
Offside rear wheel arch
I cut it out and inserted a new section. Not the easiest place to learn to weld lol
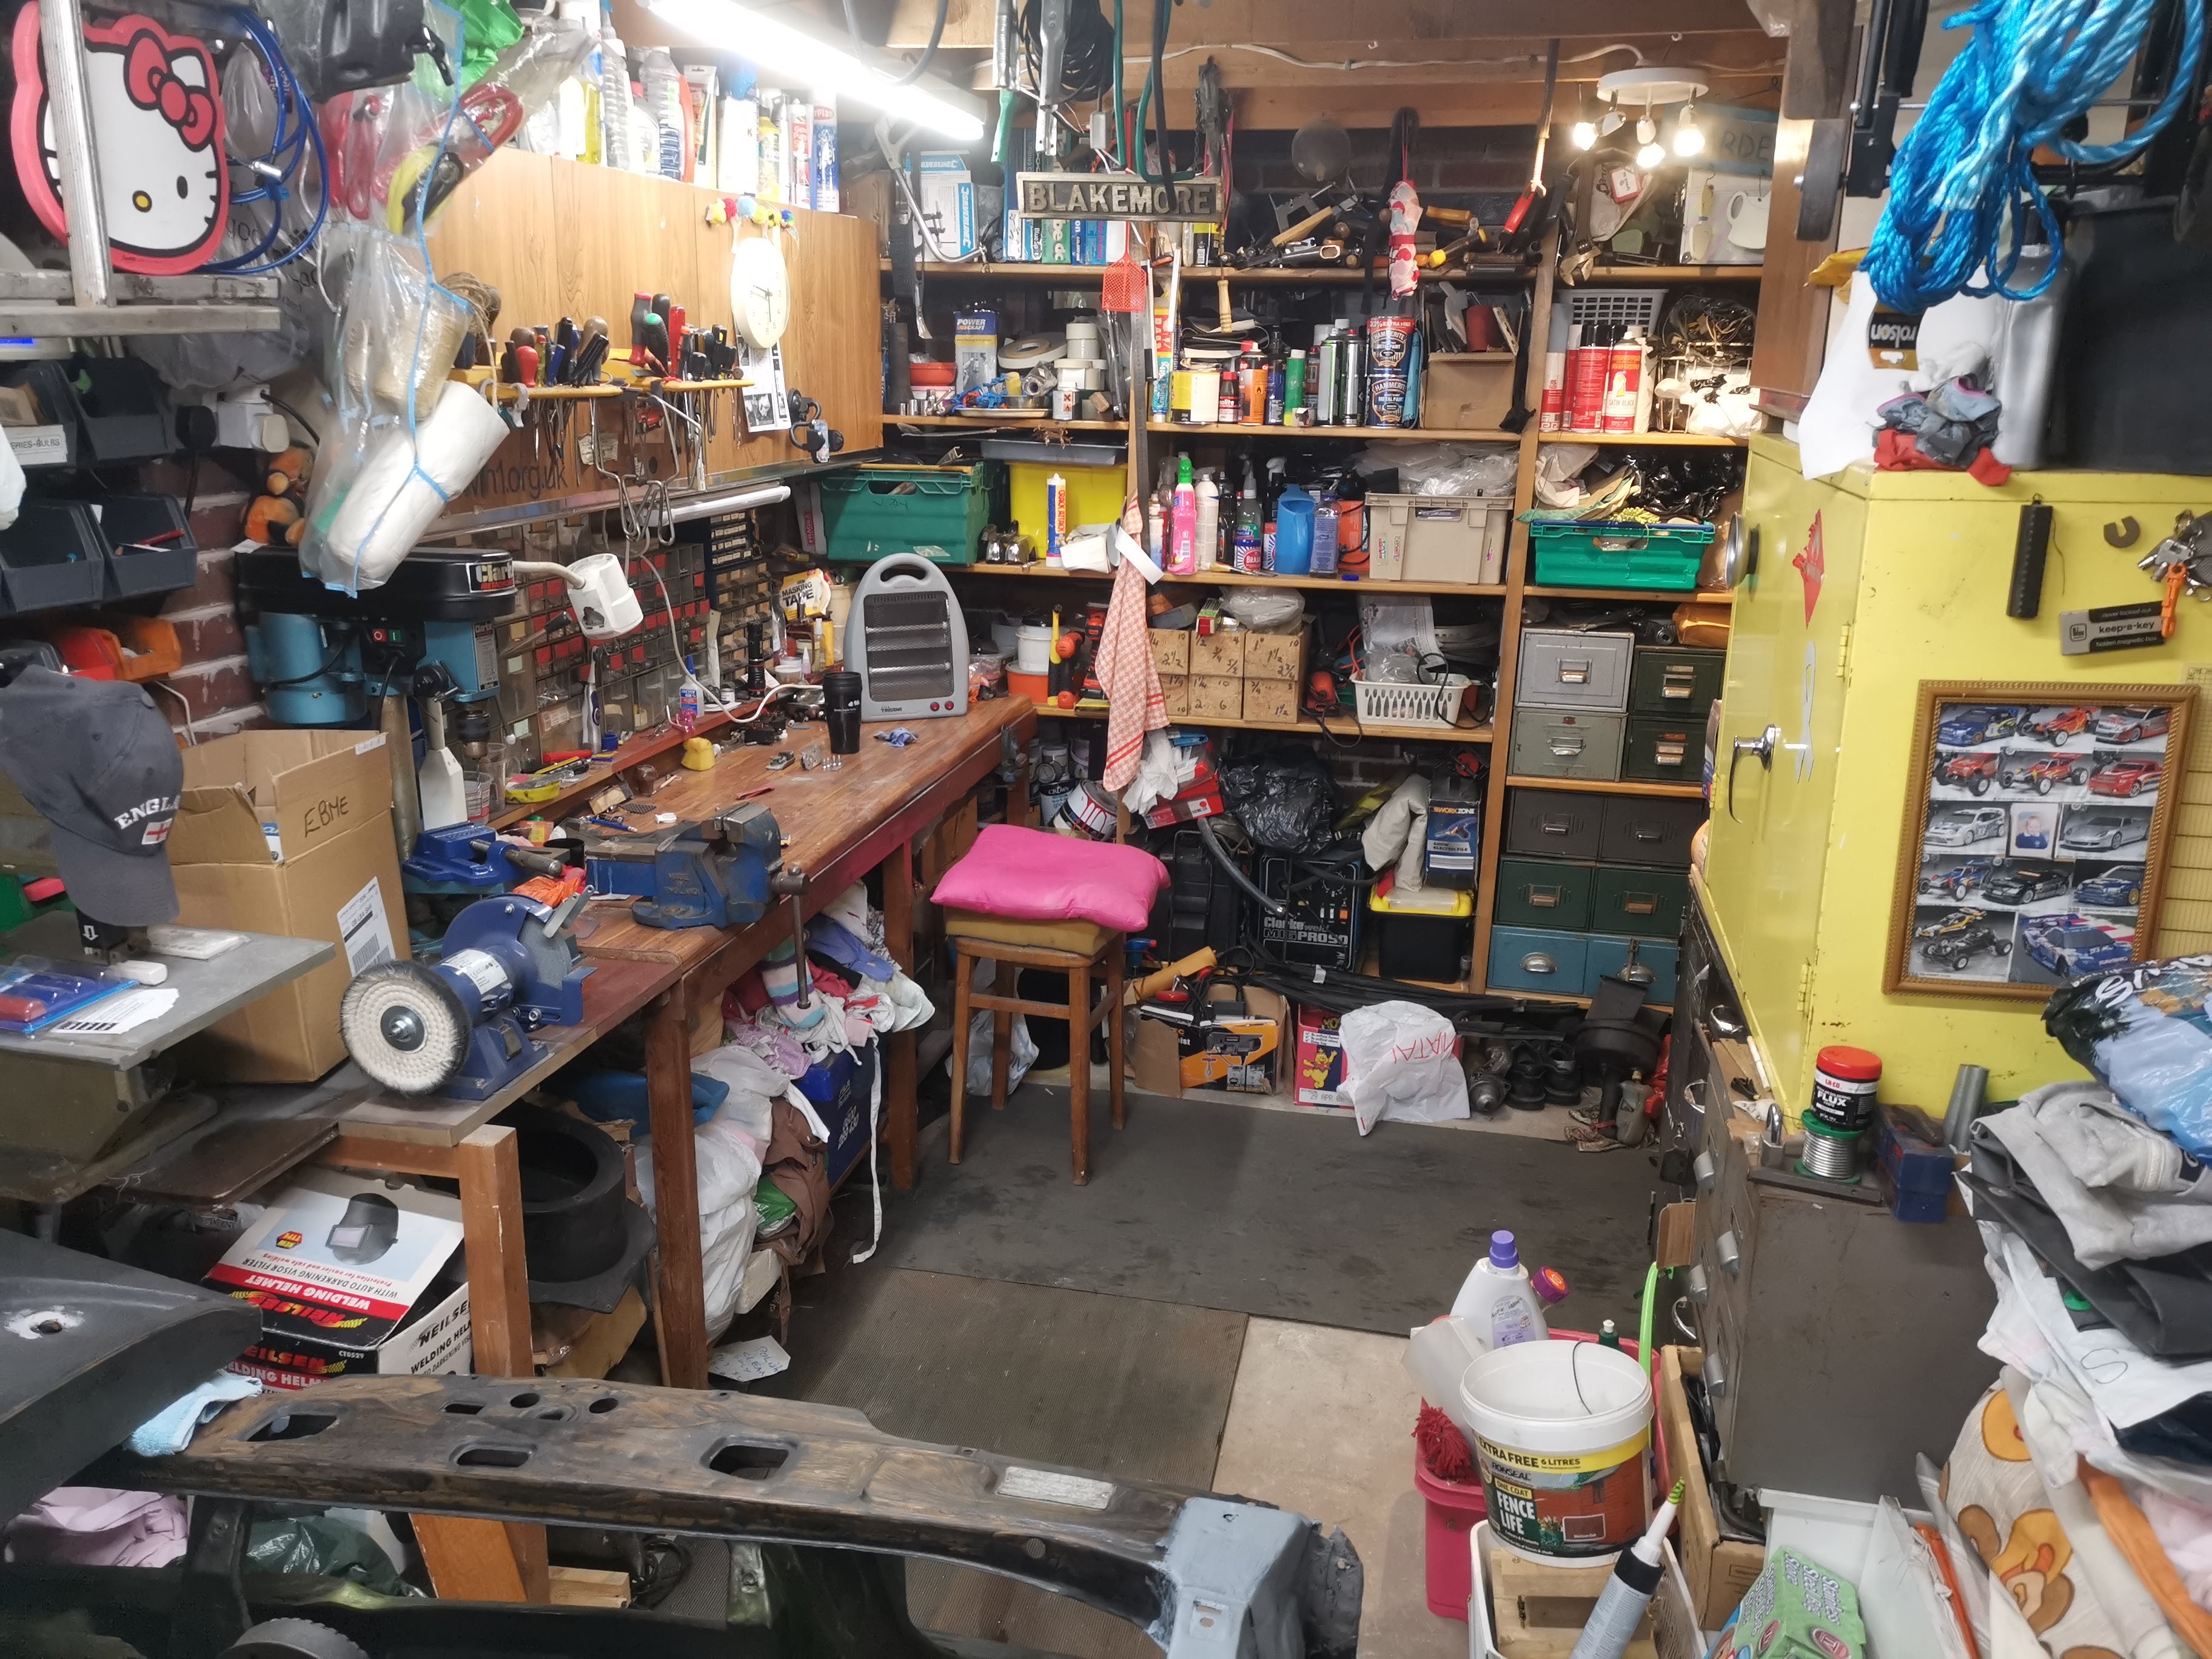
Garage workspace
Just a view of my 'expansive' workspace, filled with an 'extensive' range of machine tools lol
Early 2022
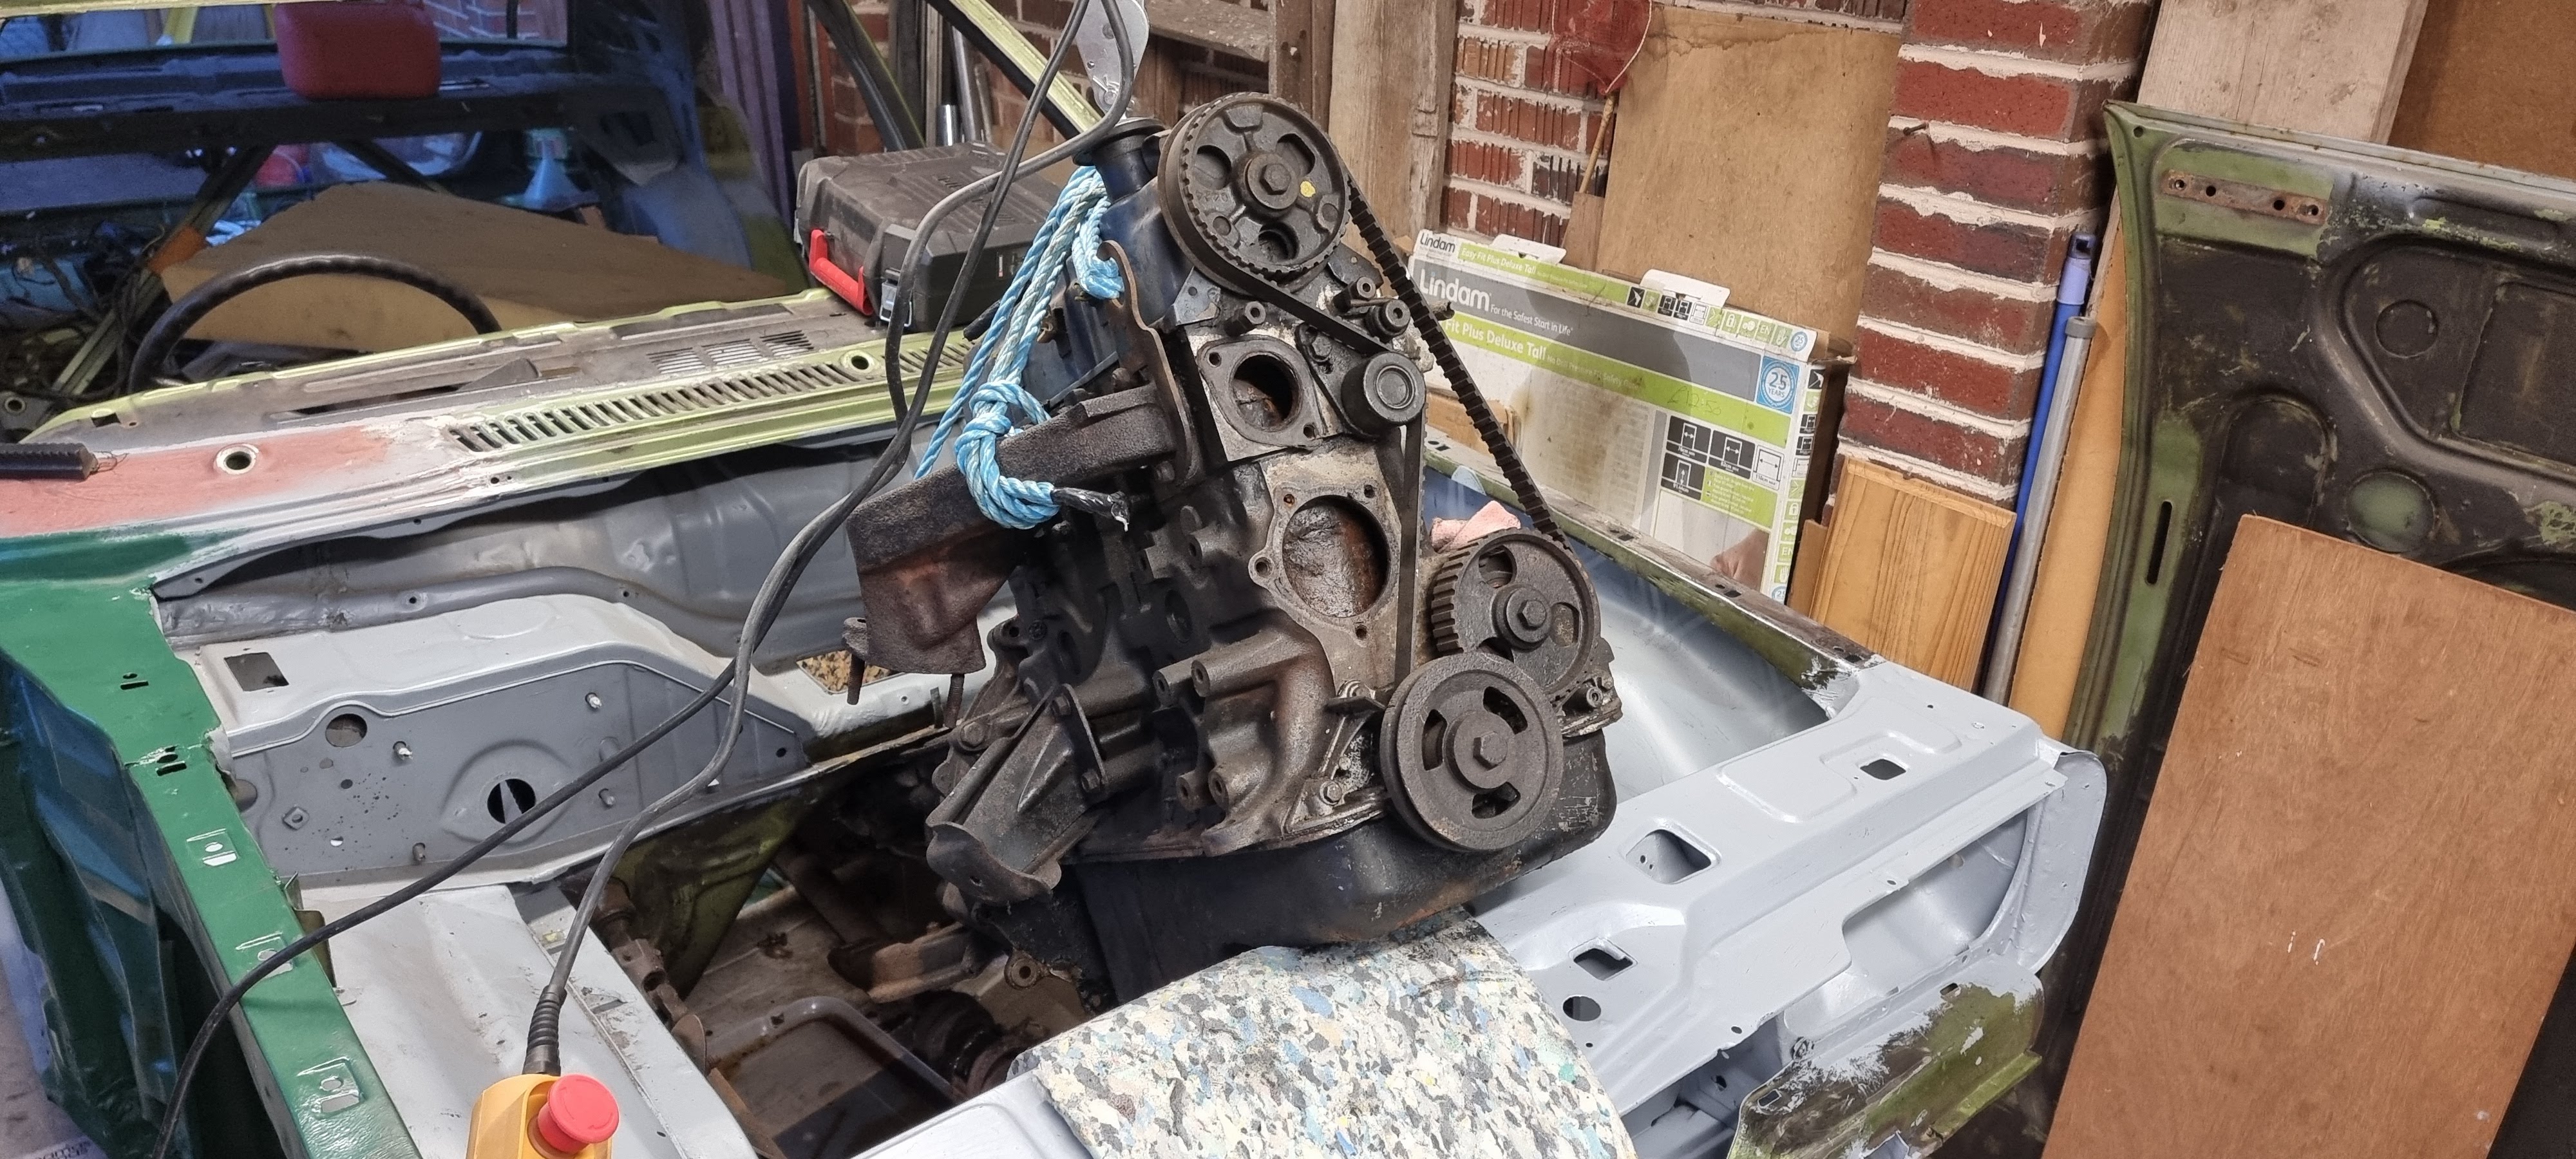
Engine removal
I lifted the engine out, being careful not to damage the paintwork lol
Back outside
Once I had the engine out I decided I needed to turn it around so the I could work on the other side (there's only room to get down one side of the car at any one time in my garage), so I pushed it back out onto the road, turned it around and back up the drive.
Back outside
I don't want to have to do that too many times. My drive is surprisingly steep when you're trying to push a car up it on your own! Even when it is completely empty!
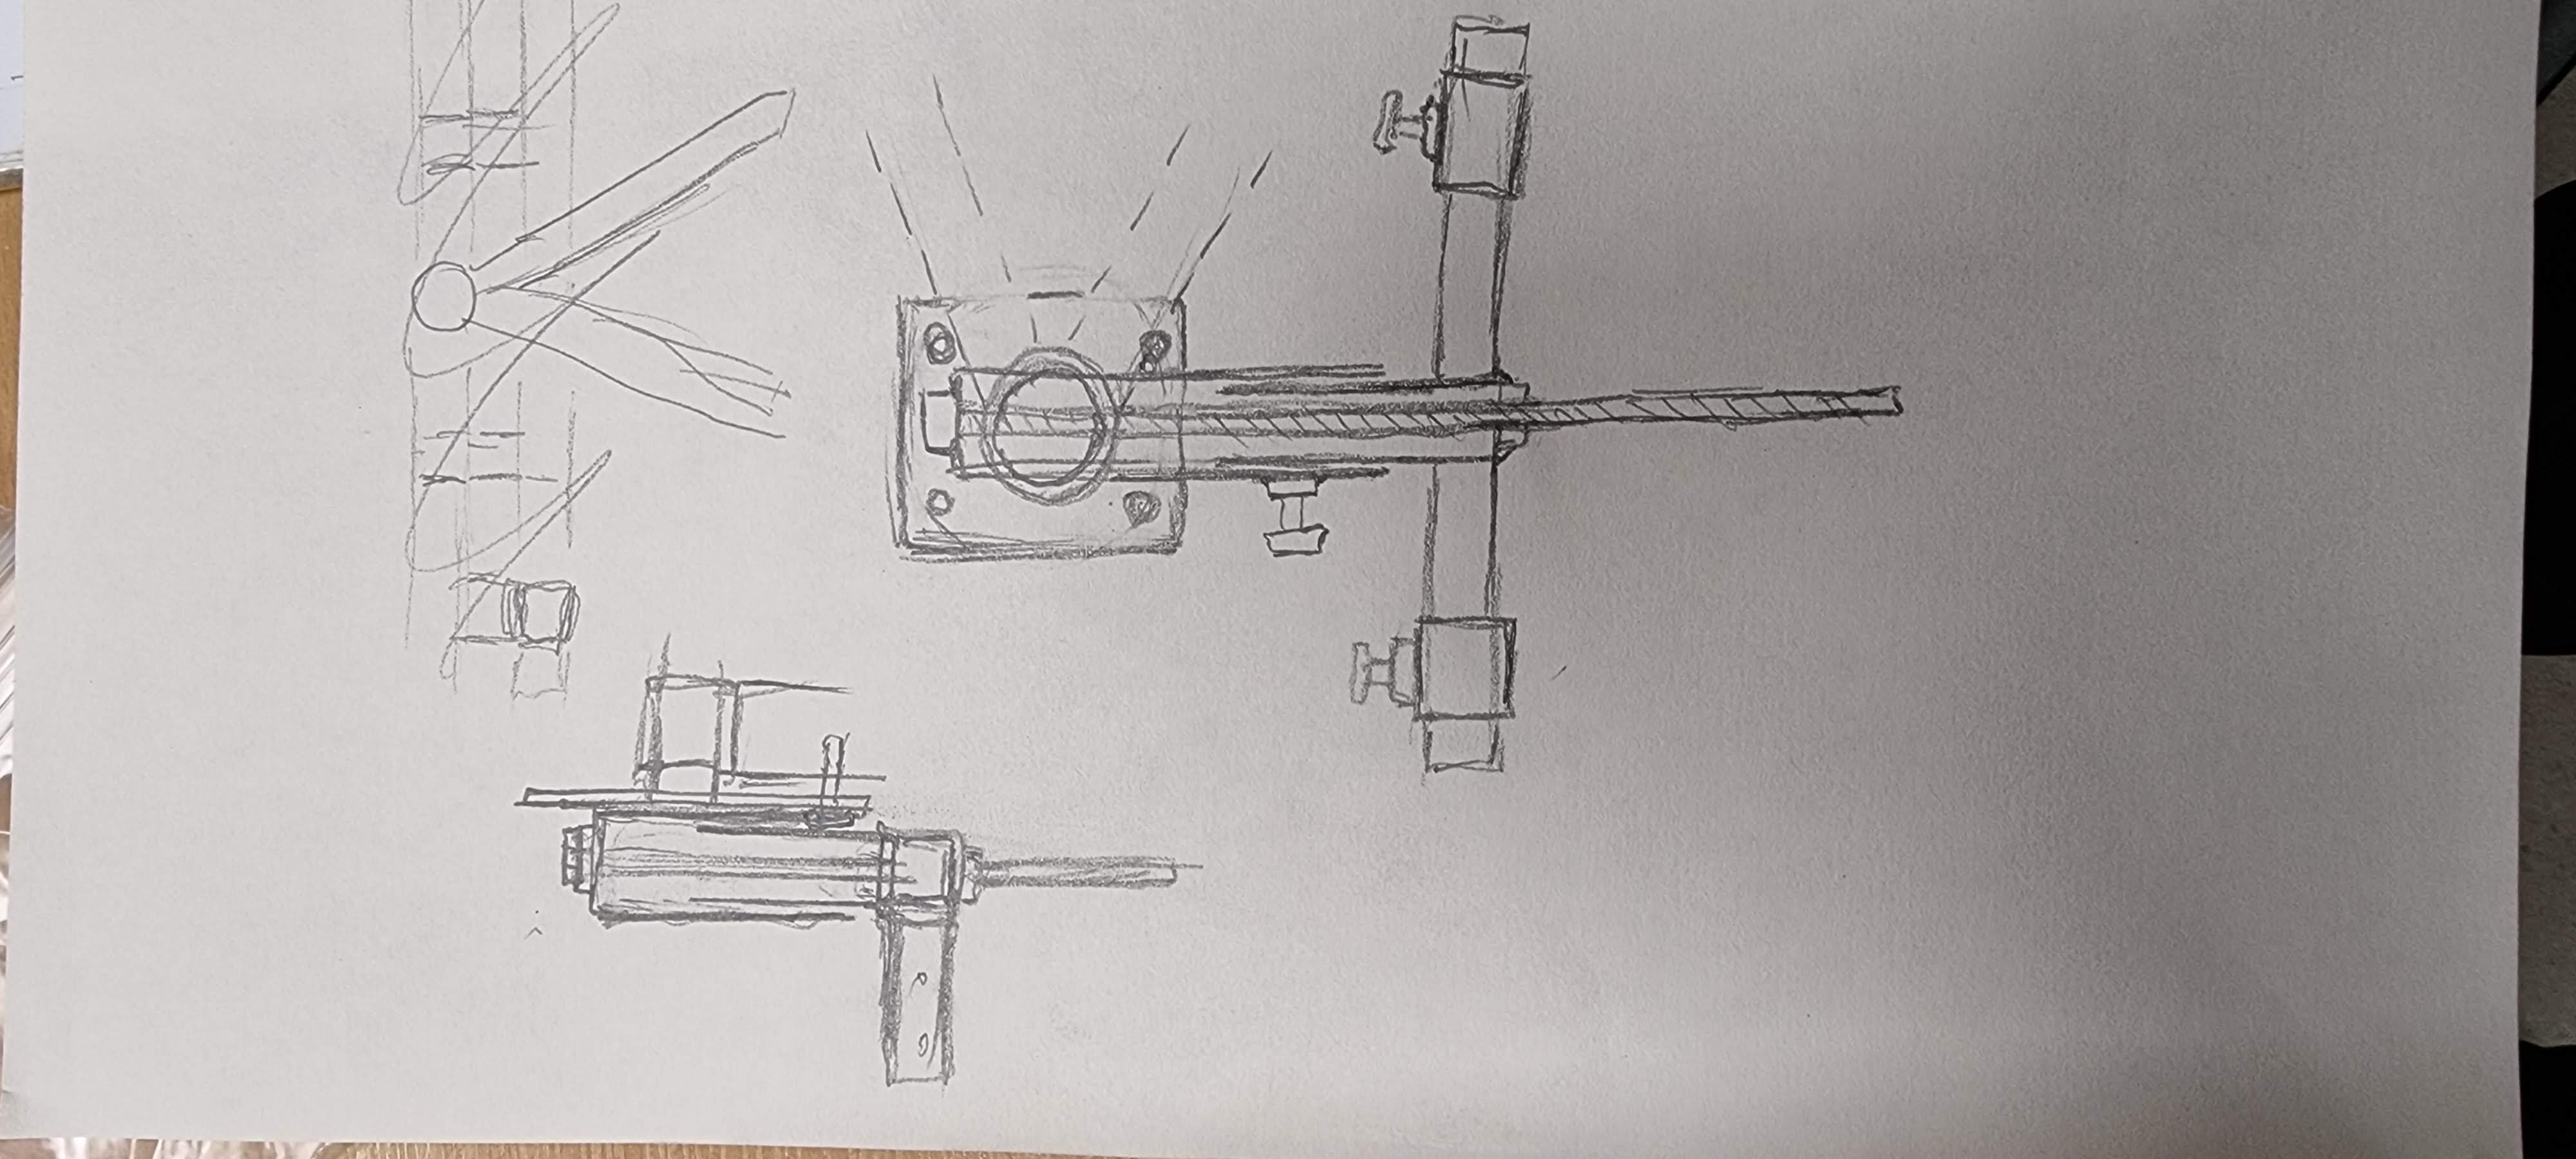
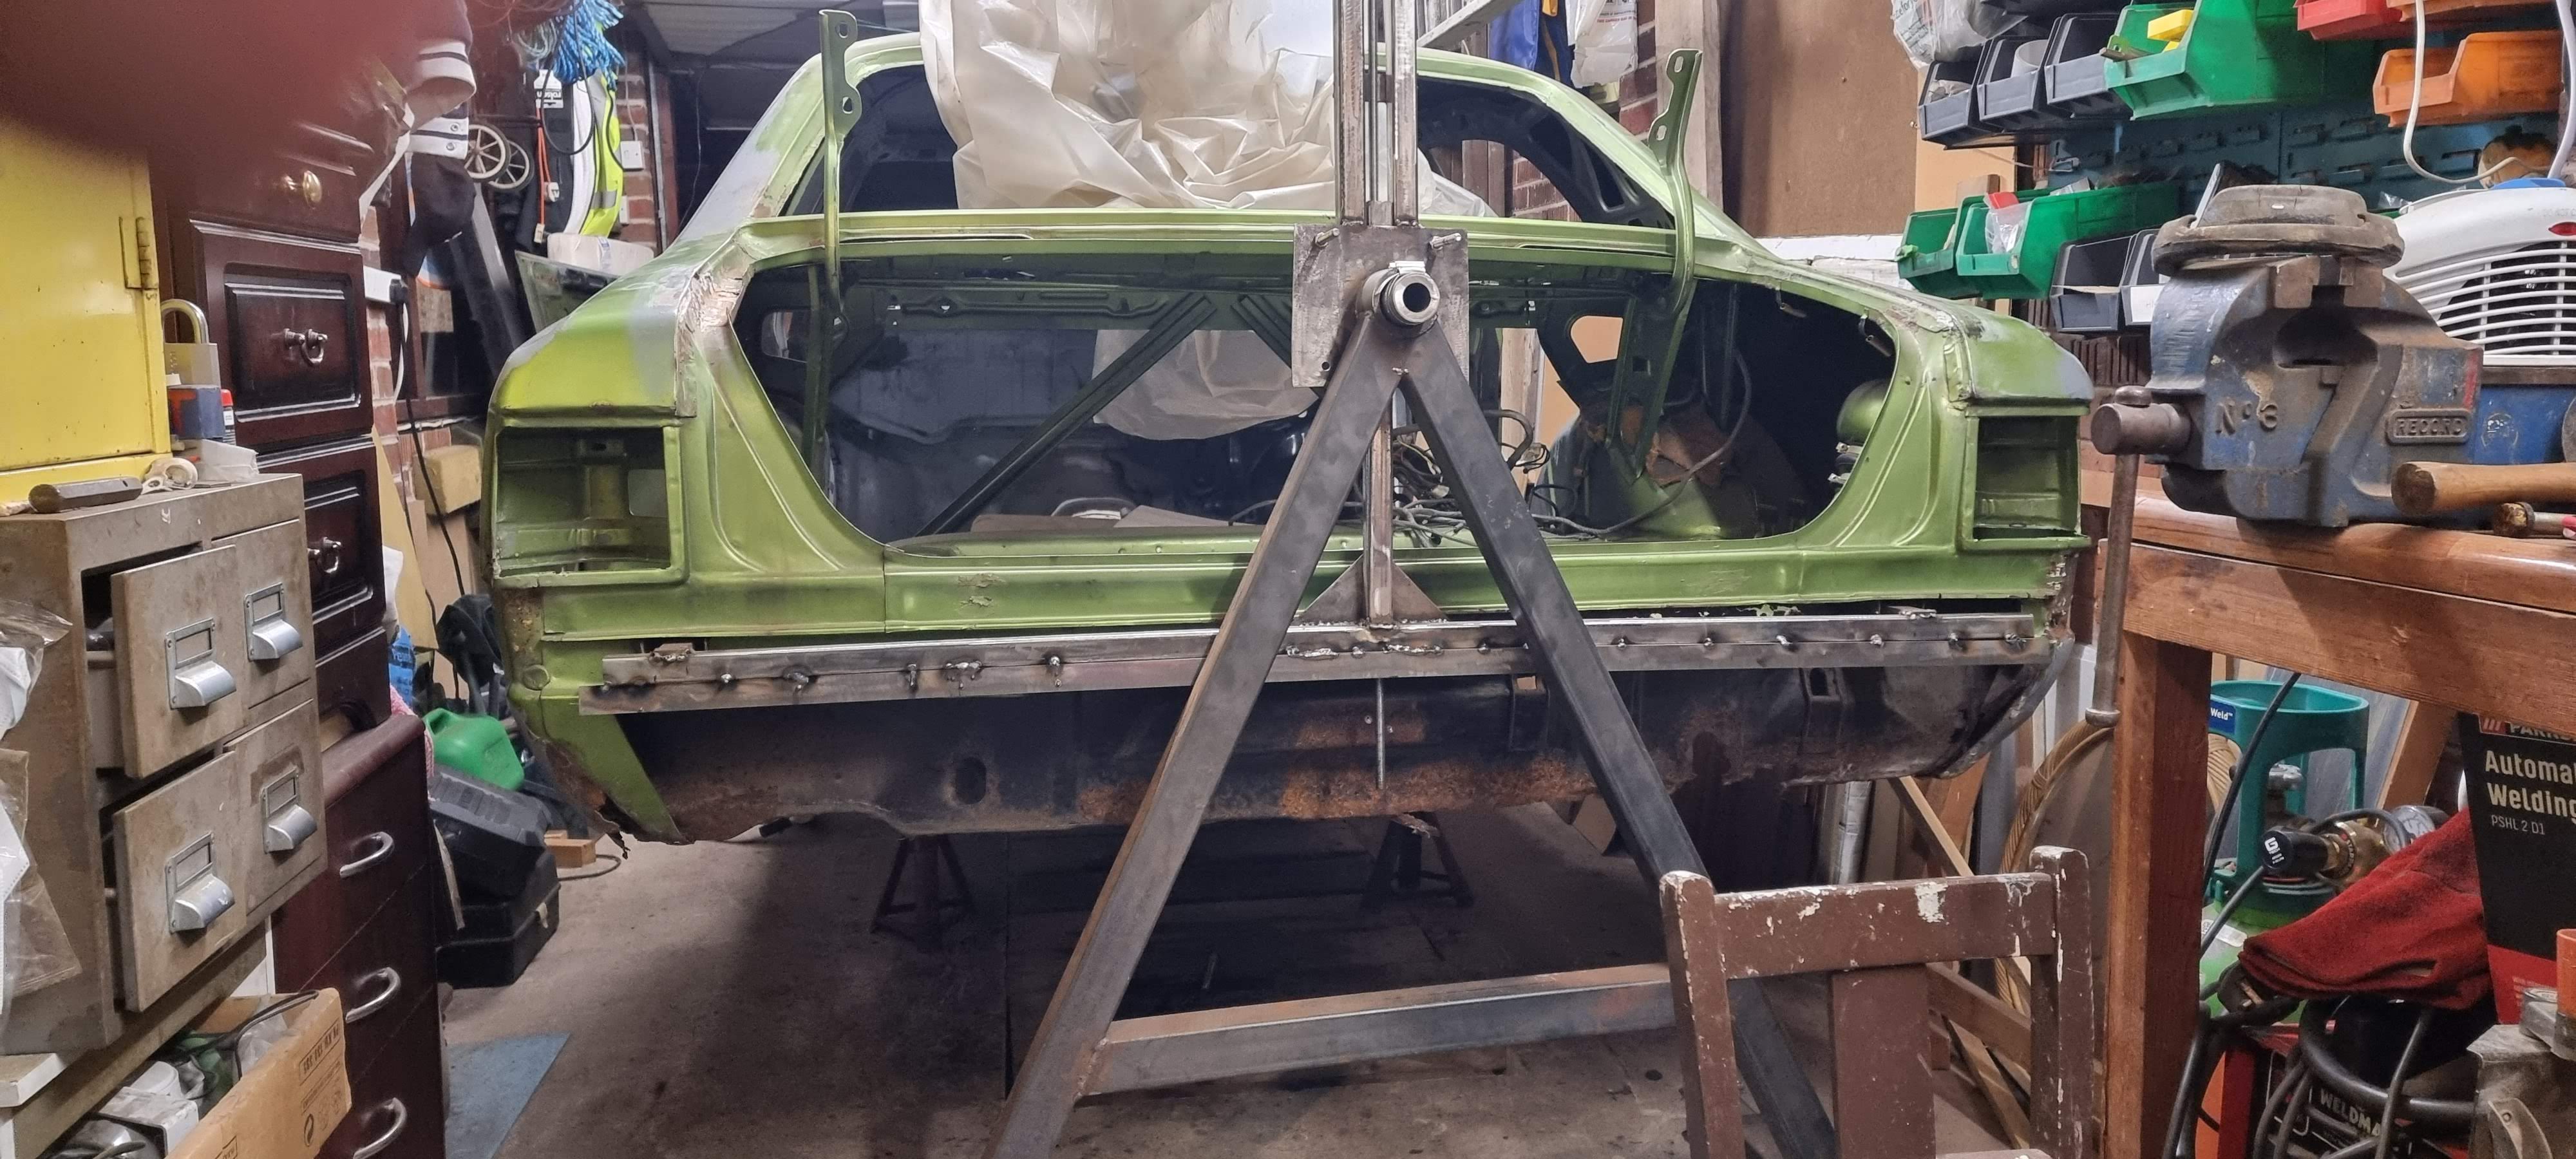
Roll over jig design
So, it was at this point I decided I needed to turn it on its side so I could work underneath it easier and therefore do a better job. I put pen to paper and drew out some designs.
Roll over jig design
This is the design I finally decided upon. The theory being that it would allow me to wind the frame up until I got the center of gravity where I needed it.
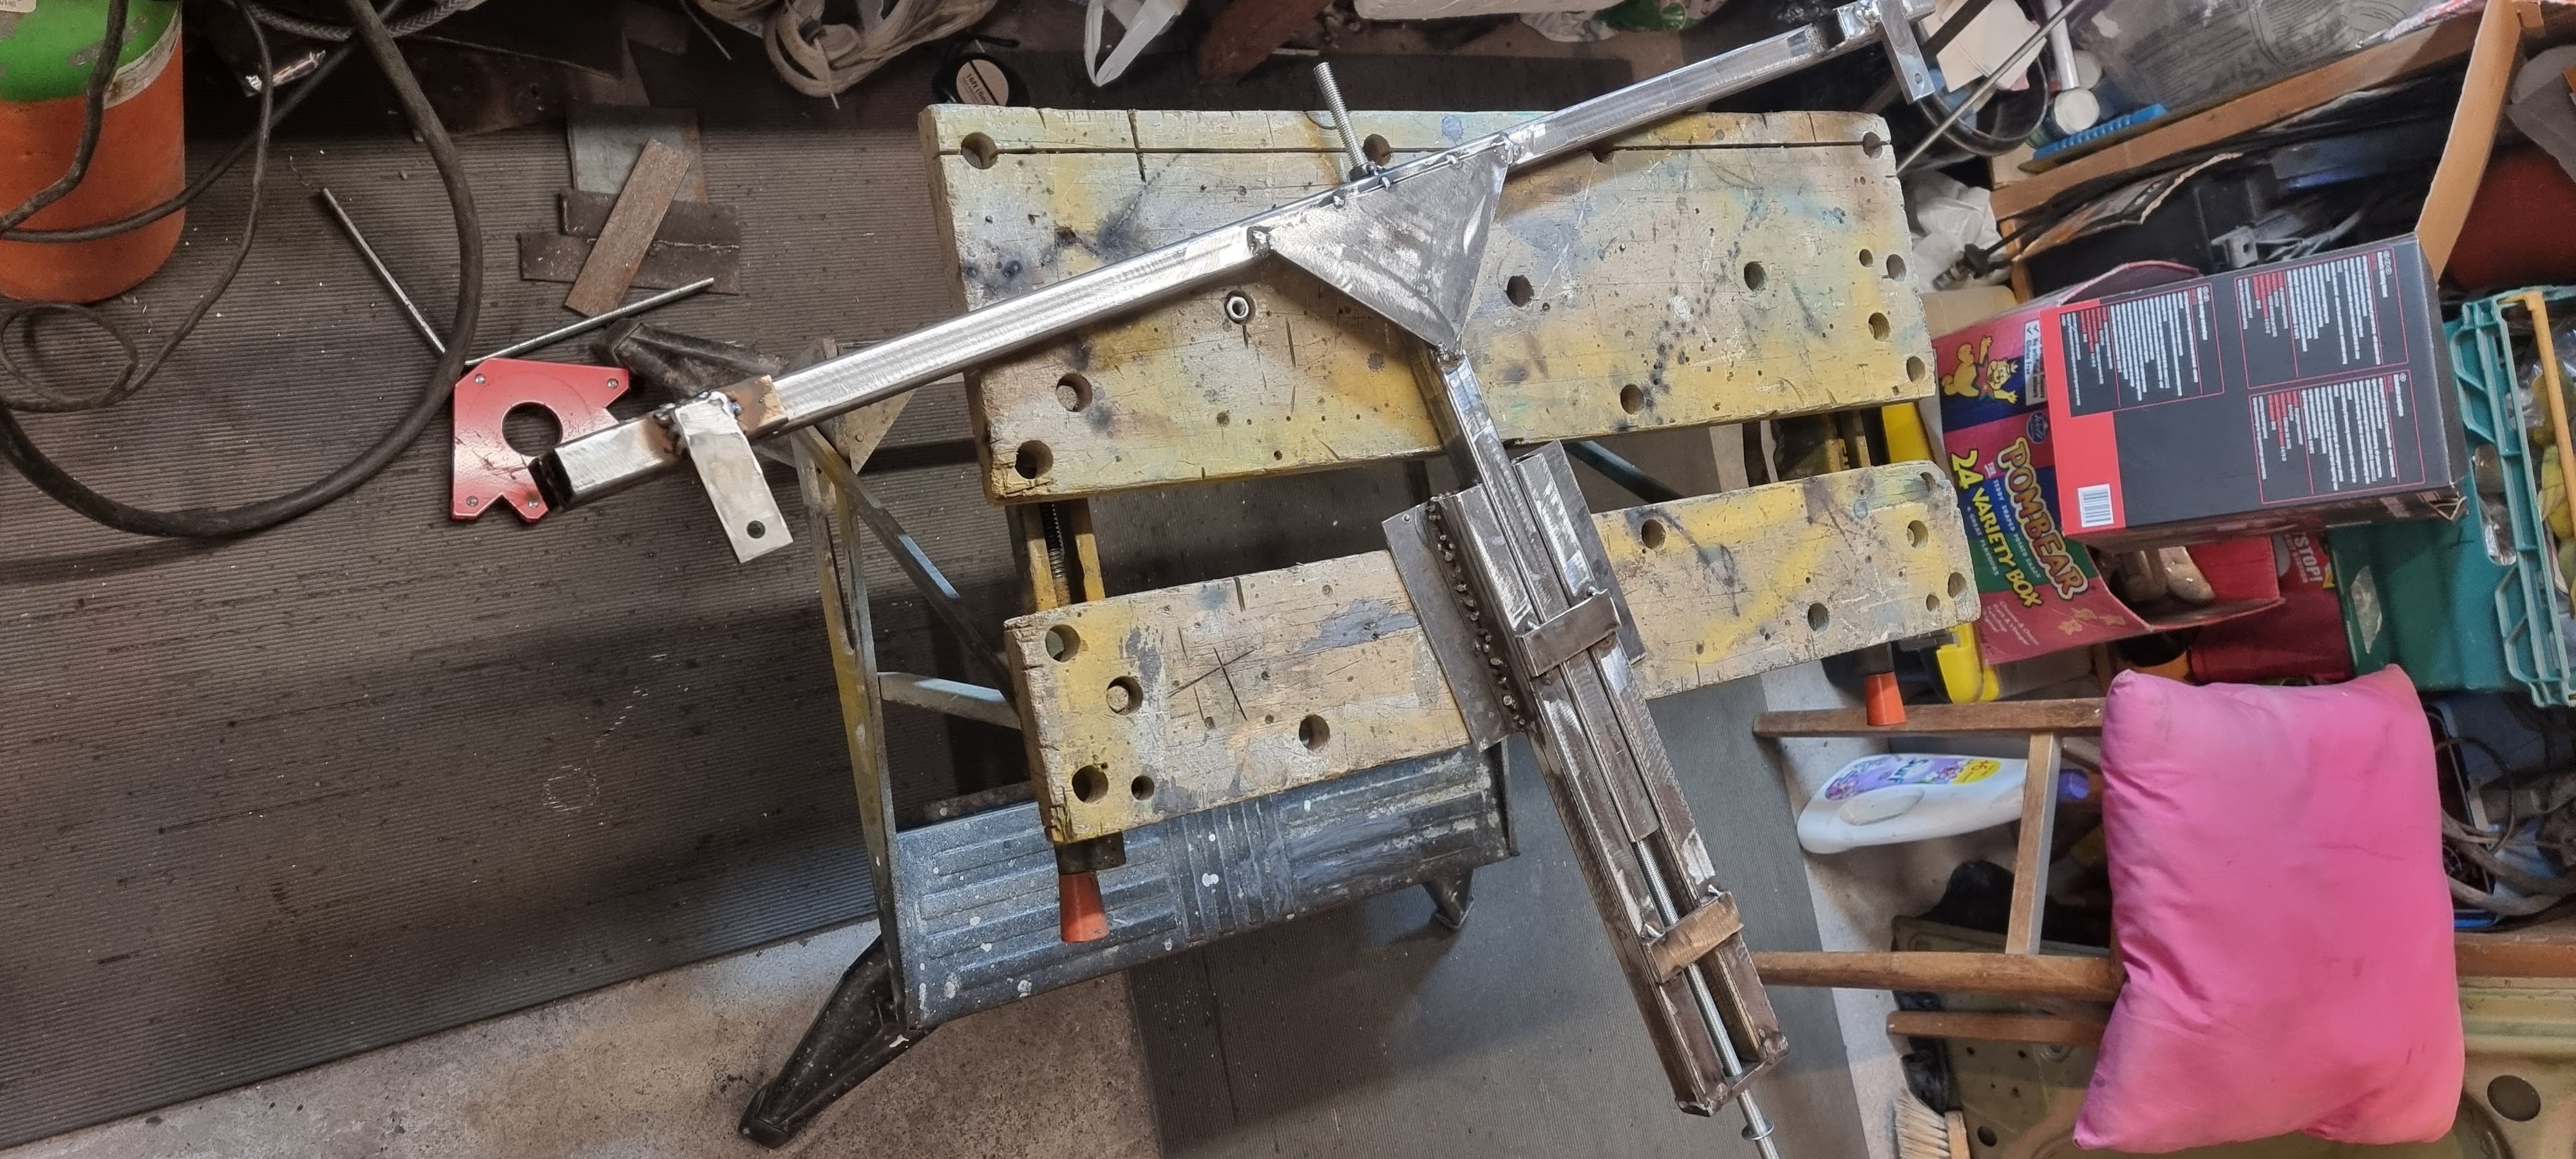
Roll over jig design
I fabricated the brackets, mechanism and framework and attached them to the car using the bumper mounting points.
Roll over jig construction
My neighbour Tom loaned me his A frames which was a massive help and saved me a lot of work!
Design modification
I quickly realised that the body-shell was too heavy for the steel section I had made the lifting frame out of and it was bending! So I added another layer to strengthen it!
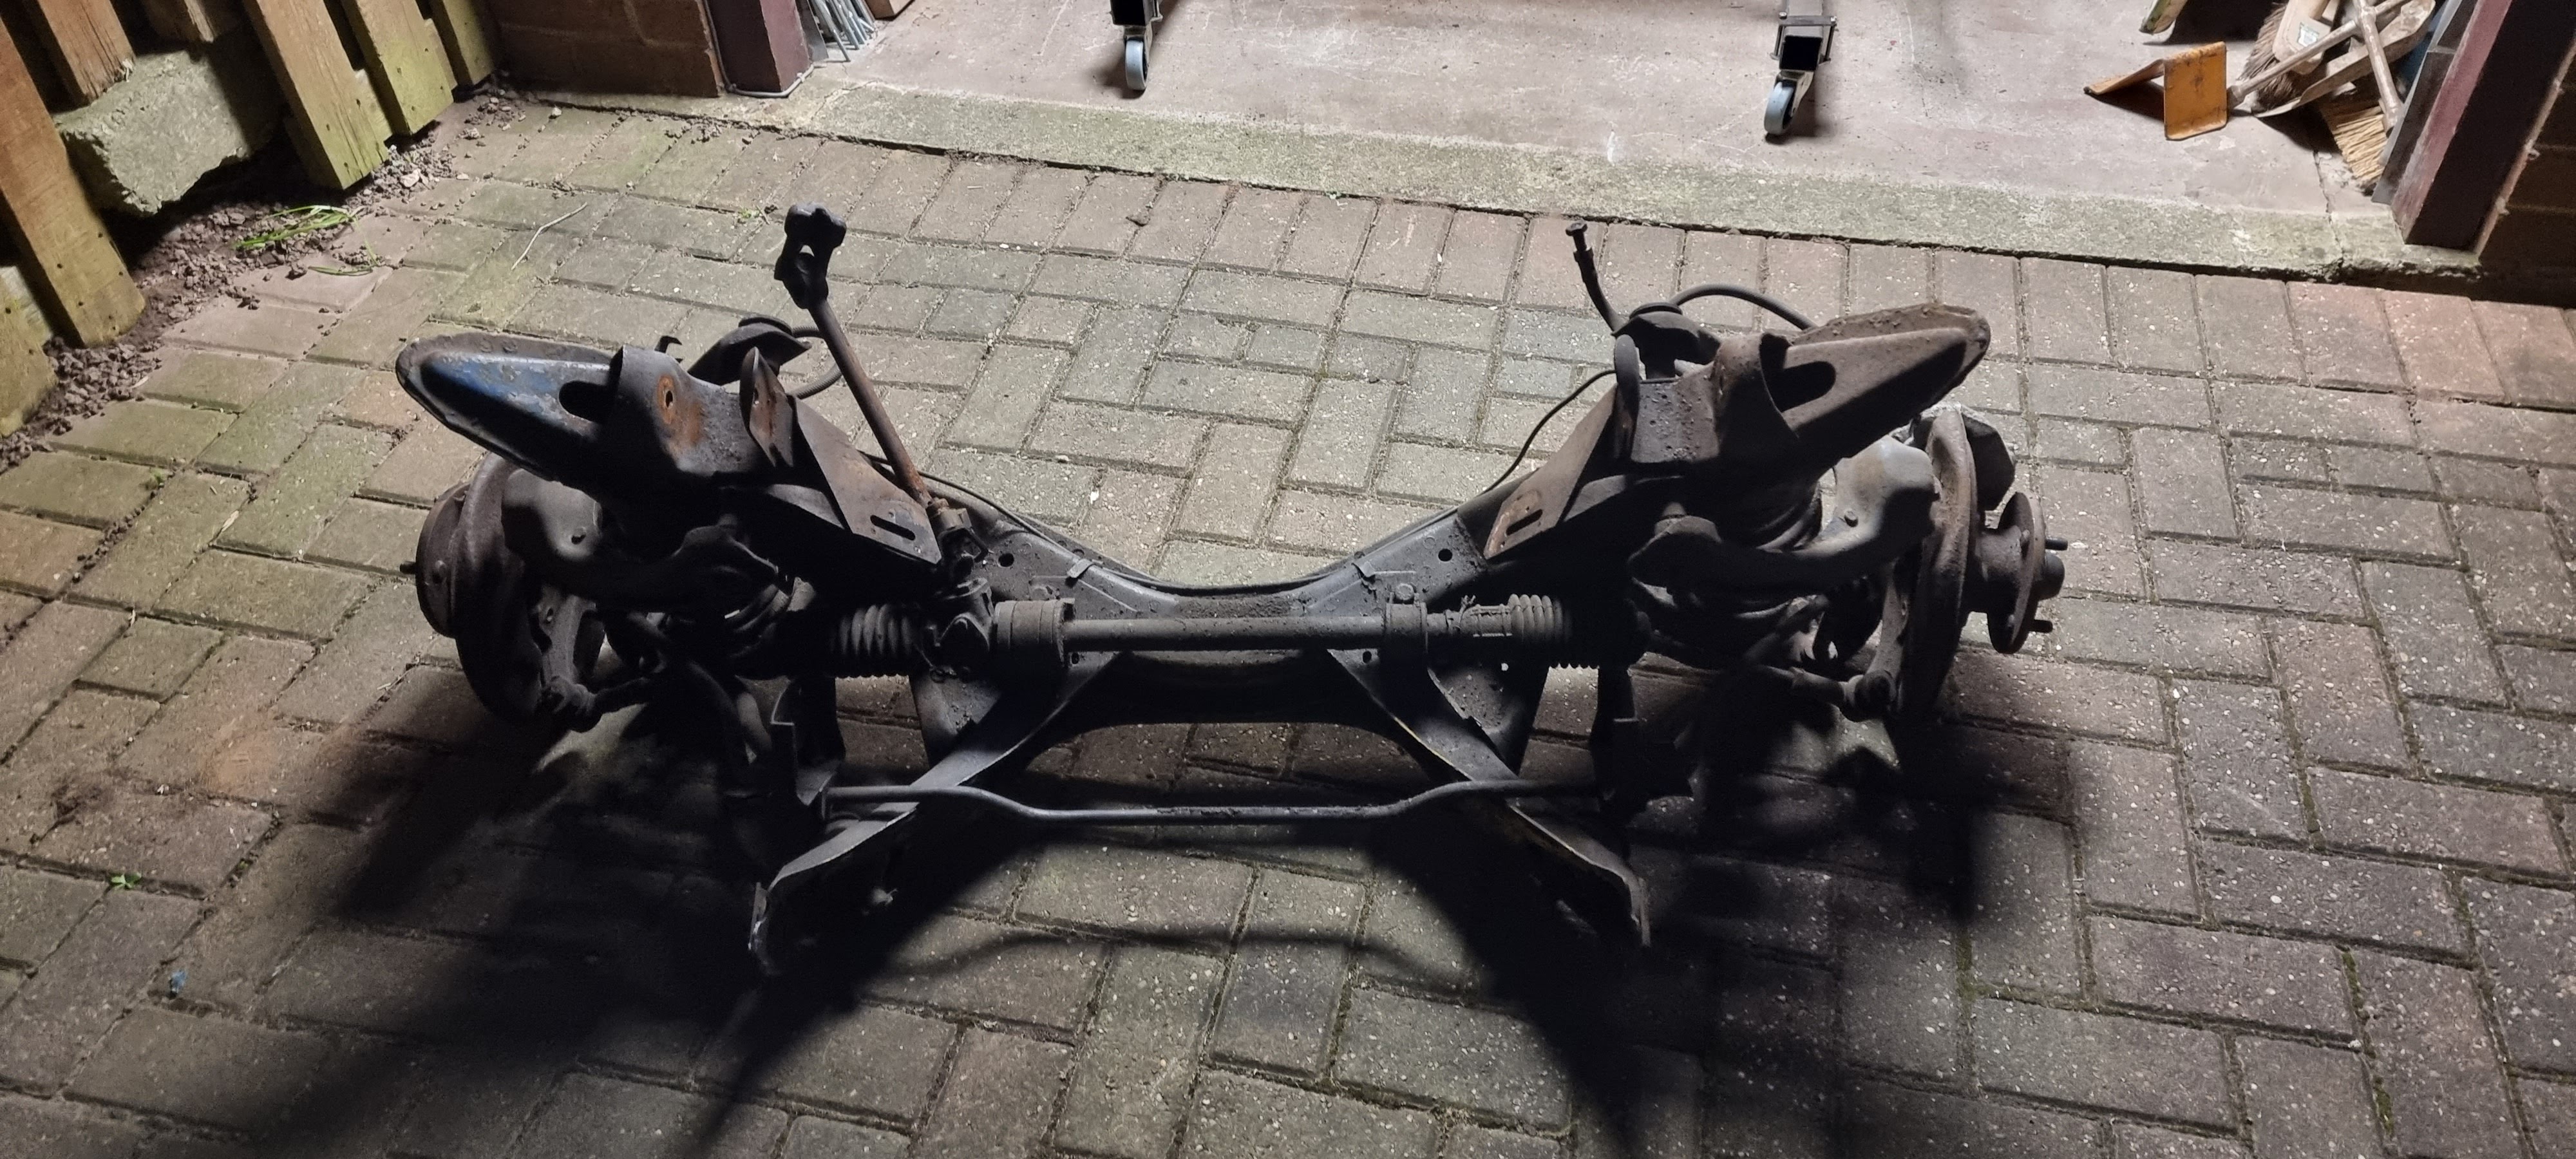
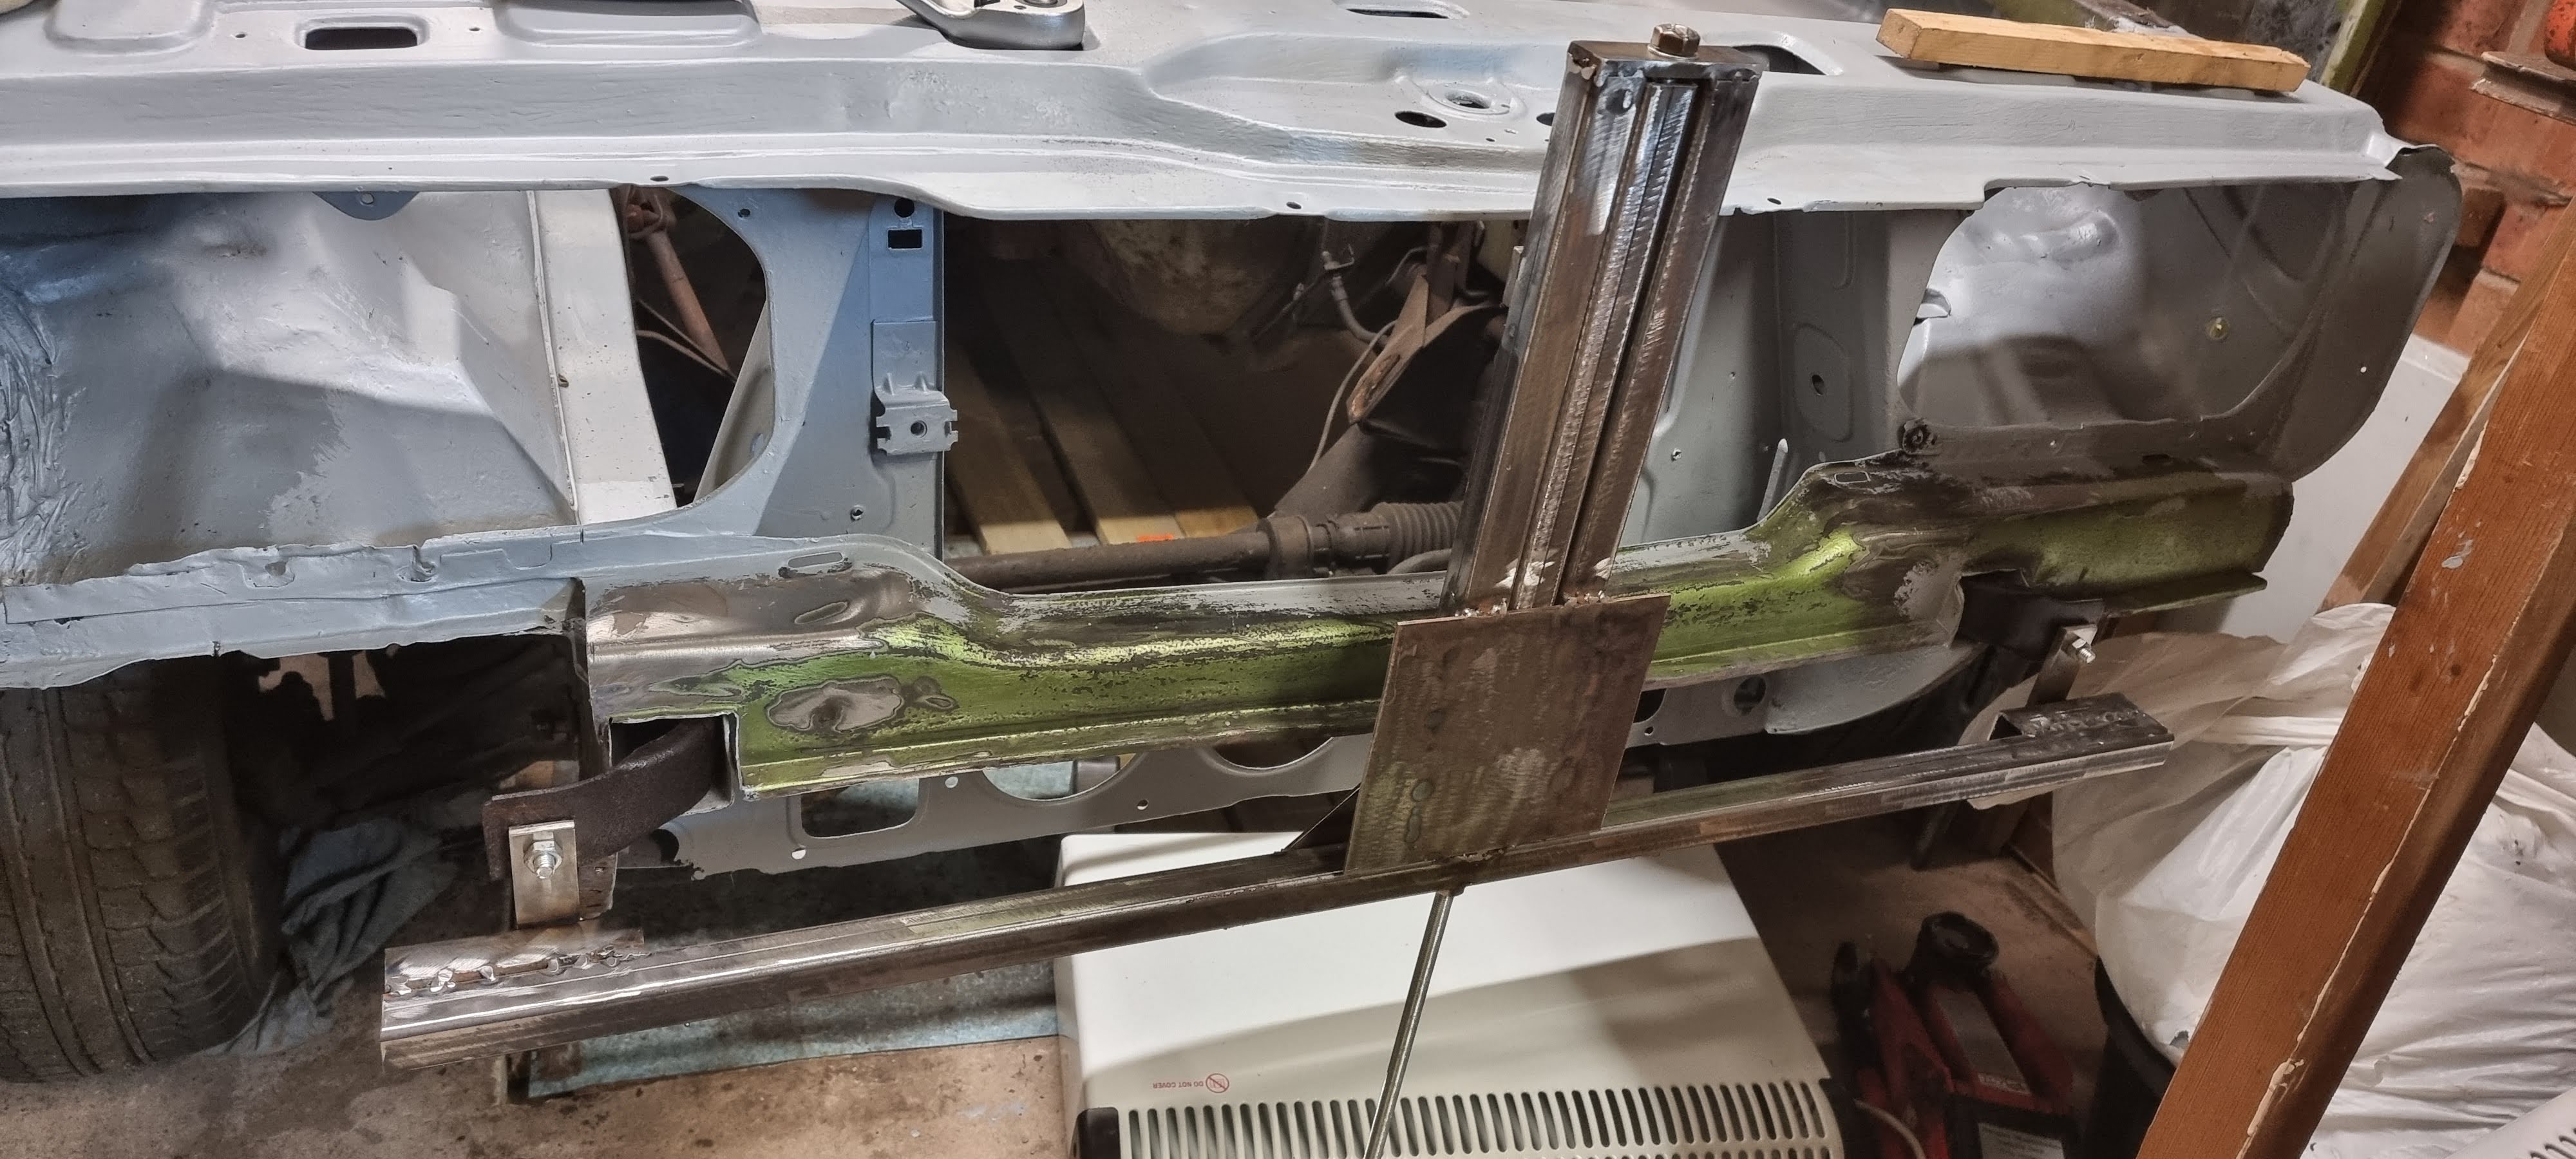
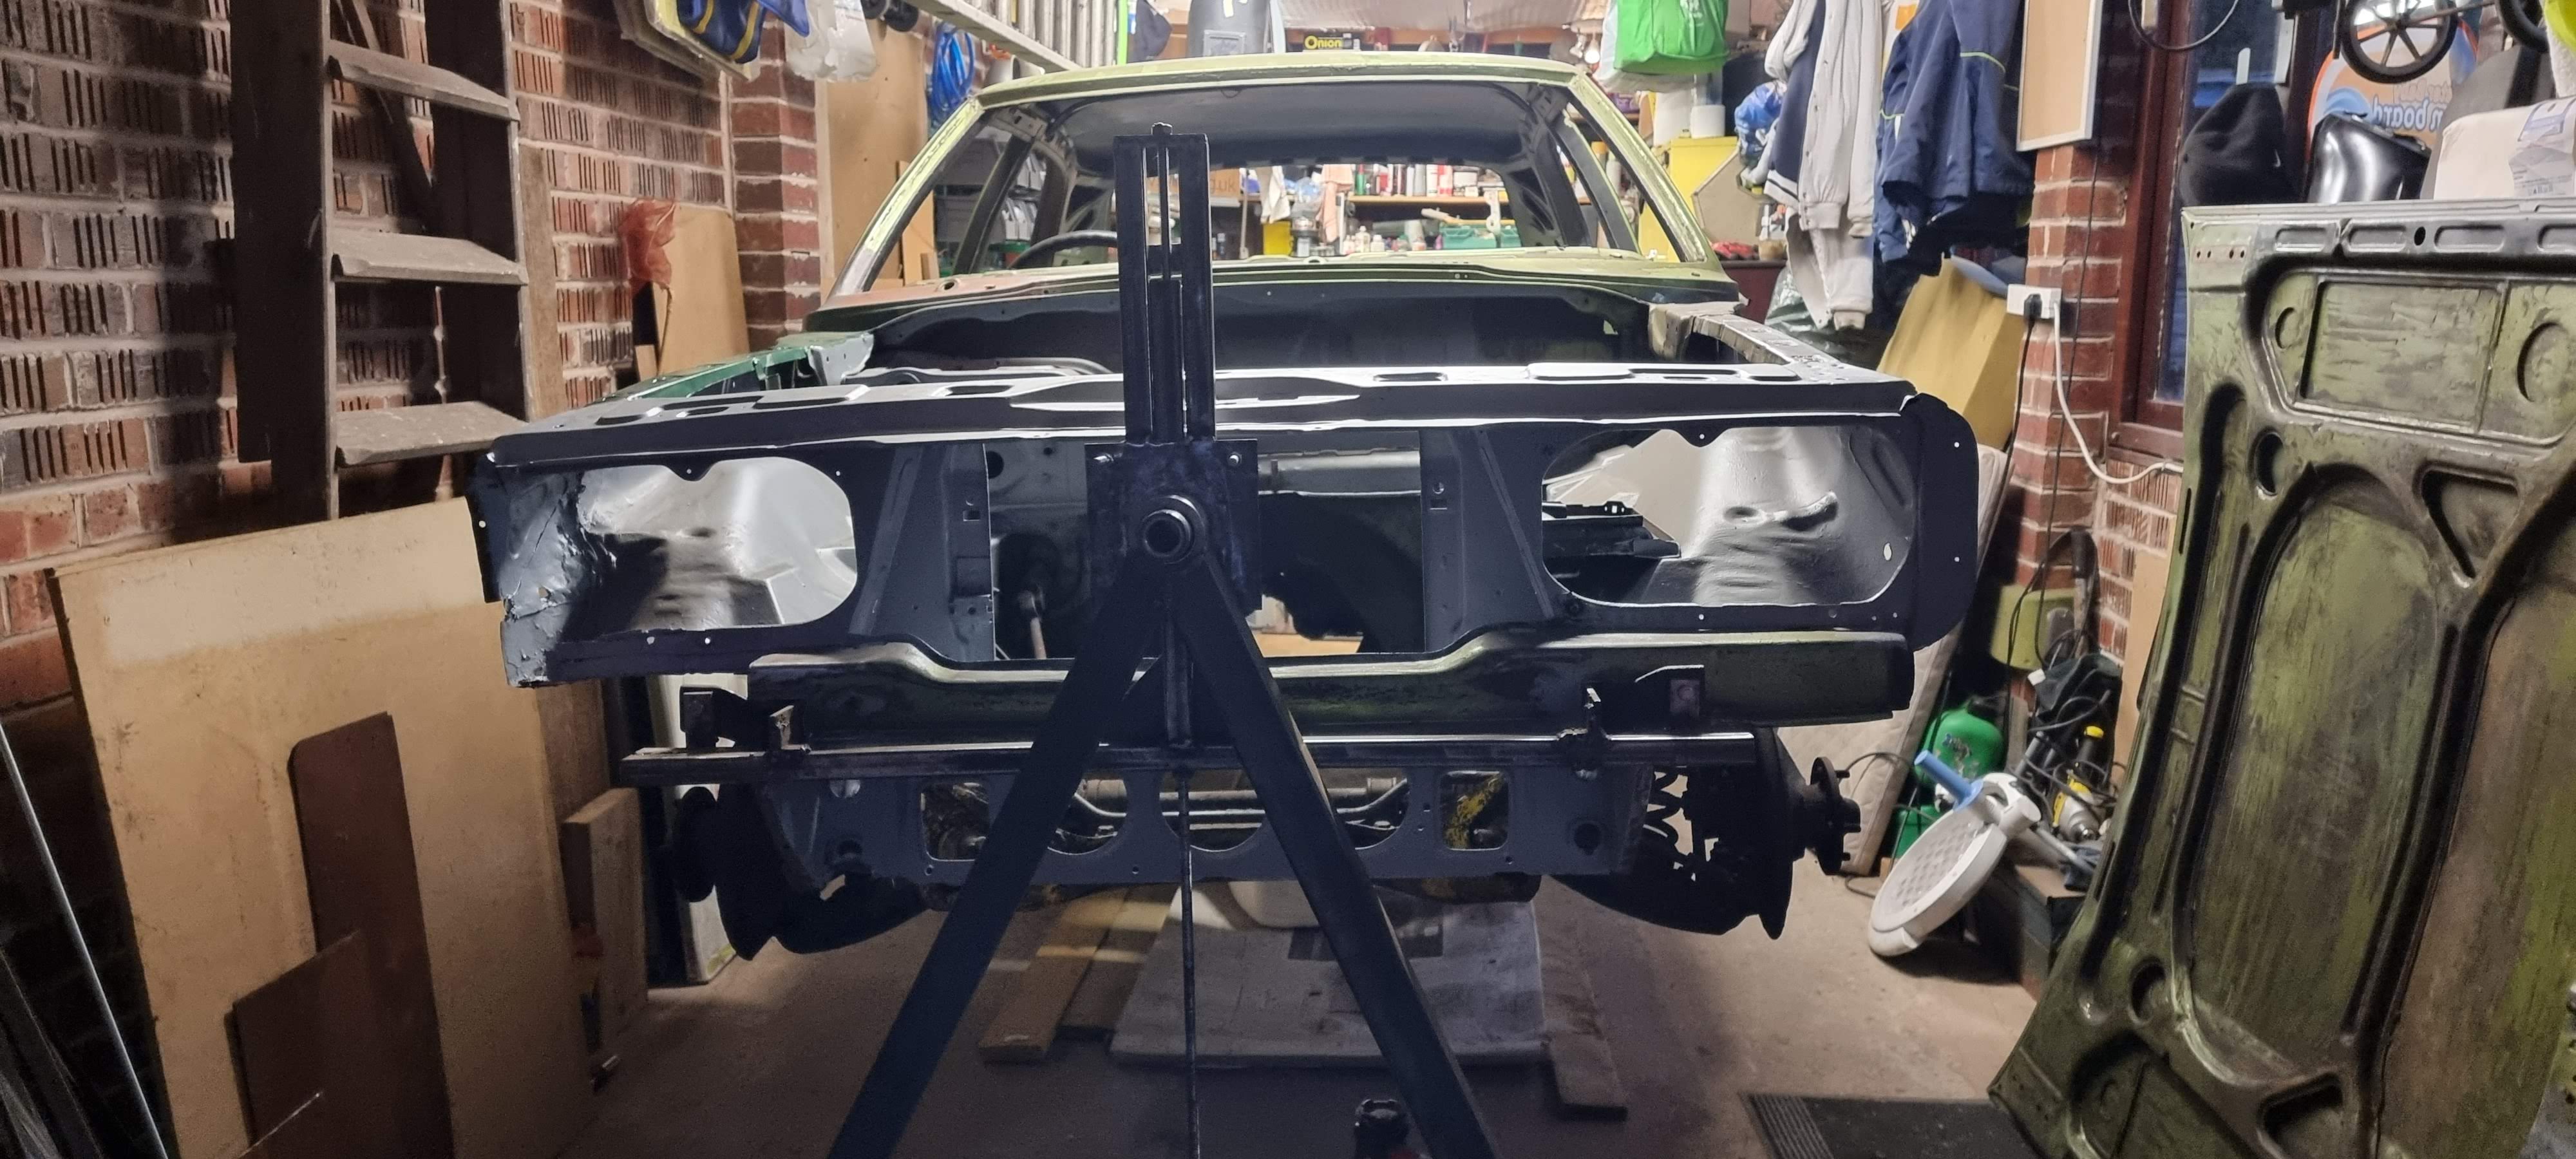
Front suspension unit (clip)
Once off the ground I could drop the front clip off. What I didn't think about though was how to extract it from under the car as I have no sideways space! Plenty of jiggling and dragging later I got it out.
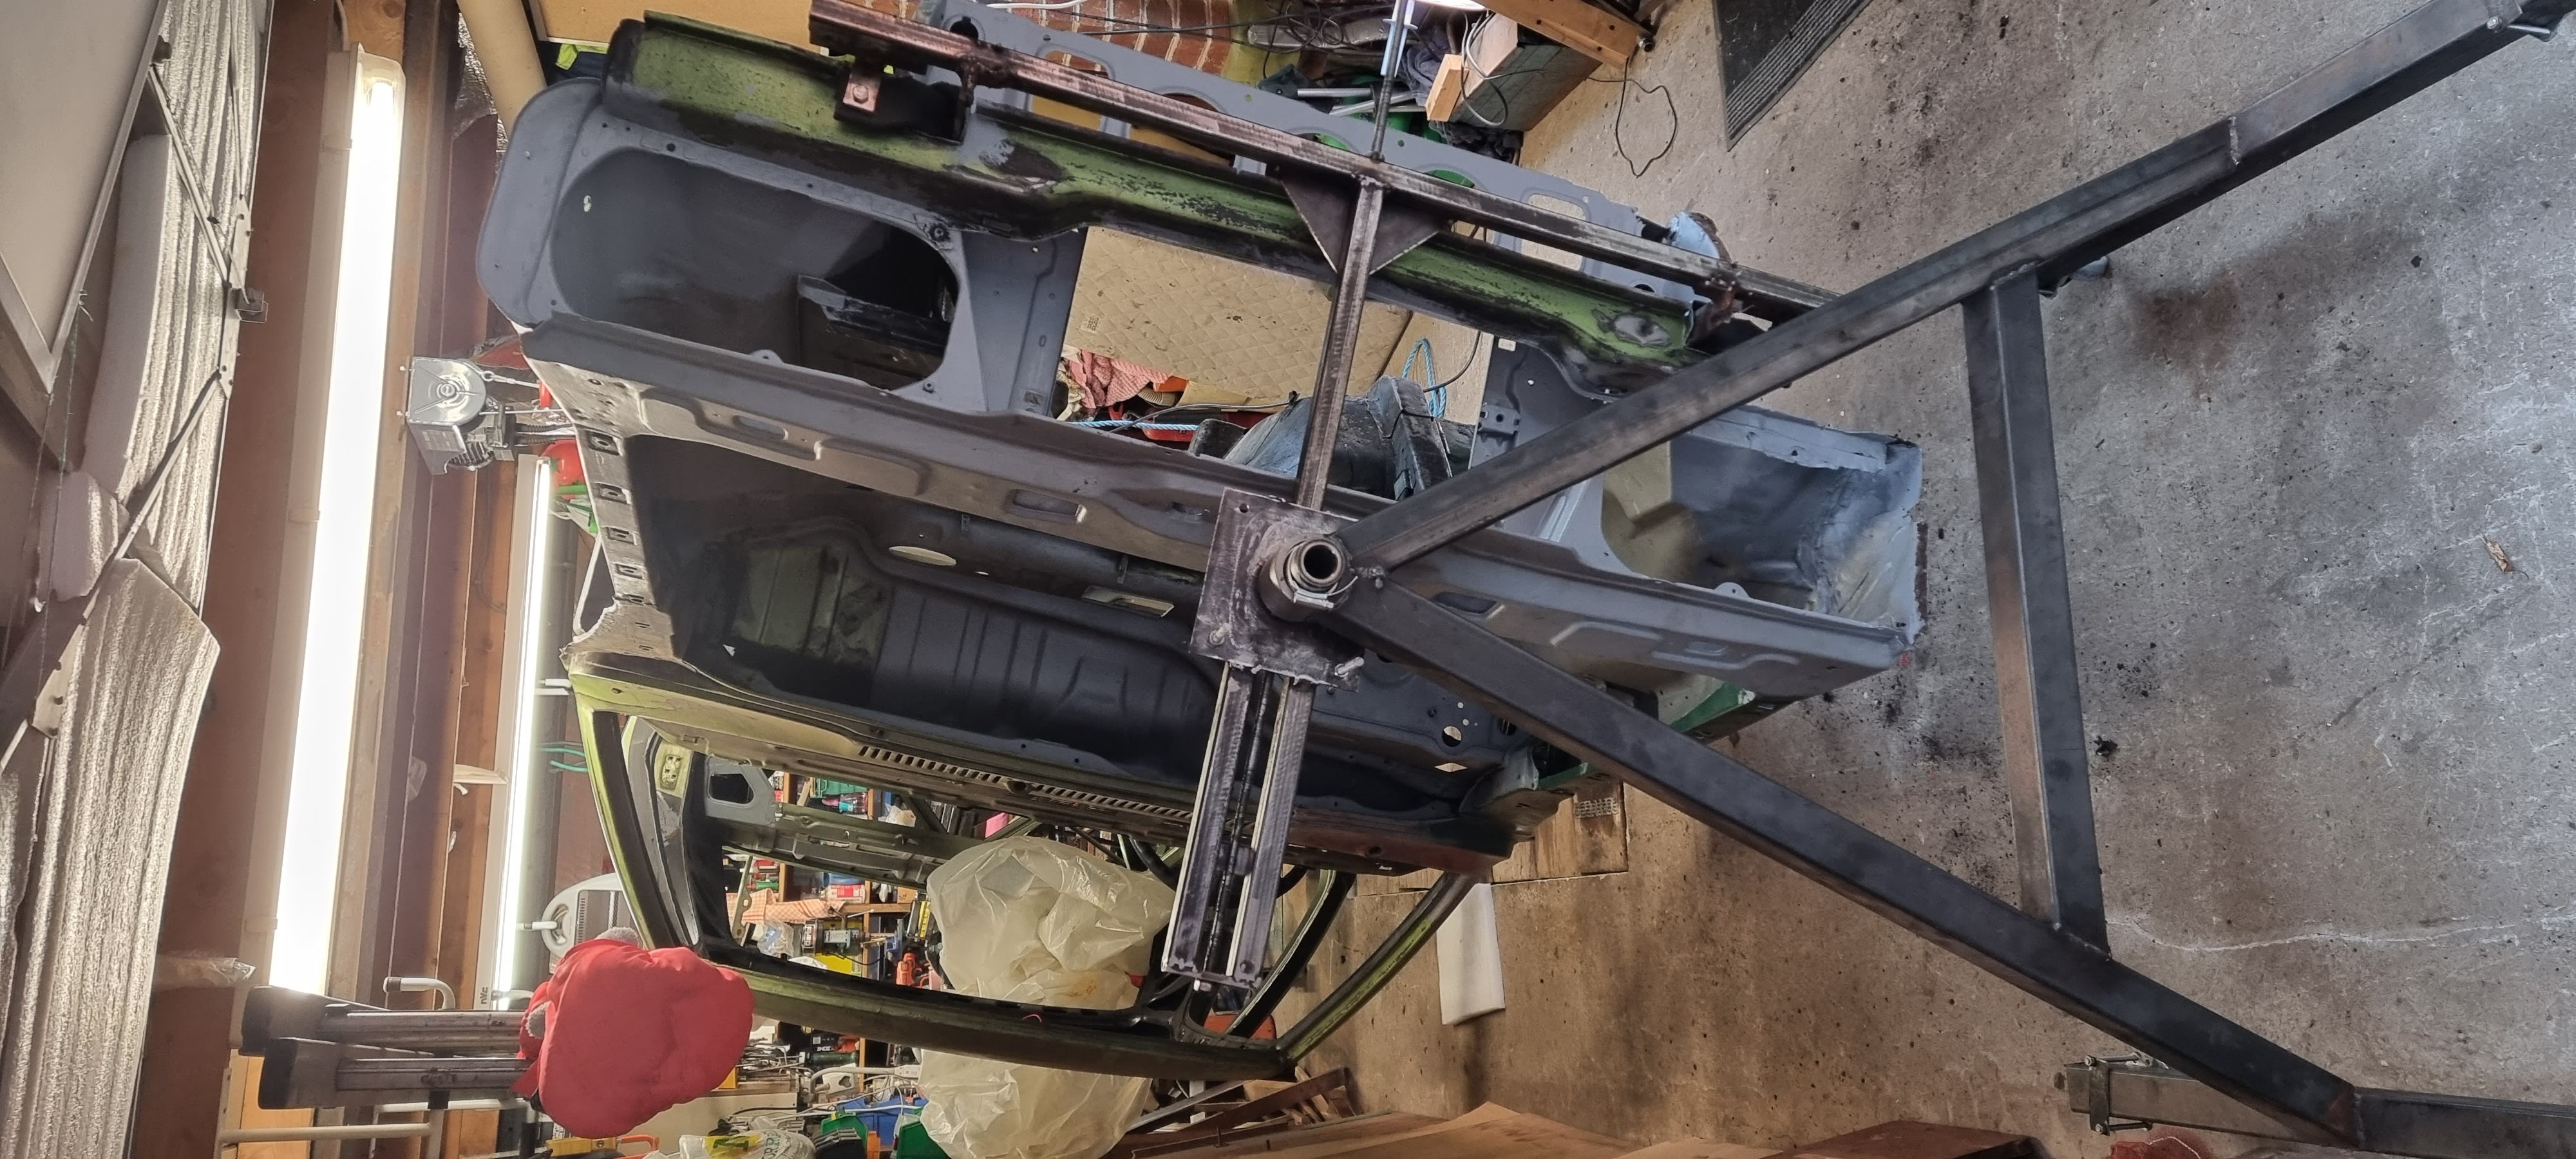
On it's side at last
Once the suspension was dropped off (the back axle was just as difficult to extract!) I could get it high enough to get it to rotate. The mechanism worked a treat!
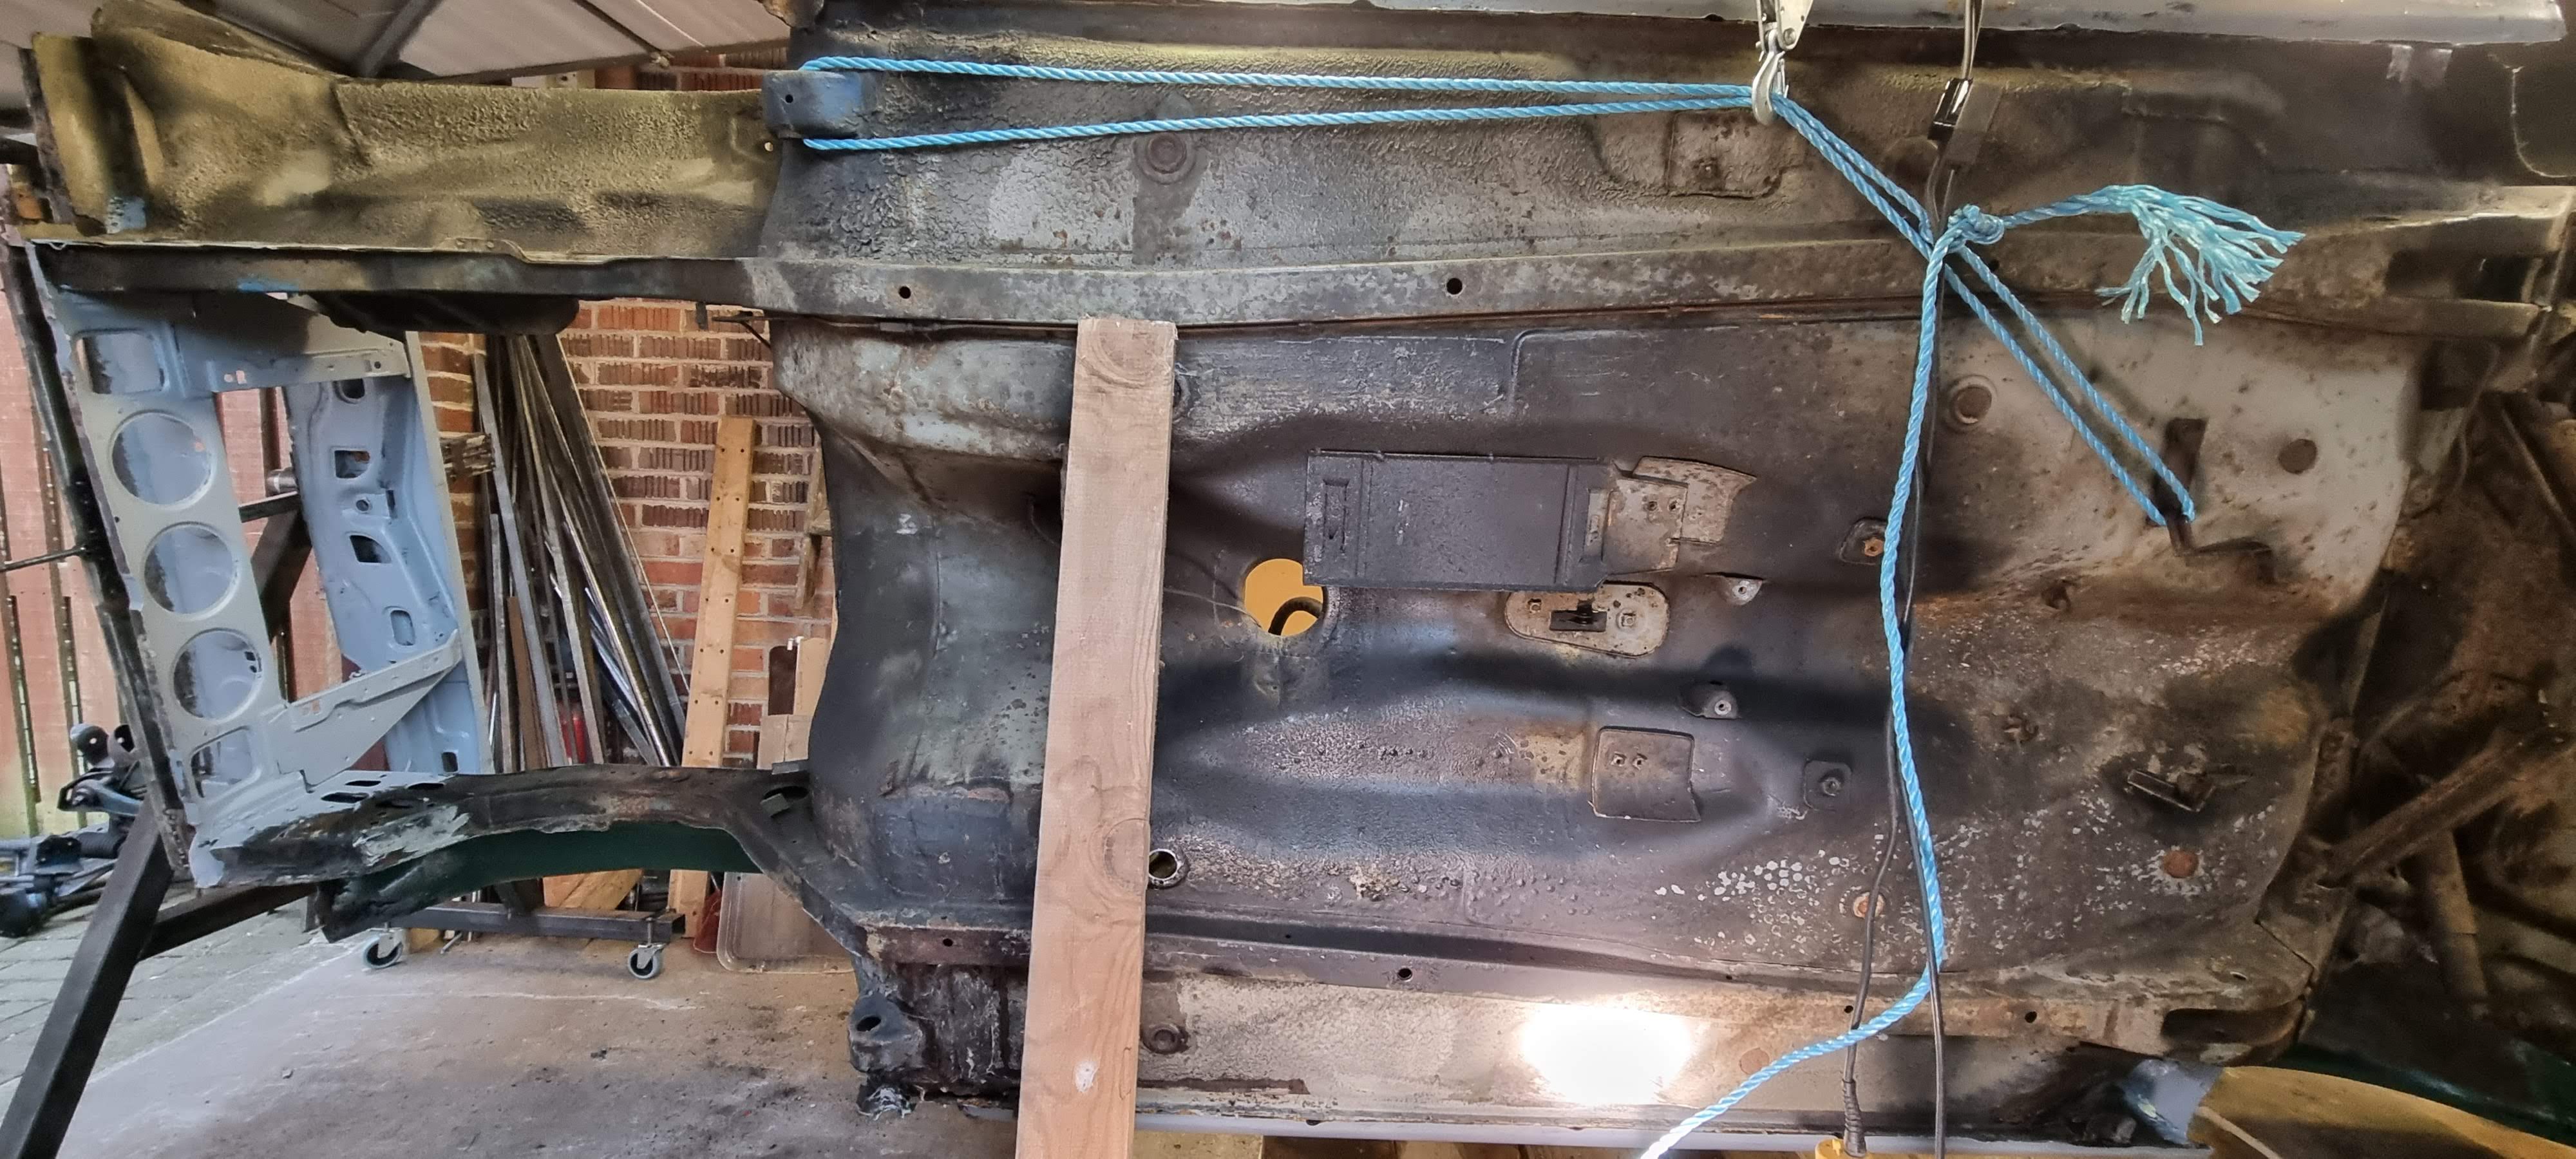
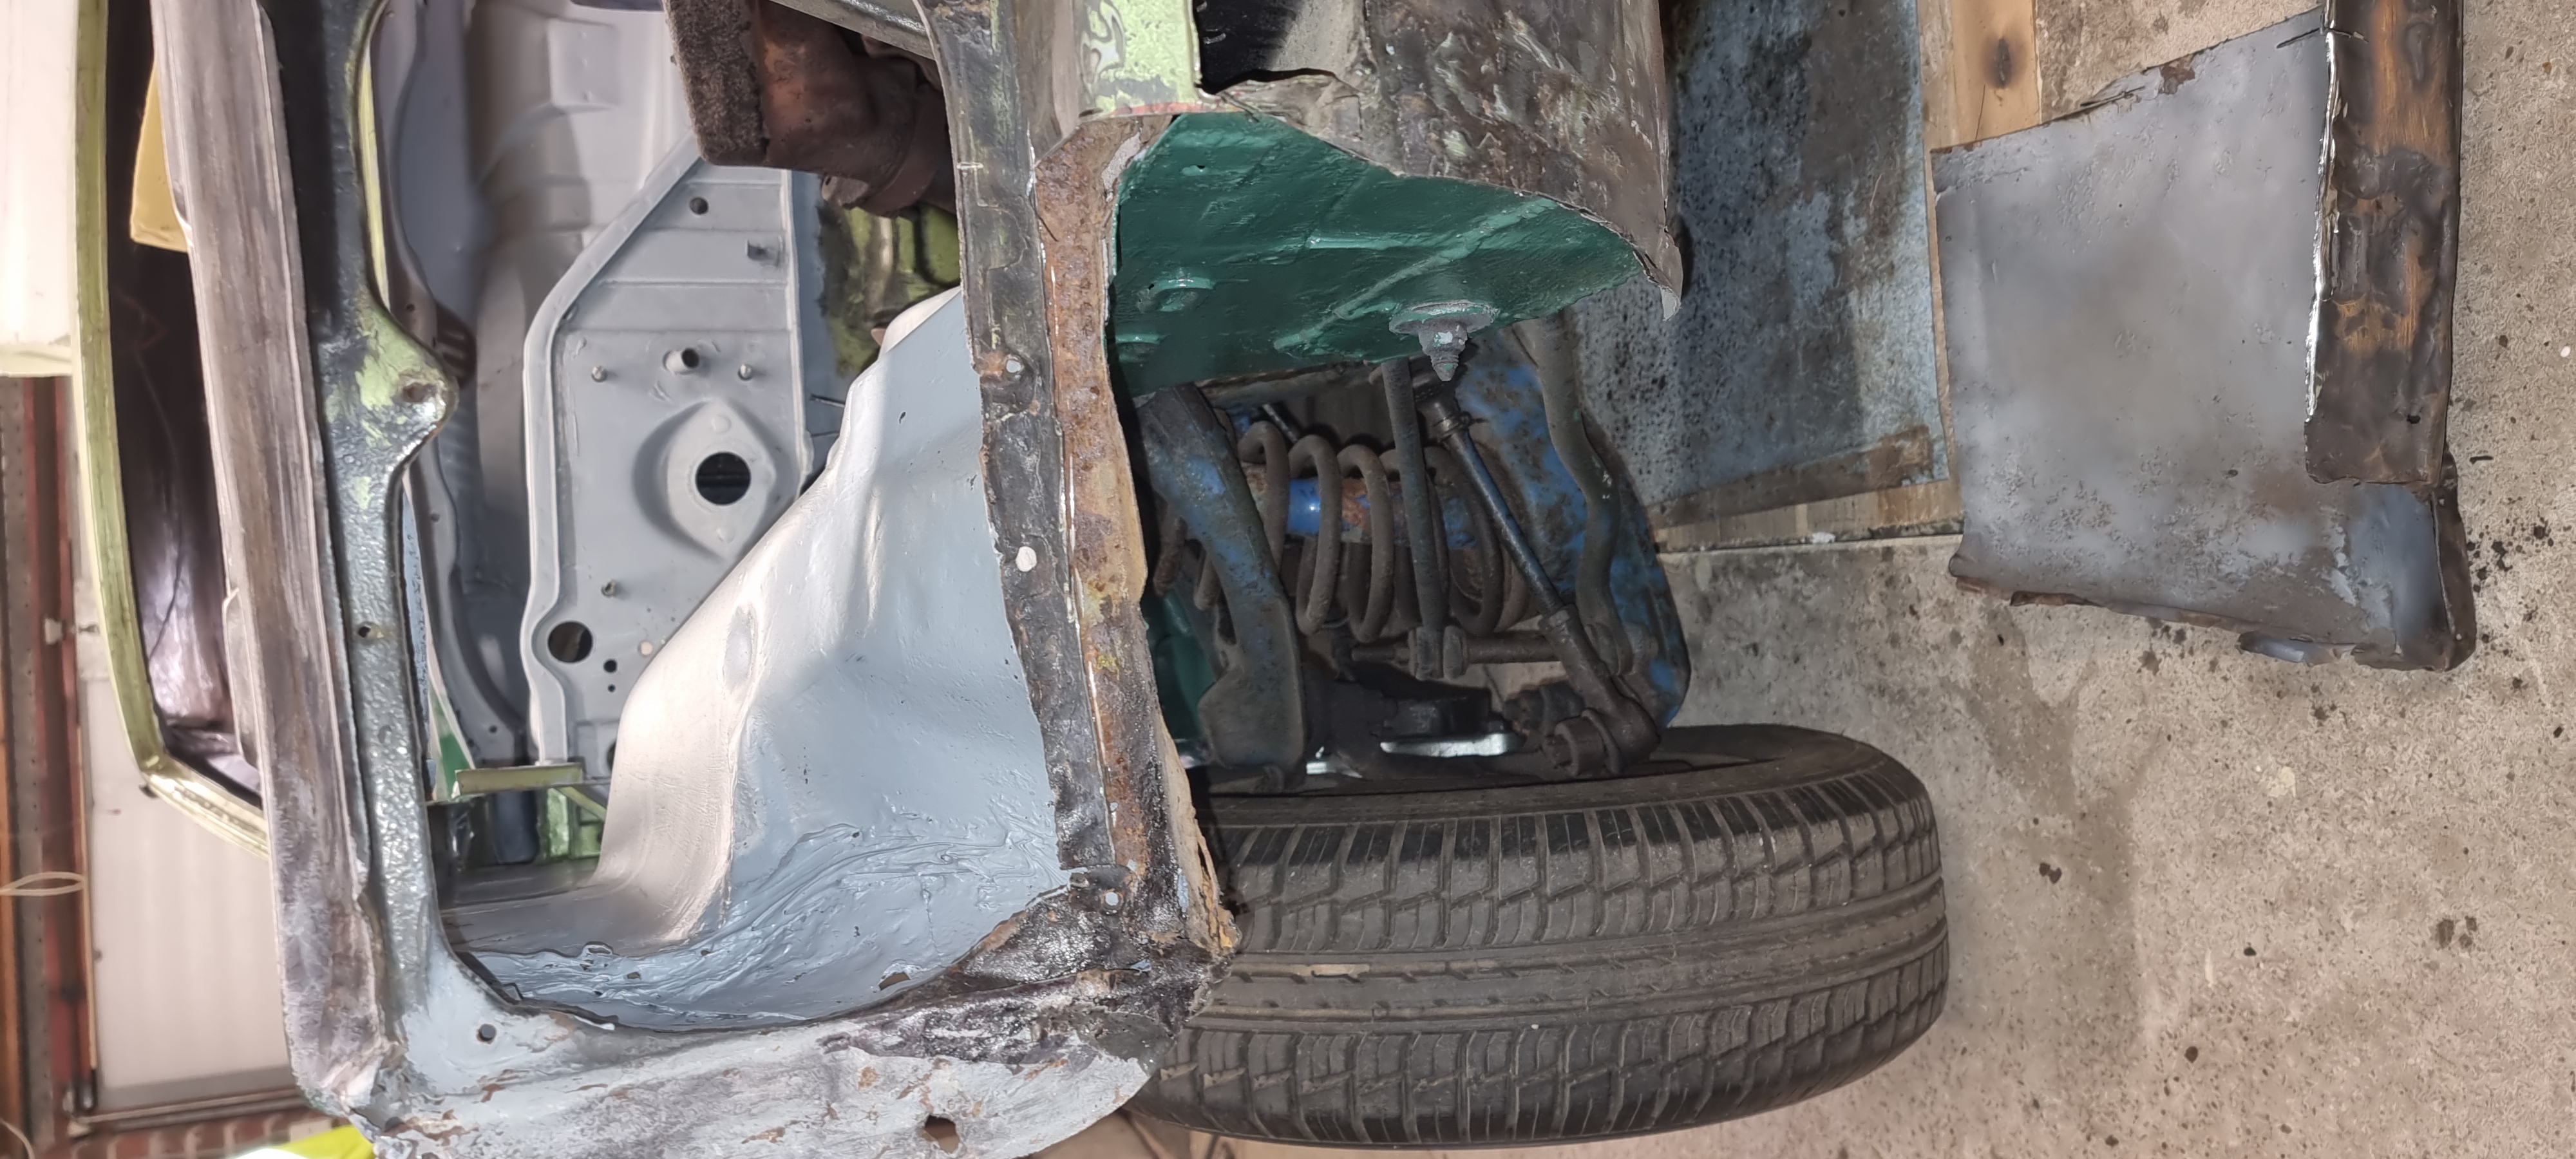
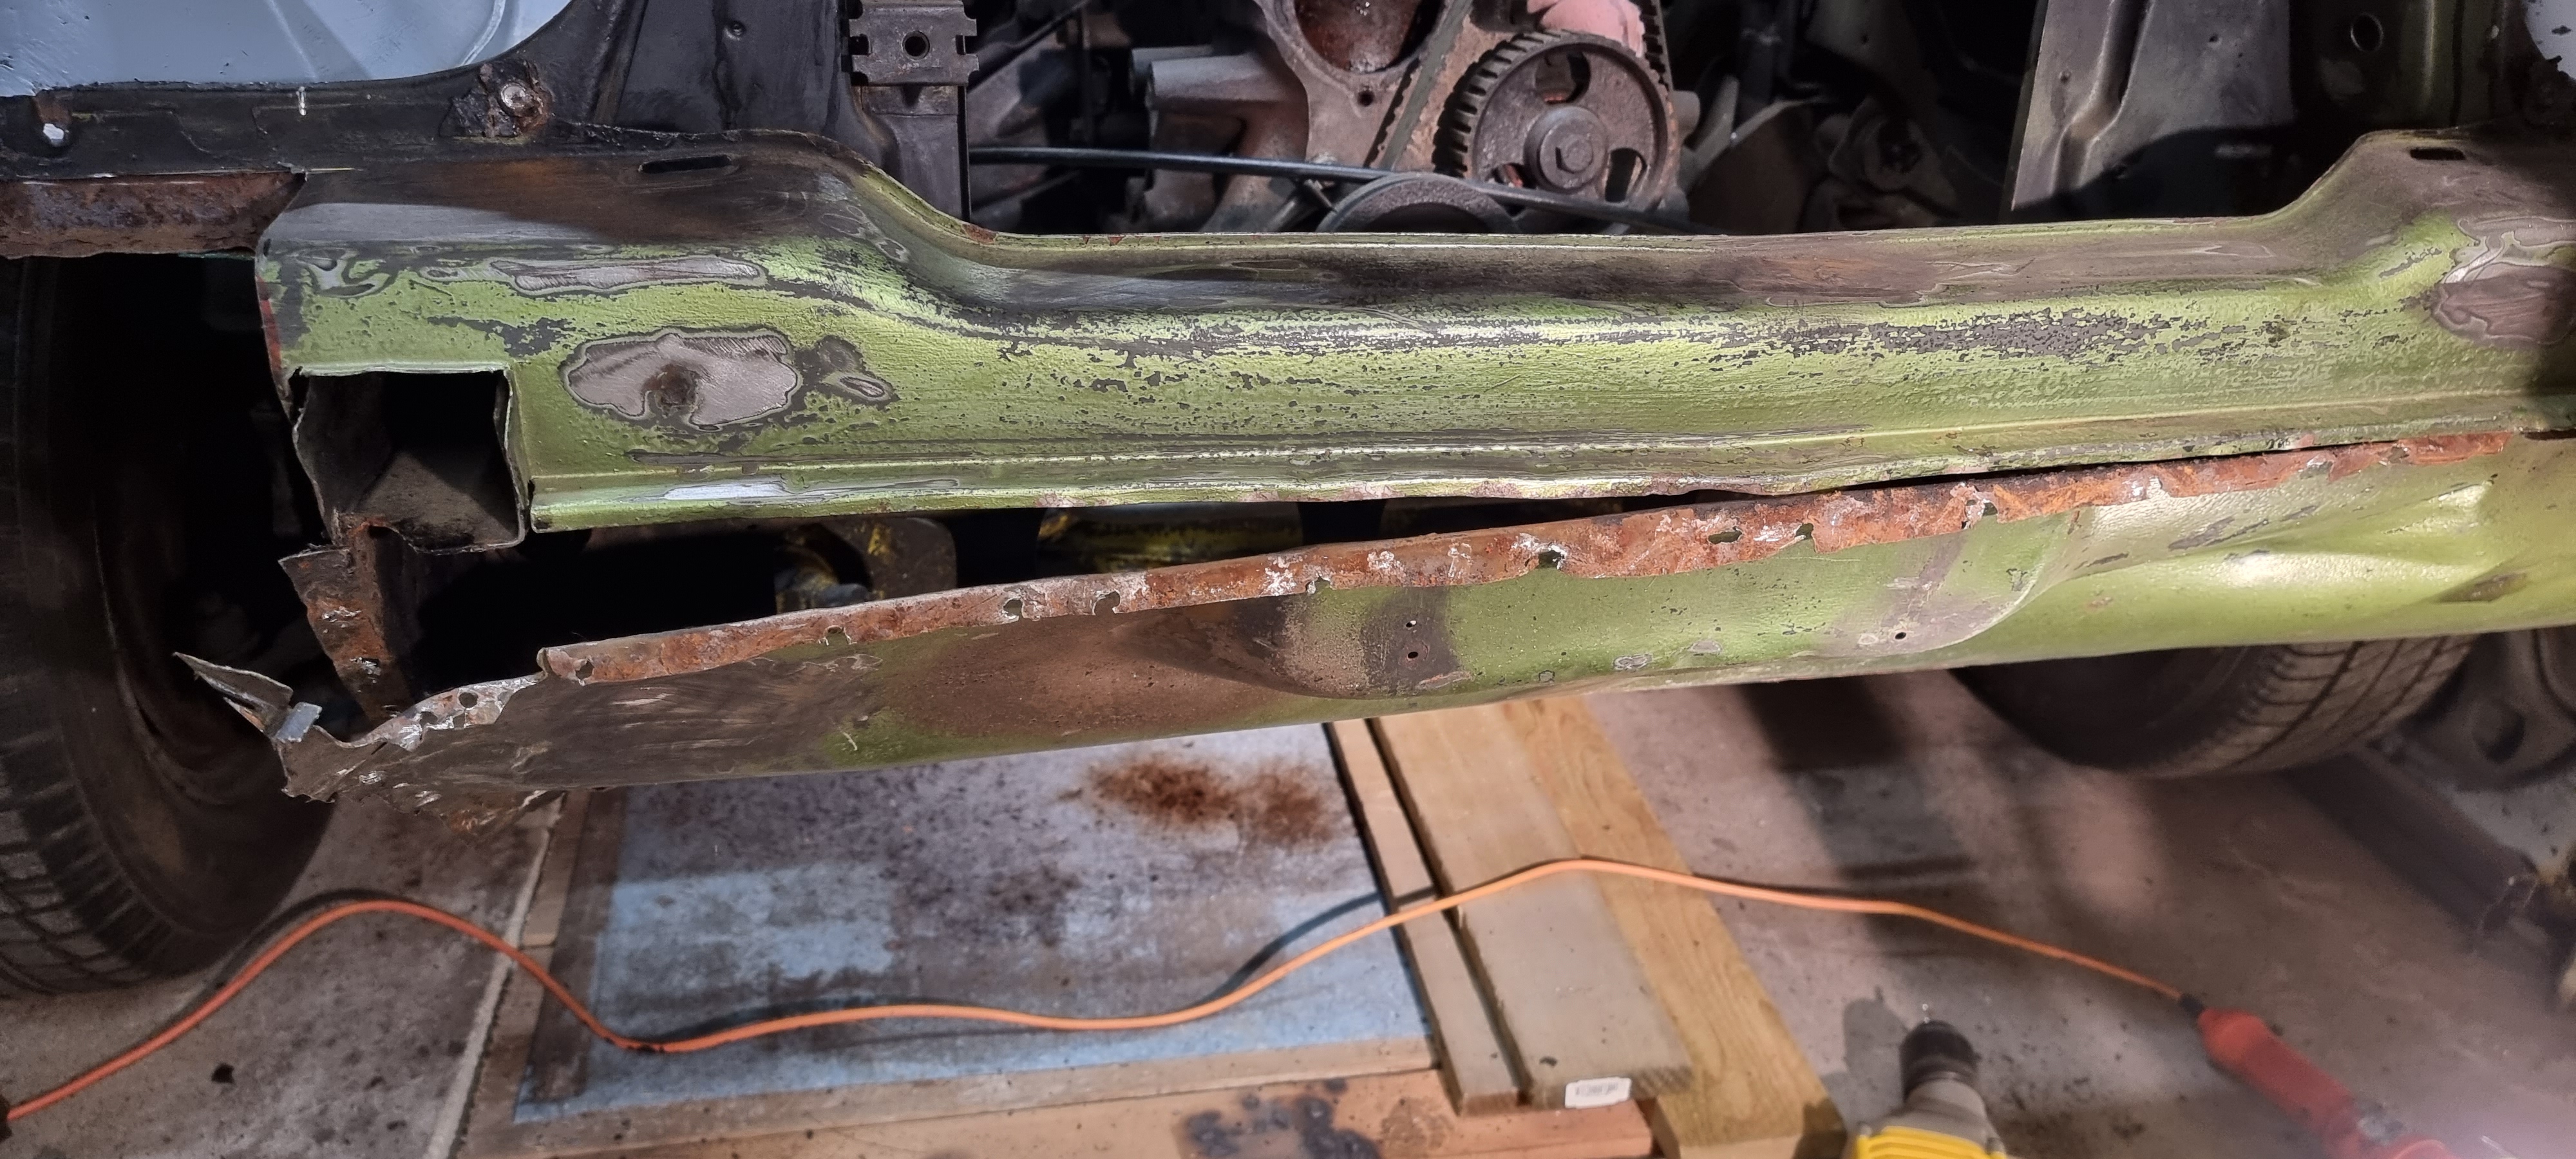
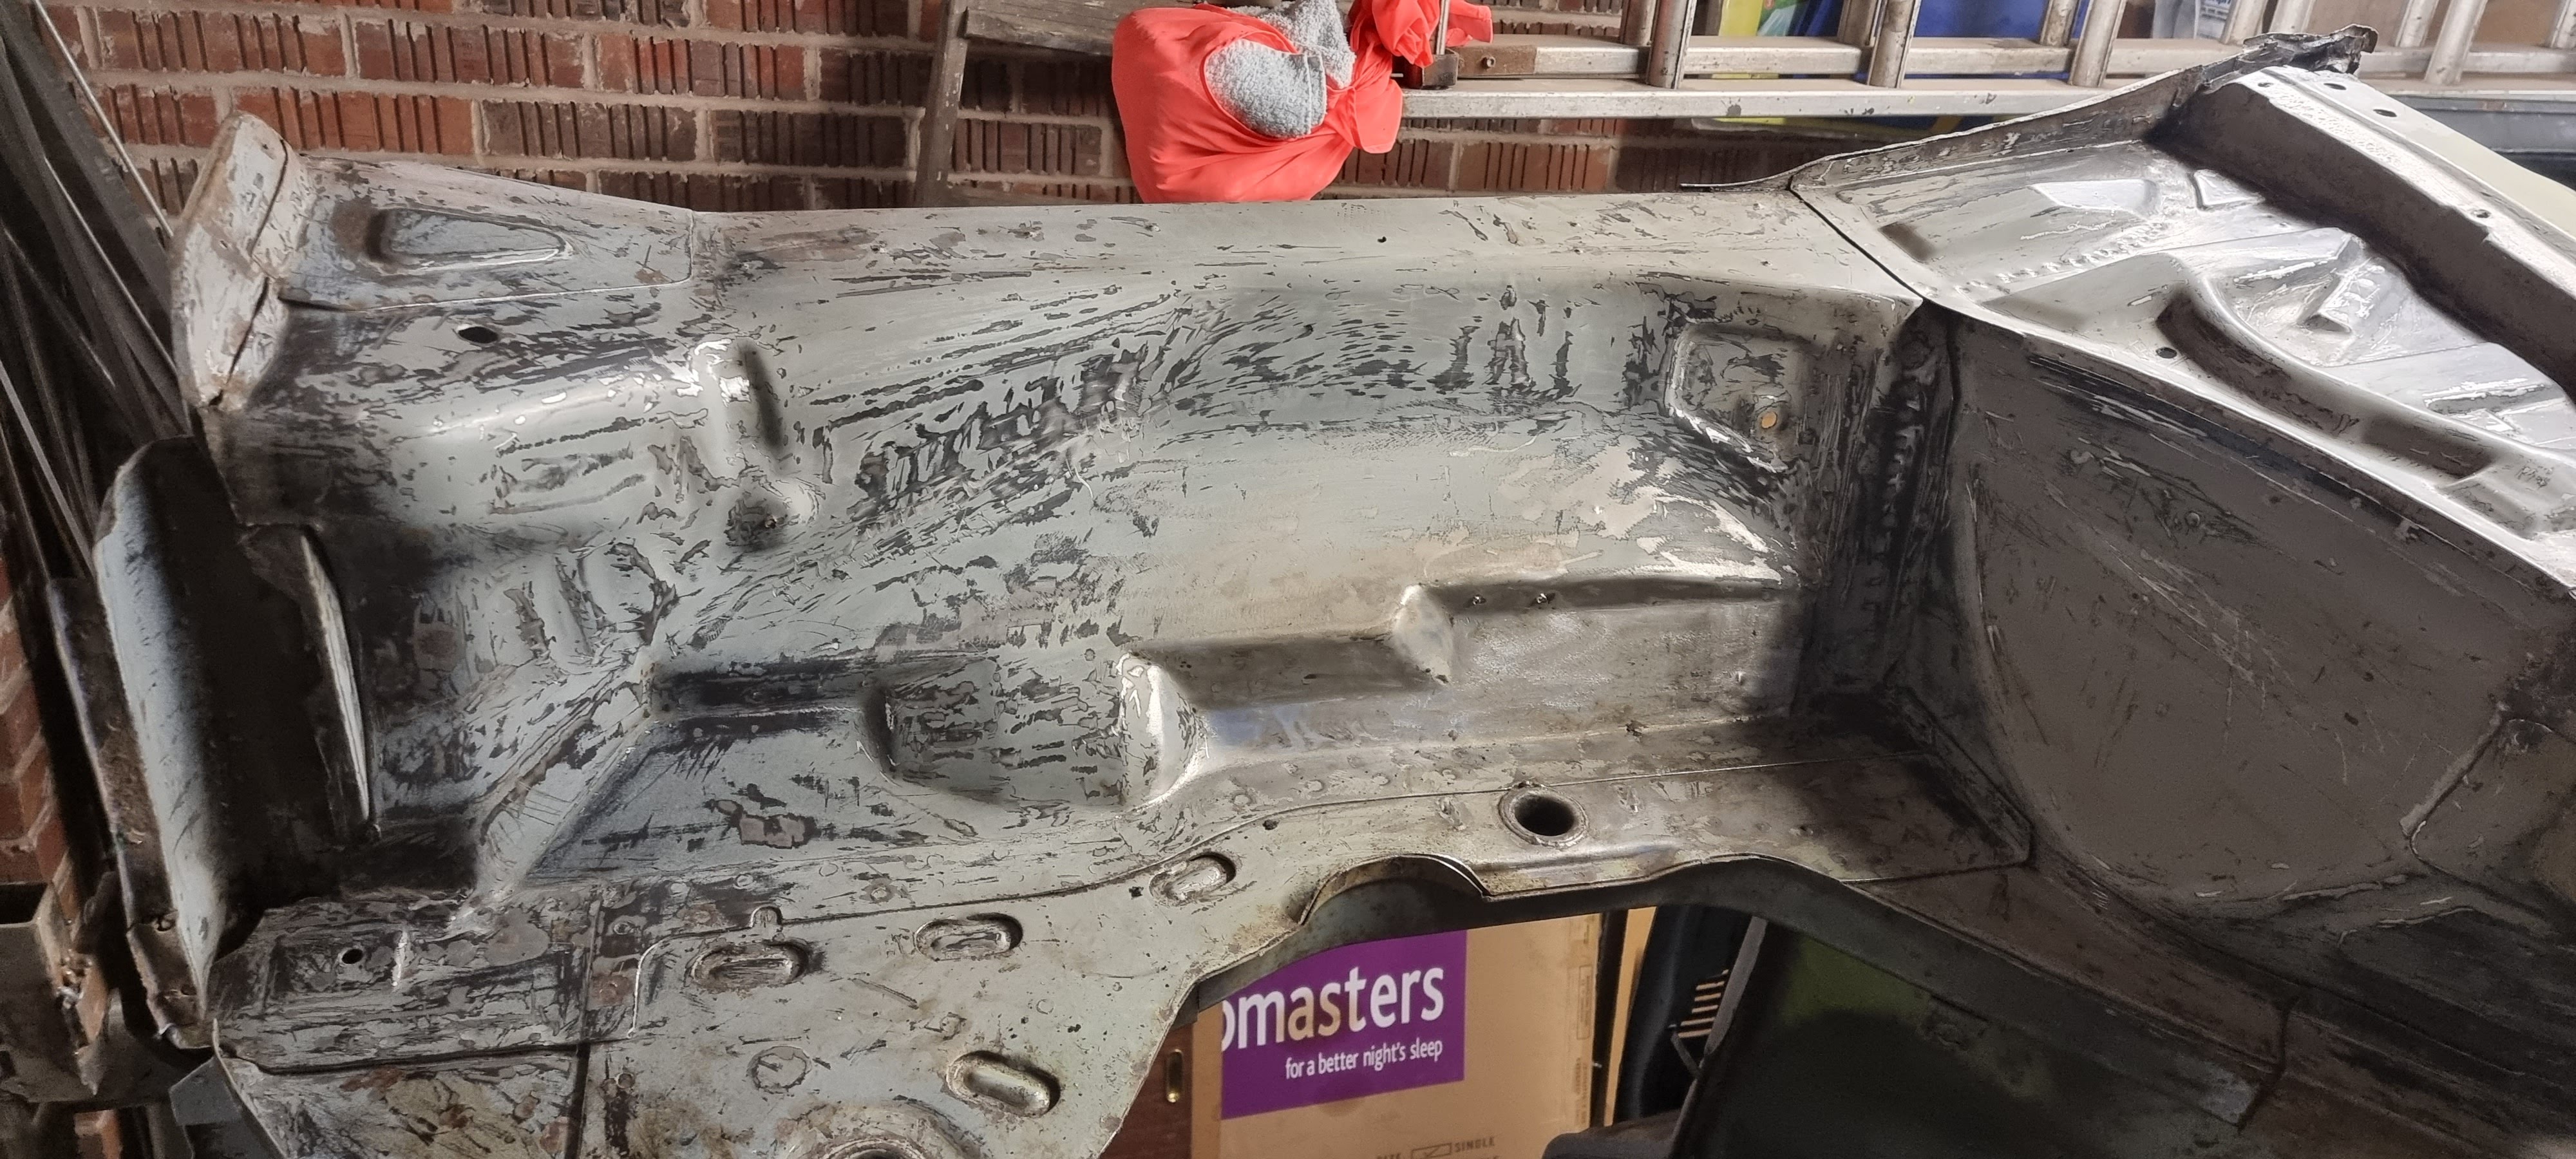
Assessing the underside.
Being the cautious type, I supported the chassis with both a big post and rope attached to my pulley. Not surprisingly, once I could inspect it properly I found a LOT more rot that would need sorting out!
Rot assessment.
Oh my! That doesn't look good.
Rot assessment.
Neither does this!
Rot assessment.
Or this!
Rot assessment.
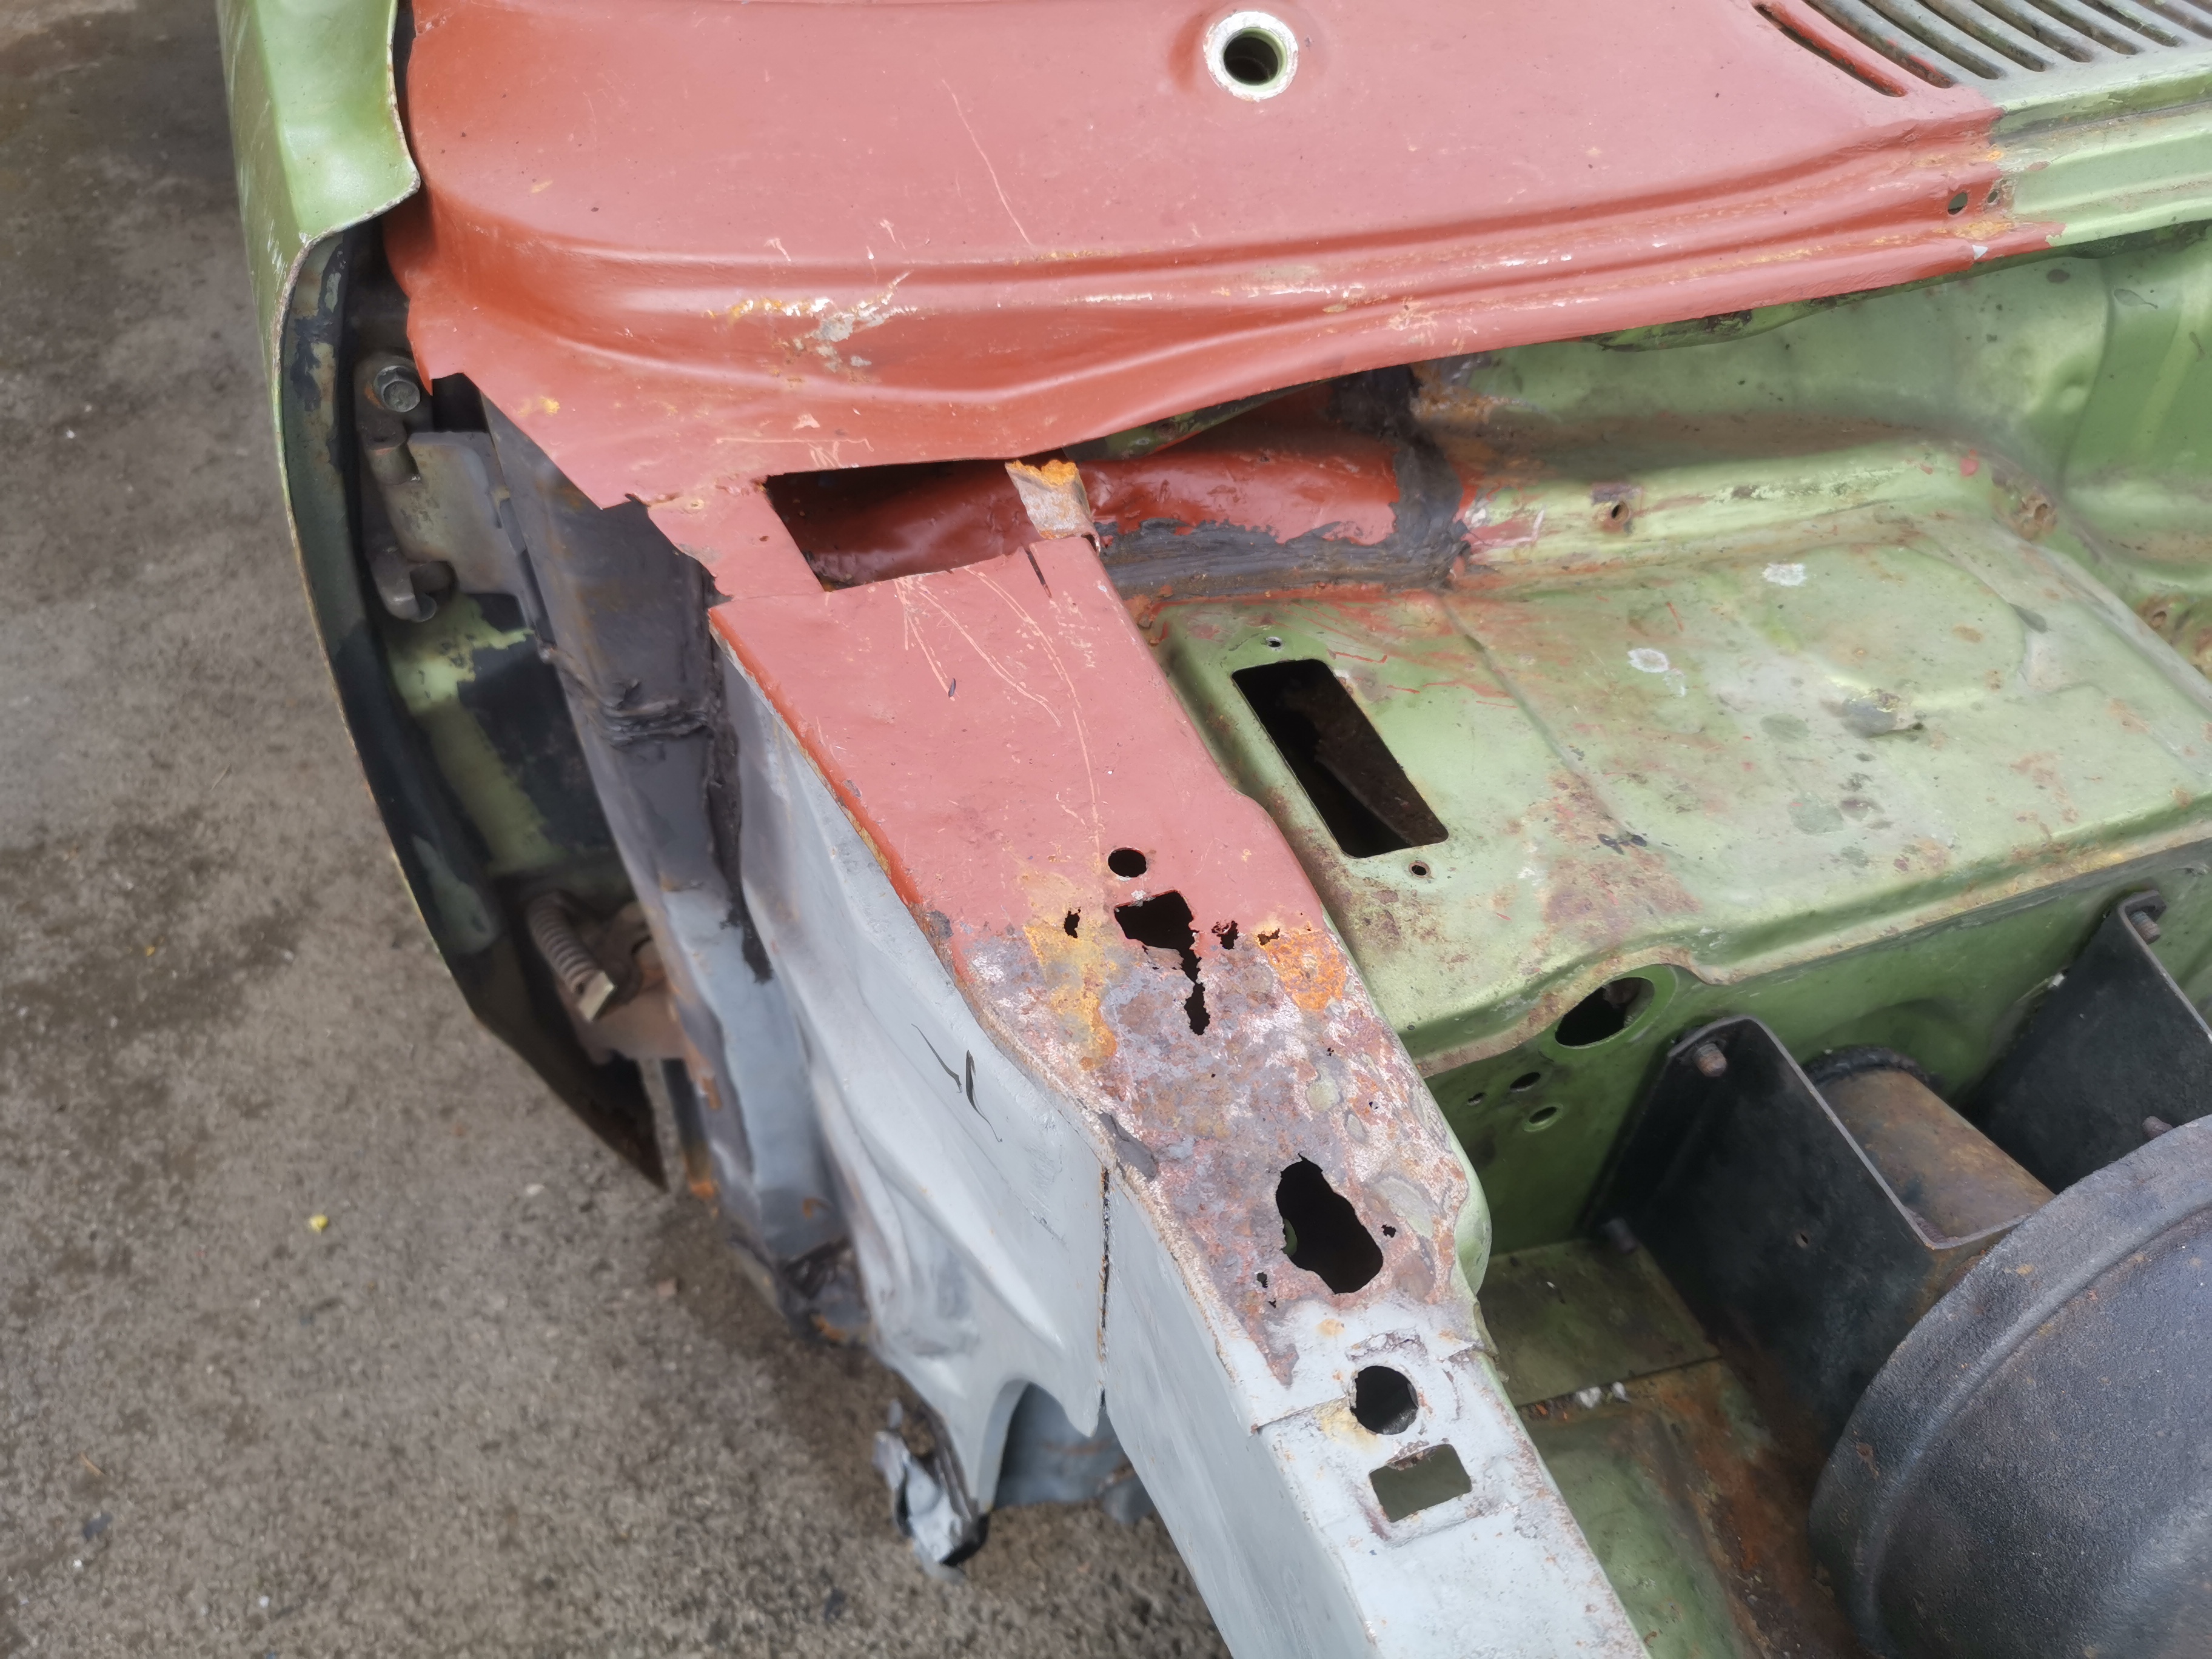
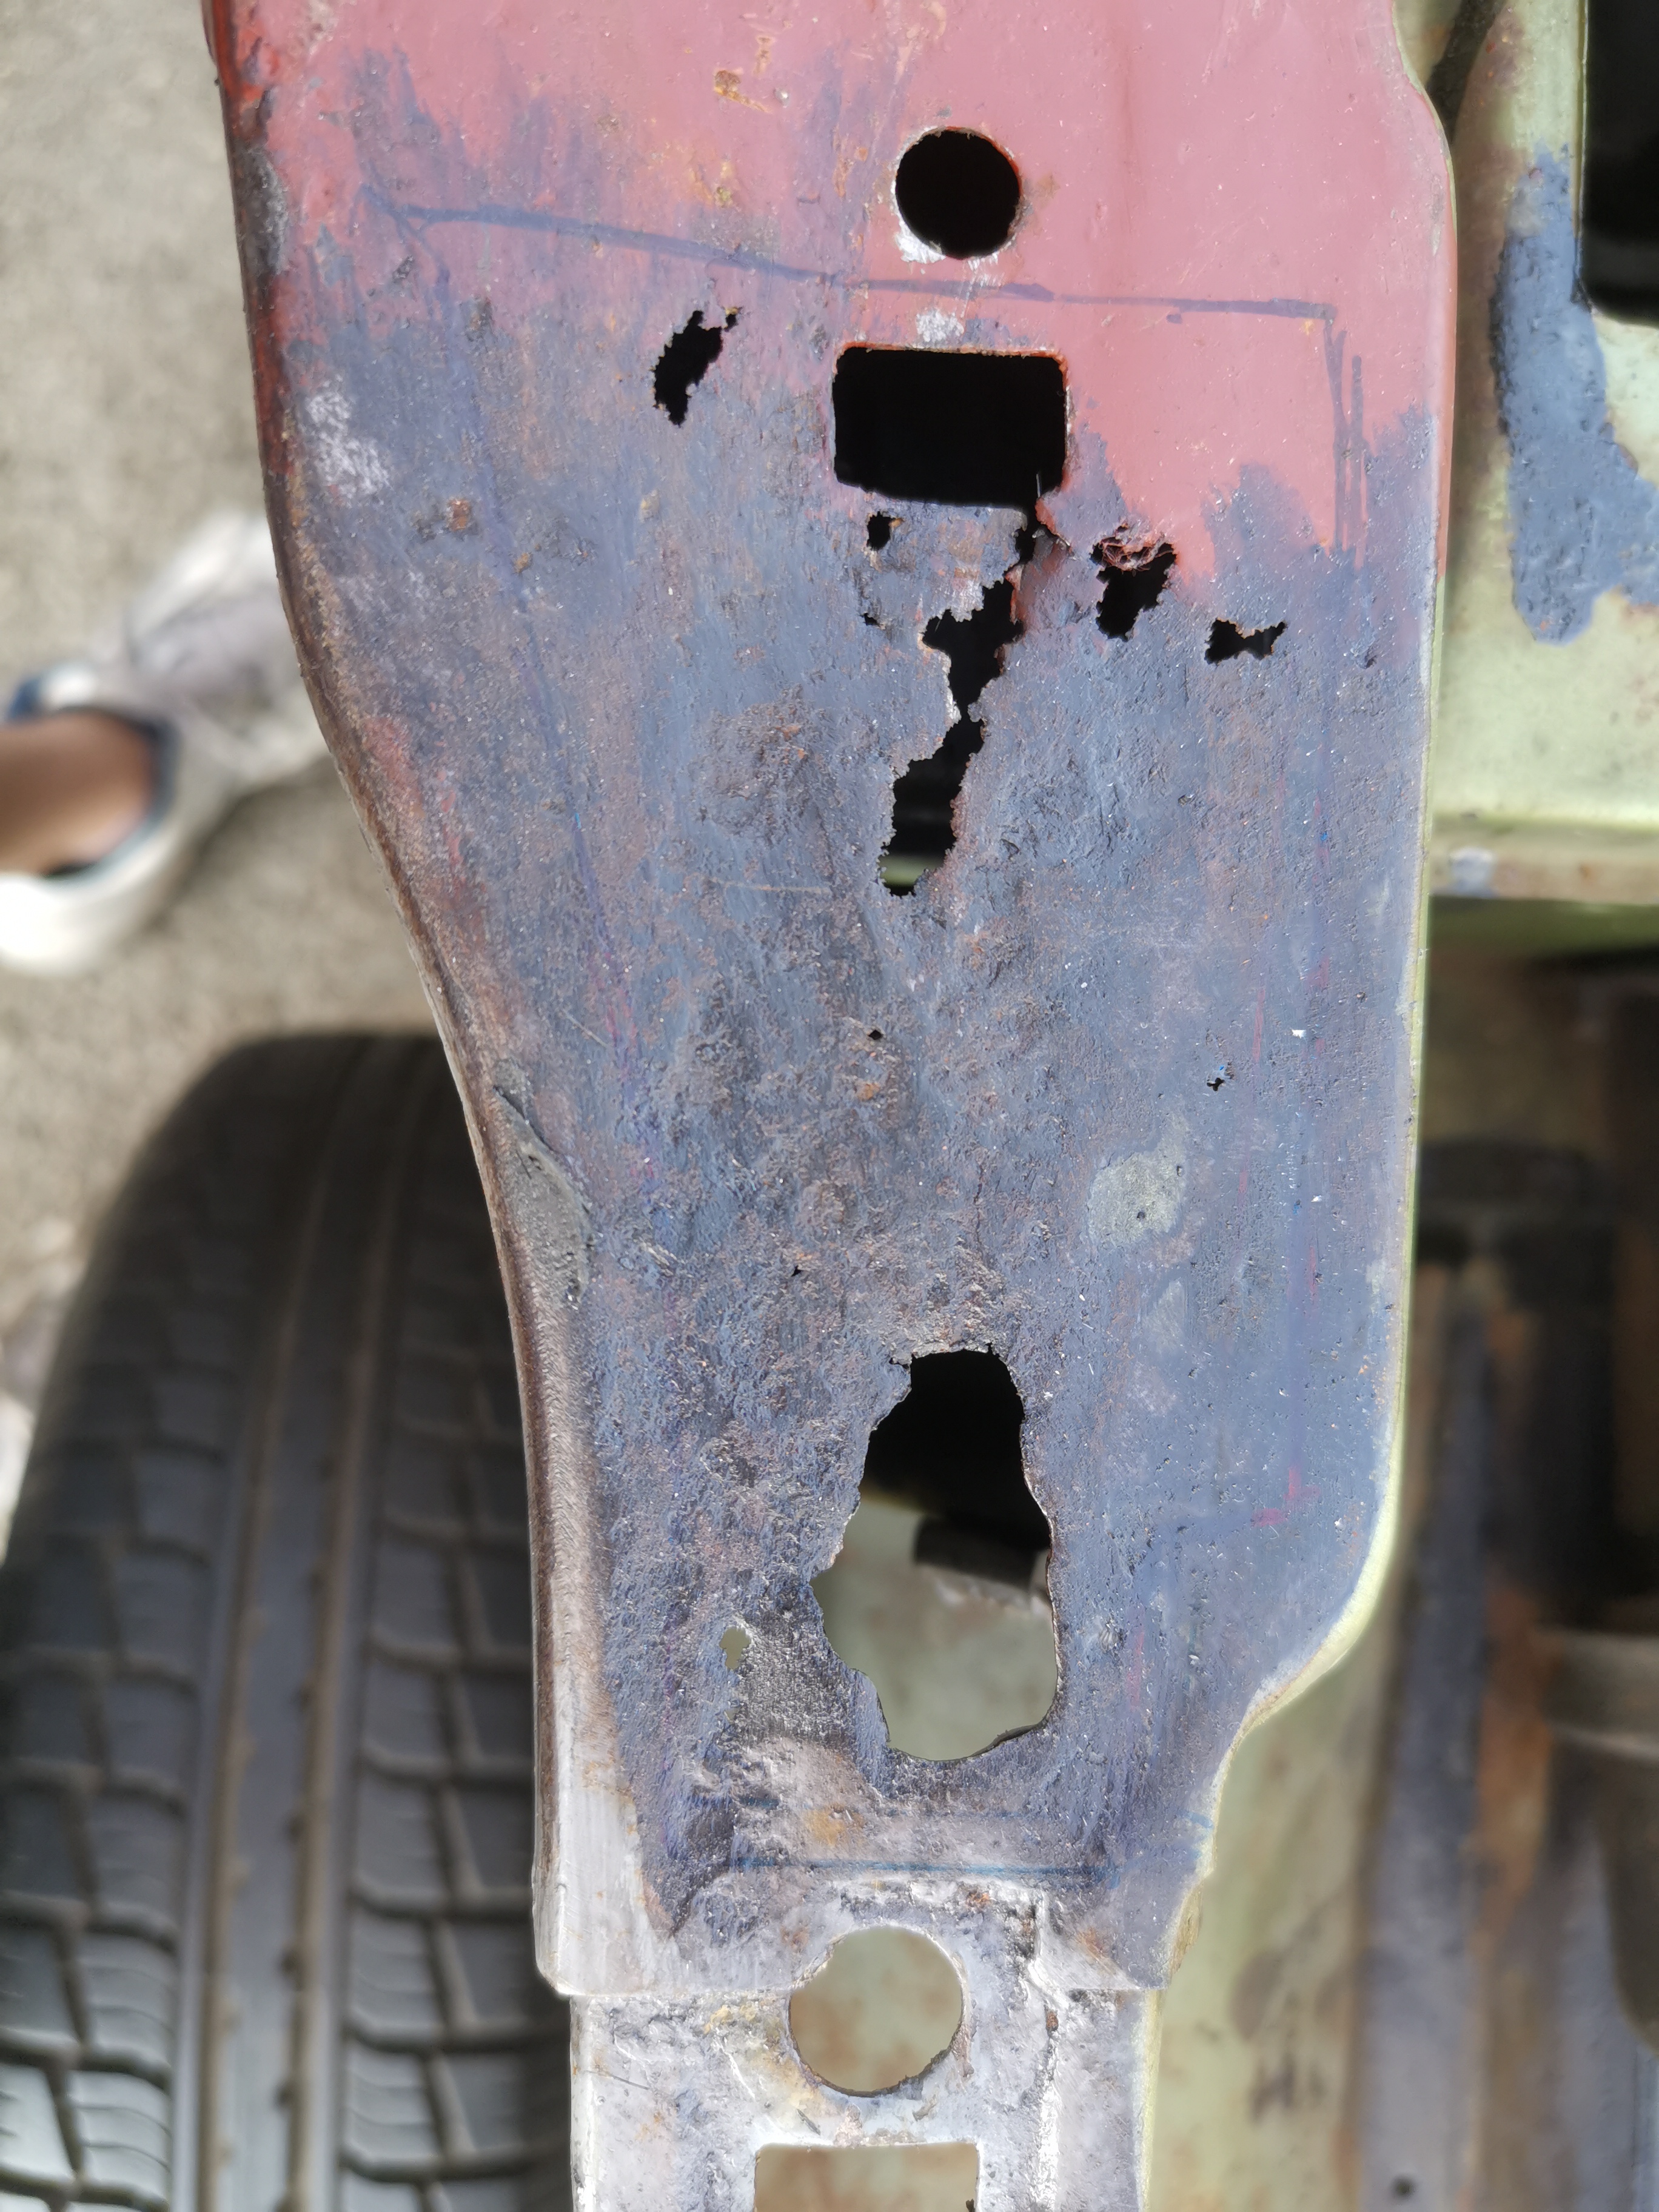
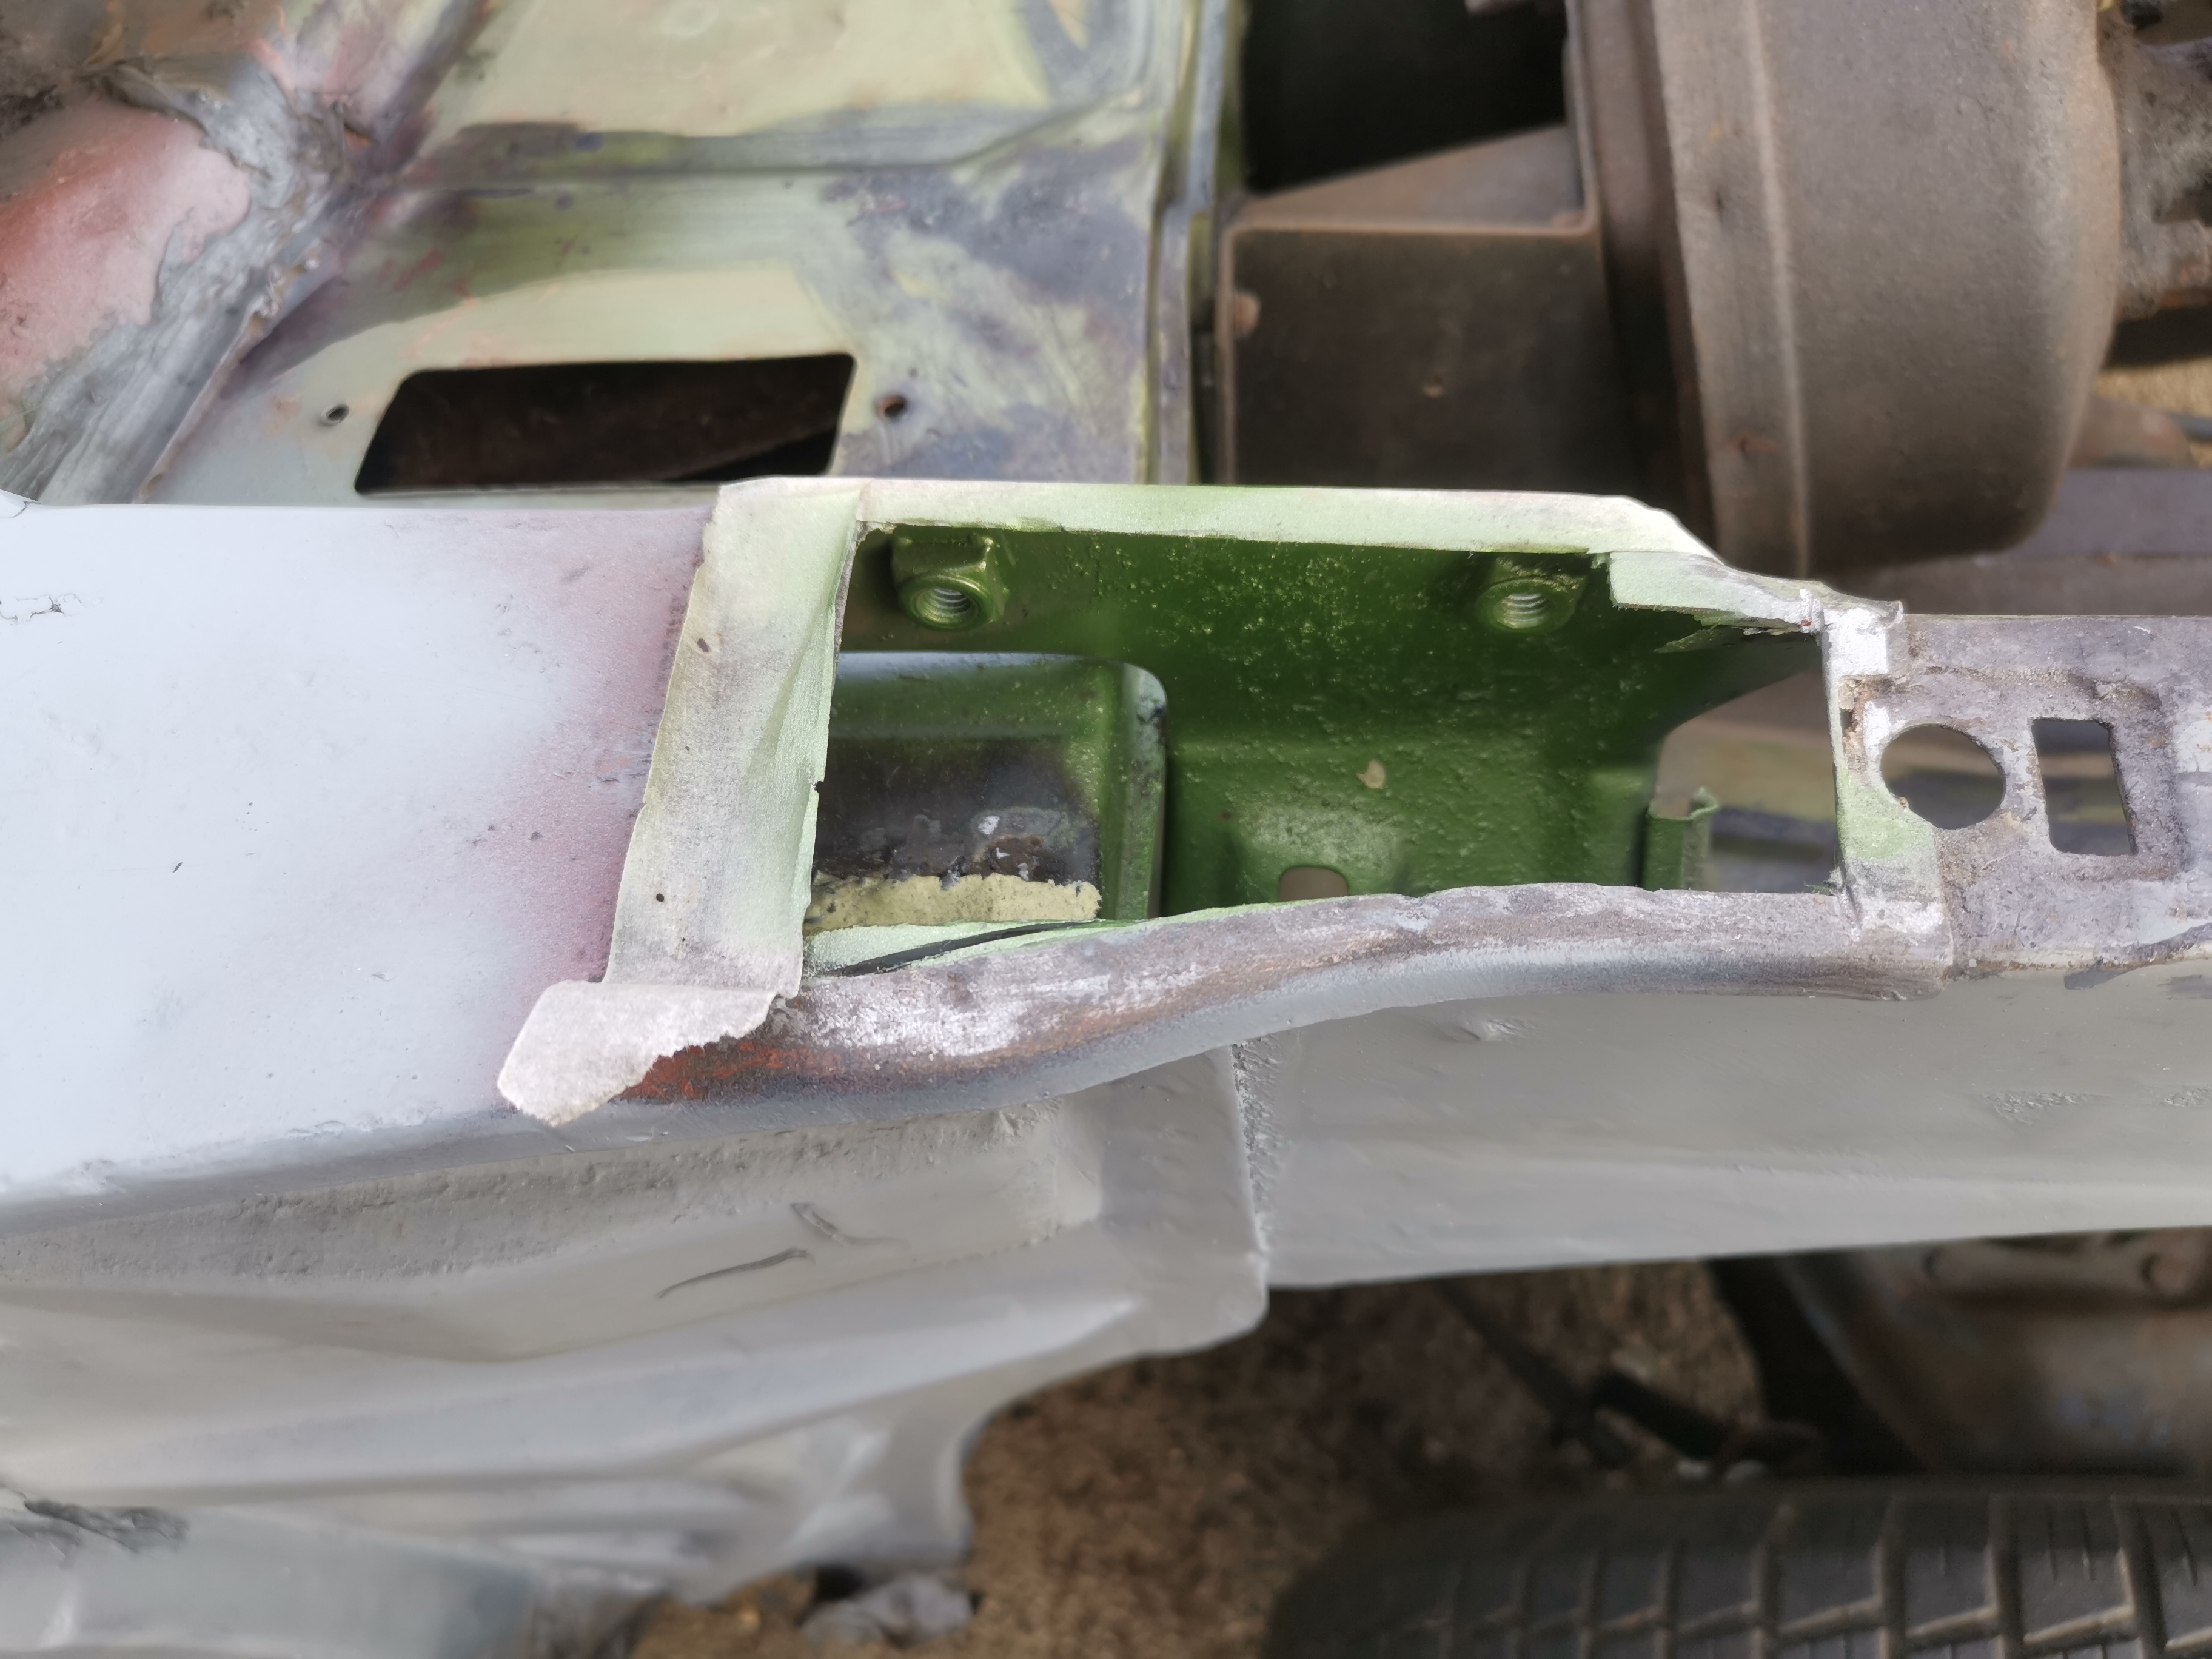
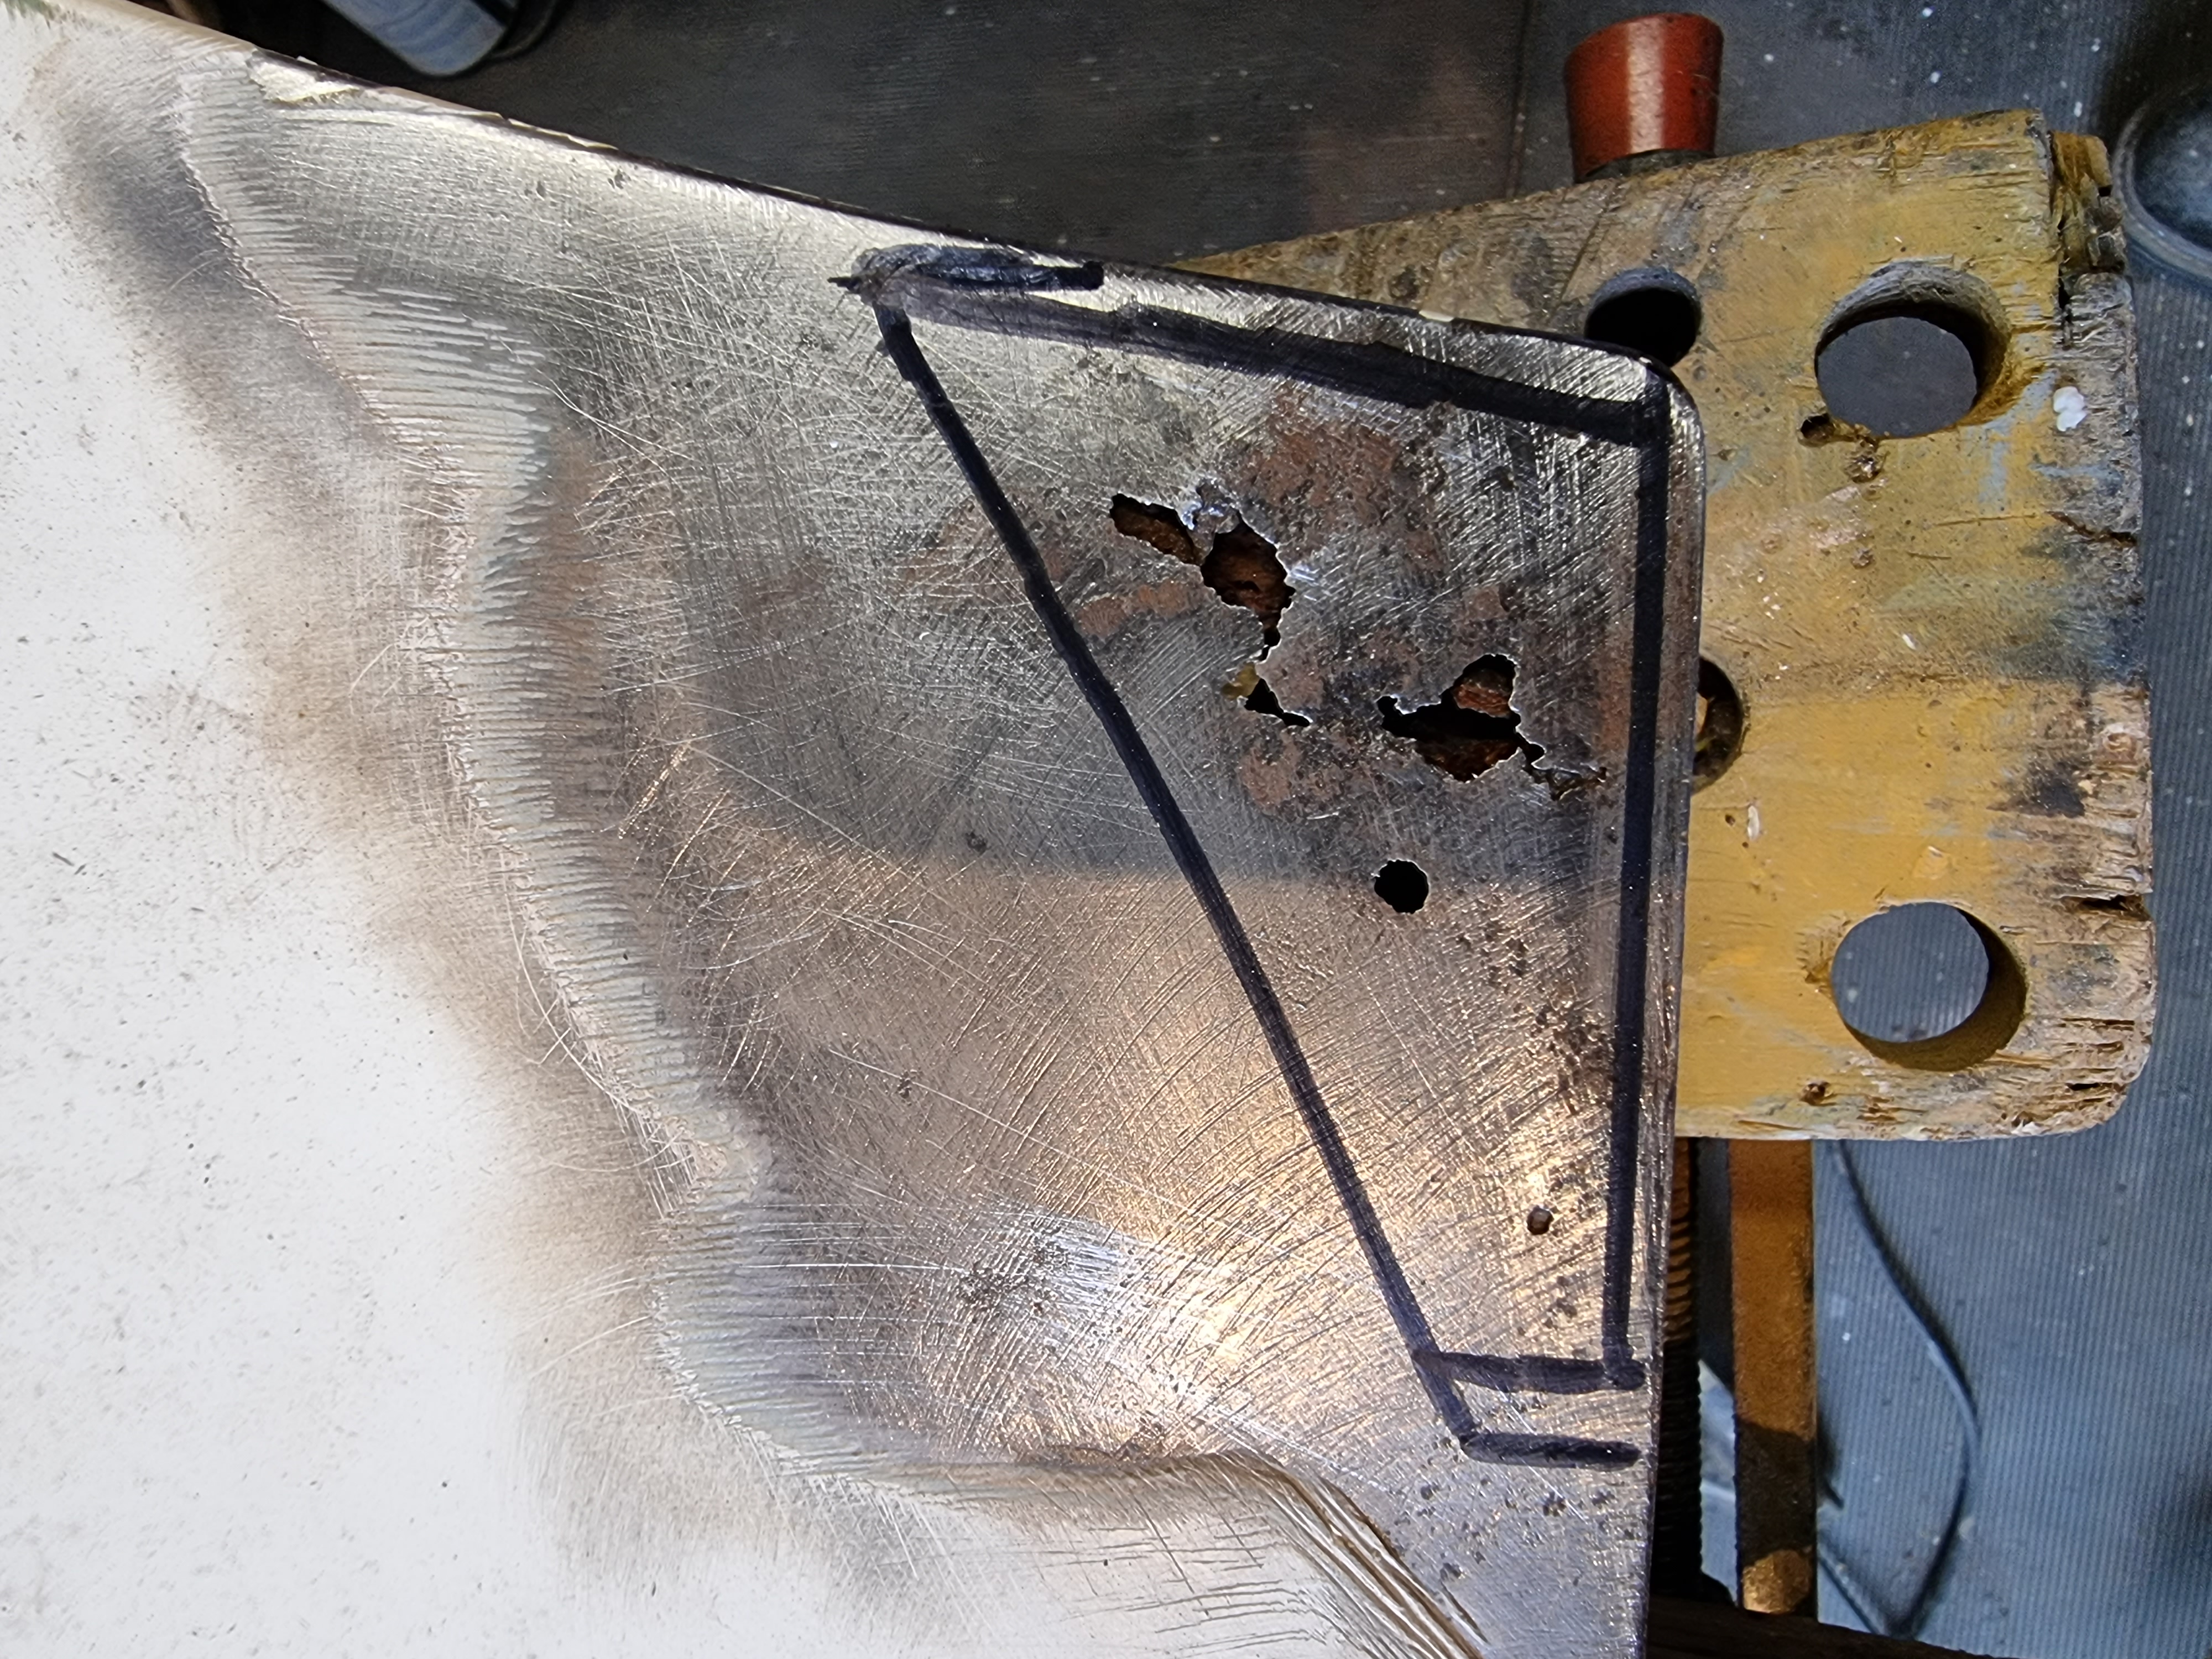
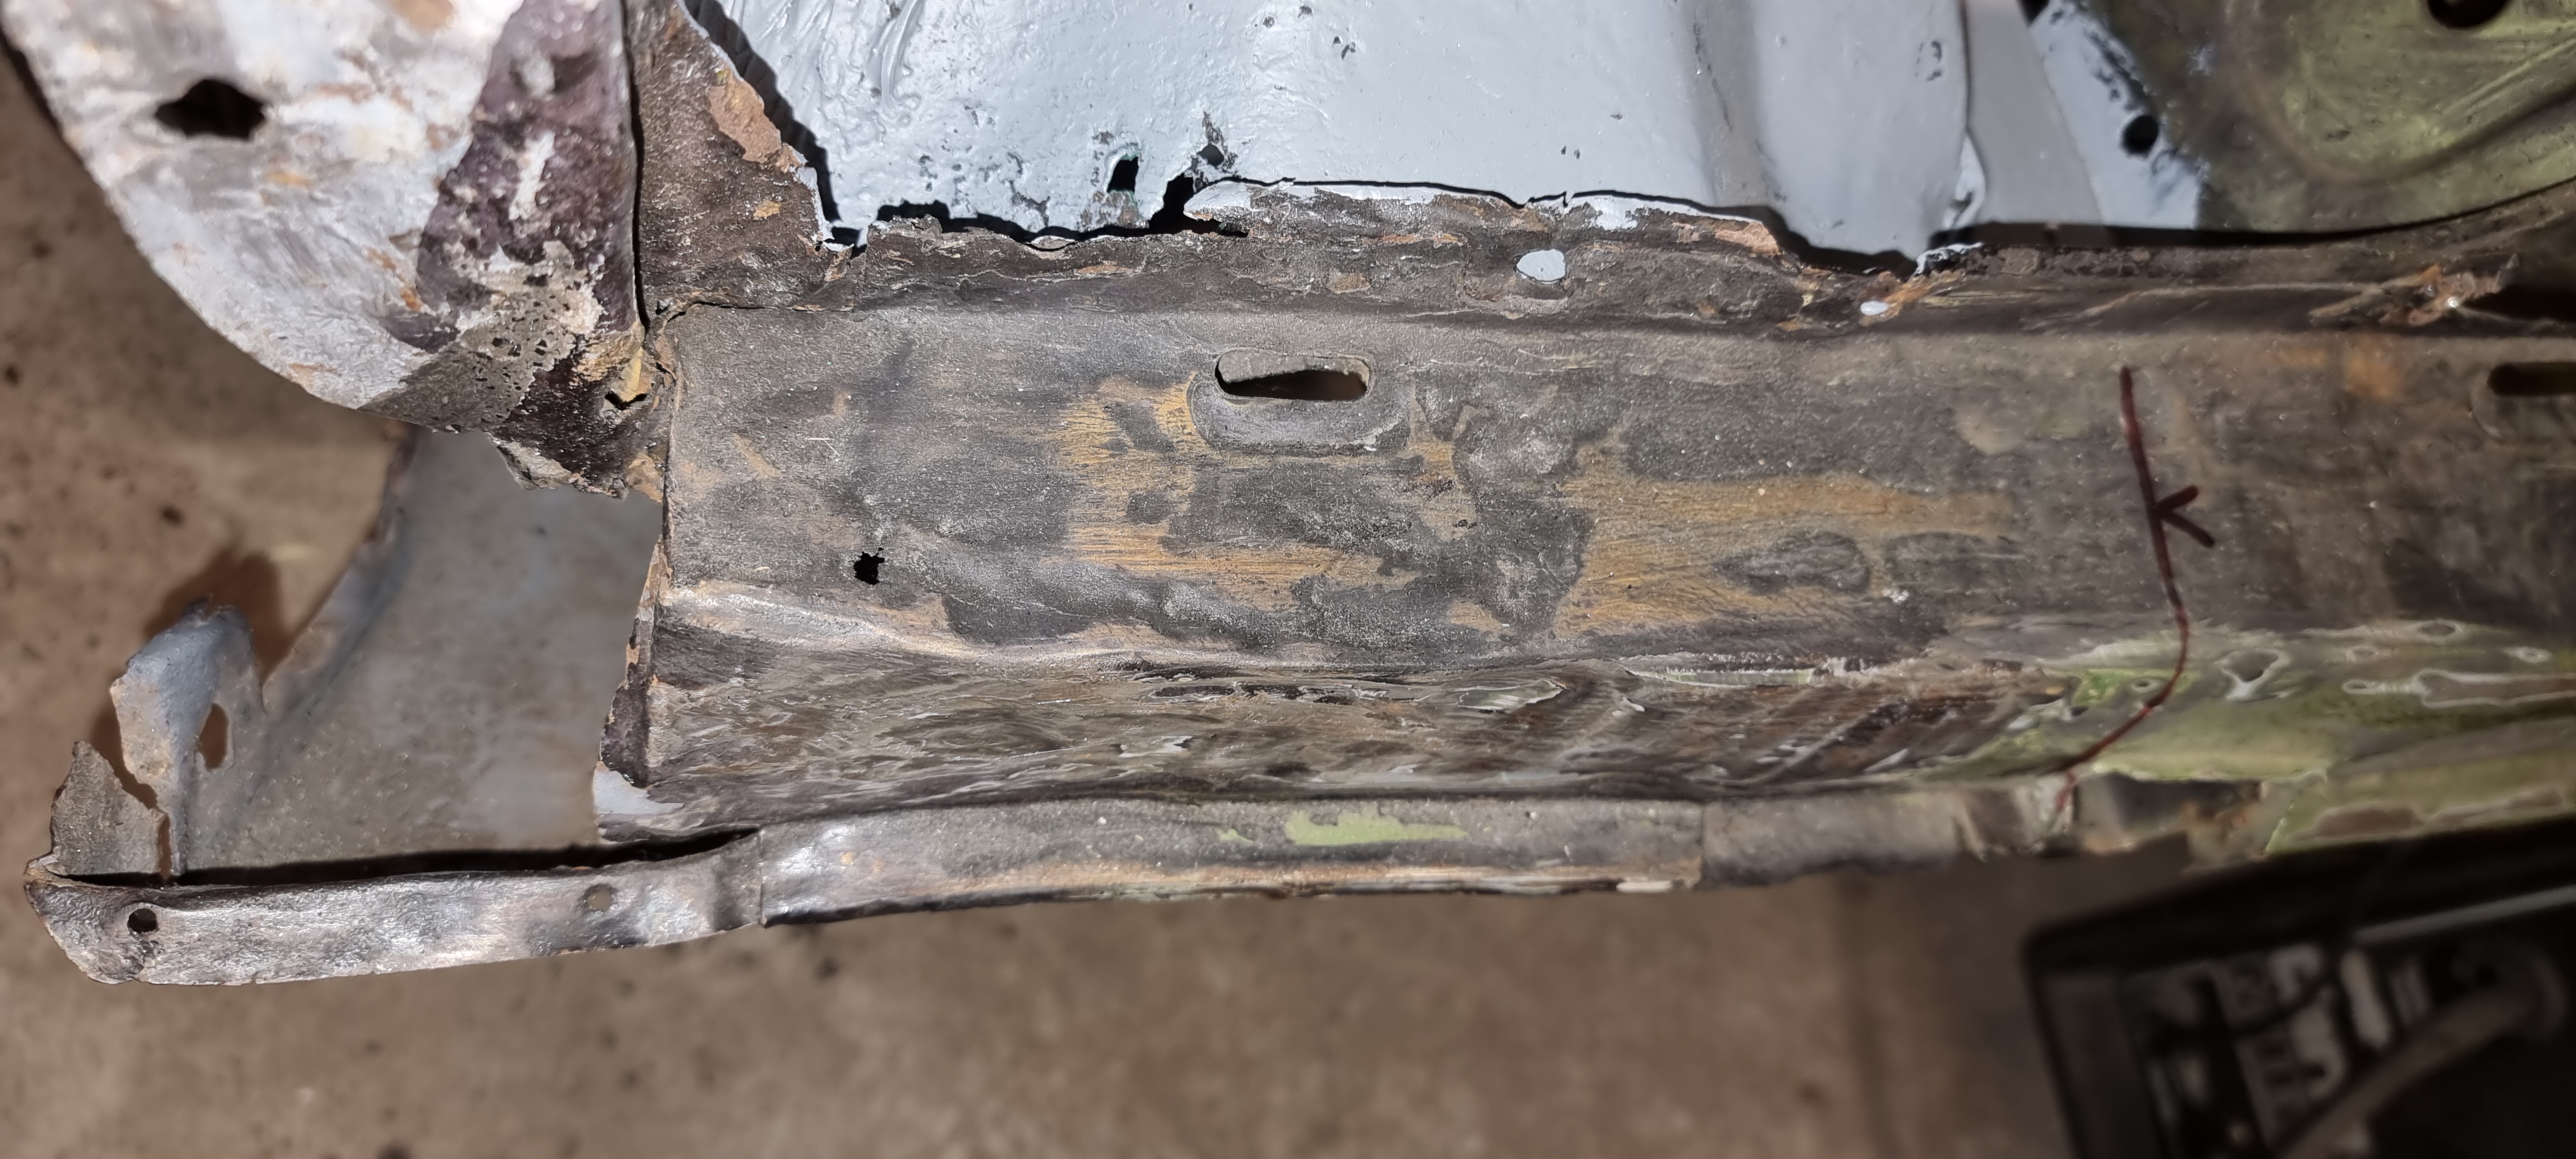
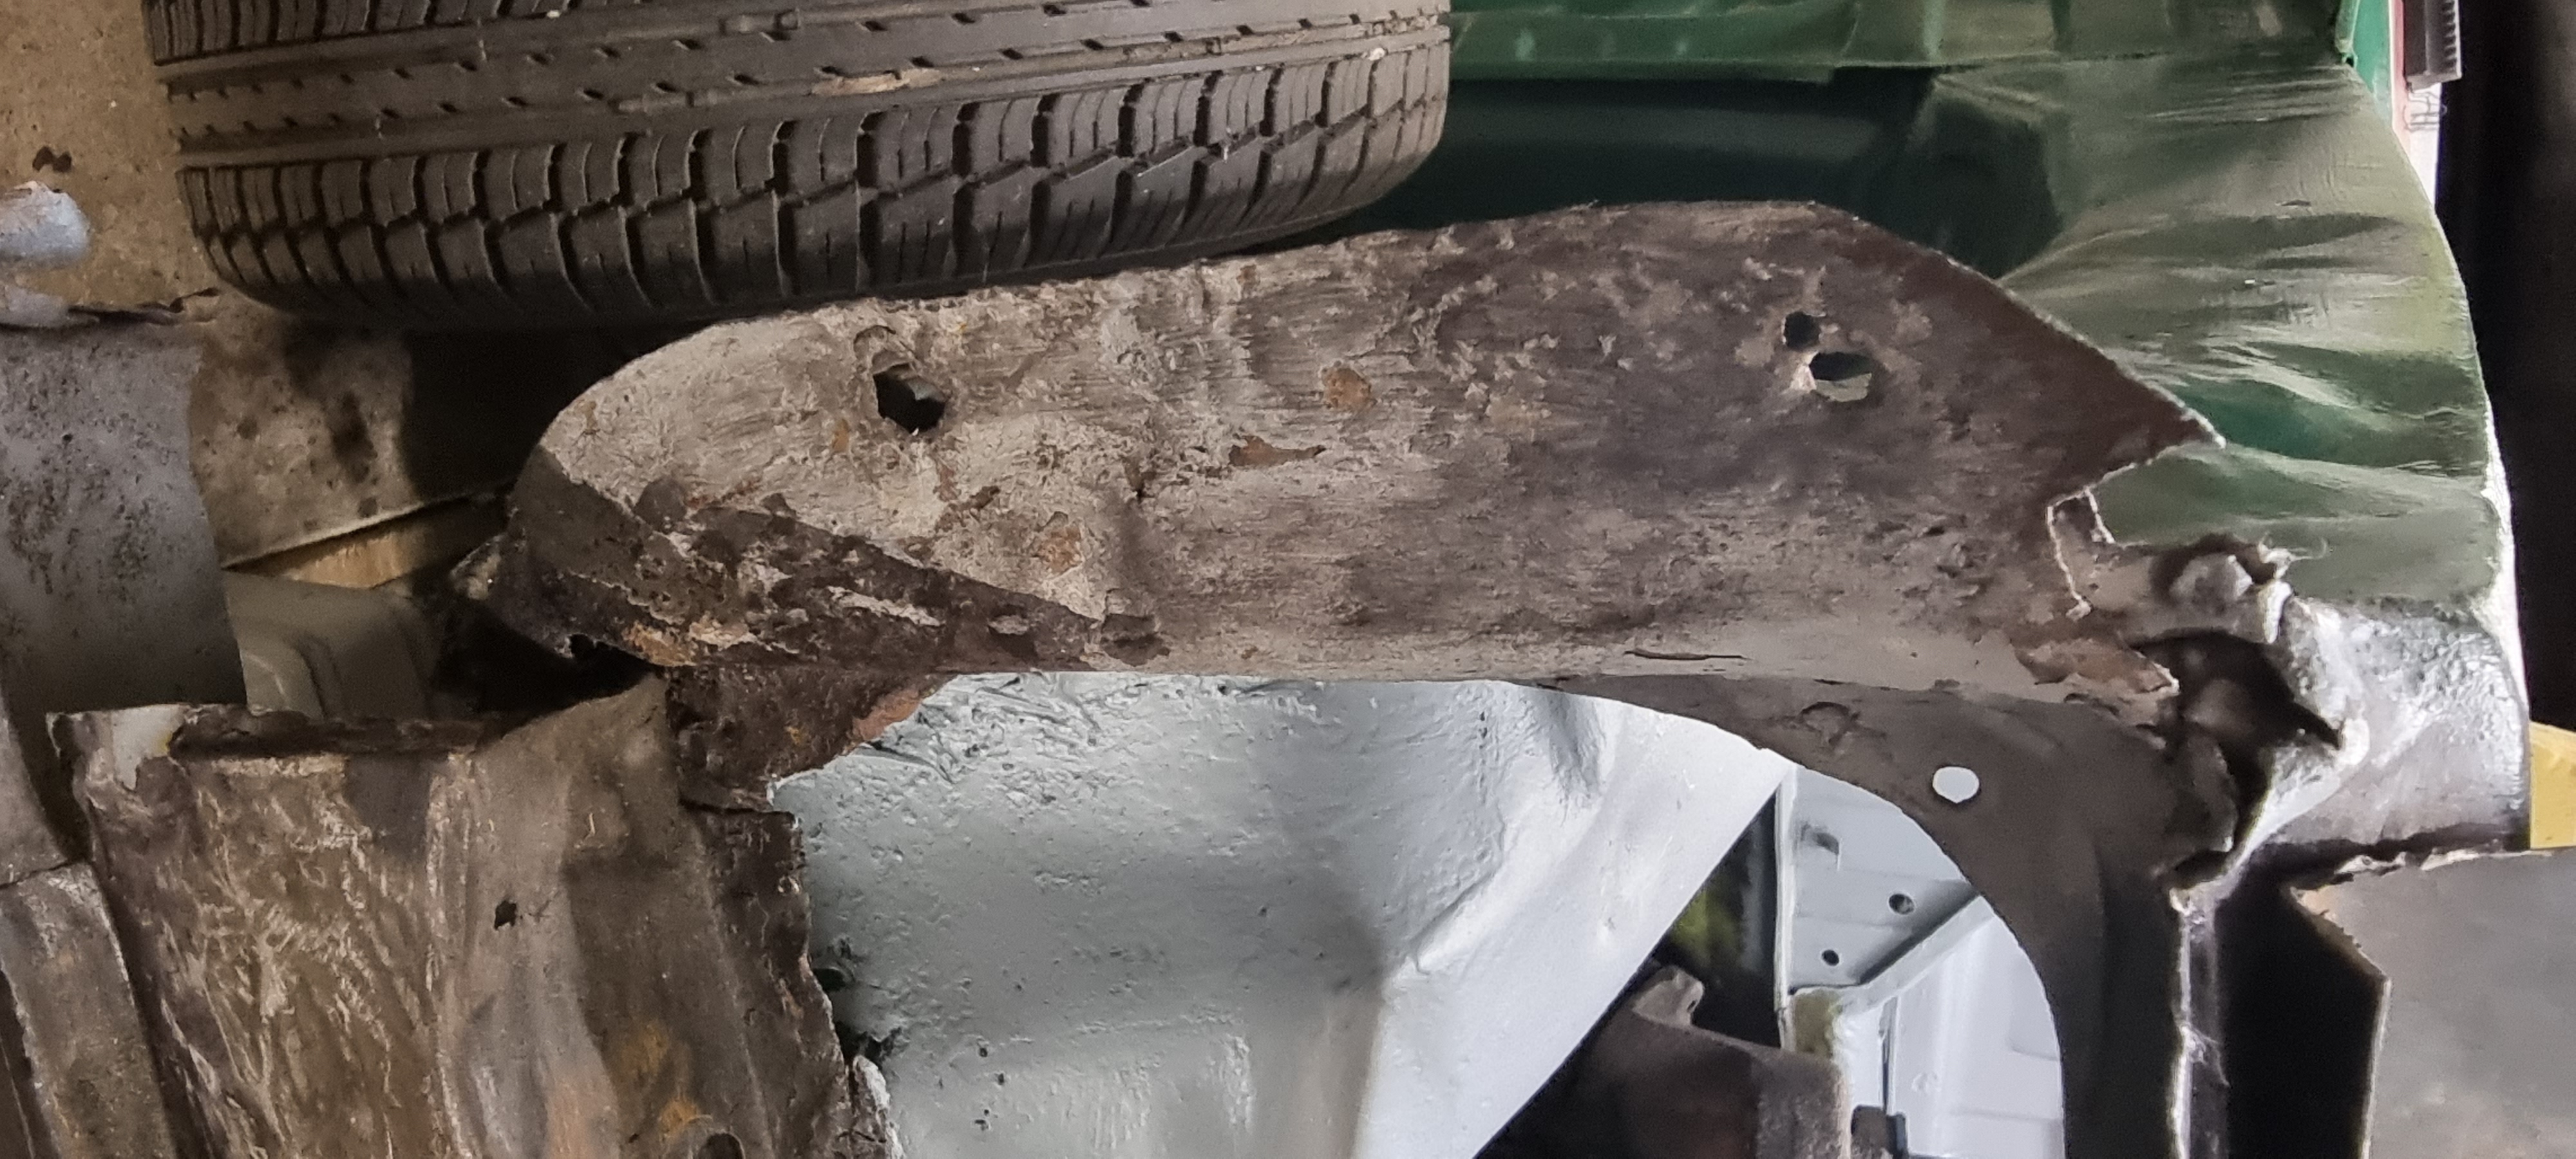
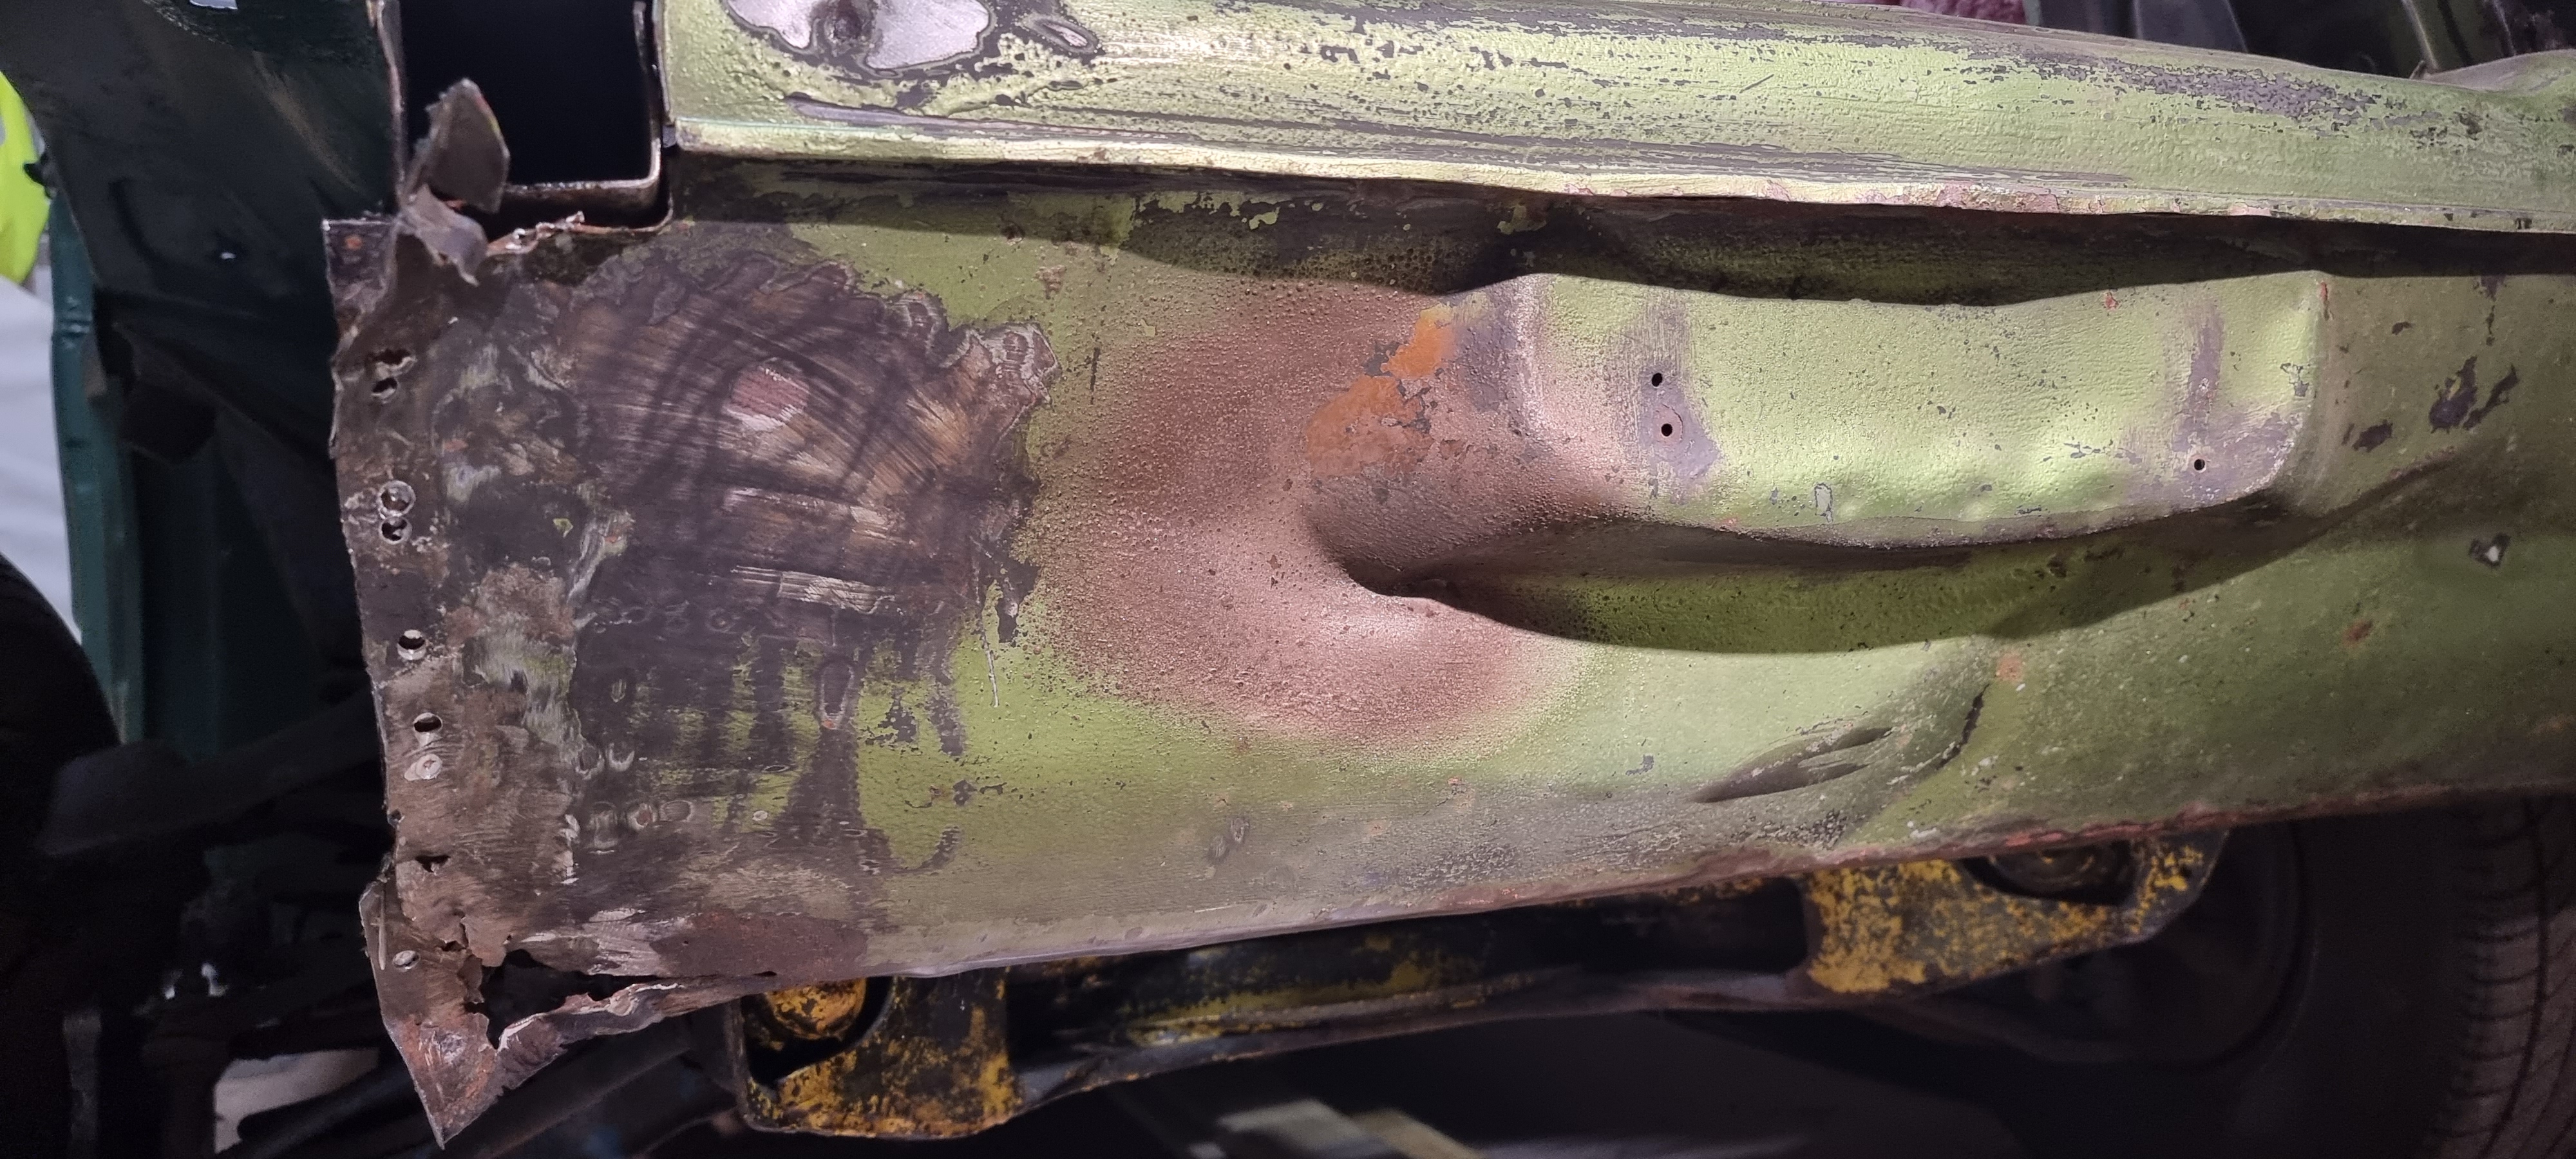
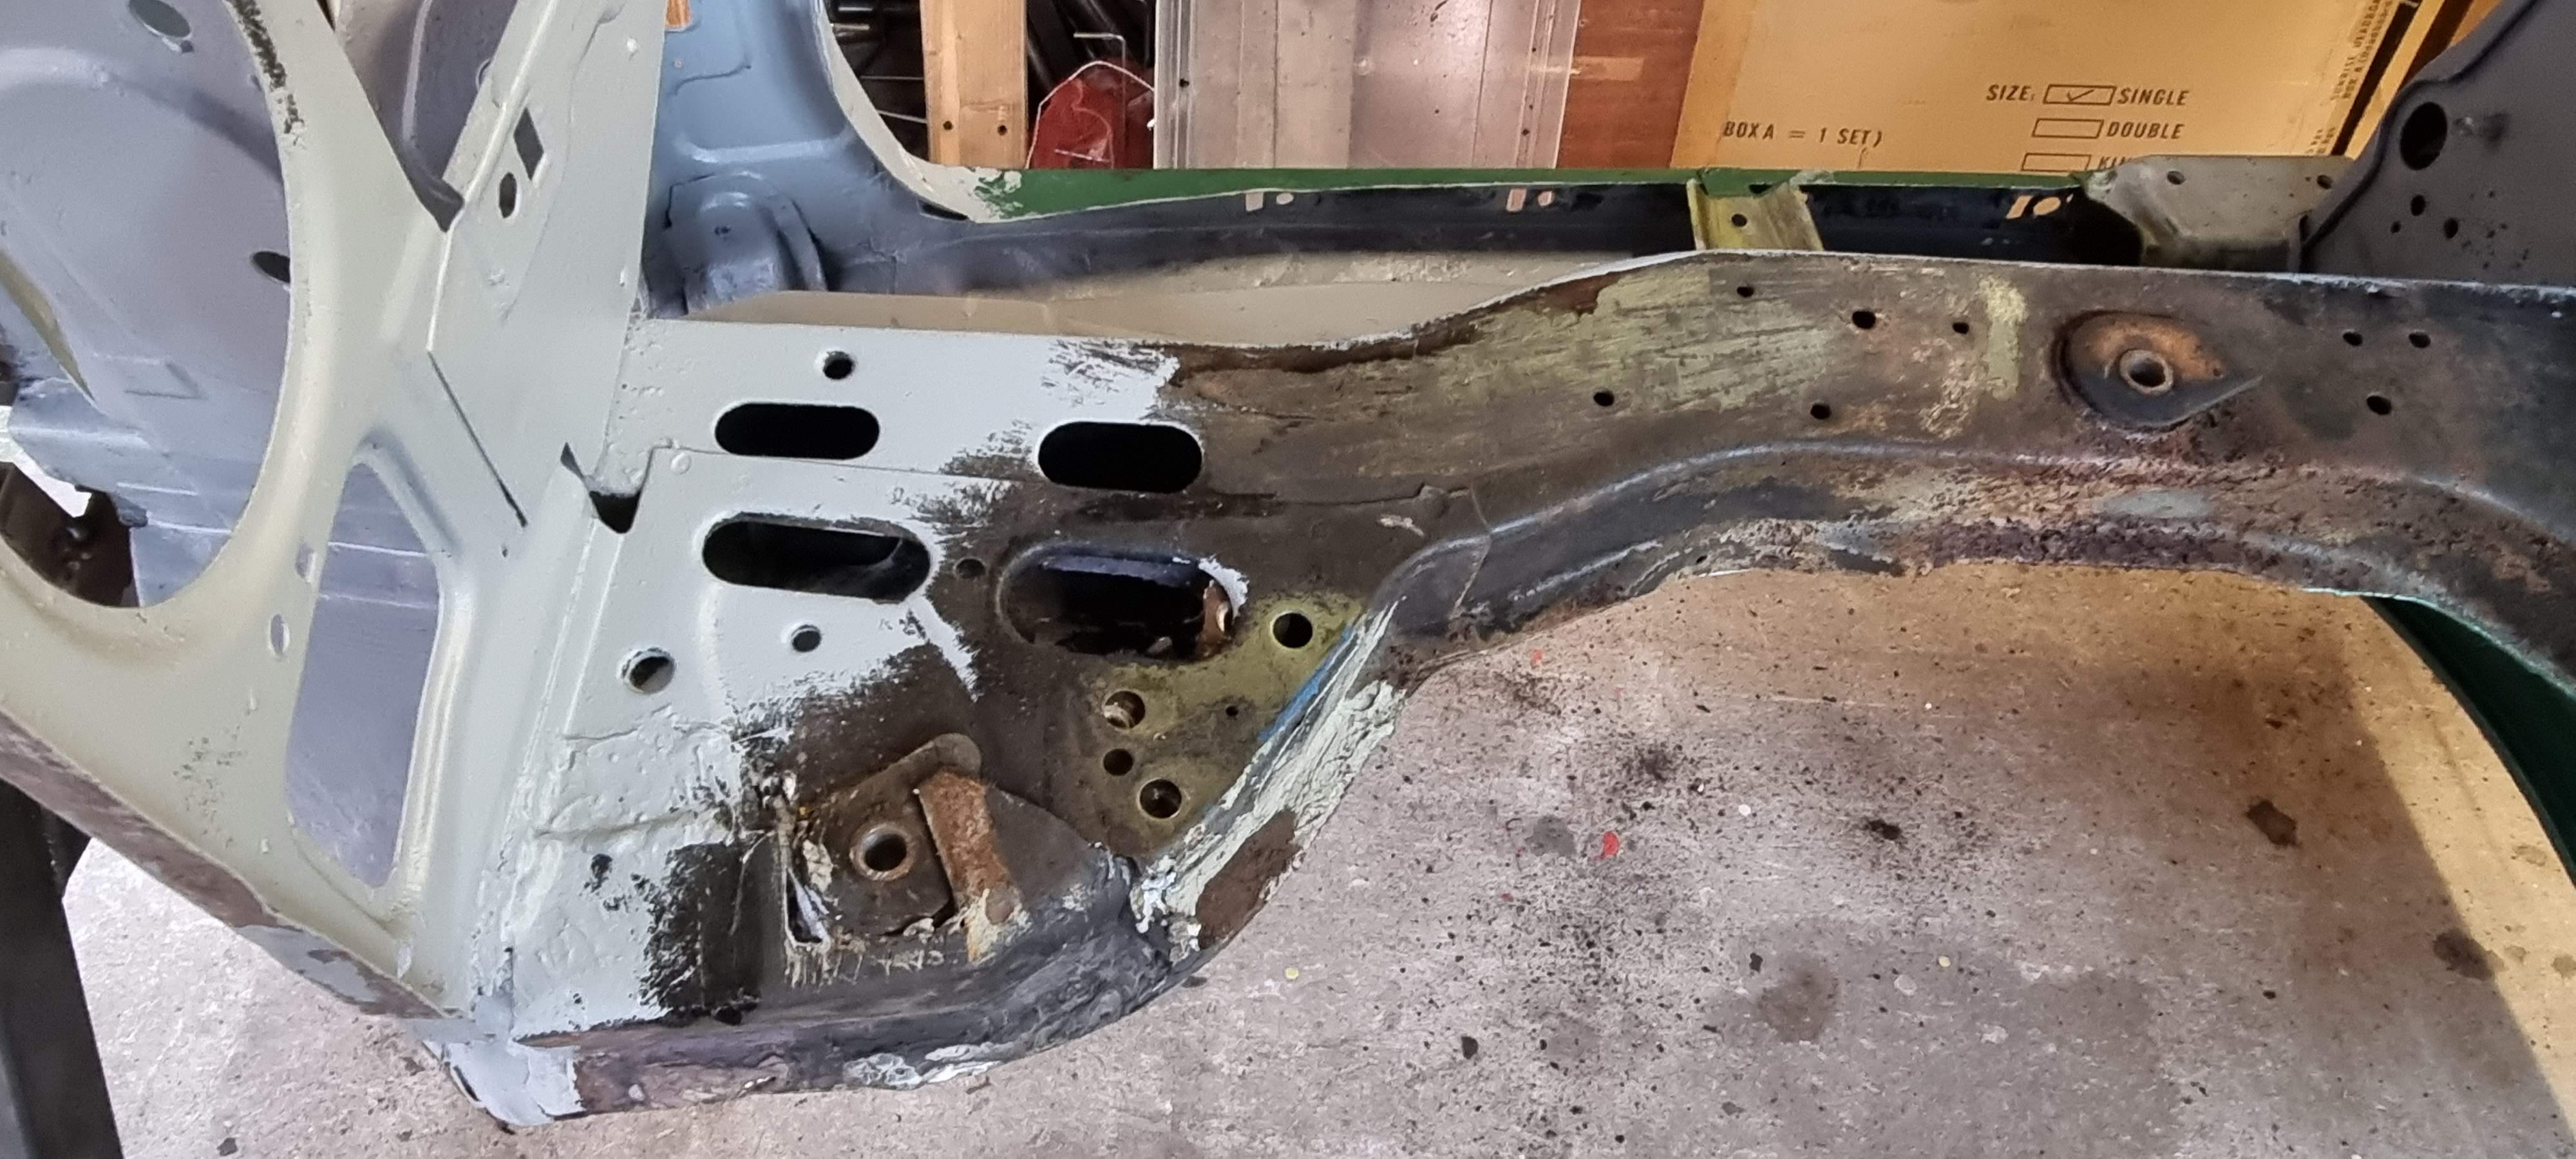
This is where the front suspension unit fastens to the chassis. Now that the clip is off I can see how poorly the accident 'repair' was done.
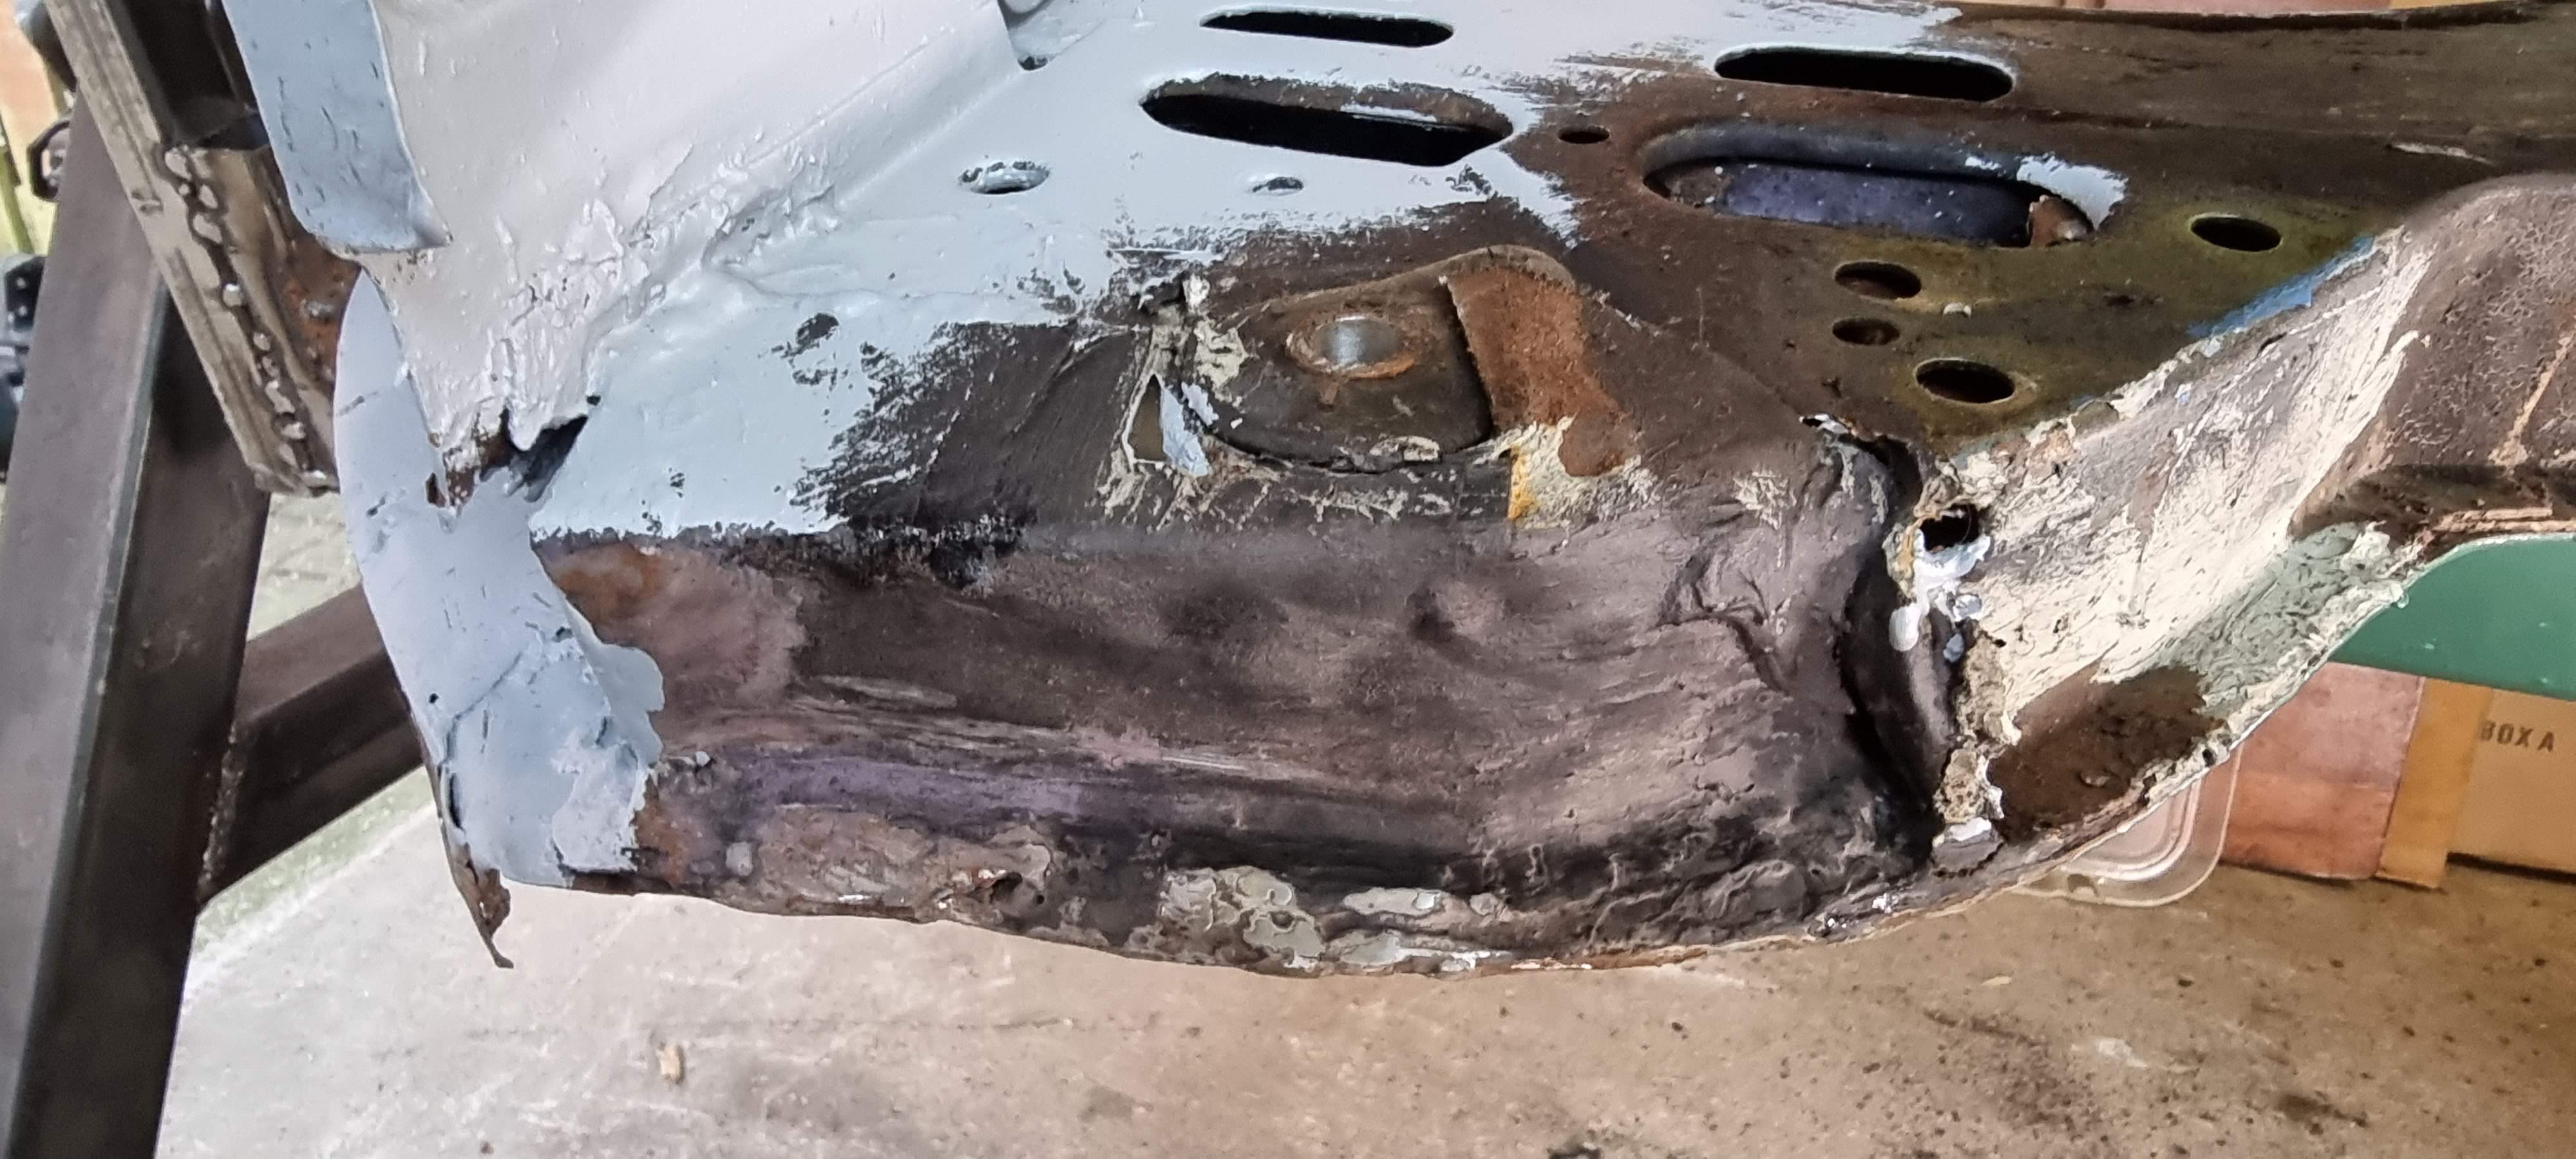
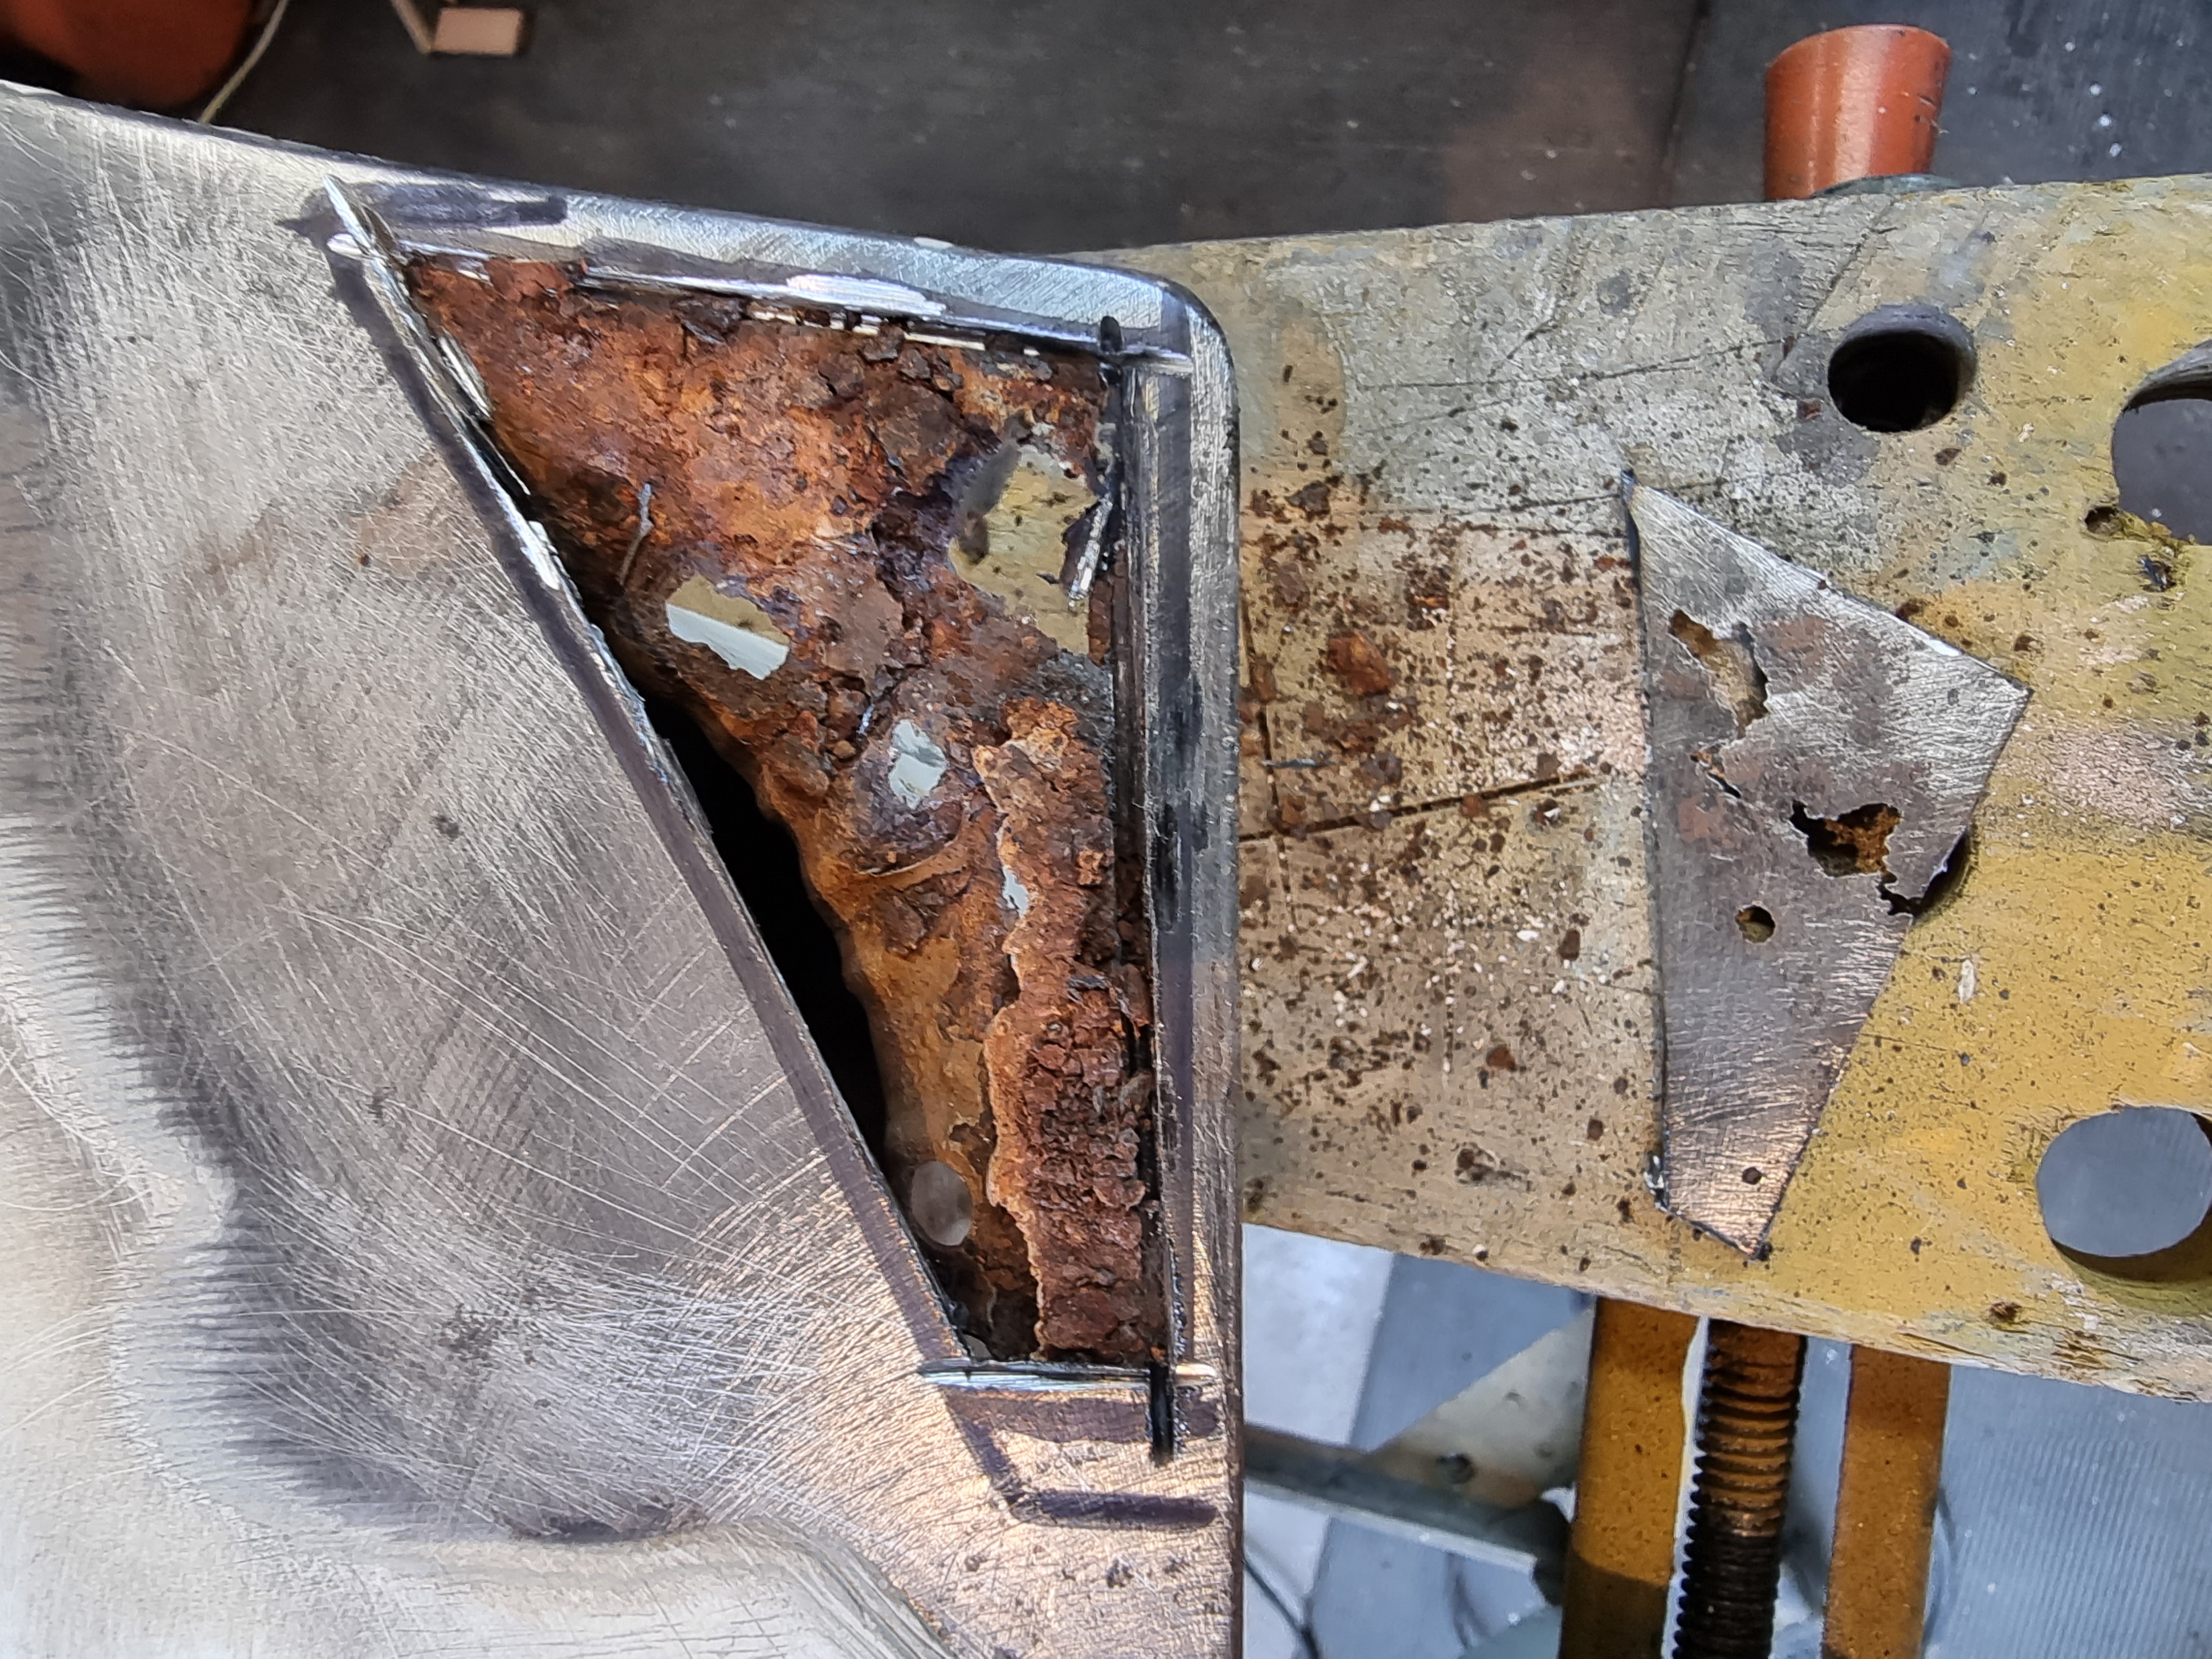
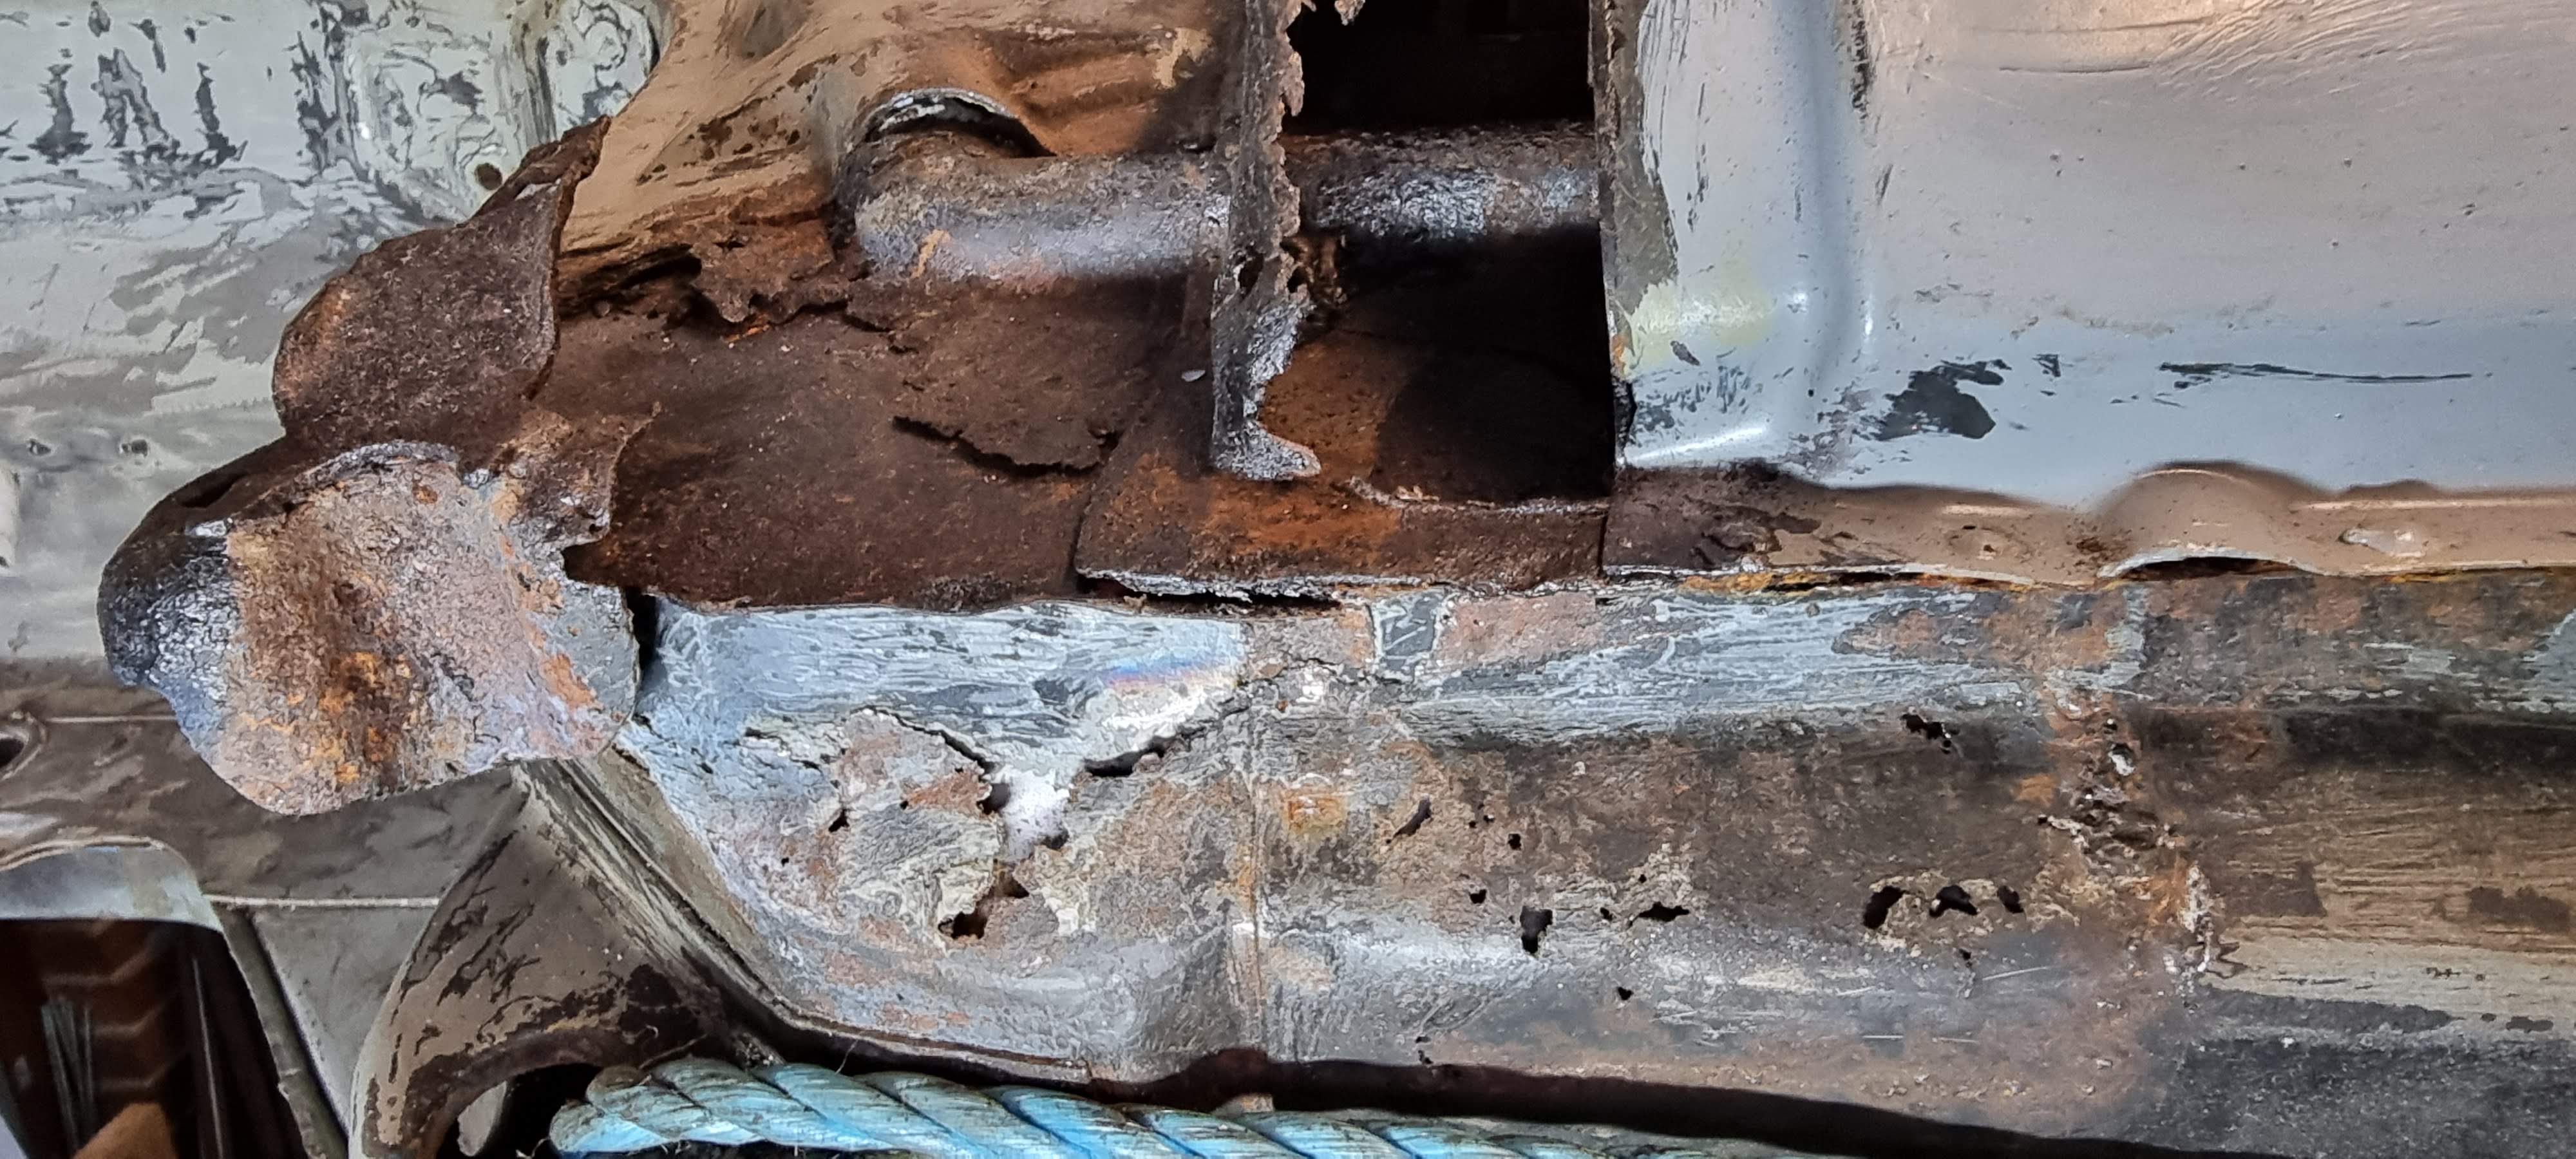
Accident 'repair' close up.
This area is quite simply unbelievable! Whomever did this should be ashamed of themselves! It's mostly just filler over some thin sheet steel.
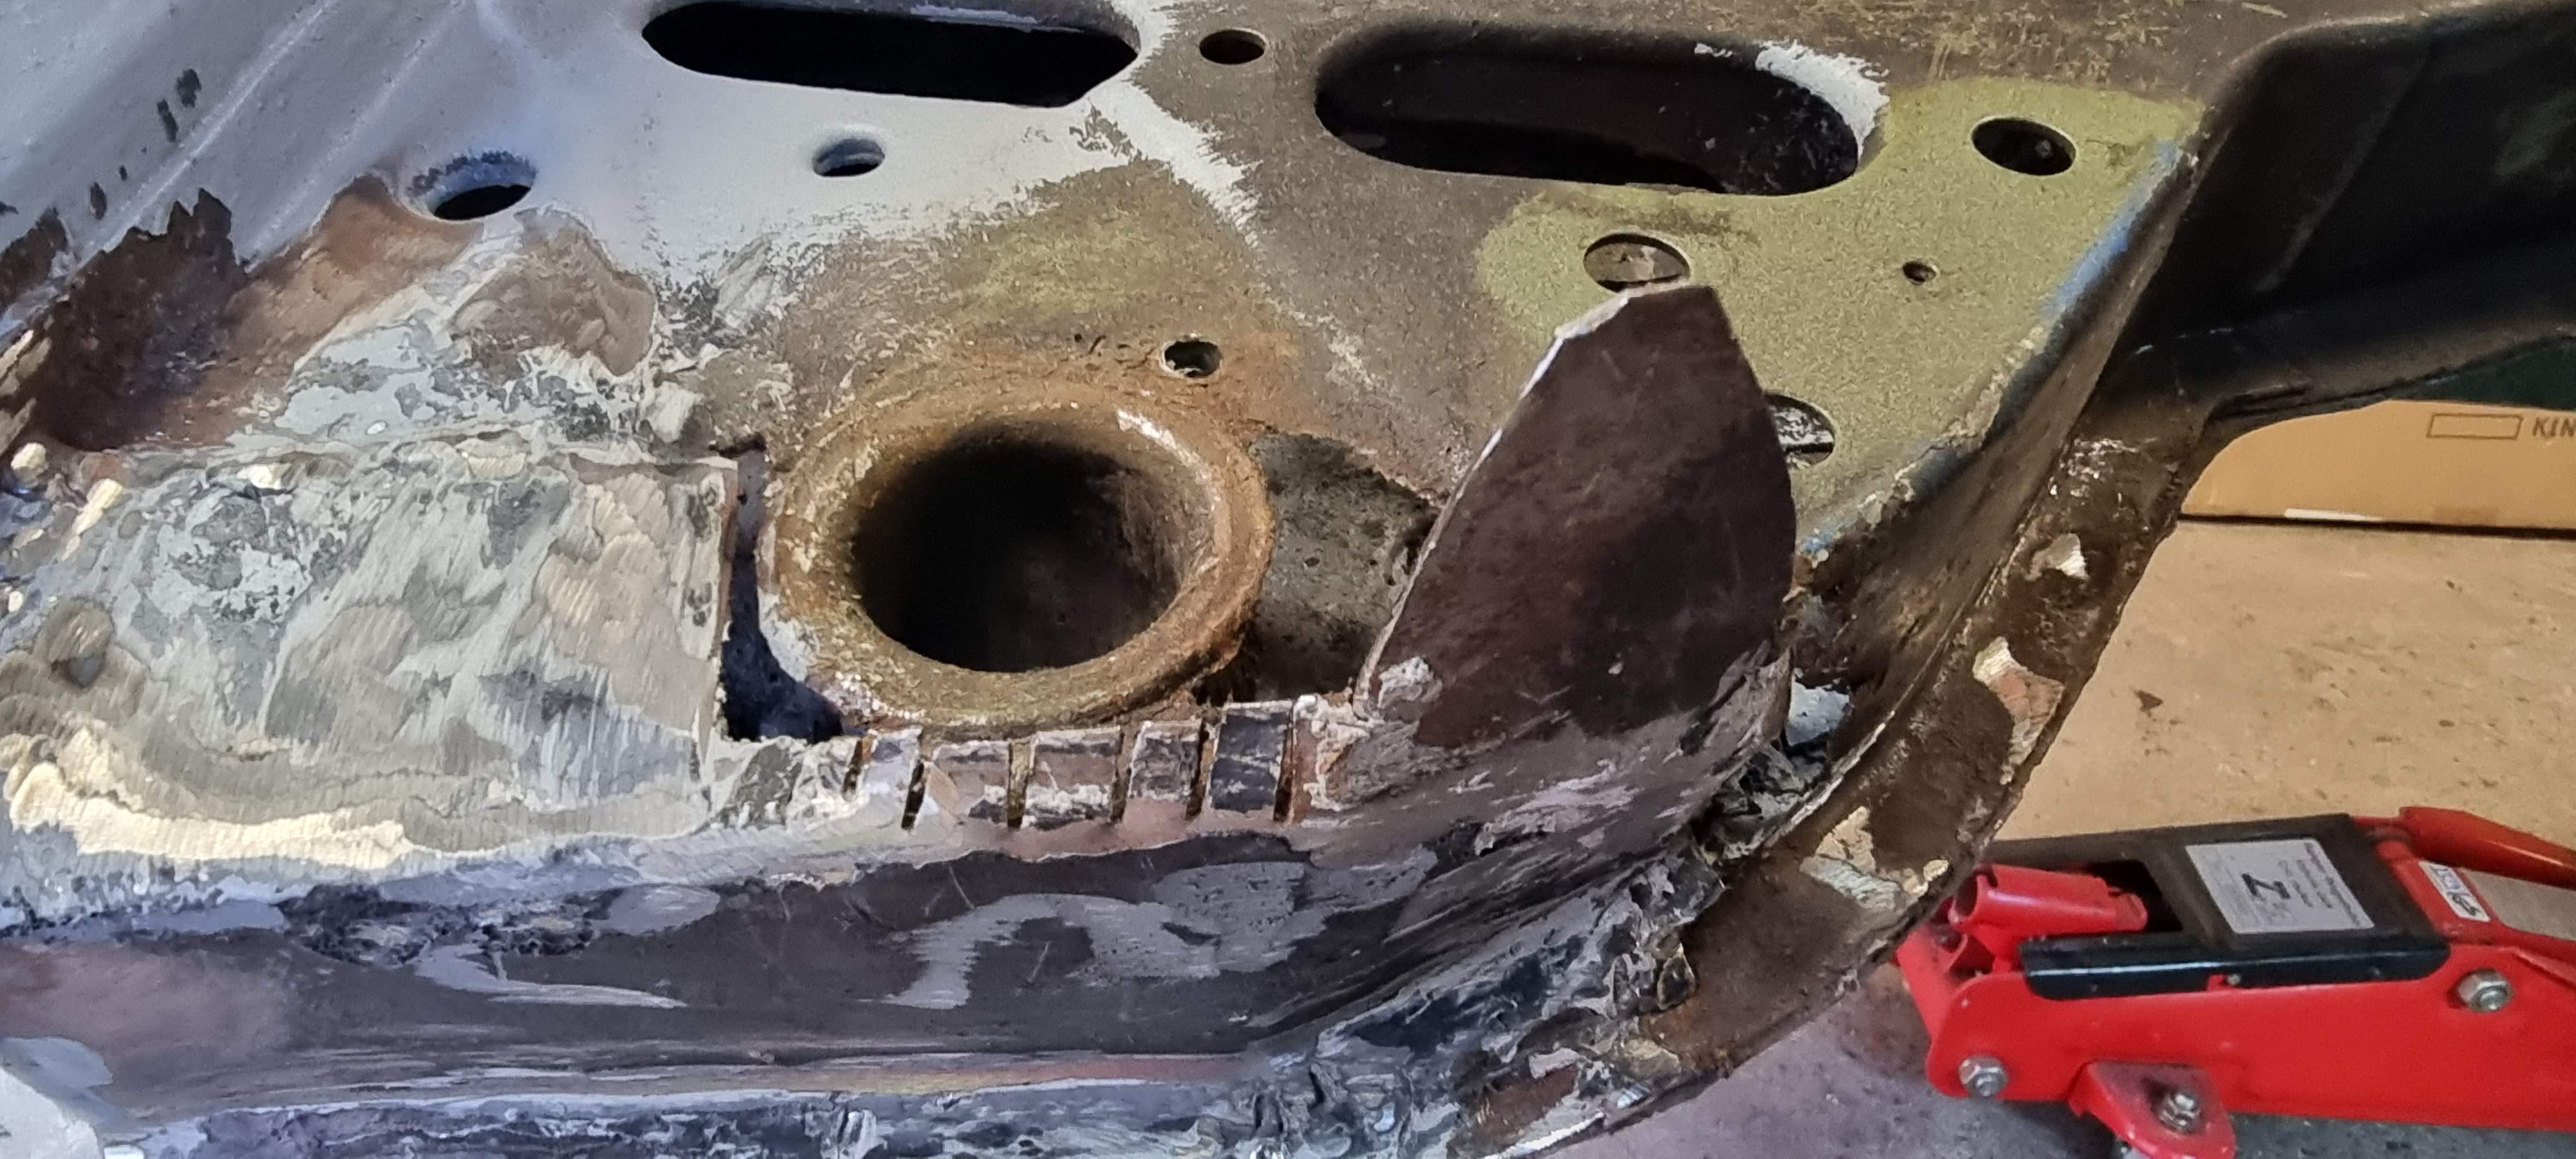
Accident 'repair' close up.
But the worst part is that it's not even welded!! It's simply folded over to cover the hole! There's no structural strength or support at all. How many years was it on the road like this?!

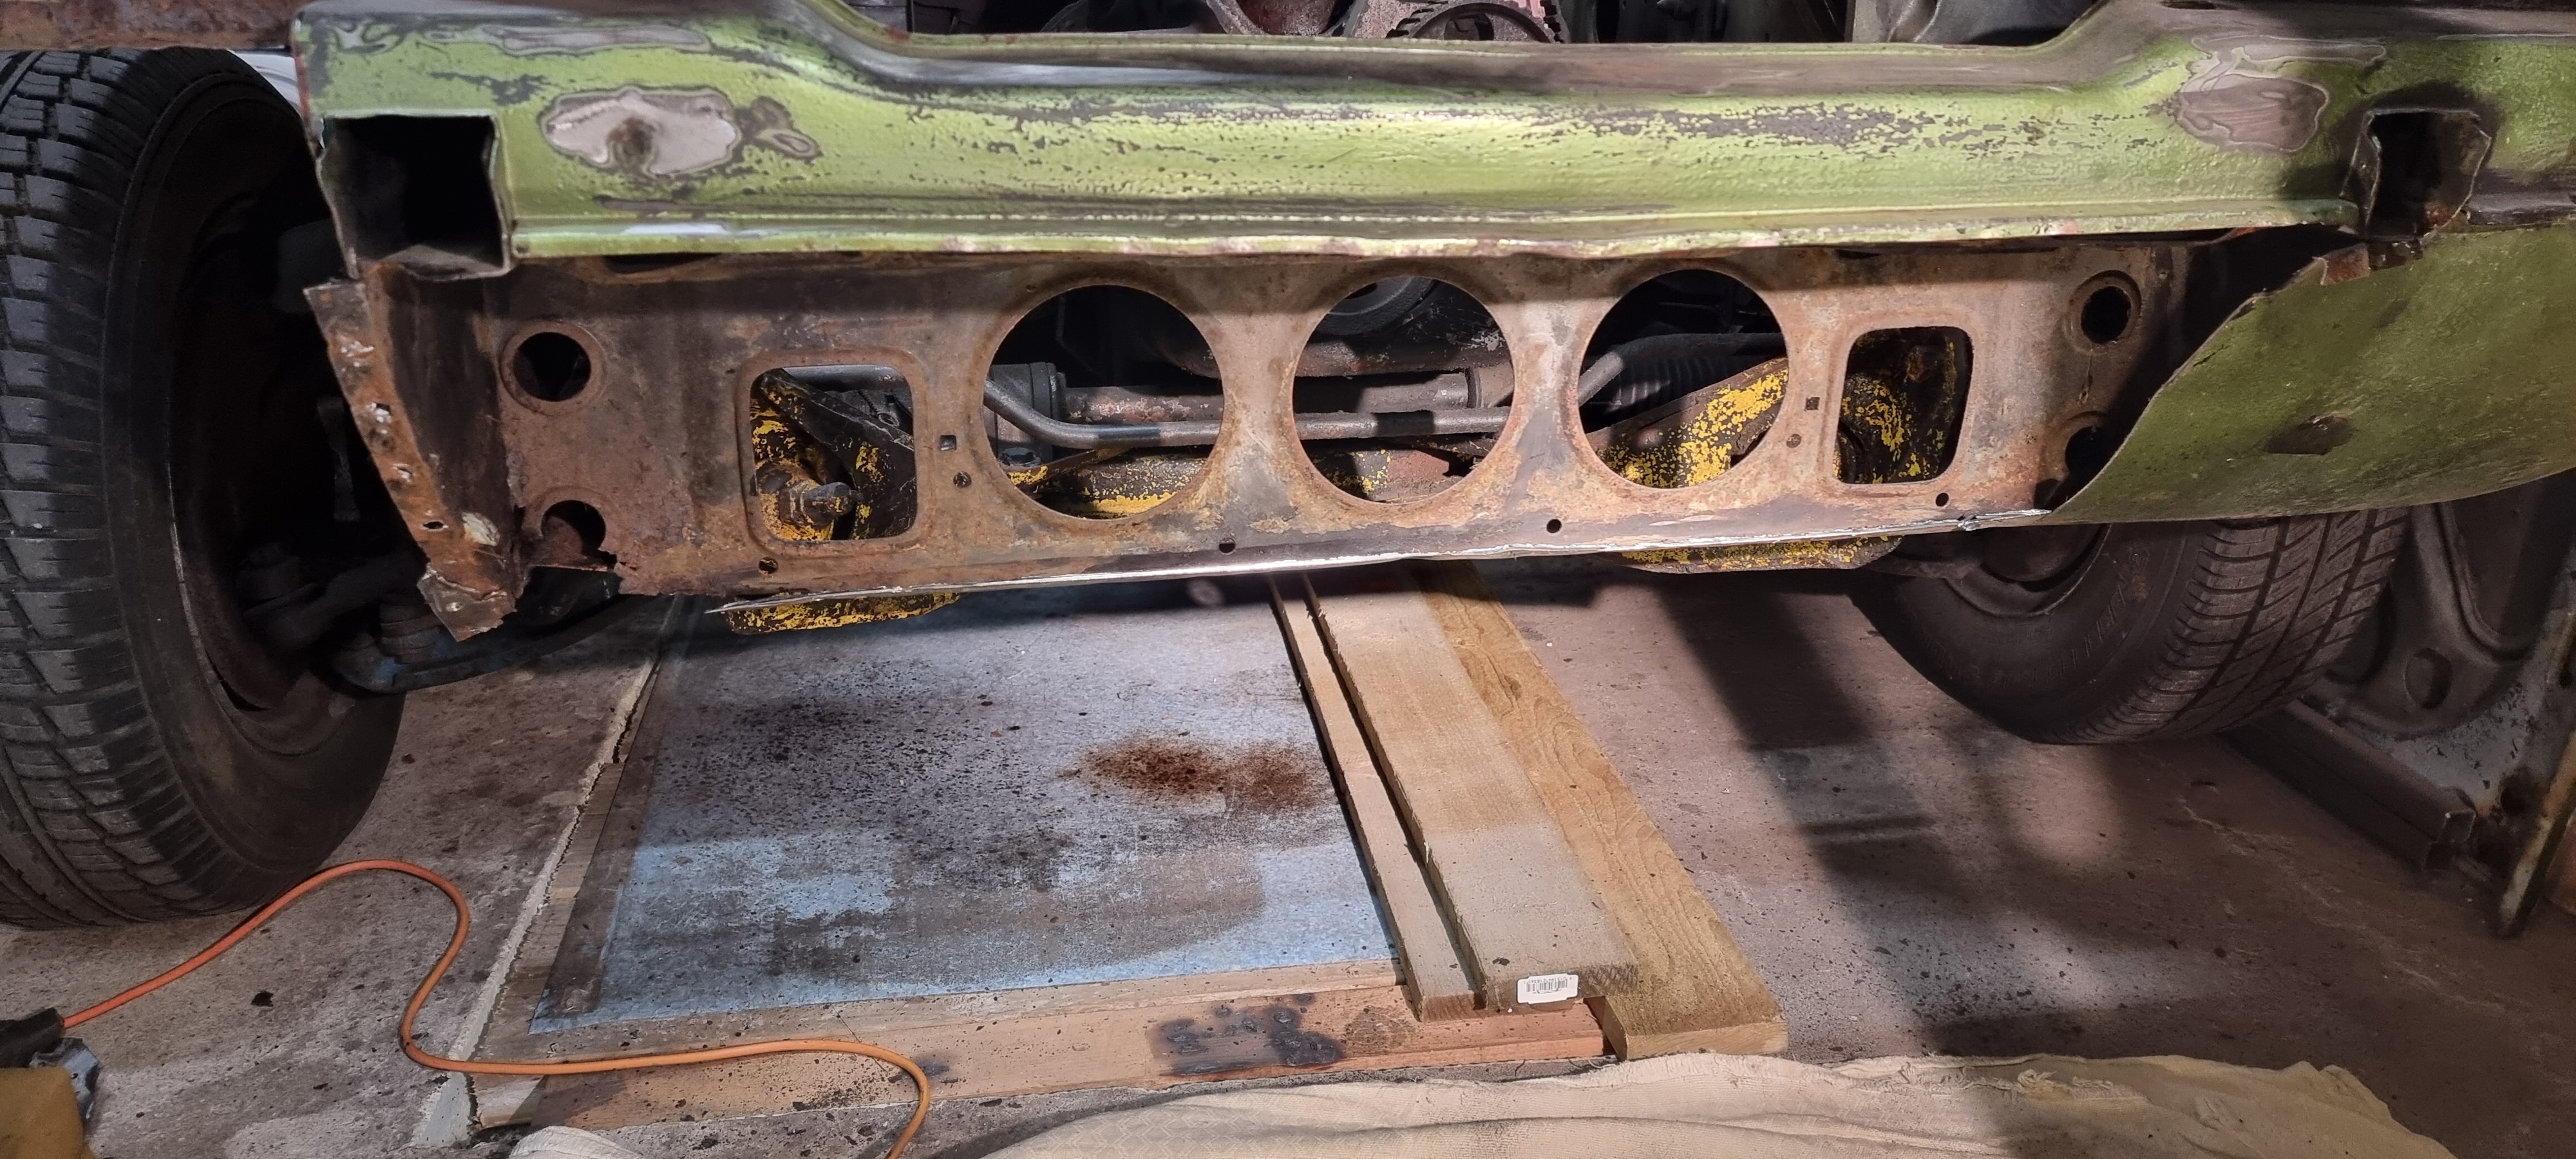
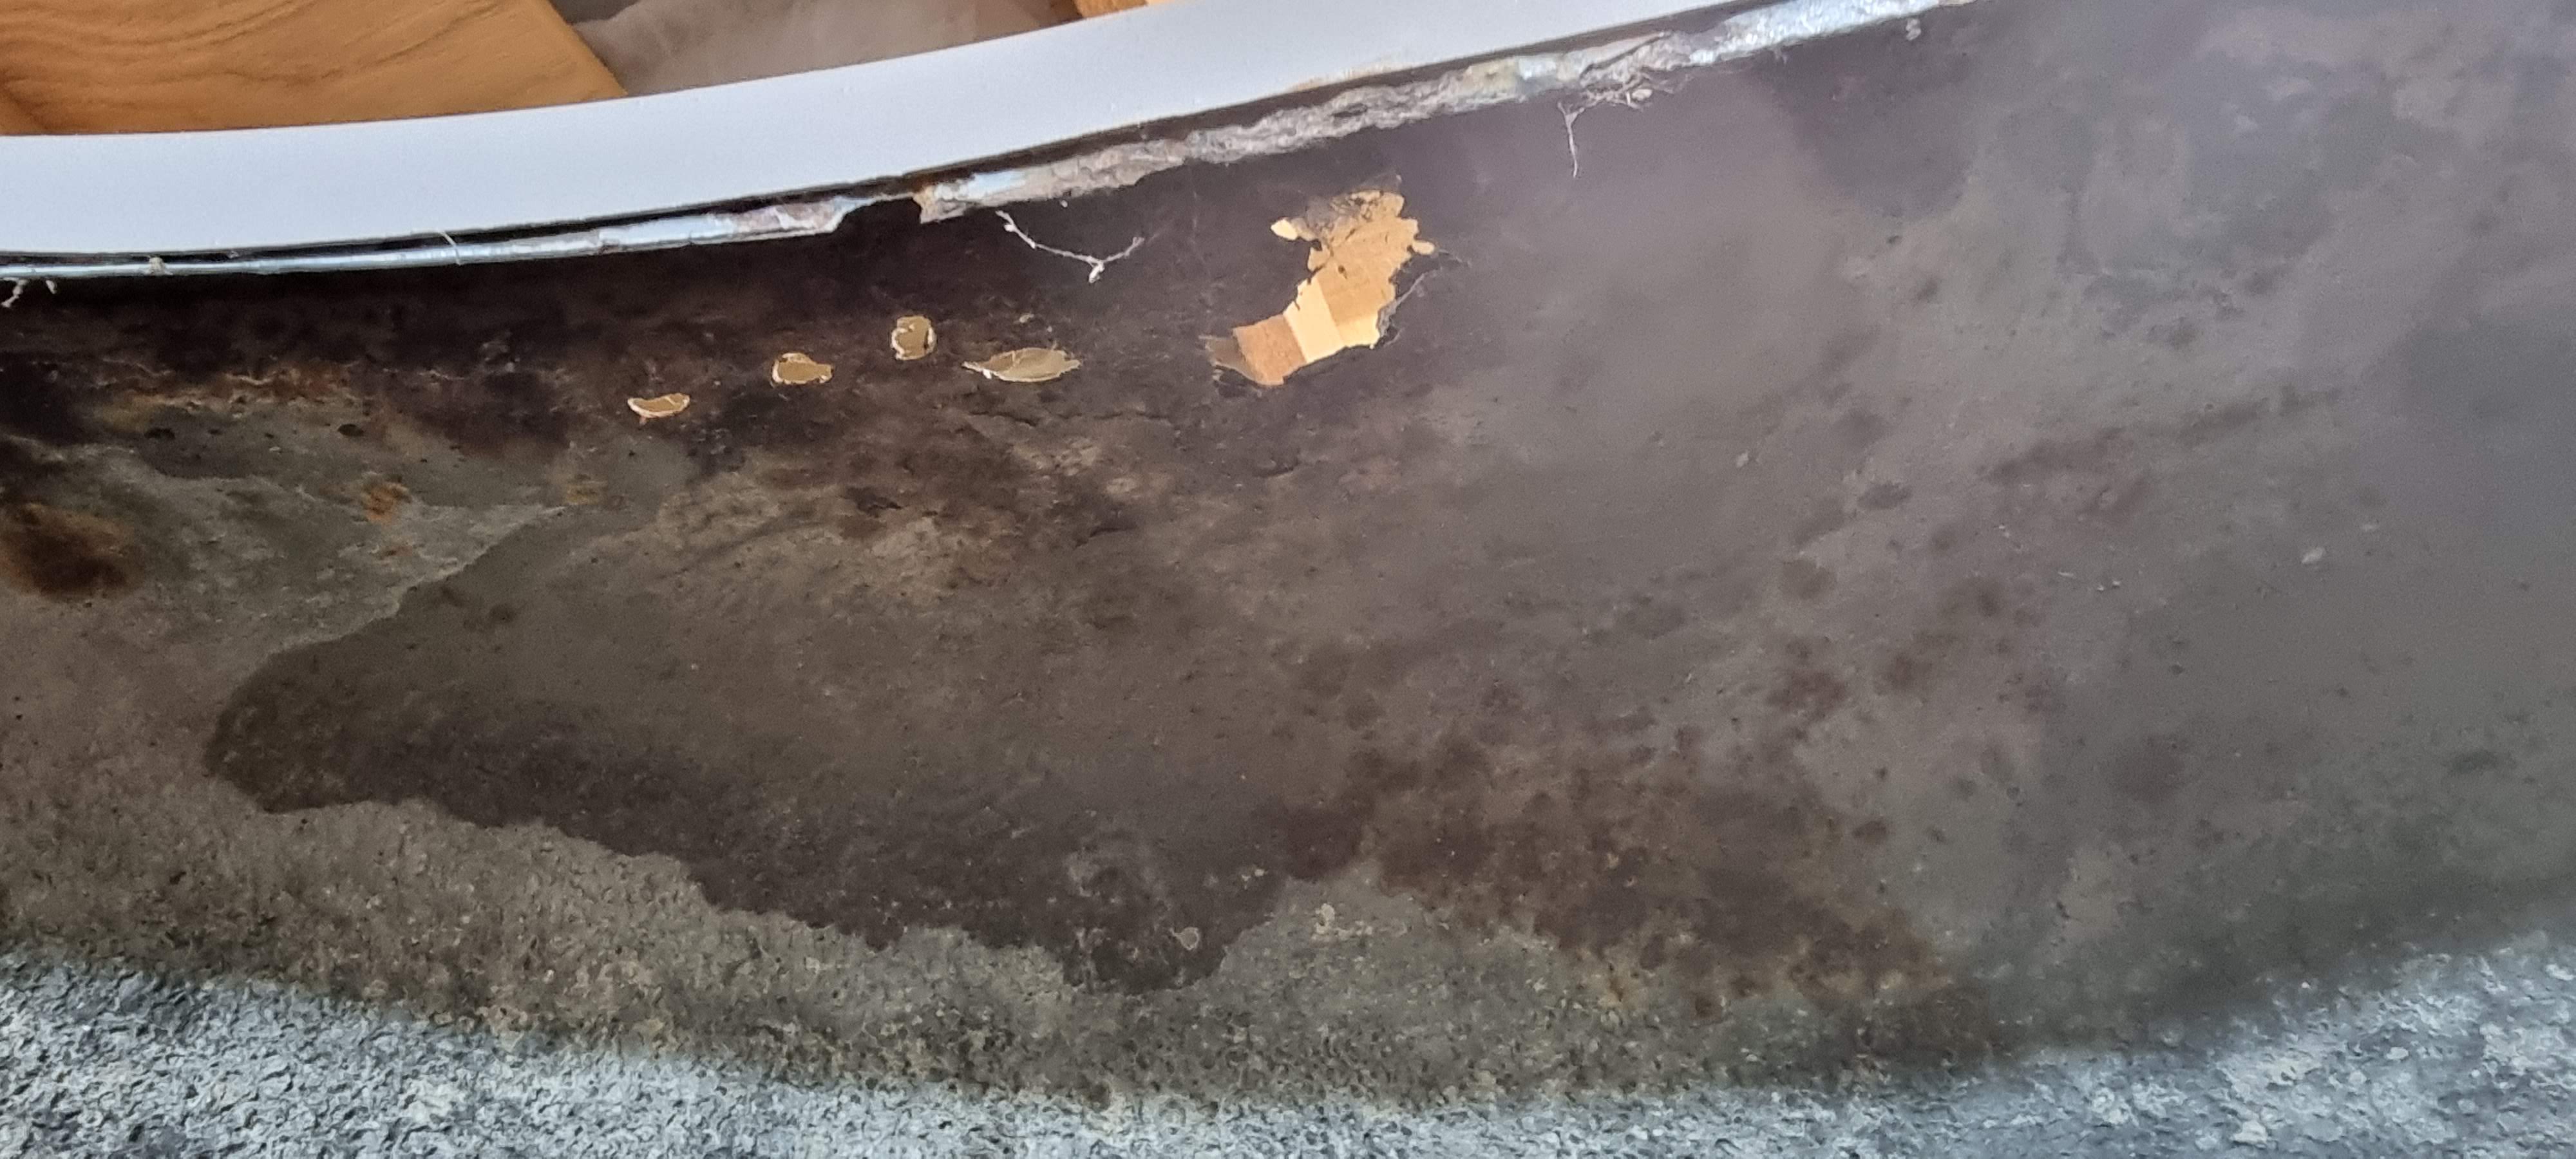
Underseal
There's thick underseal all around the inner wheel-arch. Hopefully it will have protected most of it. It'll all have to come off to check underneath.
Good news for once.
After a lot of hard work scraping all the old under-seal off, it's clear it has actually done a really good job of protecting the metal beneath. Fortunately.
Further good news.
Further back down the chassis, a mixture of under-seal and old oil have done a remarkable job of preserving much of the main center section.
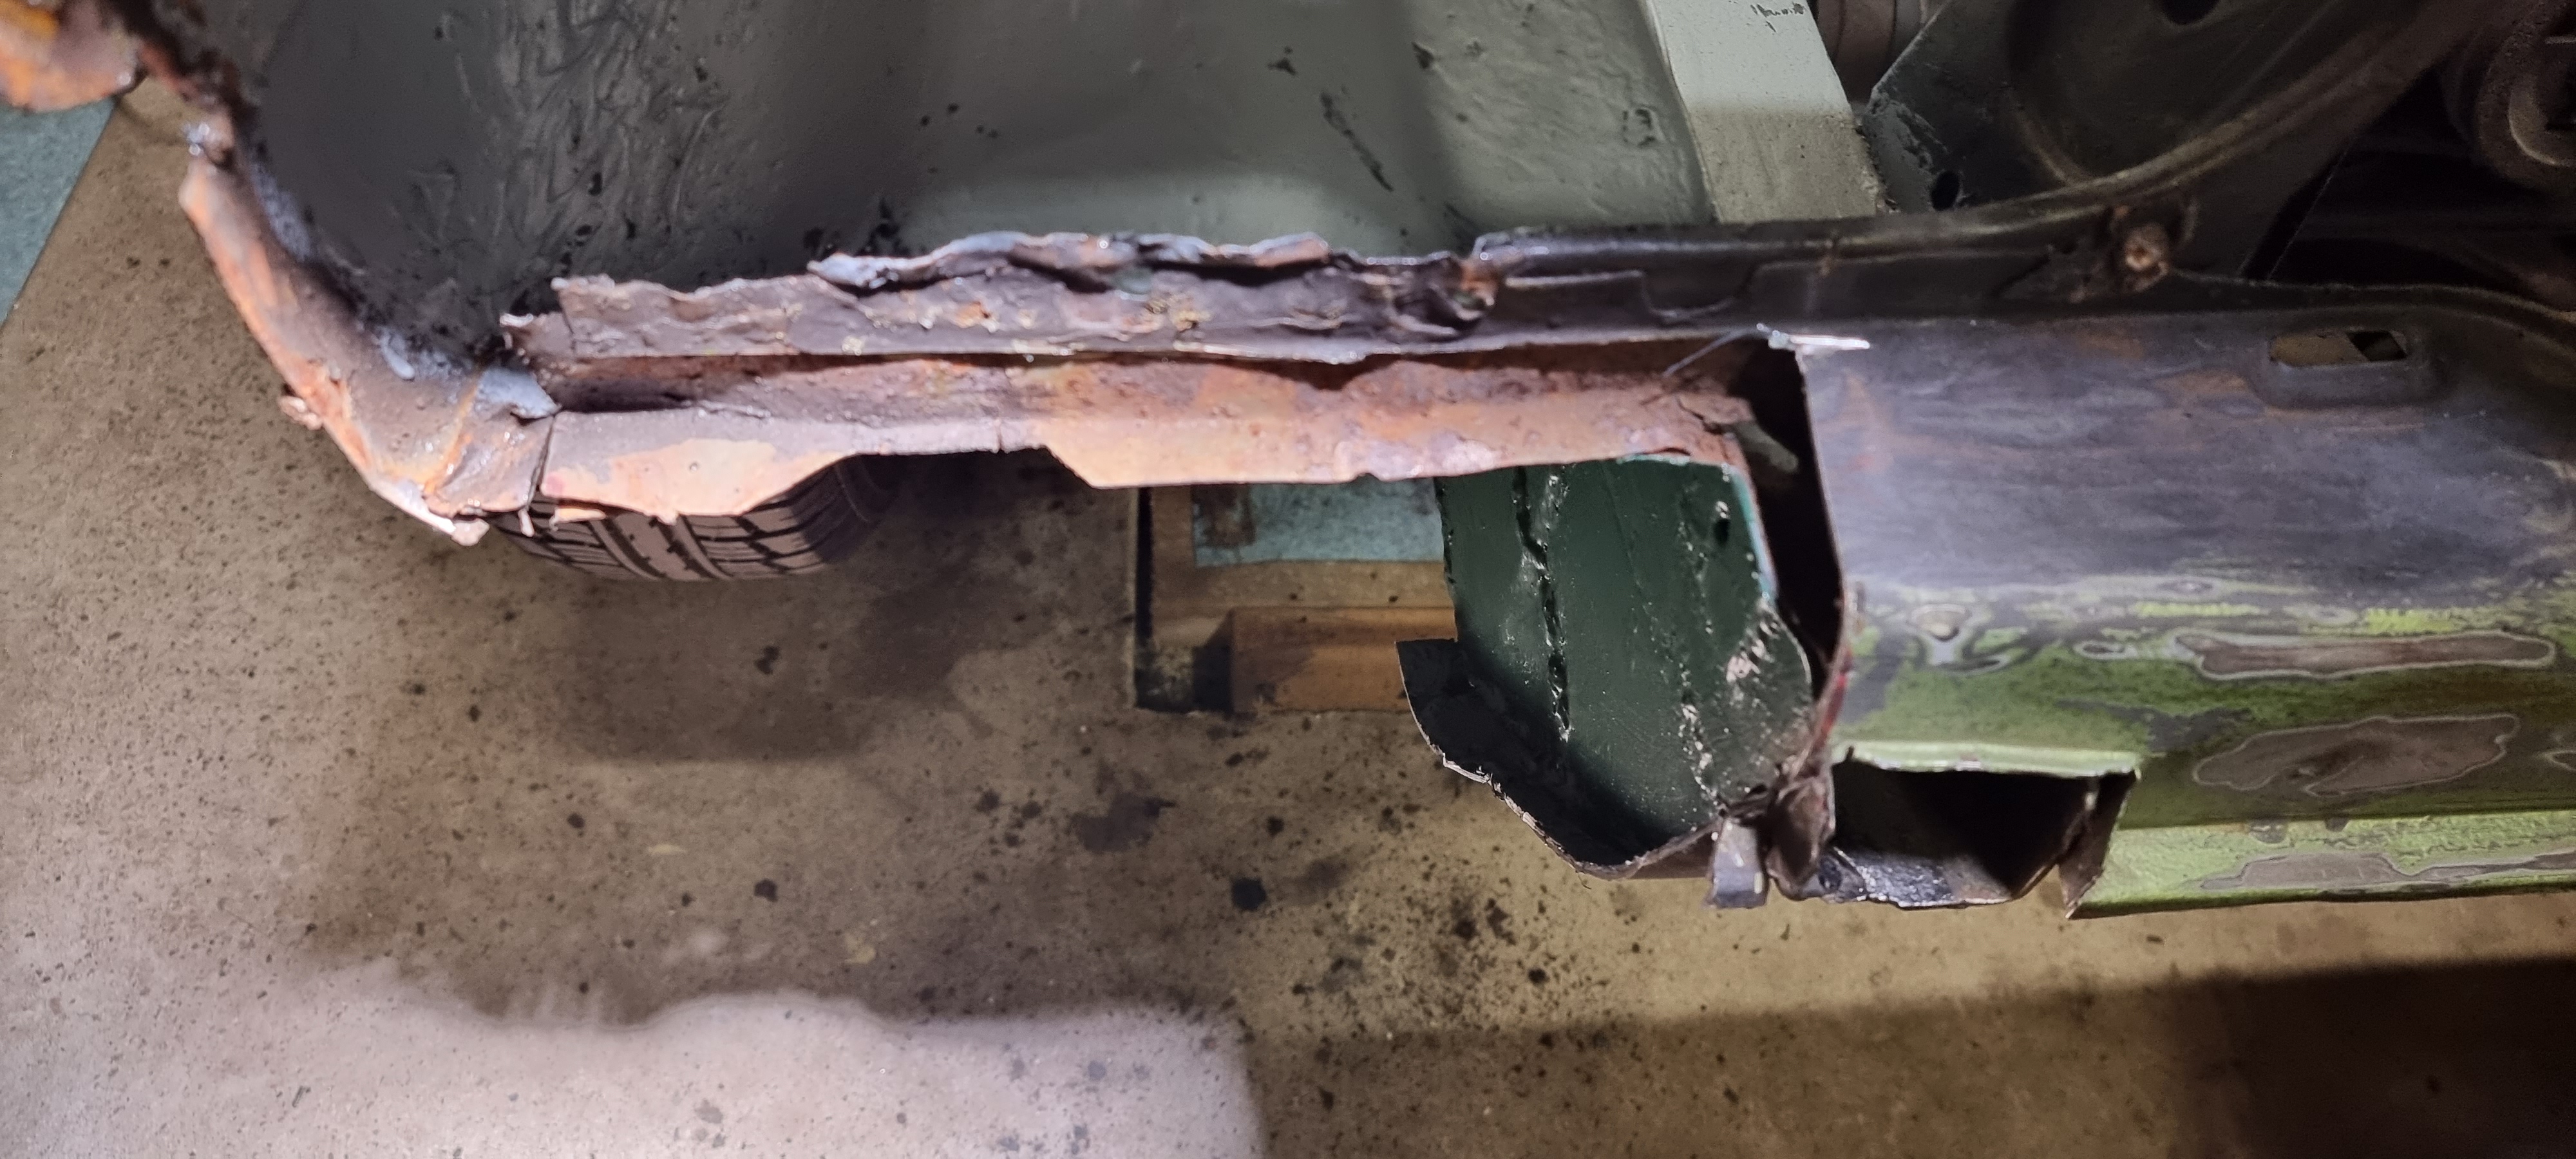
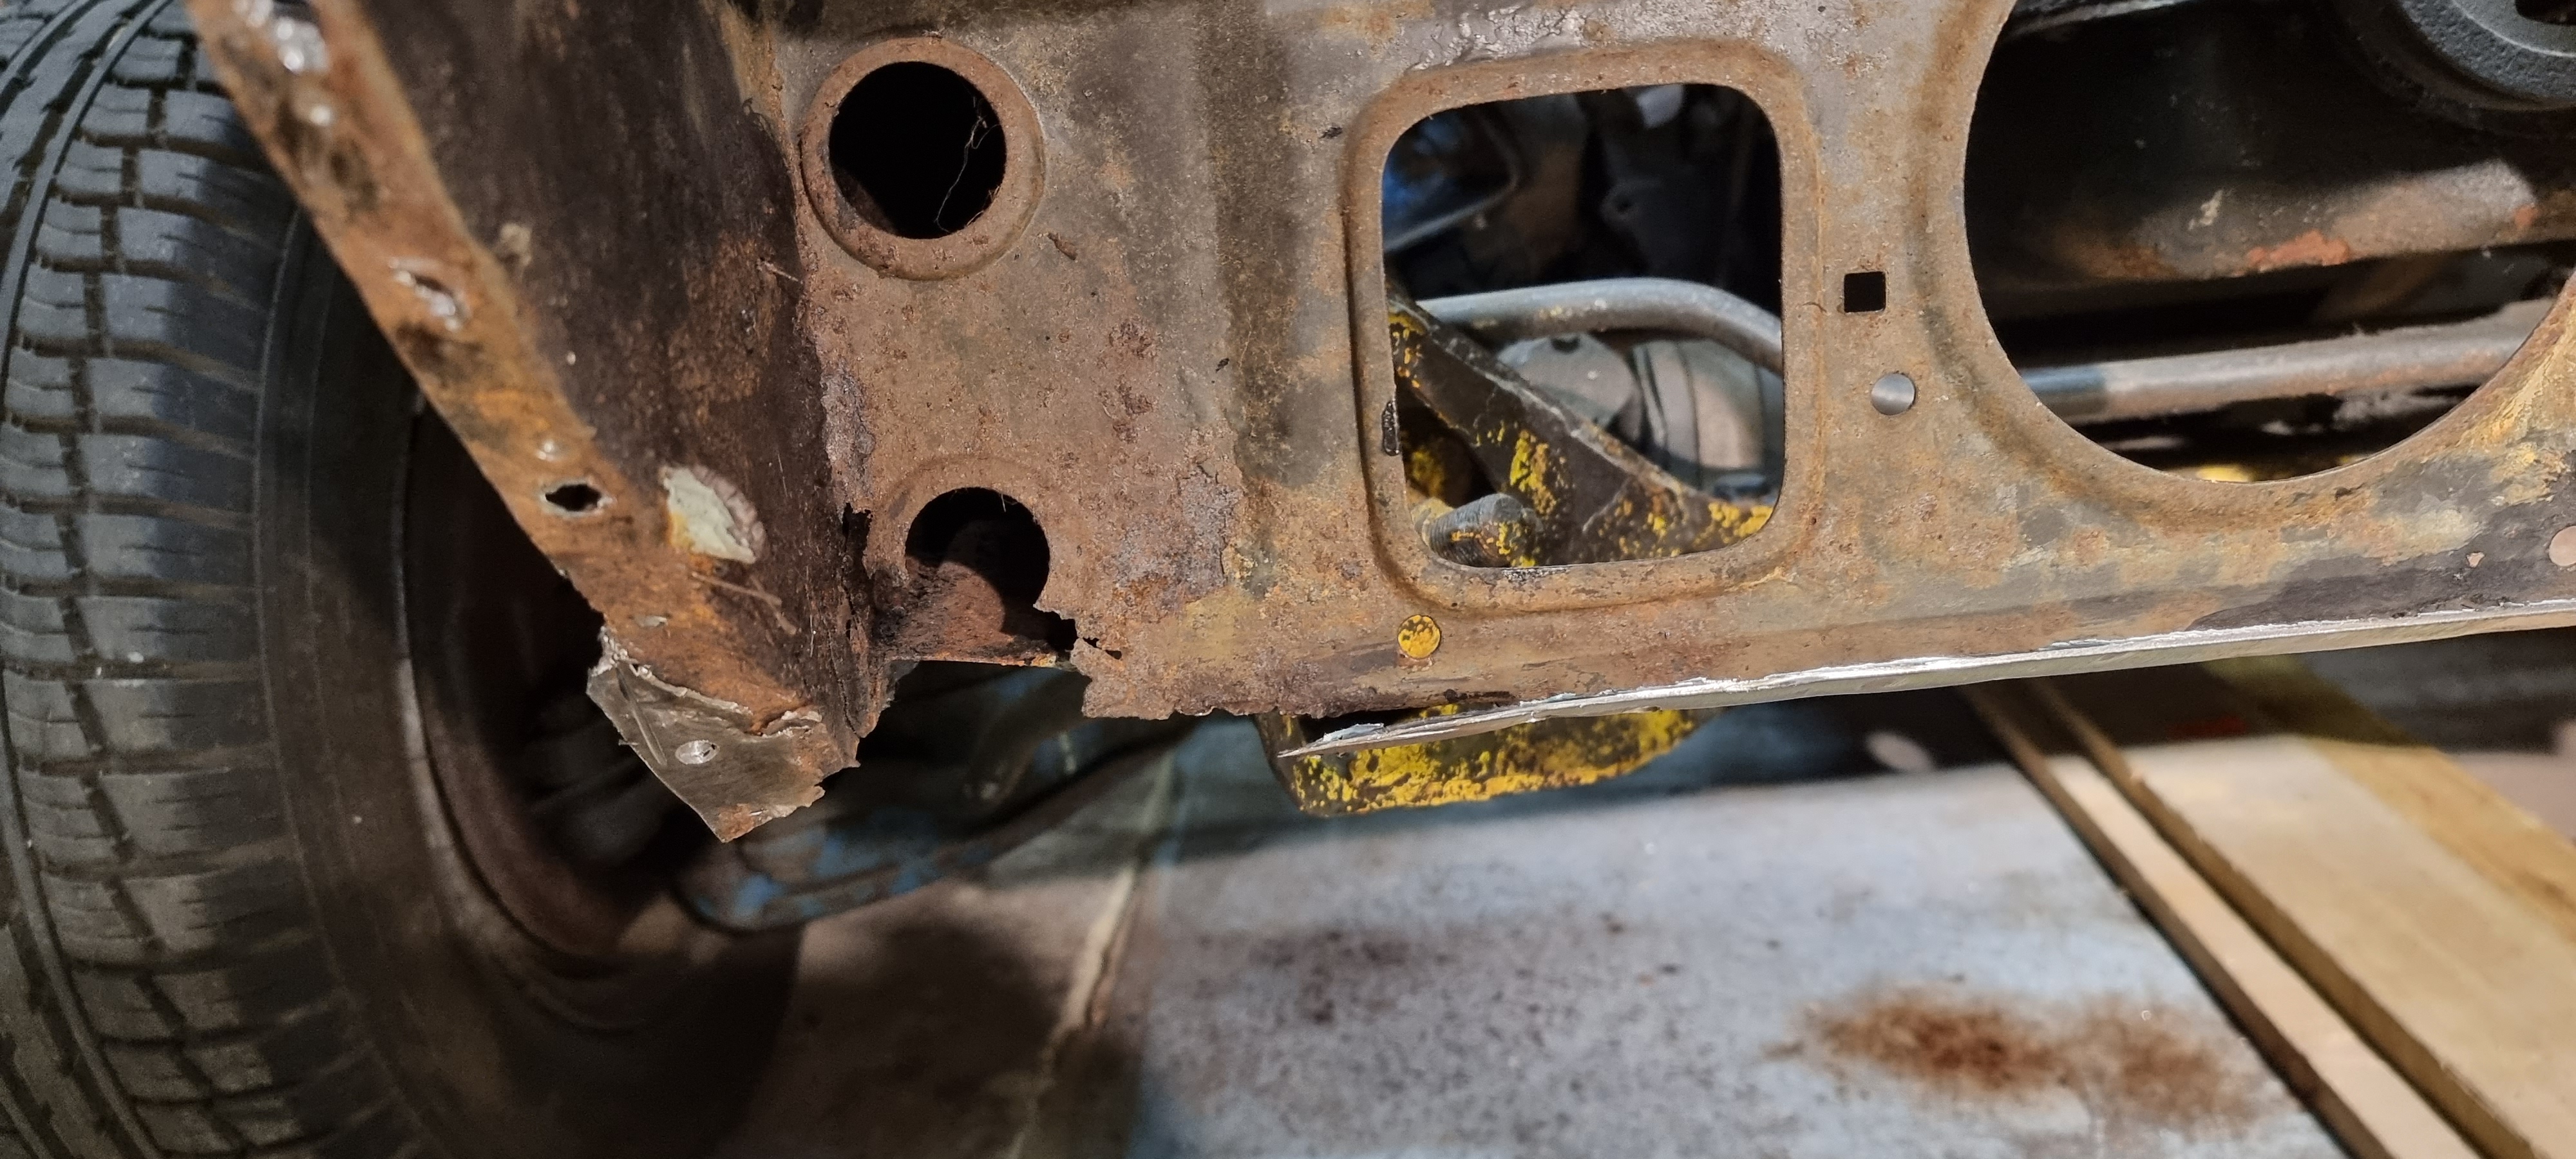
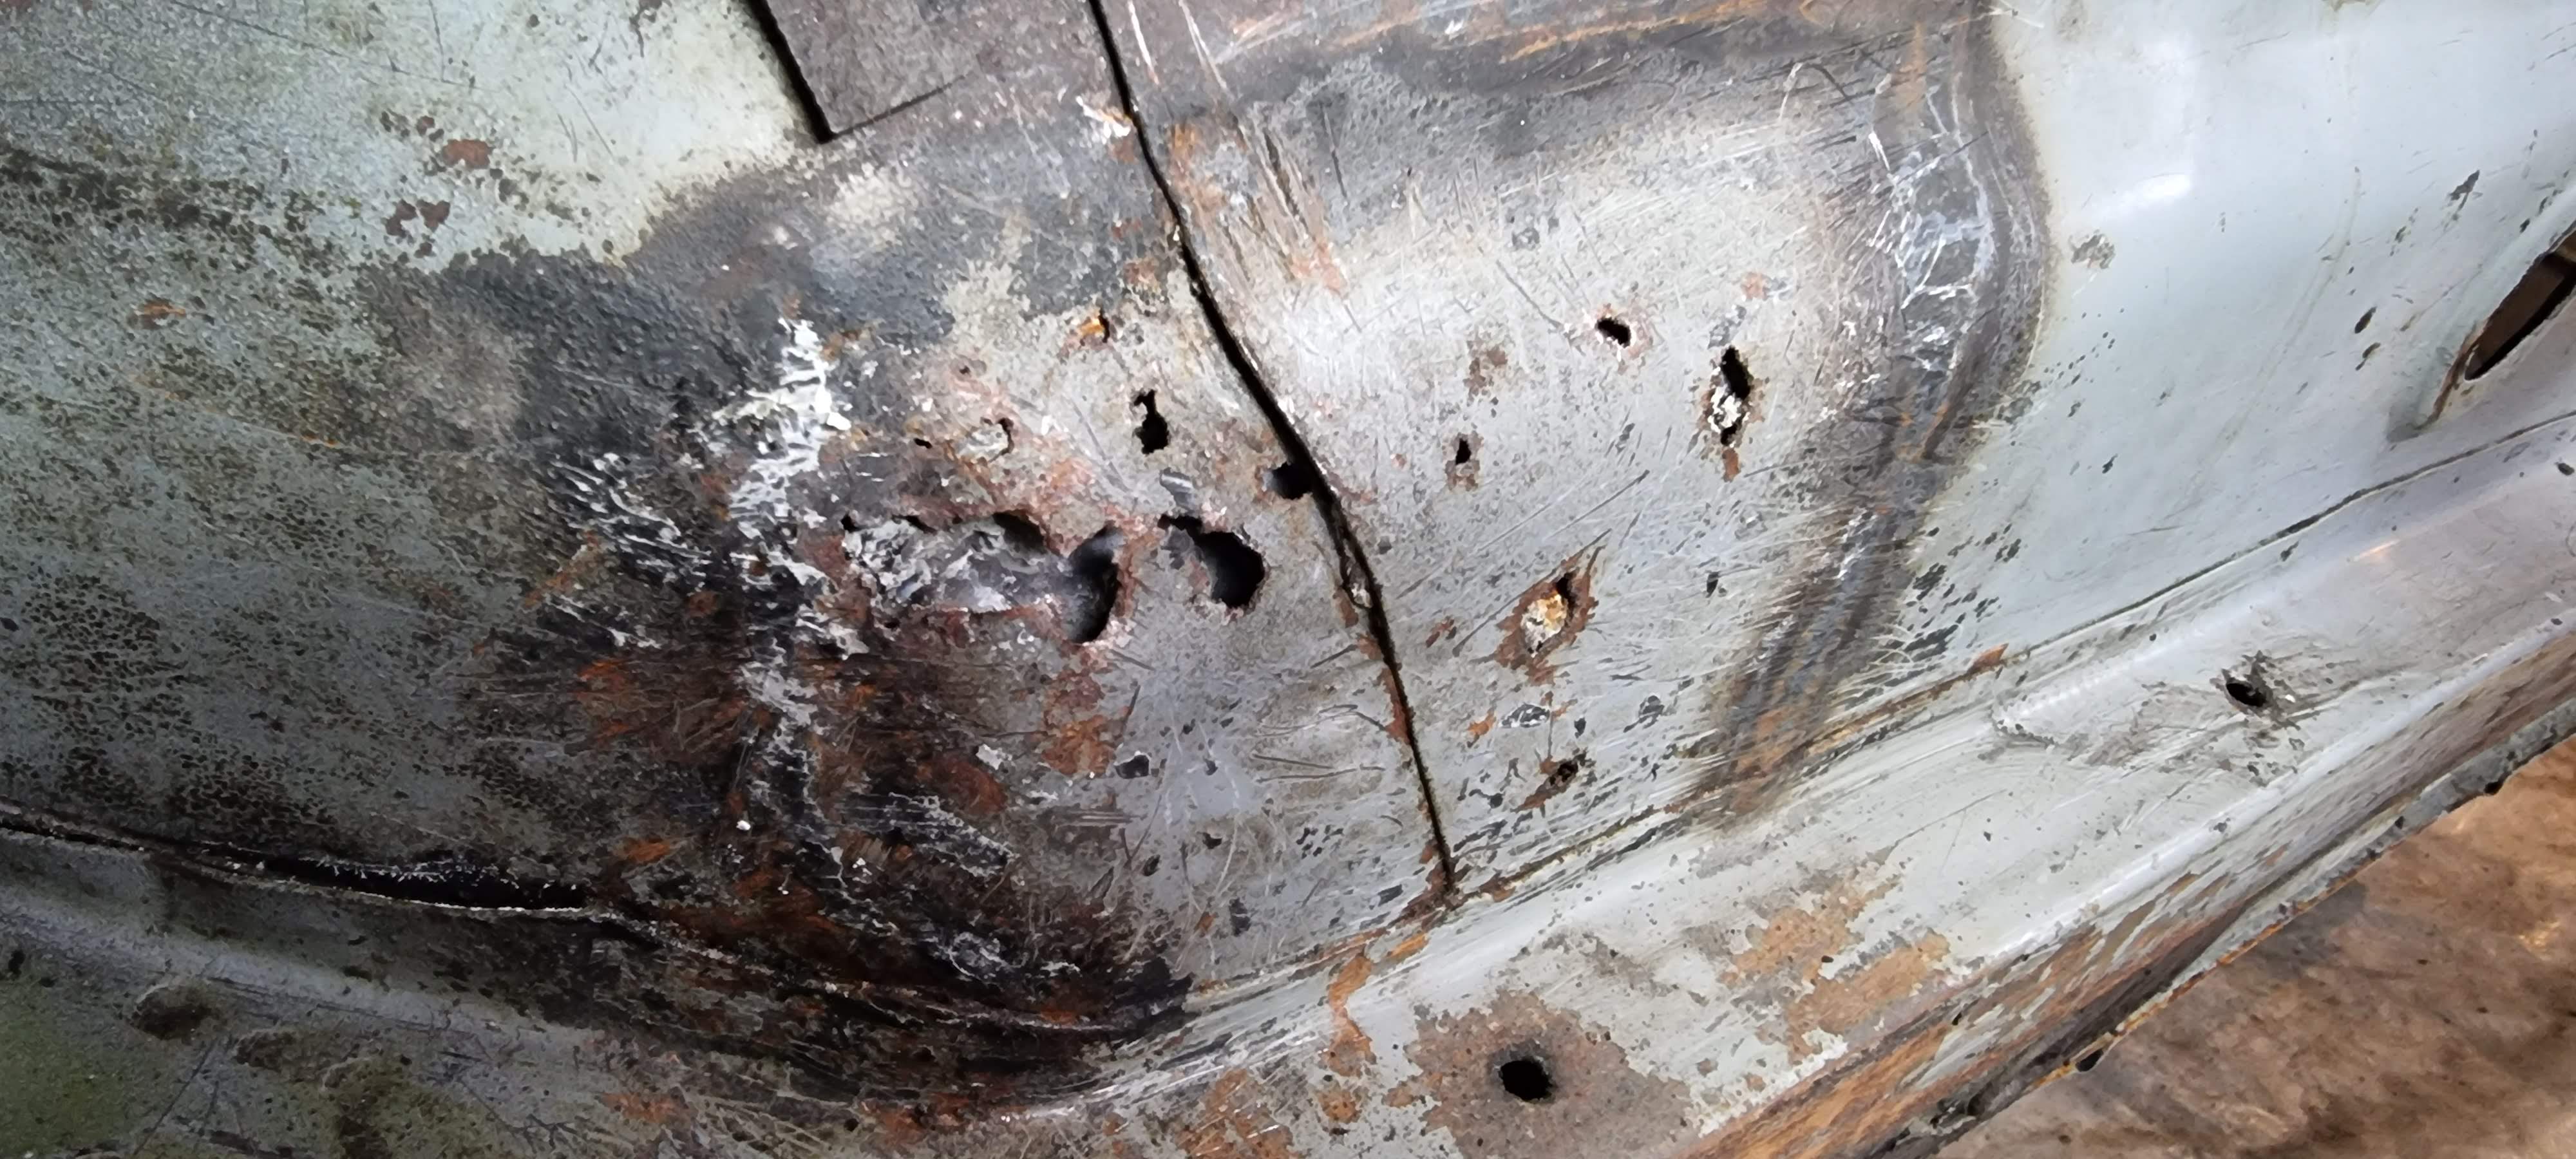
Not so good news
Some areas like the rear wheel-arches weren't quite so well protected by the under-seal. There are lots of holes that will need repairing.
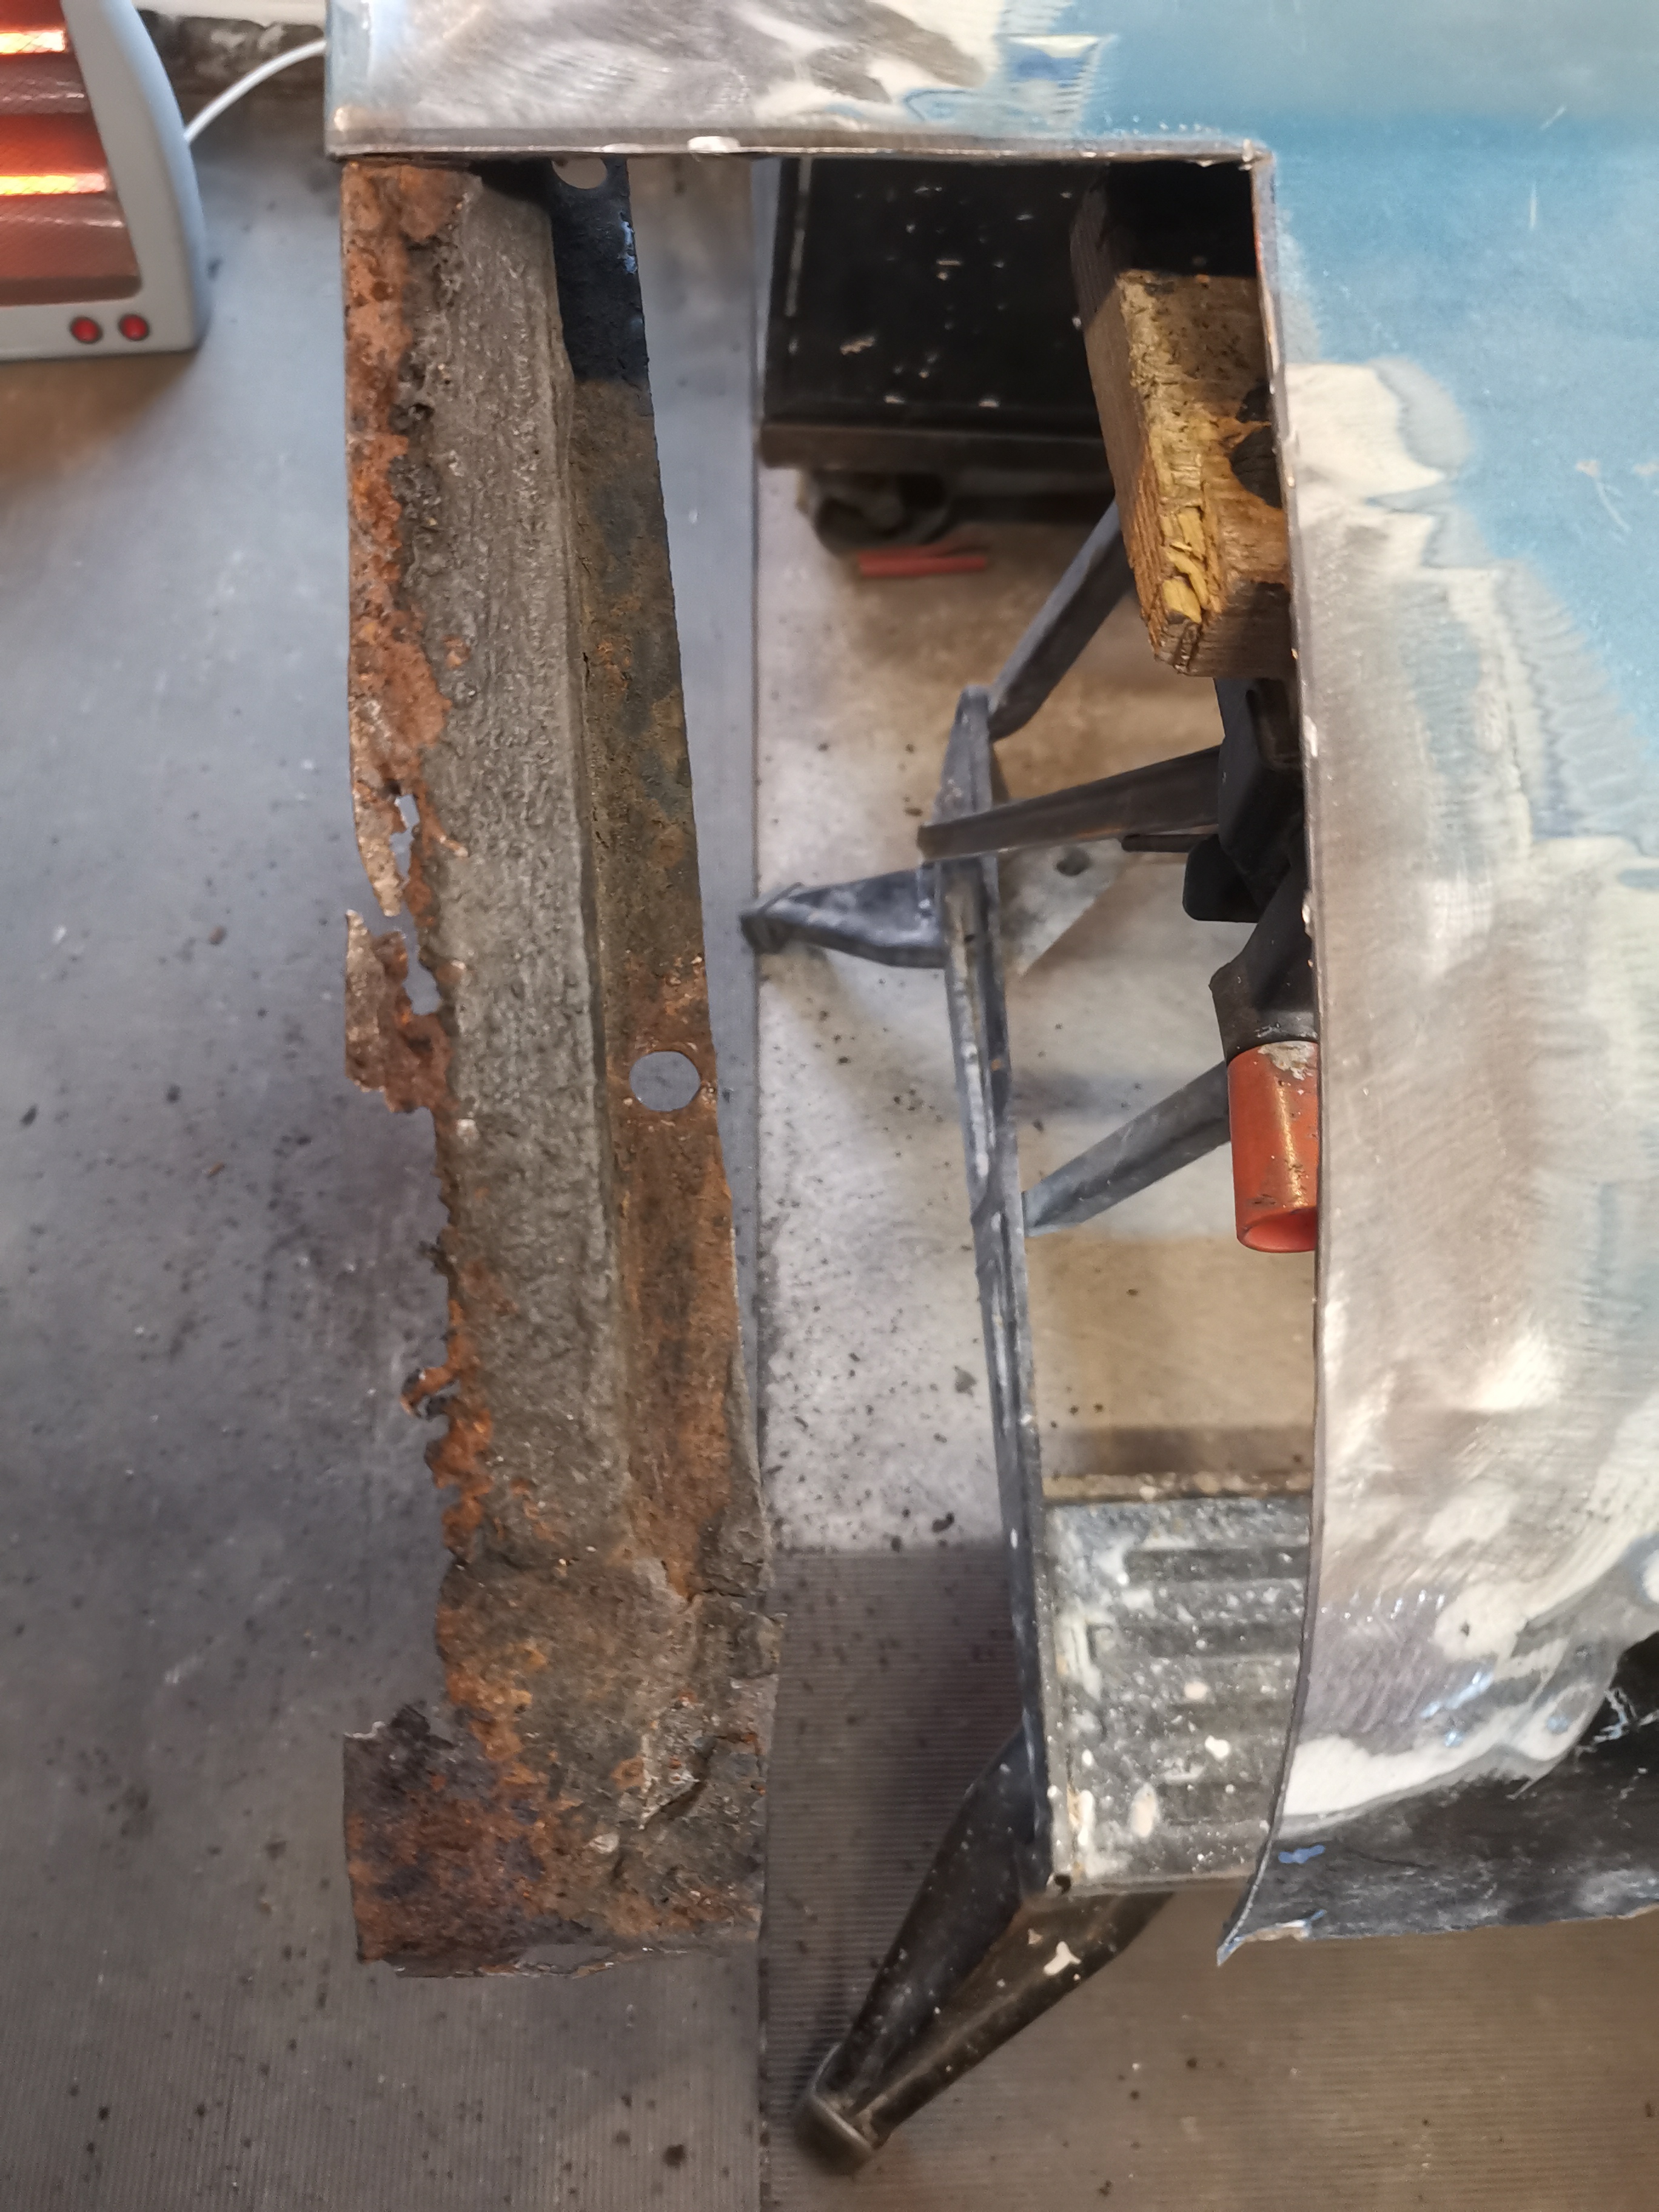
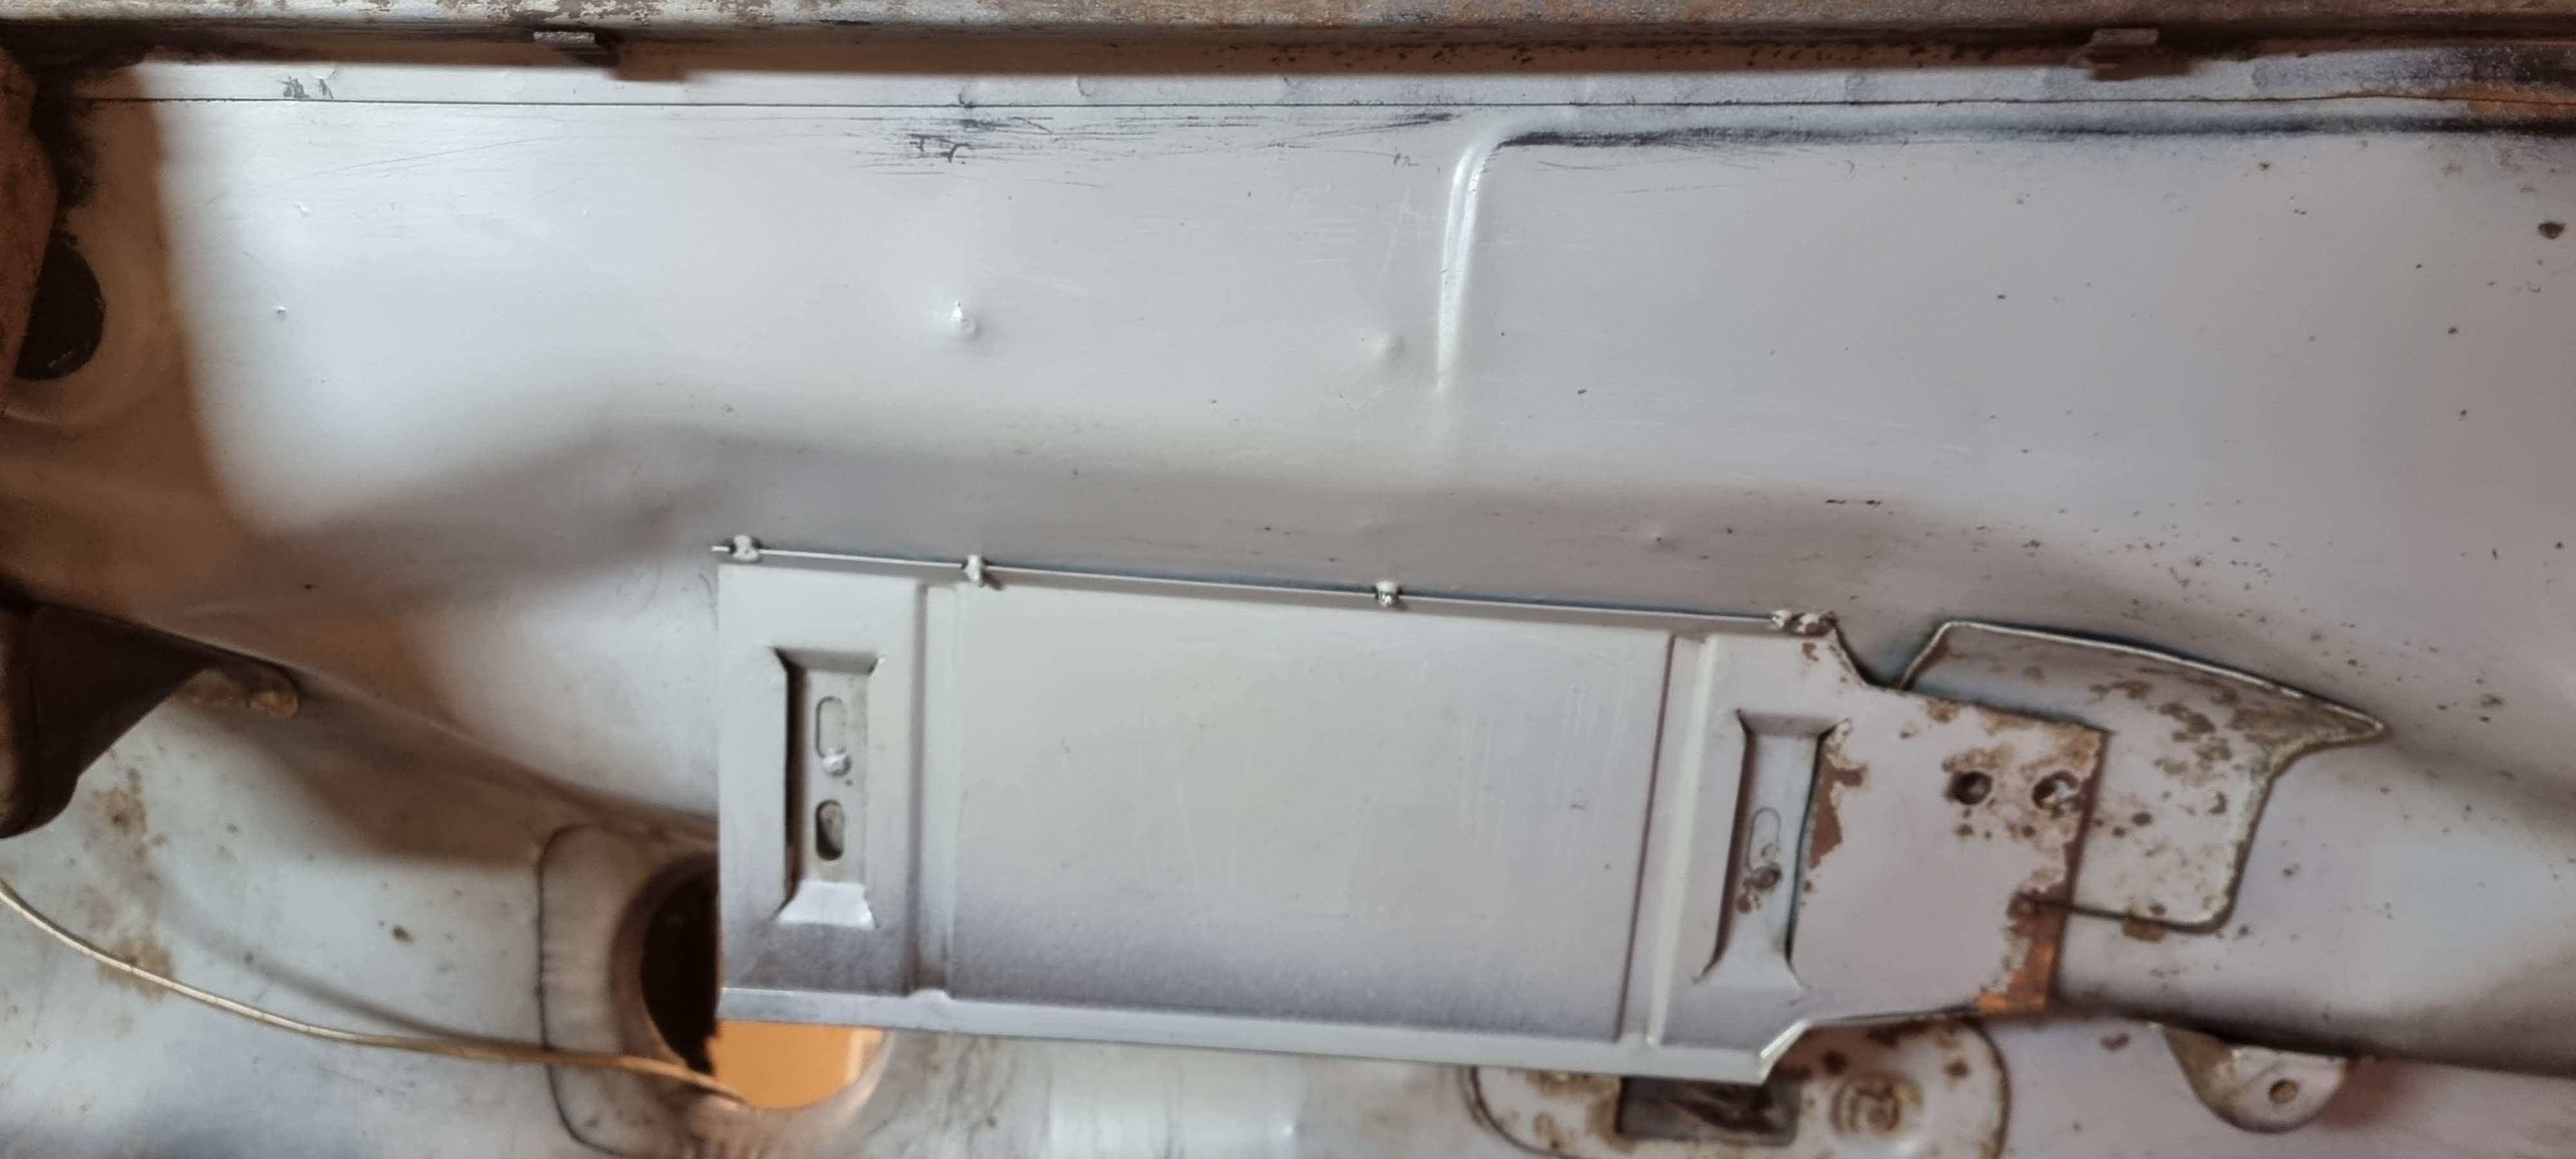
Bad news
I had seen that the footwell on the nearside / driver's side had been 'repaired' by fitting a plate on the inside. However, when I cleaned the under-seal off the outside, I found the old rusty panels were still in place and therefore trapping moisture and dirt between them,
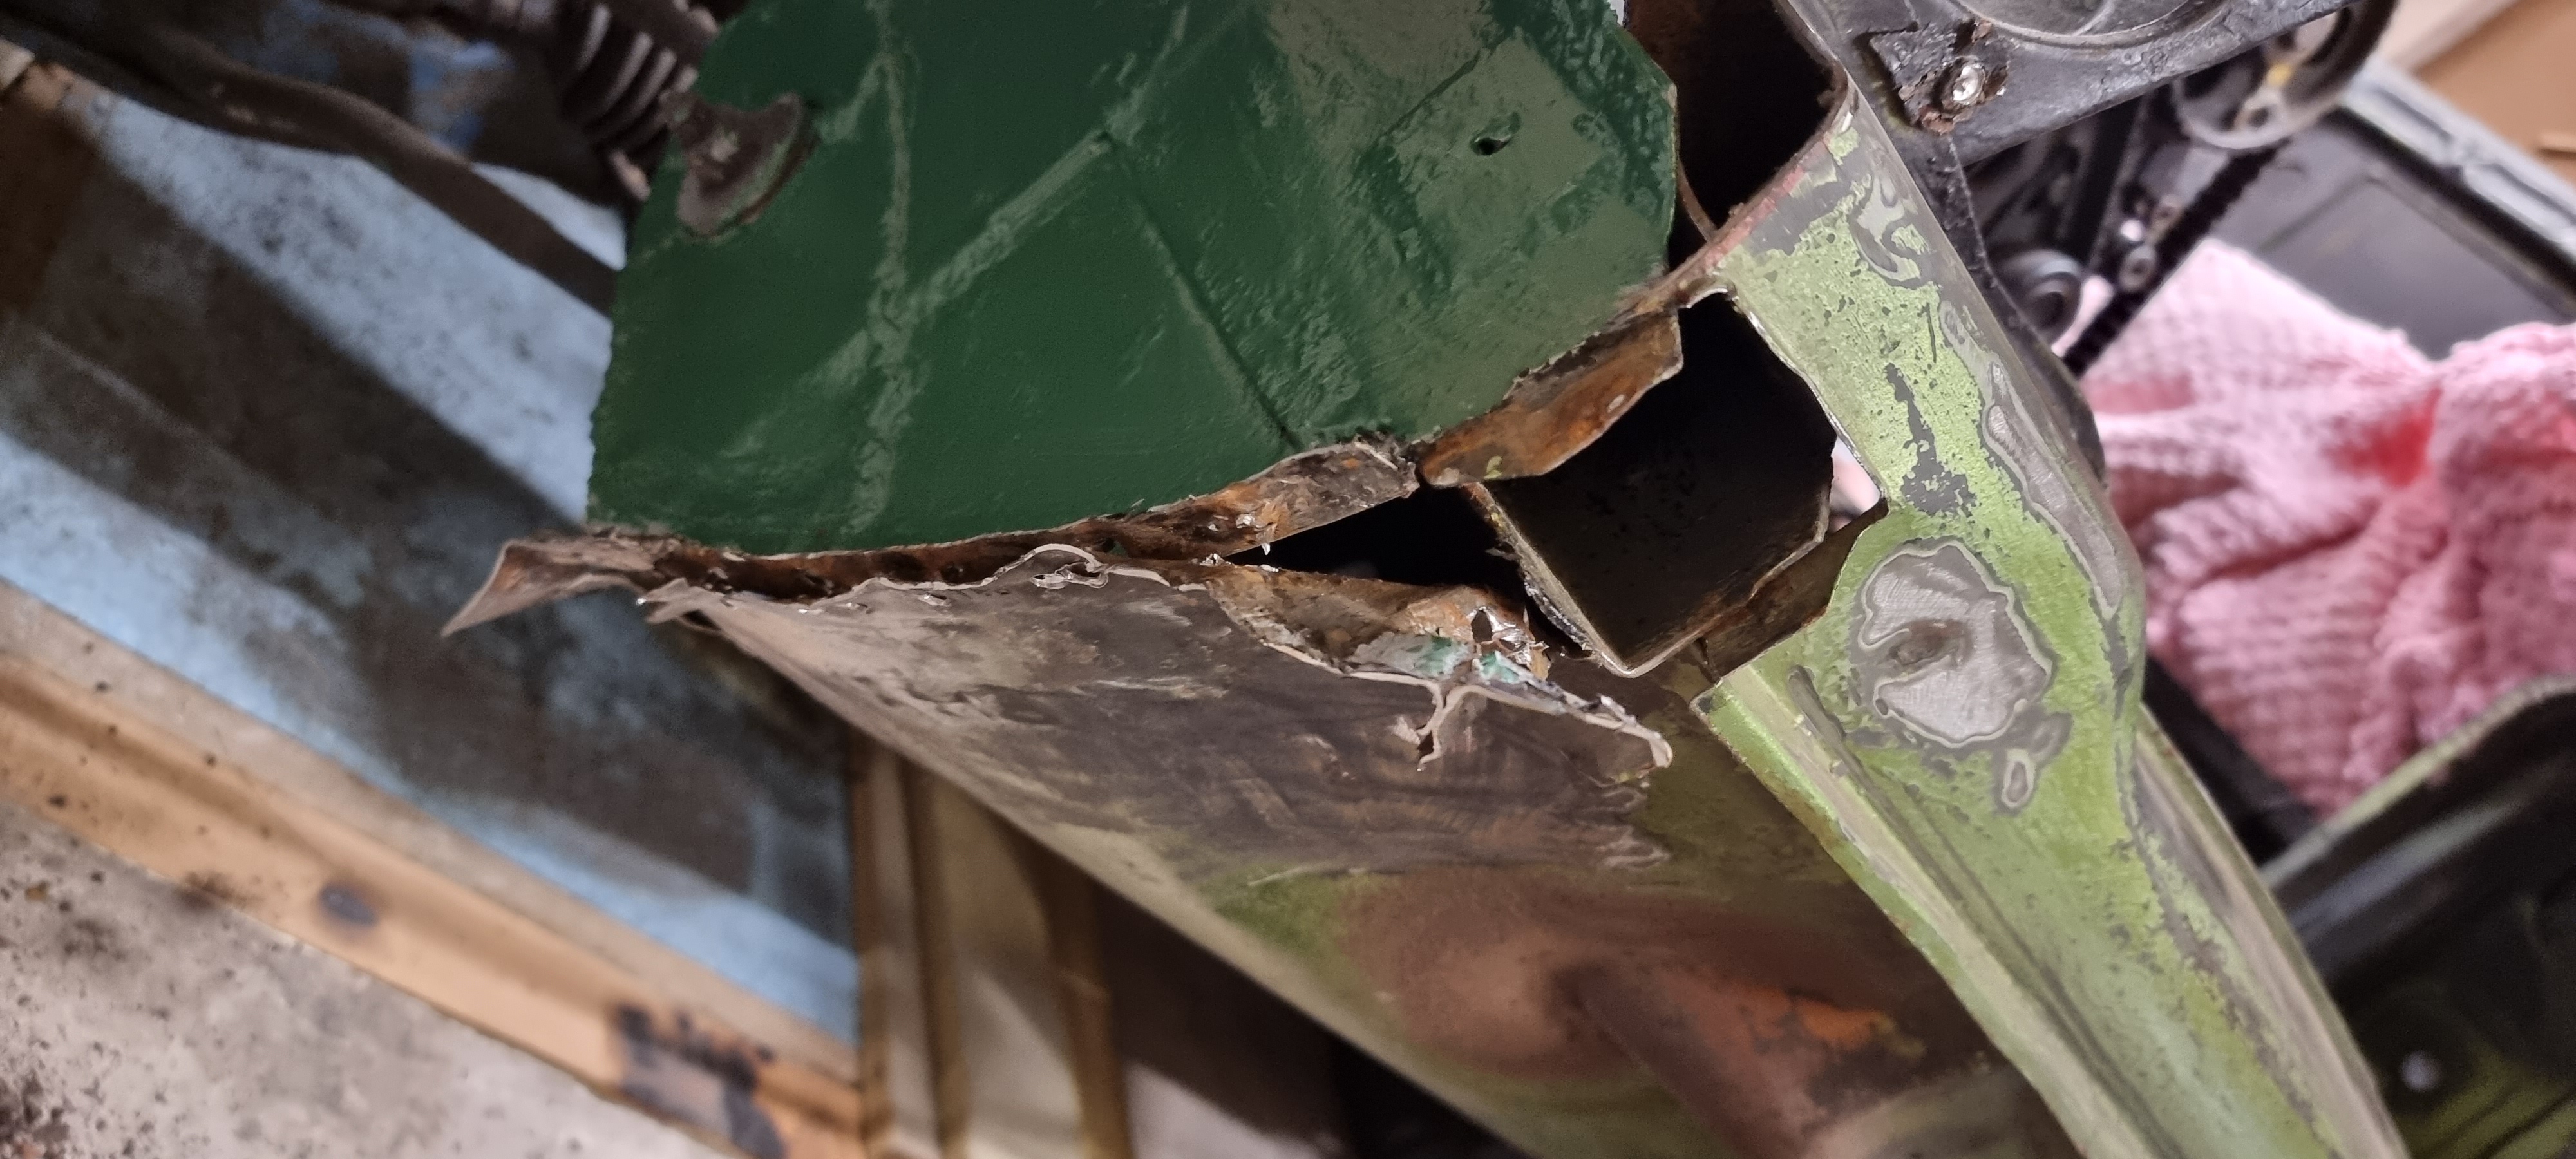
Really bad news
I had already seen the bottom of the offside A post/Sill and floor area was pretty bed, but once I'd cleaned it all up the rot and damage was far far worse than I feared. This is going to take quite some sorting out!
Guestbook
If you like what you see and would like to get in touch, comment, leave me a message, ask a question or point something out etc. please click the 'Add Comment' button below.